PC Slower Than It Used to Be?
Do these 3 things before closing this tab:
1Fix the driver behind crashes, sound loss and screen glitches2Repair Windows errors before they cause bigger problems3Scan for outdated or missing drivers - takes under a minuteA free scan shows the junk files, broken settings and background clutter dragging Windows down - then fixes them in one click.Free scan · Windows 10 & 11
Outdated Drivers Are Slowing You Down
One free scan finds every outdated or missing driver and matches the right update for your exact hardware.Free scan · exact hardware match
ThatPainter is reader-supported. When you buy through links on our site, we may earn an affiliate commission. Learn More
Turning IKEA BILLY bookcases into built-in shelves is mainly a measuring, fitting and finishing project. The cases provide the storage; a carefully built base, side fillers, top surround, trim and paint make them look attached to the room rather than parked against a wall. Safe anchoring is non-negotiable, and the exact wall fixings must match both your wall construction and the BILLY model you bought.
Use this guide to plan the opening, choose between a full framed surround and a lighter trim makeover, assemble and secure the cases, then prepare the laminate-like surfaces and MDF for paint. The dimensions and load figures below apply specifically to the US white BILLY model 505.220.40, so verify the current listing and instructions for your market before cutting anything.
The Tool Desk
Outbyte Driver Updater FREEFix the driver behind crashes, sound loss and screen glitchesFind Drivers →Outbyte PC Repair FREERepair Windows errors before they cause bigger problemsFix Now →As an Amazon Associate I earn from qualifying purchases.
What makes BILLY bookcases look built in?
A freestanding case looks like a separate piece of furniture because you can see its sides, the gap beneath it and the uneven shadow at the ceiling. A built-in treatment removes those visual breaks. The usual elements are a level plinth or base, side filler panels, a top filler or cornice, continuous trim and one paint color across the cases and surrounding woodwork.
The goal is not to make the particleboard case carry a house-like structure. The cases remain furniture and must be assembled and anchored as IKEA specifies. The framing and MDF simply close the surrounding gaps and create a straight, paintable face.
#1 Best Overall

- Sturdy Material --- Built with durable MDF particleboard, each shelf can hold 22 lb to keep your books in safe hands
- Stable Construction --- With strengthen screws and the tipover resistance device, the bookcase is more stable
- Chic Rustic Design --- A 6-tier bookcase standing at 23.82"W* 9.25"D * 70.87"H, with the clean lines, is ideal for almost any space in your home
- Clear Instruction --- With clear instructions and labeled parts, you’ll set it up in no time to pore over the pages for hours on end
- Large Storage Space --- This bookshelf unit provides storage space for books, photographs, or decorative boxes
Check the room and the exact BILLY model before buying
Measure the opening in several places
Measure the full wall or alcove width at the floor, at the middle and near the ceiling. Walls are rarely perfectly parallel, and a single measurement can leave you with a filler that works at one height but not another. Also record ceiling height, floor level, baseboard projection, outlet locations, vents, radiators, switches and any pipes. Mark the finished front line of the shelves on the floor so you know whether doors, drawers or walkways will still clear it.
Measure the depth from the wall to the front of the existing baseboard. If the baseboard prevents the case from sitting where you want it, decide whether to remove it, notch the new plinth, or bring the entire surround forward. Do not cut the bookcase until you have drawn the proposed front elevation and checked every obstruction.
Use the product-specific dimensions
The current US listing cited for white BILLY model 505.220.40 gives these figures:
| Specification | Stated value | How to use it |
|---|---|---|
| Width | 15 3/4 inches | Use the actual number of cases and fillers to calculate the wall coverage; do not assume another BILLY variant has the same width. |
| Depth | 11 inches | Compare it with baseboards, outlets and the depth you want for the surround. |
| Height | 79 1/2 inches | Leave room for a level base and a top finishing assembly. |
| Minimum ceiling height listed | 80 3/4 inches | The listing says this is the minimum ceiling height for the cited model; check the current assembly documentation before attempting a tight fit. |
| Maximum load per shelf | 31 lb | This is the product-specific stated maximum. A surround, extra screws or paint does not increase that rating. |
The 80 3/4-inch minimum is not a general rule for every BILLY size, color or country. Product pages, packaging and assembly documents can differ by market and edition. Keep enough access above the furniture to install the required anti-tip fixing; a tight ceiling contact is not a substitute for anchoring.
Choose a construction approach
Two practical approaches appear in published BILLY projects. Choose based on how much the wall needs correcting, how precise the fit must be and what tools you can use.
| Approach | What you build | Cutting and tools | Best fit | Limitations |
|---|---|---|---|---|
| Framed surround | Side walls or a full opening from lumber, joined cases, MDF closure panels and substantial trim. | A documented project used 2×4 lumber, a miter saw, table saw, circular saw, brad nailer, clamps, drills and other framing tools. | Alcoves or long walls where you need to correct uneven surfaces and create a continuous architectural opening. | More measuring, cutting, dust and finishing; the published CAD $500 figure was for one 2019 project and is not a current budget. |
| Trim makeover | Existing cases joined together, height-extension units where needed, coving and wood moulding painted as one composition. | A December 2025 account used a simple saw and mitre box rather than relying on powered saws. | A reasonably straight wall when the main goal is to hide seams and add a finished top and sides. | Large wall irregularities may remain visible, and the result may not be as deeply integrated as a framed opening. |
Neither account is a controlled comparison. The lighter method is not automatically faster for a difficult wall, and the framed method is not required for every room. Make a cardboard or tape outline at the proposed front edge before selecting materials.
Materials and tools to plan for
Core materials
- BILLY cases and any compatible height-extension units required by your ceiling.
- Level, straight lumber for a plinth or side framing; the 2×4 dimensions used in one project are an example, not a universal requirement.
- MDF or another stable trim board for side fillers, top closure and seam covers.
- Decorative trim, coving or moulding sized to the room and the desired profile.
- Fasteners for joining the cases and attaching the surround to framing.
- Wall screws and plugs selected for your actual wall material.
- Filler for joints and nail holes, sandpaper, primer suitable for the case surface, and finish paint.
Tool choices
A miter saw can make repeated angle cuts efficient, but it is optional. The documented makeover used a hand saw and mitre box. A drill/driver, clamps, tape measure, level, stud finder or equivalent wall-probing method, caulk gun and sanding tools are more broadly useful. Add a circular or table saw only if your panel cuts require them and you can use them safely. Wear eye and hearing protection for powered cutting, control dust, and follow each tool’s instructions.
Build the installation step by step
- Draw the finished elevation. Show every case, filler, trim line, outlet and the intended shelf front. Dimension the total width, each gap and the height of the base and crown. Recheck these dimensions against the actual boxes, not only the online listing.
- Prepare the floor and wall. Remove or account for baseboards that conflict with the plinth. Find framing or determine the correct masonry or hollow-wall fixing method. Repair loose plaster and identify wiring or plumbing before drilling.
- Assemble each BILLY according to the current IKEA instructions. Do not omit the back panel or hardware in an attempt to gain space. Inspect the units for damage while they are still accessible.
- Build and level the base. A continuous plinth makes several cases read as one cabinet and lets you correct a slightly uneven floor. Shim and check level across the entire run; record where shims sit so they can be secured and concealed.
- Dry-fit the cases. Place the assembled units on the base without final trim. Check the width at the front and back, the reveal to each side wall, shelf alignment and clearance for outlets. One documented framed project recessed the cases about 1 1/2 inches from the finished front; treat that as that project’s dimension, not a standard.
- Join neighboring cases. Clamp the fronts flush, verify that the sides are plumb, and use the joining hardware specified for your model or a suitable furniture fastener. Do not force a case into alignment by bowing its side panel.
- Anchor the run to the wall or surrounding framing. Use the anti-tip hardware and fixing type appropriate to the wall. Attach through structurally sound points, keep the cases plumb while tightening, and recheck that doors or shelves operate freely. Trim installed later must remain removable enough to inspect the anchor if necessary.
- Frame the sides and top. Add side walls, filler strips or a top closure so daylight cannot reveal the wall behind the cases. The IKEAhackers build framed side walls, secured the cases to those walls and used MDF to close the surround. Match every cut to your measured opening.
- Close visible seams. Fit MDF and trim with consistent reveals. Fill nail holes and joints with a compatible filler, allow it to dry, then sand progressively until the transitions are invisible under a coat of primer. Flexible caulk is useful where painted trim meets a stationary wall, while rigid filler is better for stable wood-to-wood holes.
- Install the decorative profile. Add coving, crown or other moulding after the main panels are secure. Cope or mitre corners carefully, test-fit each piece, and mark the orientation before applying adhesive or nails.
Anchor for safety before you paint
IKEA’s US safety text for the cited BILLY listing states: “WARNING! Tipping hazard – this product must be securely anchored. Use suitable screws and plugs for your home. If you are uncertain, seek professional advice.” Treat that as a required construction step, not optional hardware.
Rank #2
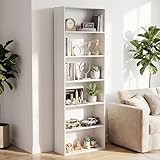
- Large Storage Space: With six spacious tiers, each standing 11.2" tall, this white bookshelf provides ample storage for all your essentials. Whether you're organizing books, DVDs, decorative pieces, or toolboxes, everything fits effortlessly. Create an organized home with our stylish book case
- Stable and Safe: The display bookshelf features a specially reinforced connection, ensuring enhanced stability. Equipped with anti-tip devices, it prioritizes safety. Store your items with ease and confidence, knowing that its reliability has been built to last
- Sturdy and Durable: Crafted from high-quality materials, the tall bookshelf boasts 0.6" thick shelves, each supporting up to 44lbs, making it perfect for storing your belongings. Its scratch-resistant, water-resistant surface is easy to maintain while ensuring long-lasting durability
- Modern Design: Boasting a sleek, modern design, this white bookcase seamlessly blends with any interior style. Its timeless appeal ensures it will never go out of fashion, making it a lasting addition to your home for years to come
- Easy to Assemble: This 6 tier bookshelf includes easy-to-follow instructions and all the essential assembly parts, ensuring a smooth and effortless setup. Get your space organized in no time with minimal effort
IKEA Netherlands guidance likewise says that BILLY can be fixed to the wall with the supplied fittings and that “Different wall materials require different types of fittings.” A timber stud, solid masonry wall, plasterboard over studs and hollow masonry each require a different fixing strategy. Follow the instructions supplied with your exact product and choose screws and plugs rated for the wall; a fastener shown in a tutorial cannot be assumed safe in your house.
Recommended Free Tools
That guidance also describes an 8 × 2 cm cut-away at the bottom of the bookcase so the cabinet can sit close to a wall without the plinth obstructing it. It is regional guidance, not permission to cut any panel without checking the current instructions. Never remove structural parts, and never rely on the decorative surround to prevent tipping.
Prepare BILLY and MDF for a durable painted finish
Clean and abrade
Vacuum construction dust, wipe the surfaces with a suitable cleaner and let them dry. Lightly abrade glossy or melamine-like faces to reduce sheen without cutting through the coating. Sand MDF edges especially well: raw edges absorb primer differently from the face and can remain fuzzy if they are not sealed.
Prime in the right order
Prime the cases, MDF, filler and trim with a product intended for the surface you actually have. There is no universal primer proven by the available project accounts. Apply thin, even coats, respect the label’s recoat time and sand only as needed between coats. Prime before final assembly when the pieces are easier to reach, as the December 2025 makeover account did, then touch up joints and fastener holes after installation.
Paint the built-in as one composition
Protect shelves and the floor, mask hardware and work from the least visible areas toward the front edges. Brush or roll the profiles and use the application method specified by the paint manufacturer for large flat panels. Inspect in raking light between coats; ridges at filler joints and unsealed MDF edges are much easier to correct before the final coat. Let the finish cure before loading shelves, even if it feels dry to the touch.
Do these 3 things before closing this tab:
1Fix the driver behind crashes, sound loss and screen glitches2Repair Windows errors before they cause bigger problems3Scan for outdated or missing drivers - takes under a minuteHow much time, money and equipment should you expect?
A 2019 IKEAhackers project author reported spending around CAD $500 for that particular installation, including its cases, doors, lumber, MDF, trim and hardware. It is a dated, single-project total, not a current estimate for another country or a guarantee of savings compared with custom cabinetry. Case count, trim profile, wall repairs, paint and whether you already own tools will change the total.
The December 2025 makeover account used inherited cases and was completed over a few weeks of available evenings and nap-time slots. That is personal scheduling information, not a reliable duration for your room. A framed surround generally creates more cutting and finishing stages; a straight wall with reusable cases may need less carpentry but still requires careful drying and curing time.
Troubleshoot the problems that most often spoil the result
The cases do not fit the opening
Stop before trimming. Recheck the narrowest wall measurement, baseboard projection and whether the cases are truly square. Use measured filler strips or alter the surround; do not compress the cases or remove panels to gain a small amount of width.
Rank #3

- Extra-Large Capacity Dual-Row Design: 7-tier dual-row structure with 14 individual compartments (each 11"D × 22"W × 11"H), this large bookshelf is perfect for organizing books, files, photo albums, decor, and more. Ideal for both home and office storage needs.
- Space-Saving Dimensions, Fits Multiple Scenarios: With overall dimensions (45.7"W×11.3"D×83.7"H), this tall bookshelf fits perfectly in studies, offices or living rooms, maximizing space while enhancing your décor.
- Reinforced Structure + Triple Protection, Sturdy & Safe: This book shelf is made with 15mm thickened boards, each shelf supports up to 20kg (44 lbs). Features anti-tip metal brackets + reinforced back screws + 3.9cm sturdy base for triple protection, ensuring stability and safety.
- Modern Minimalist Design, Elevates Your Décor: Sleek and timeless design with a space-saving dual-row structure. Combines functionality and style, making it the perfect storage solution for any modern home.
- Easy Assembly, Hassle-Free Use: Comes with detailed installation instructions and labeled parts for quick and easy assembly. We recommend two people work together for a more convenient and efficient assembly process. If you have any questions or concerns during setup or use, our customer support team is always ready to help!
A visible wedge-shaped gap remains
Walls and ceilings can be out of plumb. Scribe a filler to the wall, keep the front edge straight, and cover the scribe with trim where appropriate. A thick bead of caulk alone will telegraph the uneven gap and can crack.
The top does not meet the ceiling
Confirm the model’s required ceiling clearance and the level of your base before changing height. Use a planned top filler or crown rather than forcing the case upward. If the ceiling is below the cited 80 3/4-inch minimum for model 505.220.40, stop and verify the current product instructions; do not assume a safe workaround.
The paint scratches or beads up
Gloss, dust, grease or an incompatible primer can prevent adhesion. Clean again, abrade the sheen, use a surface-appropriate primer and allow full drying between coats. Test your complete preparation on an inconspicuous area before painting the whole run.
The unit rocks or feels loose
Unload it and check the plinth, plumb, case-to-case joints and wall anchors. Correct the underlying movement before adding trim. A painted filler can hide a gap but cannot make an unstable cabinet safe.
Load and maintain the finished shelves
For the cited US model, IKEA states a maximum of 31 lb per shelf. Distribute books rather than concentrating the heaviest items at one point, keep the shelf supports fully seated and inspect for bowing or loose hardware. Do not treat added framing or paint as an increased capacity rating. Recheck the anti-tip connection after moving furniture, after a major wall repair and whenever you notice movement.
The Tool Desk
Outbyte PC Repair FREERepair Windows errors before they cause bigger problemsFix Now →Outbyte Driver Updater FREEFix the driver behind crashes, sound loss and screen glitchesFind Drivers →Dust with a soft, dry or slightly damp cloth according to the paint and hardware instructions. Address chips early so moisture does not reach MDF edges. If you later add doors, lighting or heavier objects, verify that the modification does not interfere with the anchor, exceed the stated shelf load or obstruct ventilation and electrical outlets.
When this DIY approach is a good fit
- You can measure the room accurately and leave access for the required anti-tip fixings.
- You want a painted, continuous wall of storage and are comfortable filling, sanding and touching up trim.
- You can select wall anchors based on the actual construction, or you are willing to obtain professional advice.
- You accept that the final cost and labor depend on local materials, the number of cases and the condition of the wall.
If the ceiling is too low for the specified model, the wall is severely out of plumb, or you cannot establish a safe fixing point, redesign the layout before purchasing materials. A smaller run, a different case height or professional carpentry is safer than disguising an unsuitable fit with extra trim.
Quick Recap

Product prices and availability are accurate as of the date/time indicated and are subject to change. Any price and availability information displayed on Amazon at the time of purchase will apply.

