Crashes, No Sound, or Screen Glitches?
Random freezes, missing sound and display glitches usually trace back to one bad driver. Find and replace yours safely.
Find the Right Drivers →Free scan · under a minute
As an Amazon Associate I earn from qualifying purchases.
ThatPainter is reader-supported. When you buy through links on our site, we may earn an affiliate commission. Learn More
What’s actually slowing this PC down?
Pick the symptom - the matching free tool is one click away.
Stay stitching is a line of machine stitching sewn on a cut garment piece before construction to keep a vulnerable edge from stretching or changing shape as you handle it. It is especially useful on curves and diagonal edges, such as necklines and armholes, where fabric can distort easily.
#1 Best Overall

- 27 Unique Built-in Stitches: The Brother XM2701 sewing machine includes 27 built-in stitches including decorative, blind hem, zigzag, and stretch stitches and an auto-size buttonhole
- Automatic Needle Threader and Drop-in Top Bobbin: This beginner sewing machine is also great for experienced users; it includes an automatic needle threader that perfectly pushes thread through the needle and a convenient, jam resistant drop-in top bobbin
- Included Accessories: The XM2701 comes with 6 sewing feet, 3-piece needle set, twin needle, 4 bobbins, manual and more
- Versatile Free Arm: This free arm sewing machine is a simple sewing machine, perfect for a wide range of everyday sewing projects, and users from beginners to advanced
- At Your Side Support: The XM2701 small sewing machine comes with Brother At your side support offering free technical support via online, live chat or phone for the life of your machine
What stay stitching does
Stay stitching stabilizes an edge before sewing the garment together. Cutting, lifting, pressing, pinning, and joining fabric can pull a curved or bias-influenced edge out of shape; a row of stitches helps it hold its intended dimensions. The Sewing & Craft Alliance defines it as “a line of directional stitching, made before construction, to stabilize edges that might be pulled out of shape in handling” (Basic sewing lessons – machine stitching).
Unlike temporary basting, stay stitching generally remains in the garment. It may also help keep a curved edge stable while you clip its seam allowance.
Rank #2

- 17 built-in stitches
- 4-step buttonhole style
- Reverse button
- Free arm for sewing
- LED lighting for the work area
Where and when to stay stitch
Stay stitch vulnerable edges soon after cutting and marking the pattern pieces, before they have been moved around much. Common locations include necklines, armholes, shoulder areas, curved waistlines, and other edges that are especially prone to stretching. It is not a step for every seam: use it where the pattern directs or where the fabric and edge are likely to distort.
Work on each cut piece as a single layer. A corresponding facing or collar may also need stay stitching if the pattern calls for it. Advice for knits varies: some guidance says they are not usually stay stitched, while other guidance notes the technique can help some knits retain their shape. Follow the pattern and consider how readily your particular fabric stretches (American Sewing Guild; Sewing & Craft Alliance).
Rank #3
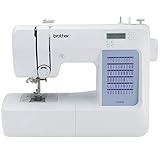
- 60 UNIQUE BUILT-IN STITCHES: The Brother CS5055 sewing machine includes 60 built-in stitches including utility, decorative and heirloom stitch functions, and 7 1-step auto-size buttonholes
- IMPROVED NEEDLE THREADER: Easier than ever to use, the automatic needle threader reliably pushes the thread through the needle. The convenient, jam resistant drop-in top bobbin easy to load and helps ensure your bobbin stays in place
- INCLUDED ACCESSORIES: The CS5055 includes 7 sewing feet, 4 bobbins, a needle set, a trilingual English/Spanish/French user manual and more
- METAL FRAME and FIXED NEEDLE BAR: The durable metal frame construction allows your machine to tackle any project, and the needle is fixed in place while you work, allowing for cleaner stitching and even lines
- LARGE NEEDLE-TO-ARM WORKSPACE: A larger workspace with increased width in needle-to-arm space allows users to work on larger projects
How to sew a stay-stitch line
- Check the pattern first. Use its arrows, placement, and seam-allowance instructions for that piece. General guidance cannot override the pattern’s directions.
- Set up the machine. Use a straight stitch. A regular stitch length is suitable; the American Sewing Guild gives 2 mm as an example of a slightly shorter setting, not a universal requirement. Use matching thread if available, as suggested in its stay-stitching guide.
- Position the line. Stitch just inside the seamline, keeping the line in the seam allowance when the pattern’s allowance permits. For a conventional 5/8-inch seam allowance, one common example is to stitch 1/2 inch from the raw edge. That measurement is an example for that allowance, not a rule for every pattern (American Sewing Guild; Simplicity).
- Follow the direction of the arrows. On a neckline, instructions commonly direct you to sew from each shoulder toward the center. Stop at the center, then stitch the other side from its shoulder toward the center rather than making one continuous pass across the neckline. The American Sewing Guild’s general guidance is to sew from wider areas toward narrower ones.
- Keep the fabric relaxed. Guide the piece without pulling or stretching the edge as it feeds under the presser foot; the point is to preserve its shape, not to ease it in.
- Continue with construction. Leave the stabilizing row in place unless the pattern says otherwise. When clipping a curved seam allowance, use the stay-stitch line as the limit: make clips that stop short of the stitches so you do not cut through them.
Placement and pattern instructions
Guides describe placement in relation to either the seamline or the cut edge, and pattern seam allowances differ. For that reason, treat measurements such as 1/2 inch from the raw edge as specific examples rather than universal settings. Follow the pattern’s arrows and placement directions for your garment; its instructions determine where the line belongs.
Quick Recap
Common mistakes to avoid
- Stitching through multiple layers: Stay stitch the individual cut piece, not a stack of pieces, unless the pattern specifically instructs otherwise.
- Waiting until the edge has stretched: Stitch soon after cutting, before extensive handling makes distortion harder to correct.
- Pulling the fabric as you sew: This can stretch the very edge the stitches are meant to protect.
- Using one direction across a curved neckline: Follow the pattern arrows; stitching from each shoulder toward the center is common guidance.
- Clipping through the stitching: Stop clips at the stay-stitch line so the edge remains stabilized.

Product prices and availability are accurate as of the date/time indicated and are subject to change. Any price and availability information displayed on Amazon at the time of purchase will apply.




