Crashes, No Sound, or Screen Glitches?
What’s actually slowing this PC down?
Pick the symptom - the matching free tool is one click away.
Outbyte Driver Updater · freeRandom freezes, missing sound and display glitches usually trace back to one bad driver. Find and replace yours safely.
Find the Right Drivers →ThatPainter is reader-supported. When you buy through links on our site, we may earn an affiliate commission. Learn More
Turn a plain light-switch plate into Halloween décor by decorating the removable plate—not the energized switch mechanism. Choose a painted pumpkin and frame for a sculpted focal point, tape or paper for a flat cover you can change easily, or polymer clay for durable relief. In every version, match the plate to your existing opening, keep the switch slot and screw holes clear, and let every coating, clay piece, and adhesive finish before reinstalling.
Before removing a plate, switch off the circuit at the breaker. Michelle’s A Crafty Mix tutorial gives that instruction, while Education.com says to wait until the plate is screwed back on before touching the switch. Those are craft-tutorial directions, not a substitute for local electrical requirements.
As an Amazon Associate I earn from qualifying purchases.
Choose the right Halloween light-switch-cover method
The plate is your craft base. You can decorate the existing plate after removal or buy a blank light-switch plate that matches the installed switch opening and screw layout. A seasonal frame can sit around a finished plate, but it must not push the plate away from the wall or interfere with the switch.
| Method | Look and relief | Materials and process | Removal and cautions |
|---|---|---|---|
| Painted pumpkin with frame | Raised pumpkin, optional top hat, ornate border | Primer, craft paint, sponge, clay, marker; air-dry or bake clay as directed | More drying or curing stages; frame weight and tape must suit the surface |
| Duct-tape jack-o’-lantern | Flat, graphic face with optional 3D accents | Orange and black duct tape, hobby knife, foam, felt, googly eyes, hot glue | Easy to change, but cut edges can lift; keep tape away from the switch opening |
| Paper cover | Flat illustration, collage, or child-decorated design | Paper, pencil, scissors, water-soluble glue, markers, stickers, glitter glue | Lightweight and removable; glue must dry before installation |
| Polymer-clay scene | Durable, sculpted relief | Polymer clay, roller, craft knife, clay tools, baking paper, tray, foil or tile | Requires oven curing according to the clay maker’s directions; ordinary tape may not hold a heavy cover |
The painted pumpkin example is presented as a beginner-friendly living-room, entryway, or party decoration in Michelle’s September 15, 2025 tutorial. The flat and clay alternatives are documented by Jonathan Fong’s eHow tutorial, Education.com, Katherine Dedul, and DIY Daisy.
#1 Best Overall

- Long Term Use: the black light switch cover plate is mainly made of metal, strong and sturdy, reliable in use, with smooth surfaces and made by careful laser cutting technology to make the patterns look lifelike
- Easy Installation: you can install the black light switch cover yourself in minutes; Installation can be done with 2 screws and a flathead screwdriver, beginner friendly; Please note that the above flathead screwdriver is not included in the package
- Add More Charm to Your Room: the outlet covers wall plate is designed in a classic black color and spooky, lovely look that is elegant, making them attractive and giving your wall a lovely touch
- Broadly Suitable: these switch plates and outlet covers can be widely applied in bedroom, kitchen, living room, dining room, bathroom, office, hotel, coffee shop, bookstore and many more places you want
- Appropriate Size: these socket covers for outlets measure approx. 7 x 11.43 cm/ 2.76 x 4.5 inches, a proper size to stick on the wall without taking up too much space; Please check the size carefully before ordering
Safety and fit checks before crafting
Isolate the circuit
- Identify the breaker controlling the switch and turn it off.
- Confirm the switch is not operating before loosening the plate screws.
- Remove the plate carefully and keep the screws together.
- Do all painting, gluing, taping, and clay work on the detached plate. Never spray or brush a switch mechanism while it is mounted or energized.
If you cannot identify the correct breaker, stop and obtain qualified electrical help. The craft sources do not establish a complete electrical-safety procedure.
Protect the openings
- Trace the switch opening and every screw hole before adding material.
- Cut or sculpt back to those lines so the switch moves freely and the screws pass straight through.
- Keep the rear of the plate and its seating edges flat. A thick bead of clay, glue, or foam on the back can leave the plate rocking against the wall.
- Match a replacement blank plate to the number, shape, and spacing of the existing switch openings; a decorative design is useless if the hardware cannot align.
Plan for drying, curing, and weight
Craft paint, water-soluble glue, air-dry clay, polymer clay, and hot glue have different handling requirements. Follow the package directions for the product you actually use. Do not reinstall while a surface feels tacky or a clay piece is still flexible. A separate ornate frame is a lightweight seasonal attachment only when its mounting method and weight are appropriate; DIY Daisy specifically warns that ordinary double-sided tape may not secure a clay cover.
Do these 3 things before closing this tab:
1Scan for outdated or missing drivers - takes under a minute2Clear out junk files and repair common Windows errors3Fix the driver behind crashes, sound loss and screen glitchesRank #2

- Single Gang Light Switch
- 11 configurations to fit your switch, outlet, or cover needs. Made in the USA!
- Laser cut acrylic plate includes screws and matching screw cap cover stickers.
- Semi-Gloss finish. Easy to clean with a soft towel and any non-abrasive cleaner.
- Exclusive flush to the wall soft foam contoured base won’t scratch or damage your walls.
Materials checklist by technique
Painted pumpkin and ornate frame
- Removable light-switch plate or a compatible blank plate
- Black and white primer, craft paint, and a sponge
- Permanent marker
- Air-dry or oven-bake clay, with optional clay sculpting tools
- Optional foam clay, a border sugar mold, and additional craft paint for the frame
- A Ziploc bag or other clean mixing/protection aid listed in the A Crafty Mix materials
- Lightweight removable mounting tape for a frame, selected according to the tape maker’s instructions
Flat jack-o’-lantern plate
- Blank light-switch plate, orange duct tape, and black duct tape
- Hobby knife and a small paintbrush
- Craft foam, felt, googly eyes, and a hot-glue gun for optional features
- Hardware for the plate
These items come from Fong’s How to Make Halloween-Themed Switch Plates.
Paper plate
- Paper, pencil, scissors, and water-soluble glue
- Tape, markers, stickers, or glitter glue
Education.com lists this paper-based set in Decorative Light Switch Covers.
Rank #3
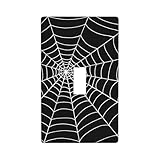
- Eye - Catching Design: Features an intricate white spider web pattern on a sleek black background, adding a distinctive Halloween - inspired look to your space.
- Easy Installation: Designed for hassle - free setup, fits standard light switch plates perfectly without complex tools or steps.
- Durable Material: Made from sturdy materials to ensure long - lasting use, resisting daily wear and tear.
- Versatile Decor: Ideal for Halloween decorations or as a year - round accent for homes that love eerie - cute aesthetics.
- Charm to Any Room: Instantly elevates the style of your light switch area, becoming a small yet charming focal point that impresses guests.
Polymer-clay relief
- Polymer clay and a plastic or metal cover
- Acrylic rolling pin, craft knife, and clay tools
- Baking paper, baking tray, and either foil or a ceramic tile
- Optional poster strips for a lightweight installation, if their instructions and the finished weight permit
Method 1: painted pumpkin with a top hat and frame
This approach follows Michelle’s September 15, 2025 project, while keeping the electrical work limited to removing and reinstalling a dead, detached plate.
- Remove and clean the plate. After the breaker is off, remove the plate and separate any decorative components that can be detached without stressing the switch. Clean dust and grease, then dry completely.
- Prime the surfaces. Use black and white primer on the appropriate plate components for the color scheme. Keep primer off the switch mechanism and off the plate’s rear seating edge.
- Paint the pumpkin base. Dab craft paint with a sponge for an even, lightly textured coat. Build thin coats rather than flooding the opening or screw recesses.
- Sculpt the pumpkin. Form a small pumpkin from air-dry or bakeable clay. Add ridges, a stem, and a tall black top hat if desired. Test-fit the piece on the plate while the clay is still workable, then remove it for drying or baking according to its label.
- Add the border. Shape an ornate frame from foam clay or use a border sugar mold as the tutorial suggests. Paint it after the material has set. Keep the inner edge clear so the switch remains fully visible.
- Finish every component. Let paint and air-dry clay cure; bake polymer clay only at the temperature and time printed by its manufacturer. Check that no piece flexes, sheds, or feels tacky.
- Reassemble off the wall. Position the pumpkin and frame on the detached plate. Use adhesive sparingly and only where it does not block screw holes or the switch opening.
- Mount the frame, if used. Apply removable double-sided mounting tape to the frame itself, not across the switch opening. Press firmly, observe the tape’s weight and surface limits, and do not assume it will hold a heavy clay cover.
Method 2: flat duct-tape jack-o’-lantern
Fong’s eHow design is a fast, graphic alternative when you want a plate that can be changed without sculpting.
Rank #4

- 1 Eye-Catching Design: Unique patented Gothic handheld design, detailed 3D texture creates an eye-catching dramatic effect
- 2 Universal: Fits standard light switches (compatible with most toggle/rocker switches)
- 3 Durable Material: High quality, lightweight yet strong and durable for long-lasting use
- 4 Easy Installation: Simply install on your existing switch plate
- 5 Versatile Decoration: Suitable for bedroom, living room, kitchen or Halloween party
- Place orange duct tape across the front of a clean, compatible blank plate, overlapping strips slightly so the base is covered.
- Turn the plate over and trim the tape around the outside edge, switch opening, and screw holes with a hobby knife. Make relief cuts at corners so the tape folds neatly without bunching.
- Cut black duct tape into eyes, a nose, and a jagged mouth. Apply the pieces to the orange surface.
- Add craft-foam shapes, felt, or googly eyes with hot glue only if the added thickness will not stop the plate from sitting flat.
- Press down every edge, especially around the opening, and reinstall only after the glue has cooled and the tape is firmly bonded.
Because tape edges can lift with handling, inspect the opening and perimeter each time the plate is removed for cleaning or storage.
Independent reader supportYour contribution helps us test, update, and keep practical guides available for everyone.Method 3: paper-covered switch plate
The paper method from Education.com is lightweight and easy to customize with children.
Best Value

- Standard Size: Single toggle wall plate size is 4.50 x 2.76 In, easy to install on wall grids, covering more wall defects, please make sure to check your size before purchase.
- Premium Quality: Made of unbreakable polycarbonate thermoplastic, heat & fade resistant to temperatures over 100 degrees which protects them against discoloration and fading over time.
- Home Decoration: High-quality uv printing, clear and vivid colors, replaces existing household light switch or outlet standard white cover, bring your wall a new fresh look.
- Easy To Install: It is equipped with spray paint screws that match the wall panel, so it is easy to install.Turn off the power of the fuse box or circuit breaker before installation.
- Wide Uses: Cute design enhances the look and feel of your house. Perfect for kitchen, bathroom, office, living room, playroom, bedroom, girls room, boys room.
- With the breaker off, remove the plate and place it on the back of the chosen paper.
- Trace around the plate, then cut the paper slightly larger than the outline.
- Mark the switch opening and screw holes. Cut the opening carefully, leaving enough paper to fold cleanly behind the plate without covering the hardware path.
- Brush on water-soluble glue, position the paper, and fold the extra margin around the back. Use tape to hold folds while they dry.
- Decorate the front with markers, stickers, or glitter glue. Keep embellishments thin at the opening and screw locations.
- Allow the glue and decorations to dry fully. Reinstall the plate before touching the switch.
Method 4: polymer-clay Halloween scene
Dedul’s Halloween cover tutorial and DIY Daisy’s cover tutorial use polymer clay for raised scenes.
- Roll clay evenly on baking paper with an acrylic rolling pin. A consistent sheet reduces warping around the plate.
- Lay the detached plastic or metal cover on the clay and mark its outline, switch opening, and screw holes.
- Cut the outer shape with a craft knife. Remove the clay from the openings so the switch and screws remain unobstructed.
- Build the Halloween scene with clay tools: pumpkins, ghosts, bats, or a graveyard. Keep the relief low enough that the finished plate can sit flat.
- Transfer the clay and its baking paper to a tray. Support it with foil or a ceramic tile if the clay instructions call for a rigid surface.
- Bake exactly as the clay package directs, then let the piece cool completely before handling.
- Test-fit the cured cover without forcing screws. If it rocks, rubs the wall, or blocks the switch, remove material rather than tightening hardware against the obstruction.
DIY Daisy notes that ordinary double-sided tape may be inadequate for a clay cover. Use the plate’s screws when the cover is designed for them; reserve poster strips or similar products for lightweight, compatible applications.
Reinstall the finished cover safely
- Inspect the front and back for loose clay, wet glue, sharp tape corners, or debris.
- Align the switch opening and screw holes with the wall box.
- Insert and tighten the original screws evenly. Stop when the plate is secure and flat; overtightening can distort a decorative cover.
- Only after the plate is fully screwed in should you restore the breaker and touch the switch, following Education.com’s handling sequence.
- Operate the switch several times. If it rubs, sticks, or cannot travel its full range, turn the breaker off again and correct the obstruction.
Troubleshooting and seasonal storage
| Problem | Likely cause | Fix |
|---|---|---|
| Plate will not sit flat | Clay, foam, glue, or folded paper is on the rear seating edge | Switch off the breaker, remove the plate, trim the obstruction, and test-fit again |
| Switch movement is restricted | Decoration overlaps the opening or projects too far inward | Enlarge the opening and reduce relief; never force the switch |
| Screws do not align | Replacement plate has a different opening or screw layout | Use a compatible blank plate and retrace the original hardware positions |
| Frame peels away | Attachment is too weak for the frame, wall finish, or weight | Remove it, clean both surfaces, and choose a mounting method rated for that specific load; do not rely on ordinary tape for a heavy clay piece |
| Paint remains tacky | Coat is too thick or has not cured | Leave the plate off the wall until the paint product’s full drying guidance is met |
| Paper wrinkles | Too much glue or insufficient smoothing | Use a thinner glue layer, smooth from the center outward, and let the cover dry under light, even pressure |
For storage, remove the seasonal plate with the breaker off, keep it dry and dust-free, and store relief pieces so they cannot bend or rub against one another. Recheck the opening and screw holes before next Halloween.
Design decisions that keep the craft practical
- Choose flat methods for frequent changes. Tape and paper add little thickness and can be replaced when the season ends.
- Choose clay for a display piece. Raised scenes create the strongest visual effect, but curing and weight make fit and attachment more important.
- Use contrast around the switch. Orange, black, white, and metallic accents remain readable without covering the control itself.
- Make the frame optional. A pumpkin plate works on its own; adding a separate border increases the attachment and clearance checks.
- Keep the design reversible. Decorating a detached, replaceable plate lets you return to an ordinary cover without painting the wall or altering electrical hardware.
No standardized project cost or completion time is established by these tutorials, so select materials based on the finish, curing method, and removability you need rather than an assumed budget or schedule.
Quick Recap

Product prices and availability are accurate as of the date/time indicated and are subject to change. Any price and availability information displayed on Amazon at the time of purchase will apply.

