Recommended Free Tools
ThatPainter is reader-supported. When you buy through links on our site, we may earn an affiliate commission. Learn More
An unwanted leather belt can become hardware, a hanger, a carrier, or a finished accessory instead of going into the trash. The best project depends on three things: how much usable length remains, whether the leather is still flexible, and whether the buckle and holes are worth keeping.
As an Amazon Associate I earn from qualifying purchases.
Use two belts for a shelf or mirror project, a short section for drawer pulls or napkin rings, and the longest uncut length for a blanket carrier or curtain tie-back. Inspect every strap, cut edge and fastener before putting weight on it; leather can look sound while the stitching, adhesive or old holes have weakened.
Quick wins for a faster PC:
Scan for outdated or missing drivers - takes under a minuteDriver Scan →Clear out junk files and repair common Windows errorsFree Scan →Start by sorting the belt
Lay the belt flat and check it from end to end. A belt with broad, supple leather is suitable for straps and handles. A stiff belt can still make a basket band, pull or decorative trim. Keep the buckle when it adds grip or visual interest; remove it only when a flat strip is easier to work with. Belts with severe cracking, deep cuts, mold, brittle stitching or a loose buckle should be limited to light decorative uses.
#1 Best Overall

- Comprehensive Leather Working Kit: This leather working tool kit have 15 pieces of Leather raw materials and a complete set of leather working tools including liquid dye (4 colors), stamping tool, swivel knife, design template(3 different patterns), rivet kit (with installation tool), engraving hammer, edge cutter ect. A complete leather starter kit
- Premium Vegetable Tanned Leather Raw Materials: This leather kit includes 15 pieces of premium vegetable-tanned leather, which can be made into wallets, key fobs, earrings, wristbands, and etc. Each piece is pre-cut into shape for quick and easy crafting. Known for its clear grain, natural texture, and excellent plasticity, this high-quality leather allows you to start your projects effortlessly while making superior results. Suitable for both beginners and experienced crafters
- High Quality Leather Making tools: Our leather tools are forged with high-quality materials and have undergone multiple layers of quality inspection, which are sturdy and durable. Each tool in the leather crafting tools is carefully matched, and you can use this leather making kit to perform a series of processing needs on raw material leather, such as engraving, stamping, dyeing and sanding, making it your Ideal choice
- Suitable for Beginners: This leather crafting kit is designed with beginners in mind, featuring detailed video tutorials. The step-by-step video instructions are easy to follow, making it simple for anyone to master the joys of DIY leather projects. Whether you're new to crafting or looking to refine your skills, this leather starter kit offers an exceptional and unexpectedly experience, guiding you through each stage of creation with ease and confidence
- Suitable for Crafting Enthusiasts: This versatile leather crafting tool set opens up a world of creativity, ideal for fashioning unique home decorations and personalized accessories like keychains, bracelets, and wallets. Whether you're just starting out or are an experienced leatherworker, this comprehensive kit equips you with all the tools needed to transform your ideas into reality with ease and precision
- Measure first: wrap the belt around the object you want to make or hang, then mark the overlap. Allow extra length for folds, holes and rivets.
- Plan the attachment: decide whether the project uses existing belt holes, punched holes, screws, rivets, glue, knots or a combination.
- Finish cut edges: round sharp corners with scissors or a craft knife, then smooth roughness with fine sandpaper.
- Test gradually: load any suspended object with a light weight before placing it above people, furniture or breakables.
A leather rotary hole punch is the most useful single purchase for these projects. More involved work may also require medium leather rivets, a rivet setter and a hammer. Easier projects can use scissors, clamps, hot glue, hooks and a planter.
Which project fits your belt?
| Project | Best belt condition and length | Fastening and tools | Buckle | Use and load judgment |
|---|---|---|---|---|
| Shelf straps | Two long, flexible belts | Screws, wall anchors, drill; punched holes can help | Optional decorative detail | Functional; use only for a lightweight shelf and suitable anchors |
| Curtain tie-back | One medium or long belt | Usually no cutting; wall hook or tie-back hardware | Keep visible | Decorative and lightly tensioned |
| Mirror hanger | Strong, uncracked belt with enough length to form a loop | Wall anchors, screws and frame attachment | Usually retained or positioned as a feature | Functional; match every attachment to the mirror’s weight |
| Planter holder | Long belt or two to three belts | Hole punch, rivets and setter, hammer; or glue and clamps for a simple version | Usually removed | Functional; test with an empty pot, then damp soil |
| Basket wrap or handle | Any usable section; longer for a handle | Glue, screws, rivets or existing holes | Optional | Decorative wrap or light carrying load |
| Drawer or cabinet pulls | Short, flexible sections | Screws or bolts through punched holes | Optional for grip and style | Functional; tighten hardware without crushing the leather |
| Wall organizer | Several strips or one belt cut into sections | Screws, anchors, pockets, envelopes or small containers | Usually removed | Functional for mail and small items |
| Blanket or yoga-mat carrier | Long belt with a reliable buckle | Existing buckle and holes; little or no cutting | Useful for adjustment | Functional; carry a rolled, moderate-weight item |
| Tray, box or luggage handle | Wide section long enough for two attachment points | Rivets, bolts or screws; hole punch | Optional | Functional; reinforce the container where the handle is attached |
| Small accessories and closures | Scraps and short pieces | Scissors, hole punch, glue, snaps or thread | Optional | Low-load decorative or organizing uses |
10 ways to reuse an old leather belt
1. Make rustic shelf straps
Two belts can support a narrow wooden shelf while adding a warm, industrial look. This is the most attachment-sensitive project in the list, so use a shelf that is genuinely light and a wall surface that can accept appropriate anchors.
- Cut or fold both belts so each forms a vertical loop from the wall, under the shelf and back to the wall.
- Position the loops at equal distances from the shelf ends and mark the wall and shelf attachment points.
- Punch clean holes through the leather where screws or bolts will pass. Keep holes away from cracked edges.
- Install the wall anchors and fasteners, then secure the shelf. Check that both straps share the load rather than allowing one side to sag.
- Test with a few light objects before adding anything breakable or heavy.
2. Turn the belt into a curtain tie-back
Wrap the belt around gathered curtains and close it with the original buckle. The buckle becomes the design detail, so this works especially well when the metal or leather finish suits the room.
Free tools Windows power users keep installed
One-click scans. No signup required.
For a permanent tie-back, install a wall hook at the height where the belt naturally sits. Leave enough slack to gather the fabric without crushing it, and trim only after you have confirmed the buckle position from across the room.
3. Hang a lightweight framed mirror
A strong belt can replace a conventional hanging strap on a lightweight framed mirror. Form a loop behind the frame, attach both ends securely to the frame or its existing hanging points, and hang the loop from a wall anchor rated for the complete mirror weight.
Rank #2

- 【Compact Leather Working Starter Kit】- Our leather working tools come with a high-quality storage bag that includes a 7-in-1 stitching Groover, 10 leather waxed threads, stitching awl, punching cutting tools, and other essential leather working and sewing supplies. This complete entry-level leather kit is perfect for beginners to start their leather crafting journey immediately.
- 【High Quality & Durable】- PLANTIONAL leather working tools set features stitching awls, finger cots, and other accessories that make sewing leather easier and protect your fingers. Made from steel and wood, these tools are sturdy and long-lasting. The handle has a non-slip texture with an elegant appearance, and the stainless steel material is rust-resistant, smooth, and free of burrs.
- 【Wide Application】- This practical and comprehensive DIY Leather Craft Tools set allows you to sew various materials, including leather, fabric, denim, canvas, and tarpaulin. It's perfect for making handbags, belts, keychains, and repairing carpets and upholstery.
- 【Get Started in Leather Crafting】- With this starter kit, you'll learn tooling, carving, finishing, and sewing. If you enjoy creative activities and working with your hands, leather working can be a highly rewarding and enjoyable hobby.
- 【Great Gifting Idea】- We emphasize high quality in our leather making tools, using superior materials for long-lasting and satisfactory user experiences. If you're looking for a thoughtful gift for a friend or family member, or if you want to design a unique leather gift, this beginner's leather working kit is an excellent choice. Surprise the handyman in your family and share the joy of leather crafting.
Do not rely on a single old belt hole, decorative nail or weak frame molding. Inspect the belt under tension, pull-test the attachment by hand, and use a second safety point if the frame design permits one.
4. Build a plant hanger or planter holder
There are two useful approaches. The simple version uses one belt, scissors, clamps, hot glue, a hook and a planter. Cut the belt lengthwise into three similar strips, thread the strips through holes or openings in the planter, glue and clamp the joins, knot the upper ends together, and hang the knot from a cup hook. Keep the plant small until the assembly has been tested.
Crashes, No Sound, or Screen Glitches?
Random freezes, missing sound and display glitches usually trace back to one bad driver. Find and replace yours safely.Free scan · under a minutePC Slower Than It Used to Be?
A free scan shows the junk files, broken settings and background clutter dragging Windows down - then fixes them in one click.Free scan · Windows 10 & 11For a more durable geometric holder, use two or three belts. Measure the planter, punch matching holes in the strips, overlap the ends and fasten them with medium rivets using a rivet setter and hammer. Assemble the cradle around the pot so it cannot slide through the bottom. Rachel Pereira’s eHow tutorial notes that “These cute planter holders can be used with the same pots you used to make them, or easily switched out with similar sized pots.” That interchangeability is useful when you want to remove a pot for watering.
Hang the holder from a hook screwed into a suitable support, not merely from drywall without an anchor. Check it first with an empty pot, then with the filled pot placed on the floor beneath the hook.
5. Wrap a basket or add a handle
A belt can refresh a plain storage basket without changing its structure. Wrap it around the outside as a band, align the buckle at the front, and secure the belt to itself if it tends to slip. For a carrying basket, cut a section long enough to span two opposite sides, punch holes at both ends and attach it as a handle with screws or rivets.
Rank #3
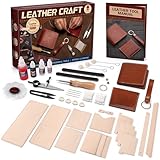
- Leather Working Kit: This leather Making kit contains the materials and tools needed to make leather wallets, card holders, and key chains, including vegetable tanned leather, leather edge bevelers, leathercraft compasses, waxed thread, leather needles, leather paint, leather rivet, and more. You can easily start and finish beautiful leather arts
- Pre-cut Vegetable Tanned leather: We provide high-quality veg tan leather, the simple design and appearance make it easy to match. The leather surface is smooth, the back is soft, waterproof, comfortable to touch, and brings a pleasant use experience. Each leather sheet is pre-cut and ready for you to make personalized leather wallets, leather keychains, and leather card holder kits
- Useful Leather Tools: Our leather crafting kits come with practical leather working tools. Leather needles and wax thread allow for sewing of leather pieces. The leather edge beveler tool is sharp, making it easy to trim and smooth leather edges. A leathercraft compass can be adjusted in size for arcing, measuring, and dividing lines. Nail files are included for polishing leather surfaces to a fine finish
- Leather Paint Kit: This leather tooling kit also comes with red-orange and dark brown water-based leather dyes, adhesives, a color palette, wool dauberball brushes, etc. Leather paints are easy to apply to leather and maintain colors for an extended period, resisting fading and flaking. Leather adhesive can quickly penetrate and firmly fix the gaps between leathers, and can bond different leathers well
- Easy to Use: This leather wallet kit includes a detailed recorded video tutorials. It starts with getting to know the leather tools and then goes into each specific step. Whether you are a complete novice or a lover who wants to improve your skills further, you can start your leather creation journey smoothly under our guidance
Use the wrap for decoration and light stabilization; use a reinforced handle only when the basket walls can withstand the pulling force.
6. Create drawer or cabinet pulls
Short belt sections make comfortable, flexible pulls. Cut equal lengths for every drawer, round the corners, and punch two holes at matching distances from each end. Fasten each strip with machine screws, bolts or suitable cabinet hardware from the inside of the drawer or door.
A buckle can remain on one end when its profile improves grip, but remove bulky hardware where it would catch clothing or prevent a door from closing. Make a drilling template from cardboard so every pull sits at the same height.
7. Assemble a wall organizer or mail holder
Cut one belt into vertical rails or use several belts as horizontal supports. Attach the strips to a wall board or directly to the wall, then slide envelopes, pockets, small containers or fabric pouches behind them. Existing belt holes provide adjustable positions for hooks or screws.
Keep the organizer near an entryway for incoming mail, keys and notes. Distribute weight across several attachment points; a single strip carrying a full container can twist or pull away from the wall.
Rank #4

- PRACTICAL LEATHER WORKING KIT - Our leather craft tools with specially designed tool bags include 7 in 1 stitching groover, 15 x leather waxed thread, 5 x wool daubers, 3 x stitching awl, leather stitching punch, hollow punch set, sewing needles in various sizes. If you opt for this leather tool set, you don't need to worry about missing tools for basic leather making.
- LEATHER TOOL STORAGE BAG - The leather craft tools set contains 66PCS leather working tools, and all the leather making tools are stored in a delicate storage bag in an orderly manner. Don't worry about clutter and loss. Various types of leather sewing needles and stitching awls to meet all the needs of your leather sewing project.
- LEATHER HOLLOW PUNCH SET - Professional punch set 1.0mm, 2.0mm, 2.5mm, and 3.0mm. Design to better maintain the verticality and smooth of the leather hole. These sizes are especially suitable for punching for leather belts, watchbands, leather straps, plastic sheets, canvas, paper Etc.
- WIDELY USED - Perfect leather repair sew kit for carpets, upholstery, coats, tents, and mattresses. Practical and abundant leather DIY tools kit, you can sew different leather, fabric, denim, canvas, tarpaulin, or other projects. This is an essential tool for leather professionals and beginners.
- ELABORATELY CRAFTED - As craft professionals, we are well aware of what craft enthusiasts expect from the quality of their tools, so we have always emphasized the high demands on quality. This hand-stitched set can be used for a long time. Please choose with confidence.
8. Make a blanket or yoga-mat carrier
The buckle and adjustment holes make a long belt ideal for securing a rolled blanket or yoga mat. Wrap it around the roll, feed the pointed end through the buckle, and tighten until the roll is held without compressing it. For a shoulder-carry version, leave a longer section between the two wraps or use a second belt as the shoulder strap.
This method also works for a picnic blanket. Keep the belt flat against the roll so it cannot migrate toward an edge while you walk.
9. Add a handle to a tray, box or piece of luggage
Use a wide belt section as a centered handle on a wooden tray, storage box or similar container. Mark two attachment points with enough spacing for your hand, punch the holes, and fasten the ends with rivets, bolts or screws backed by washers.
Reinforce thin wood or cardboard before attaching the handle. Lift the empty container first, then add contents gradually. If the leather flexes excessively, shorten the handle or add a second layer beneath each attachment point.
Do these 3 things before closing this tab:
1Repair Windows errors before they cause bigger problems2Scan for outdated or missing drivers - takes under a minute3Clear out junk files and repair common Windows errors10. Turn scraps into small accessories and closures
Short pieces are valuable even when the main belt is too damaged for structural work. Cut and finish them as:
Best Value

- Leather Working Kit: Our leather crafting kit includes 8 pieces of vegetable-tanned leather, swivel knife, wooden engraving hammer, liquid dyes (7 colors), leather cords, a color palette and more leather tools. This leather bookmark kit also includes a clear instruction and carving pattern paper. Even beginners can experience the complete process of leather diy craft making.
- Pre-cut Vegetable Tanned Leather: This leather bookmark is made from 1.5mm thick vegetable-tanned leather. Each leather sheet is pre-cut for easy use. The leather is smooth, easy to carve and dye. Its great color absorption properties allow for even color rendering of liquid dye, resulting in clear, smooth carving lines. The finished bookmark is durable over time, and the bookmarks are also very suitable for book lovers.
- Complete Leather Tooling Kit: From tracing, choosing your favorite pattern to carve, dyeing, and finally sanding sealing, you can easily make a leather bookmark. A variety of uniquely designed patterns and 7 different colors of dyes are available for selection. You can also design your own unique patterns to create your own style and add a different feel to your reading experience.
- Bookmarks for Adults Beginners: This leatherworking tool set includes paper and video tutorials, as well as basic tools for following along and learning various leather DIY techniques. While learning, you can also create unique leather bookmarks to place in your books for easy reading. It's perfect for beginners or DIY lovers, and you can enjoy the fun of crafting with family and friends.
- Unique Leather Bookmark Crafting Kit: This leather making kit produces bookmarks that can be used as reading bookmarks, keychains, bag charms, or other creative accessories. This leather bookmark kit is perfect for book lovers, craft lovers and beginners. Contains various leather diy crafting techniques, it's ideal for inspiring creativity and focus.
- Cuff bracelets, with a snap, button or existing buckle as the closure.
- Napkin rings sized around a rolled napkin.
- Book straps that wrap around a closed notebook or journal.
- Gift tags, plant labels or luggage tags made from punched shapes.
- Wreath accents and hanging loops.
- Cable wraps secured through a punched slot or small snap.
These projects need the least leather and impose little load, making them suitable for narrow offcuts, worn sections and belts with damaged buckle ends.
Independent reader supportYour contribution helps us test, update, and keep practical guides available for everyone.Cutting, punching and fastening leather
- Mark the finished shape: use a ruler and a removable pencil mark on the flesh side. Account for overlap before cutting.
- Cut on a stable surface: sharp scissors handle thin leather; a craft knife handles thick sections but requires a cutting mat and controlled pressure.
- Round corners: square corners catch on fabric and begin to peel. Trim a small radius and smooth it with fine sandpaper.
- Punch, do not drill when possible: a leather rotary punch makes clean, consistent holes and reduces tearing.
- Set rivets correctly: place the rivet through aligned layers, support the head on a hard surface, and use the setter and hammer with controlled taps.
- Protect the finish: test glue, paint or conditioner on an unseen section first; some coatings darken or stiffen old leather.
Load testing and common failure points
Most failures happen at holes, folded edges, old stitching and wall hardware rather than in the middle of the belt. Reject any section that elongates noticeably when pulled by hand. For hanging projects, apply a light test load for several minutes, inspect for stretching or slipping, and increase the load in small steps. Never place a mirror, planter or shelf over a bed, seating area or fragile object until the attachment has passed that test.
Moisture also changes the risk. A planter becomes heavier after watering, and damp soil can remain in the pot for hours. Keep leather away from constant drips, wipe spills promptly and replace a strap if it becomes soft, moldy or delaminated.
A simple decision guide
- You have one long belt and want no cutting: choose a curtain tie-back or blanket carrier.
- You have two matching belts: consider shelf straps, provided the shelf and wall anchors are light-duty and appropriate.
- You have a strong belt and a small pot: make the planter holder, beginning with an empty-pot test.
- You have short, clean sections: make drawer pulls, basket handles, book straps or napkin rings.
- You have worn or narrow scraps: use them for tags, cable wraps, wreath details and other low-load accessories.
- You have an attractive buckle: keep it visible on a tie-back, carrier, basket wrap or cuff.
Once the belt is sorted by strength and length, the project choice becomes straightforward: reserve intact leather for anything suspended or load-bearing, and turn every remaining scrap into a closure, trim piece or small organizer.
Quick Recap

Product prices and availability are accurate as of the date/time indicated and are subject to change. Any price and availability information displayed on Amazon at the time of purchase will apply.

