What’s actually slowing this PC down?
Free tools Windows power users keep installed
One-click scans. No signup required.
Pick the symptom - the matching free tool is one click away.
ThatPainter is reader-supported. When you buy through links on our site, we may earn an affiliate commission. Learn More
The best camera for LightBurn is the one whose field of view matches your laser bed at its mounting height. Resolution matters, but it comes after bed coverage, distortion, focus stability, connection reliability, and a rigid mount. For most buyers, the LightBurn Camera is the simplest supported choice if remaining stock is available; the Logitech C920S is the sensible budget candidate, the C922 is a mainstream 1080p alternative, the Brio 4K is the higher-detail consumer option, and a fixed-focus global-shutter or MJPEG/IP camera is the strongest route for large or custom installations.
Every camera still requires lens calibration and workspace alignment before accurate placement can be expected. This guide explains which option fits your machine, how to choose the lens and mounting position, and how to avoid the calibration problems that make an expensive camera perform worse than a basic one.
#1 Best Overall
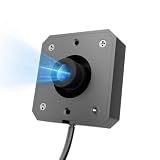
- 【Smart Camera for Detailed Workbed Visibility】Equipped with a high-resolution lens, this camera provides clear visual coverage of the entire laser bed, making it easy to check material placement and review design details directly on your screen.
- 【Real-Time Workspace Preview in Software】Stream a live image of your workbed into your LightBurn and CutLabX software. Simply drag, drop, and resize your design on top of the actual workpiece image to plan your layout before starting the engraving job.
- 【Accurate Visual Positioning & Alignment】Features camera-assisted alignment to help place designs accurately on small, curved, or irregular items, helping reduce material waste and unnecessary trial runs.
- 【Streamlined Batch Processing for Multiple Items】Easily set up multiple small items—like coasters, keychains, or tags—on the workbed at once. The camera overlay allows you to position graphics over each item efficiently for repeat production.
- 【Quick Machine Integration & Software Compatibility】Easily mounts directly onto the M3 enclosure for a neat, compact setup. Fully compatible with LightBurn and CutLabX software across Windows and Mac operating systems.
What a LightBurn camera does
A camera connected to LightBurn can show the material inside your laser, allowing you to:
- Position designs: place artwork over blanks, existing objects, or registration marks using the camera overlay.
- Trace objects: convert visible artwork and outlines into LightBurn vectors.
- Monitor the work area: view the bed from the computer, although this is not a replacement for laser-safety equipment, enclosure practices, interlocks, ventilation, or supervision.
LightBurn’s camera workflow has two separate stages: lens calibration corrects optical distortion, while workspace alignment establishes the camera’s position relative to the laser. Lens calibration can generally be reused, but moving the camera requires workspace realignment.
Quick comparison
| Camera | Best for | Focus | Connection | Main advantage | Main limitation |
|---|---|---|---|---|---|
| LightBurn Camera | Straightforward first-party setup | Manual | USB | LightBurn-oriented support and presets | Sales are being discontinued; availability is uncertain |
| Logitech C920S | Budget users and smaller beds | Verify the specific model’s behavior | USB | Common, inexpensive webcam category | Not a first-party LightBurn camera; coverage depends on height and lens |
| Logitech C922 Pro Stream | Readily available 1080p setups | Autofocus | USB 2.0 | Tripod mounting and documented specifications | Autofocus and a 78-degree diagonal field of view may be unsuitable |
| Logitech Brio 4K | Higher-detail consumer installations | Verify focus and framing stability | USB; USB 3.0 needed for 4K | 4K detail and adjustable field of view | More expensive; 4K does not automatically improve accuracy |
| Fixed-focus global-shutter or MJPEG/IP camera | Large beds and custom rigs | Fixed | USB/UVC or network MJPEG | Specific lens and sensor choices | Requires careful specification and installation checks |
These are use-case recommendations, not the result of undocumented hands-on testing. Third-party compatibility can vary by camera, operating system, computer, USB port, and LightBurn version.
The five best camera choices for LightBurn
1. LightBurn Camera: best for the simplest supported setup
The first-party LightBurn Camera remains the least ambiguous option for users who can still obtain one. It is designed around LightBurn’s camera workflow, and LightBurn provides calibration presets for its own supported cameras. The product page describes a CMOS sensor, automatic exposure and white balance, and a manually focused lens.
Choose it if: you want first-party guidance, a simpler calibration path, and can find remaining stock.
Skip it if: you need guaranteed long-term availability, require a particular lens angle for a large bed, or cannot source a suitable replacement mount.
Important availability warning: LightBurn announced on June 8, 2026 that it would discontinue camera sales after existing inventory was depleted. Its hardware-sales notice also reported that camera mounts and LightBurn Bridge kits were no longer in stock. Check the official product and announcement pages before relying on availability. LightBurn points users toward printable mounts and on-demand 3D-printing services, but fit for third-party cameras is not guaranteed.
2. Logitech C920S: best budget and common-webcam candidate
The Logitech C920S is a practical candidate for smaller and moderately sized beds when its field of view and mounting height cover the entire usable area. It belongs to a widely available conventional webcam category and generally costs less than premium 4K models. Logitech’s U.S. storefront showed an approximately $59.99 sale price versus $69.99 regular price when observed in August 2026; prices and stock change by region and retailer.
The Tool Desk
Outbyte PC Repair FREEClear out junk files and repair common Windows errorsFree Scan →Outbyte Driver Updater FREEScan for outdated or missing drivers - takes under a minuteDriver Scan →Its 1080p image can be sufficient for positioning and ordinary tracing. However, do not buy it solely because it is popular. Confirm the actual model’s focus behavior, framing stability, and field of view, then compare those characteristics with your bed dimensions in LightBurn.
Choose it if: you have a small diode-laser bed, already own one, or want a low-cost camera to evaluate before spending more.
Skip it if: your bed is large relative to the available mounting height, the camera will sit on a flexible clip, or you specifically need fixed focus or global-shutter behavior.
Rank #2

- HD Recording with Wide-Angle Capture: The Longer Lightburn camera with an industrial-grade wide-angle lens, the camera covers a large 740x560mm area, far exceeding the typical 400x400mm range. It supports time-lapse recording to fully capture the engraving process, making it easy to share creative details on social media.
- Precision Imaging for Superior Engraving: The Longer Lightburn camera features 5MP high-definition resolution, making it the perfect companion for laser engravers and cutters. Its high-quality imaging ensures precise positioning, helping you achieve top-quality engraving results with ease.
- Auto Positioning & Accurate Detection: Designed for CNC engraving, the camera’s auto area detection function, combined with LightBurn software, offers a positioning accuracy of less than 1mm. With simple calibration, the engraving area is automatically reflected in LightBurn, making operation more convenient and editing more efficient.
- Preview Function & Simultaneous Multi-Material Engraving: The preview function allows you to design directly on materials, ideal for handling irregular patterns. No need to preview each material individually, as you can engrave multiple materials simultaneously, greatly improving efficiency and ensuring precise engraving every time.
- Wide Compatibility, Easy to Use: This camera is specifically designed for use with LightBurn software and is compatible with all Longer laser engravers, as well as frame laser engravers from other brands. It supports both Windows and Mac systems. (Please note: LightBurn software is not included and must be downloaded separately).
3. Logitech C922 Pro Stream: best mainstream 1080p alternative
The Logitech C922 Pro Stream offers 1080p at 30 FPS, 720p at 60 FPS, a 78-degree diagonal field of view, USB 2.0 connectivity, tripod mounting, and autofocus according to Logitech’s published specifications. Its U.S. product page listed it at $119.99 when observed in August 2026.
Quick wins for a faster PC:
Fix the driver behind crashes, sound loss and screen glitchesFind Drivers →Repair Windows errors before they cause bigger problemsFix Now →Scan for outdated or missing drivers - takes under a minuteDriver Scan →The tripod mount can make a rigid overhead installation easier, but autofocus is a meaningful risk for a camera that must preserve a stable geometric relationship with the bed. If the camera refocuses when material height, color, lighting, or contrast changes, the image can shift enough to make an overlay unreliable. Autofocus does not mean the C922 will always fail; it means you should be able to disable or reliably lock it before treating the setup as permanent.
The 78-degree diagonal field of view may work for a moderate bed at sufficient height but can be too narrow for a large bed mounted close to the work surface. Its streaming features and higher frame-rate mode do not automatically improve engraving accuracy.
Choose it if: you already own one, need a readily available 1080p webcam, and have enough mounting height plus control over focus.
Skip it if: you need to cover a large bed from a low position or are paying extra for streaming specifications that do not solve your actual coverage and calibration problem.
Do these 3 things before closing this tab:
1Scan for outdated or missing drivers - takes under a minute2Repair Windows errors before they cause bigger problems3Fix the driver behind crashes, sound loss and screen glitches4. Logitech Brio 4K: best higher-resolution consumer option
The Logitech Brio 4K family offers 4K capability, USB connectivity, and adjustable fields of view. Logitech’s published information lists 90-, 78-, and 65-degree field-of-view options for the Brio model and states that 4K recording requires USB 3.0. Logitech’s U.S. storefront showed approximate August 2026 price signals of $169.99 for Brio 4K and $199.99 for MX Brio.
Extra pixels can help when you need to inspect details, crop the view, or trace visible artwork. They do not, by themselves, make physical placement more accurate. A wide field of view can introduce more distortion; a USB connection that falls back to a lower mode can eliminate the expected detail; and unstable mounting or changing focus can remain the real source of error.
Use one only after selecting a fixed field-of-view mode and confirming that framing and focus remain unchanged. Check that the computer, port, hub, and cable can reliably provide the intended USB mode.
Choose it if: you already own a Brio, need more visual detail, or have a large or detailed work area with adequate mounting height and USB 3.0 support.
Skip it if: your bed is small, 1080p already gives sufficient placement detail, or you are assuming 4K will compensate for poor geometry or calibration.
5. Fixed-focus global-shutter or MJPEG/IP camera: best custom large-bed solution
For a large bed or specialized overhead rig, the best answer may not be one named webcam. It may be a camera selected as a class: fixed focus, at least 12 FPS, approximately 8–12 MP as an ideal range, and preferably a global-shutter sensor. These are the characteristics emphasized in LightBurn’s camera-selection guidance.
Rank #3

- A laser engraver camera can realize high-definition video recording and real-time monitoring
- Provides visual feedback: observe work progress, material changes, or machine operating status
- Facilitate subsequent processing and analysis, improve work efficiency and accuracy
- Specific parameters: Compatible models: RAY5 series, B1 series, and most models on the market Package Size:612X270X95mm Product Size:420X50X560 (high) mm weight:1.25kg(After packaging)
A global shutter captures the image at once, reducing skew from vibration or moving objects. A rolling shutter reads the image progressively and can produce wobble or geometric skew. Rolling shutter can still be acceptable for a rigid, static overhead camera, but global shutter is more valuable for head-mounted cameras, vibrating machines, moving workpieces, fast previews, and large installations where small errors are more visible.
A network camera can also solve long USB cable runs, but it must provide MJPEG or individual frames. An RTSP-only camera is not suitable under LightBurn’s current camera documentation. Network setups add configuration, latency, authentication, and image-format concerns.
Outdated Drivers Are Slowing You Down
One free scan finds every outdated or missing driver and matches the right update for your exact hardware.Free scan · exact hardware matchPC Slower Than It Used to Be?
A free scan shows the junk files, broken settings and background clutter dragging Windows down - then fixes them in one click.Free scan · Windows 10 & 11Choose it if: you need a specific lens angle, global-shutter behavior, large-bed coverage, a custom mount, or a network connection.
Skip it if: you cannot verify UVC, MJPEG, frame rate, resolution, focus, lens angle, and mounting requirements before purchase.
How to choose the right camera for your laser
1. Measure the usable bed
Measure the actual work area in millimeters, not merely the manufacturer’s headline machine size. Include the full region where you expect to position material. Enter those dimensions accurately in LightBurn.
2. Measure the camera height
Measure from the camera lens to the work surface at the intended installation point. A narrow lens may cover a bed when mounted high but fail completely when mounted close to it. Choose a camera whose required height is close to, but somewhat below, the available height so you retain adjustment room.
3. Use LightBurn’s selection helper
Open Help → Camera Selection Help in LightBurn and enter the machine dimensions. Compare the recommended lens angles and minimum mounting heights. The helper is based specifically on USB cameras sold through LightBurn, so use it as a geometry reference for third-party cameras rather than as a universal compatibility guarantee.
For a third-party camera, compare equivalent lens angles and verify the result with LightBurn’s selection or verification tools. Be careful when comparing specifications: manufacturers often quote diagonal field of view, while a calculator may use horizontal field of view. Those figures are not interchangeable.
4. Prioritize lens coverage over resolution
A high-resolution camera with a narrow lens cannot show the entire bed. An excessively wide-angle or fisheye lens may show everything but introduce distortion that becomes more severe near the edges. LightBurn recommends judging calibration by whether straight lines remain straight, not merely by the numerical calibration score.
5. Prefer stable focus and framing
Fixed focus is the safer choice for a permanently mounted overhead camera. Autofocus may react to workpiece height, color, texture, lighting, or contrast. Also avoid automatic digital zoom, face tracking, or any mode that changes framing. After setup, the camera should produce the same geometry every time.
Recommended Free Tools
6. Match the connection to your computer and installation
USB cameras are usually simpler and often appear as standard UVC webcams, but cable length, hubs, adapters, USB generations, operating systems, and drivers can affect behavior. IP cameras are useful when the computer is far from the laser, but require network setup and MJPEG or individual-frame output rather than RTSP alone.
Rank #4
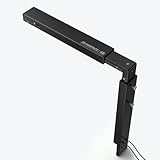
- Visual Preview: This camera perfectly solves the positioning problem of irregular patterns, allowing direct design on the surface of items, and achieving a WYSIWYG (What You See Is What You Get) effect. (Machines with infinite position switches cannot use the precise positioning function.)
- Precise Positioning: After simple calibration with the software, it can achieve area-seeking engraving, automatically locating the position of items for work with a positioning error of less than 1mm.
- Batch Engraving: Can complete batch processing of multiple items at once, with the under the guidance of the camera finding multiple items and processing them one by one.
- Real-time Monitoring: Covers 2.4GHz & 5GHz dual-band WiFi, allowing remote real-time viewing of the engraving machine's working status (via the AtomStack mobile APP), providing peace of mind with enhanced security.
- High-definition Recording: 1080P resolution, recording each creative process (via the AtomStack mobile APP), ready to share with family and friends at any time.
7. Treat the mount as part of the camera
A premium camera on a flexible monitor clip can be less useful than a modest camera on a rigid, repeatable mount. The camera must not move after alignment. Use a mechanically secure mount, avoid touching it during ordinary use, and ensure the lens angle and height can be reproduced if the camera must be removed.
LightBurn setup: calibration and alignment
Before installation
- Confirm that your laser works with LightBurn.
- Measure the usable bed and camera-to-bed height.
- Confirm that the operating system detects the camera.
- Install a rigid mount and connect the camera directly or through a known-good hub.
- Use consistent lighting across the bed.
- Disable or lock autofocus, zoom, and changing field-of-view modes where possible.
- For the camera positioning workflow, confirm the coordinate mode required by your machine; older LightBurn installation guidance specifically notes the use of Absolute Coords for accurate positioning.
Lens calibration
- Open LightBurn’s camera controls or camera-management interface and select the intended camera.
- Start the lens-calibration wizard.
- Prepare the AprilTag calibration target. It must be flat, sharp, unobstructed, high contrast, and well lit.
- Capture the required views. LightBurn’s current documentation describes five principal positions: the four corners and the center.
- Compare the available calibration models visually.
- Choose the model that makes known straight lines look straight, particularly near the edges. The highest numerical score is not necessarily the most accurate model.
- Finish and save the lens calibration.
A curved, blurry, poorly lit, or incorrectly sized target can prevent tag detection. Back the target with rigid material and adjust its size or distance so the tags are large enough for the camera to recognize.
Workspace alignment
- Leave the camera in its final mounted position.
- Run the workspace-alignment wizard after lens calibration.
- Burn or use the required alignment pattern on suitable material.
- Complete the wizard and save the camera configuration.
- Test the overlay against a known object, registration mark, or measured position.
Moving the camera invalidates its positional relationship with the laser. Lens calibration can generally be reused, but workspace alignment must be repeated after movement. LightBurn 2.1 also supports multiple cameras; each camera requires its own lens calibration and workspace alignment. Multiple cameras can be useful for large beds where one wide-angle view would create excessive edge distortion.
Outdated Drivers Are Slowing You Down
One free scan finds every outdated or missing driver and matches the right update for your exact hardware.Free scan · exact hardware matchPC Slower Than It Used to Be?
A free scan shows the junk files, broken settings and background clutter dragging Windows down - then fixes them in one click.Free scan · Windows 10 & 11Resolution, field of view, and sensor choices
LightBurn’s guidance identifies roughly 8–12 MP as an ideal resolution range, recommends at least 12 FPS, and prefers global-shutter sensors where possible. It also warns that resolutions above 16 MP can encounter USB 2.0 bandwidth limitations and that resolutions above 20 MP may encounter diffraction limits. These are selection guidelines, not a guarantee that every 8–12 MP camera will outperform every lower-resolution model.
The practical order of priorities is:
- Can the camera cover the whole usable bed from the available height?
- Can it do so without unacceptable edge distortion?
- Will focus, zoom, framing, and exposure remain stable?
- Can the mount remain rigid?
- Does the computer support the camera’s USB or network requirements?
- Only then: does extra resolution improve the detail you need for tracing or placement?
USB webcam versus network camera
| Factor | USB webcam | IP/MJPEG camera |
|---|---|---|
| Installation | Usually simpler and often UVC-based | Requires network configuration |
| Distance | Limited by cable quality, length, and bandwidth | Useful when the computer is far away |
| LightBurn format | Check UVC and operating-system recognition | Must provide MJPEG or individual frames; RTSP-only is unsuitable |
| Failure points | Hubs, adapters, drivers, ports, and exclusive camera access | Latency, authentication, network reliability, and image format |
| Best use | Most single-camera installations | Long runs, custom rigs, or multiple-camera systems |
LightBurn supports a broad range of third-party cameras, but compatibility is not guaranteed for every camera and computer combination. A camera working in the operating system may still fail in LightBurn if it is virtual, not UVC-compatible, claimed by another application, or connected through a problematic adapter.
Troubleshooting common problems
The entire bed is not visible
Likely causes: the camera is too low, the lens is too narrow, the aspect ratio is wrong, or incorrect bed dimensions were entered.
Fix: raise the camera, choose a wider suitable lens, recheck the usable-area measurements, and use LightBurn’s calculator instead of guessing from a “wide-angle” label.
The image is visible but placement is inaccurate
Likely causes: lens calibration or workspace alignment was skipped; the camera moved; focus or zoom changed; the mount flexes; or the machine is using the wrong coordinate mode.
Fix: secure the mount, lock focus and framing, recalibrate the lens if necessary, realign the workspace, and confirm the coordinate mode required by the camera workflow.
The calibration score is high but the edges look wrong
Do not automatically choose the highest score. Inspect straight lines near the edge of the view and select the model that produces the most geometrically plausible result. Excessive fisheye distortion can make a nominally successful calibration unsuitable for accurate placement.
The calibration target is not detected
Use a clean, flat, high-contrast target on rigid backing. Improve lighting, adjust focus, remove obstructions, and change the target’s scale or distance so the AprilTags are large and clear enough to detect.
Do these 3 things before closing this tab:
1Clear out junk files and repair common Windows errors2Fix the driver behind crashes, sound loss and screen glitches3Repair Windows errors before they cause bigger problemsBest Value

- 【5MP HD Precision with Less Trial & Error】 Get sub-millimeter positioning with a 5MP laser engraver camera, so you can align designs exactly where you want them. No more trial-and-error or wasted materials—just clean, accurate results every time across a 550×800mm workspace.
- 【Real-Time Preview for Confident Setup】 See your design directly on the material before engraving. Whether you're working with irregular shapes or curved surfaces, you can position with confidence and avoid costly mistakes—perfect for beginners and precision work alike.
- 【Batch Engraving for Higher Productivity】 Engrave multiple items in one run with automatic alignment after calibration. Spend less time setting up each piece and more time producing—ideal for small businesses, bulk orders, or anyone looking to increase productivity.
- 【Image Tracking for Easy Design Capture】 Turn real-world patterns into engravable designs with image tracking. Simply capture and trace graphics from materials, reducing manual design work and helping you bring ideas to life faster and more easily.
- 【Record, Share & Create Without Limits】 Capture HD videos of your engraving process to document your work or share online. Combined with wide 550×800mm coverage and broad compatibility, it’s built for creators, hobbyists, and workshops.
The camera works in the operating system but not in LightBurn
Close other applications that may be using the camera. Test another USB port, remove unnecessary adapters or hubs, and verify that the camera is presented as a UVC device rather than a virtual camera. For network cameras, verify that the output is MJPEG or individual frames, not RTSP-only.
The image jumps, reframes, or changes size
Autofocus, automatic digital zoom, automatic field-of-view changes, exposure software, and a loose mount can all cause this. Disable those features where possible, use a fixed field-of-view mode, reinforce the mount, and repeat calibration and alignment after making changes.
A 4K camera performs no better than a 1080p camera
The computer may be downscaling the camera because of USB bandwidth, the field of view may be too wide, the mount may be unstable, or the extra pixels may be irrelevant at the working distance. Calibration and alignment—not headline resolution—may be the limiting factors.
Which camera should you buy?
- Beginner wanting the least ambiguous setup: choose a LightBurn Camera if remaining stock is available and its lens geometry suits your bed.
- Cheapest sensible route: consider the Logitech C920S for a small or moderate bed, provided coverage and focus behavior are suitable.
- Existing webcam owner: test a C920S, C922, or Brio before buying another camera; compatibility and geometry matter more than brand.
- Mainstream 1080p buyer: the C922 is reasonable when its 78-degree diagonal view covers the bed and autofocus can be controlled.
- High-detail consumer buyer: choose the Brio 4K only when extra detail, adjustable framing, and USB 3.0 support justify the cost.
- Large-bed or custom-installation owner: select a fixed-focus global-shutter camera, or a suitable MJPEG/IP camera, using LightBurn’s calculator and verified specifications.
- Multi-camera user: use LightBurn 2.1’s multiple-camera support, calibrating and aligning every camera separately.
LightBurn-branded cameras should now be treated as a compatibility benchmark with time-sensitive availability, not as a permanently guaranteed product category. Prices cited above are U.S. signals observed in August 2026 and can change by region, retailer, promotion, and stock status. Check the linked manufacturer pages before purchasing.
Quick wins for a faster PC:
Clear out junk files and repair common Windows errorsFree Scan →Fix the driver behind crashes, sound loss and screen glitchesFind Drivers →Repair Windows errors before they cause bigger problemsFix Now →FAQ
What is the best camera for LightBurn?
There is no universal best choice. Match field of view and mounting height to your usable bed first, then weigh focus stability, distortion, connection, and resolution. The LightBurn Camera is the simplest first-party option if available; other choices depend on your machine and setup.
Does LightBurn work with any webcam?
LightBurn supports many third-party cameras, but compatibility is not guaranteed for every camera and computer combination. Check that the camera is recognized appropriately by your operating system and verify its behavior in LightBurn before relying on it.
Do I need to calibrate a LightBurn camera?
Yes. Accurate placement requires lens calibration to correct optical distortion and workspace alignment to relate the camera view to the laser. Moving the camera requires workspace realignment.
Is 4K better than 1080p for LightBurn?
Not necessarily. 4K can provide more visible detail, but it does not fix poor bed coverage, distortion, unstable focus, a loose mount, or incomplete calibration. Confirm the camera’s geometry and computer connection before paying more for resolution.
Free tools Windows power users keep installed
One-click scans. No signup required.
Can I use an IP camera with LightBurn?
Some network cameras are supported. The camera must provide MJPEG or individual frames; an RTSP-only stream is not suitable under LightBurn’s current documentation. Network configuration and latency are additional considerations.
What should I do if I move the camera?
Repeat workspace alignment after moving the camera. Lens calibration can generally be reused if the camera and lens settings have not changed, but check the resulting image and alignment before production use.
Quick Recap
Sources and current LightBurn guidance
- LightBurn camera overview and multiple-camera support
- LightBurn camera-selection criteria
- LightBurn lens calibration
- LightBurn workspace alignment
- LightBurn hardware-sales discontinuation notice
- Logitech C922 technical specifications
- Logitech Brio technical specifications

Product prices and availability are accurate as of the date/time indicated and are subject to change. Any price and availability information displayed on Amazon at the time of purchase will apply.




