Quick wins for a faster PC:
Repair Windows errors before they cause bigger problemsFix Now →Scan for outdated or missing drivers - takes under a minuteDriver Scan →
ThatPainter is reader-supported. When you buy through links on our site, we may earn an affiliate commission. Learn More
For a standard seam, choose the straight stitch, leave the stitch width at its straight-stitch default (often 0), start with the medium stitch length recommended in your machine’s chart, and use a compatible general-purpose or zigzag foot. Keep the tension at its marked default initially. Test the combination on a scrap of similar fabric before sewing your project; dial numbers vary by model.
Start with the stitch that matches the job
The stitch pattern is the first setting to choose. A straight stitch is the usual choice for seams, topstitching, and zippers, especially on woven fabric. A zigzag can finish raw edges or provide some give. Stretch fabrics may call for a stretch stitch or a narrow zigzag, while buttonholes and decorative satin stitching use dedicated patterns and often a compatible foot.
| # | Preview | Product | Price | |
|---|---|---|---|---|
| 1 |

|
Brother Sewing Machine, XM2701, Portable Sewing Machine, 27 Stitches | $138.29 | Buy on Amazon |
| 2 |

|
Brother FB1757X Mechanical Sewing Machine | $94.99 | Buy on Amazon |
| 3 |
|
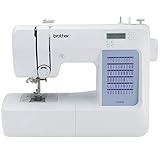
Brother CS5055 Computerized Sewing Machine with LCD Display | $134.00 | Buy on Amazon |
Your machine’s stitch chart identifies available patterns and may also pair each one with recommended width, length, tension, and presser foot. Use that chart over generic settings: machines differ, and some patterns have fixed settings.
Recommended Free Tools
Set width and length for the stitch
Stitch width
For a straight stitch, width is commonly set to 0 or left at the machine’s straight-stitch default. Brother’s straight-stitch instructions specify width 0 (Brother USA straight-stitch settings). On some machines, the width control also shifts the needle left or right. Before sewing, check that the needle will clear the presser foot.
#1 Best Overall
- 27 Unique Built-in Stitches: The Brother XM2701 sewing machine includes 27 built-in stitches including decorative, blind hem, zigzag, and stretch stitches and an auto-size buttonhole
- Automatic Needle Threader and Drop-in Top Bobbin: This beginner sewing machine is also great for experienced users; it includes an automatic needle threader that perfectly pushes thread through the needle and a convenient, jam resistant drop-in top bobbin
- Included Accessories: The XM2701 comes with 6 sewing feet, 3-piece needle set, twin needle, 4 bobbins, manual and more
- Versatile Free Arm: This free arm sewing machine is a simple sewing machine, perfect for a wide range of everyday sewing projects, and users from beginners to advanced
- At Your Side Support: The XM2701 small sewing machine comes with Brother At your side support offering free technical support via online, live chat or phone for the life of your machine
For zigzag, select a width that covers the fabric edge without sending the needle into the foot. The appropriate width depends on your machine, fabric, and purpose; start with the chart’s recommendation.
Stitch length
A medium stitch length is a practical starting point for ordinary seams, but the dial value is model-specific. Longer lengths make coarser stitches; shorter lengths make finer stitches. If the stitches bunch together, stop and increase the length before continuing. Brother cautions against sewing on with bunched stitches because the needle may bend or break (Brother stitch-length guidance).
Rank #2
- 17 built-in stitches
- 4-step buttonhole style
- Reverse button
- Free arm for sewing
- LED lighting for the work area
Very short lengths may be appropriate for satin stitching, but only where the machine’s chart specifies them. On some machines, choosing a stitch automatically loads preset width and length values, and those values may reset when you switch stitches or turn the machine off unless saved.
What’s actually slowing this PC down?
Pick the symptom - the matching free tool is one click away.
Leave thread tension at its default first
If your machine offers automatic tension or a marked default, begin there. Adjust tension only after checking that the upper thread is correctly threaded, the bobbin is seated properly, the needle is in good condition, the selected stitch is appropriate, and the presser foot matches the stitch. Tension scales are not universal, so consult your model’s chart rather than relying on a generic dial number.
Rank #3
- 60 UNIQUE BUILT-IN STITCHES: The Brother CS5055 sewing machine includes 60 built-in stitches including utility, decorative and heirloom stitch functions, and 7 1-step auto-size buttonholes
- IMPROVED NEEDLE THREADER: Easier than ever to use, the automatic needle threader reliably pushes the thread through the needle. The convenient, jam resistant drop-in top bobbin easy to load and helps ensure your bobbin stays in place
- INCLUDED ACCESSORIES: The CS5055 includes 7 sewing feet, 4 bobbins, a needle set, a trilingual English/Spanish/French user manual and more
- METAL FRAME and FIXED NEEDLE BAR: The durable metal frame construction allows your machine to tackle any project, and the needle is fixed in place while you work, allowing for cleaner stitching and even lines
- LARGE NEEDLE-TO-ARM WORKSPACE: A larger workspace with increased width in needle-to-arm space allows users to work on larger projects
Choose a compatible presser foot and needle
For a straight stitch, Brother’s instructions call for the zigzag presser foot. Check that the foot and shank fit your machine. The machine’s chart may specify a different foot for buttonholes or decorative patterns.
Use a needle suited to the fabric as well as the stitch. For knit or stretch fabric, a ballpoint or stretch needle is a sensible match; check your machine’s manual for compatible needle guidance. Whenever you change stitch width or needle position, slowly turn the handwheel toward you to confirm that the needle clears the foot before using the pedal.
Quick Recap
Starting settings by task
| Task | Starting choice | Check before sewing the project |
|---|---|---|
| Standard woven seam | Straight stitch; width 0 or the straight-stitch default; medium length; compatible zigzag/general-purpose foot | Test on scrap, confirm seam allowance, and check stitch balance. |
| Edge finishing | Zigzag stitch; moderate width and length based on the chart | Confirm the needle clears the foot and the zigzag covers the fabric edge. |
| Stretch or knit seam | Stretch-compatible stitch or narrow zigzag from the chart | Test the seam’s stretch and confirm the needle and feeding suit the fabric. |
| Basting or gathering | Longer stitch length, unless the machine’s instructions specify otherwise | Leave thread tails and plan how the temporary stitches will be removed. |
| Buttonhole or decorative satin stitch | Dedicated pattern and compatible foot; use a very short length only where the chart specifies it | Test on scrap because the result depends on fabric and thread. |
Test the setup before sewing
- Read the stitch chart for the fabric and task, then select the pattern and its recommended foot.
- Set width and length to the chart values or the pattern’s default. For a straight stitch, use the straight-stitch width default, commonly 0.
- Keep upper-thread tension at automatic or marked default at first.
- Raise the presser foot and thread the machine as directed; confirm the bobbin is placed correctly and the needle is sound.
- With the presser foot down, sew a short test on scrap fabric similar to the project. Brother Canada recommends testing stitch and length settings on scrap to observe how the material feeds (Brother Canada stitch-setting guidance).
- Assess the seam, then adjust one control at a time. If changing width or needle position, turn the handwheel toward you slowly first and verify clearance.
If the machine sews incorrectly
- Zigzag comes out straight: Stop and reselect the intended stitch. Check whether the machine’s pattern selection or preset has changed.
- Stitches bunch together: Increase stitch length before continuing. Do not keep sewing through bunching.
- Needle strikes the foot: Stop immediately. Check the width, needle position, stitch-foot match, and clearance by turning the handwheel toward you.
- Stitch looks unbalanced: Recheck threading, bobbin placement, needle condition, selected pattern, and presser-foot compatibility before changing tension.
- Generic advice conflicts with the machine chart: Follow the chart and owner’s manual for that model.

Product prices and availability are accurate as of the date/time indicated and are subject to change. Any price and availability information displayed on Amazon at the time of purchase will apply.




