What’s actually slowing this PC down?
Pick the symptom - the matching free tool is one click away.
ThatPainter is reader-supported. When you buy through links on our site, we may earn an affiliate commission. Learn More
As an Amazon Associate I earn from qualifying purchases.
The best electric sander depends on the surface and the job: choose a random orbital sander for broad flat areas and general finishing, a belt sander when you need fast stock removal or leveling, and a detail or delta sander for corners and awkward small sections. An orbital sheet sander is another option when fine sanding on flat areas is the priority. No single sander is efficient or safe for every shape and material.
What an electric sander does
An electric sander removes material with a coated abrasive surface. The motor moves that abrasive across wood, paint, filler or another compatible surface, stripping material and leaving a smoother finish. The motion and shape of the abrasive pad determine where the tool works well.
#1 Best Overall
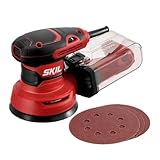
- POWERFUL - With a 2.8 amp motor and 13,000 orbits per minute, it's able to deliver a smooth performance over a variety of sanding applications.
- EASY TO CLEAN DUST CONTAINER - The X-flow dust collector uses cyclone force to collect dust in it's easy-to-empty transparent container.
- SPEED CONTROL - Variable speed control provides the right amount of power and control across different materials.
- LOW VIBRATION - Through its ergonomic design and a soft rubber grip your hand stays comfortable while counterweight balance reduces hand fatigue from vibration. All so that you can work longer.
- SAND IN TIGHT PLACES - With a compact size and ergonomic design This sander can get into tight spaces easily and maximizes user control.
Because sanding breaks material into very fine particles, dust control is part of choosing and using the tool. The Occupational Safety and Health Administration (OSHA) states: “Sanders produce a considerable quantity of fine wood dust. All sanders should be well ventilated.” Contact with the abrasive can also cause abrasions or lacerations, so the tool is not simply a faster version of hand sanding.
Which electric sander do I need?
Start with four questions: How large is the surface? Is it flat, edged or contoured? How much material must come off? What finish do you need when you are done? This task-first approach follows the job descriptions in Bosch DIY guidance rather than treating one category as a universal winner.
| Project need | Most relevant type | Why it fits |
|---|---|---|
| Broad flat surfaces and general finishing | Random orbital sander | Versatile on large areas and capable of producing a fine sanding pattern when paired with the correct disc. |
| Rapid removal, rough sanding or leveling a large surface | Belt sander | The moving belt is the more aggressive choice for taking off material quickly, but it demands extra control. |
| Corners, edges and awkward small areas | Detail, delta or multi-sander | An edged or triangular pad reaches places a round pad cannot; it is inefficient for large expanses. |
| Fine sanding on flat areas | Orbital or sheet sander | A sheet-style pad suits controlled fine sanding on flat work; choose it when that finish is more important than aggressive removal. |
These are task descriptions, not independent performance rankings. Actual results depend on the abrasive, pressure, speed setting, surface and operator technique.
Random orbital sanders: the practical general-purpose starting point
A random orbital sander is a defensible first purchase for many DIY painting and woodworking projects involving broad, mostly flat surfaces. Bosch DIY describes random-orbit sanding as producing a fine pattern, and a Canadian Tire buying guide lists it for several surface-preparation and finishing tasks. The pad is round, so it covers open areas efficiently while the random motion helps avoid a simple repeating scratch pattern.
Use this category for preparing a tabletop, door, panel, shelf or other wide surface before painting or applying a finish. It can remove old coating or minor surface irregularities, then move to a finer abrasive for the final preparation. It is not the right answer for every contour: tight inside corners, narrow profiles and very rapid leveling call for a different pad or motion.
Rank #2

- 🍀[Quiet and Efficient] - HYCHIKA detail sanders run at 1.6 amps and up to 14,000 orbits per minute; ideal for polishing metal and plastic in small corners, stripping paint and removing rust from metalwork.
- 🍀[3 Types of Sanding Paper/12Pcs] - Includes 12 sheets of sanding paper (P80/P120/240) for immediate use. Hook and loop for quick and easy attachment of the sander, 3 types of sandpaper (140*90mm) in coarse, medium and fine to meet your different woodworking needs.
- 🍀[Efficient Dust Collection]This hand sander with dust bag,and 6-hole efficient dust collection system,maximum extraction of sawdust dust, keeping your work area clean.easy to disassemble and install, keeping you work area clean and relatively dust-free.
- 🍀[Ergonomic Design] - Small Sander with cord 2m, with its compact size and soft rubber head design, it can easily reach tight spaces to finish edges, corners and any other hard-to-reach spaces, allowing you to work perfectly on woodworking details. Ideal for interior detail work. Try not to use this product on drywall or cement plaster.
- 📦[Included Components] -1Pcs HYCHIKA detail sander;12Pcs Hook and Loop sandpapers(P80/120/240); 1PCS dust bag; 1 Pcs manual.If you have any question,please feel free to contact us.
What to check before buying one
- Confirm the disc diameter specified by the tool.
- Match the disc’s hole pattern to the sander so dust can pass through the pad into the collection system.
- Choose a hook-and-loop attachment if that is the interface the model requires; discs must be the matching size and pattern.
- Check whether a hose adapter, dust port or included collection arrangement fits your vacuum.
- Compare weight, grip and balance. A tool that is easy to hold level is more useful on a large panel than one that causes fatigue.
- Consider variable speed when the materials or finish require more control, but treat it as a feature to match to your work rather than a promise of better results.
Orbital versus random orbital: what is the difference?
An orbital (often called a sheet or finishing sander) uses a sheet-style abrasive pad and is aimed at fine sanding on flat surfaces. A random orbital uses a round disc and a less repetitive motion, making it a more versatile compromise between removal and finishing on broad areas.
Choose the orbital or sheet format when your work is predominantly flat and the final smoothing pass is the main task. Choose random orbital when you want one tool to prepare and finish larger panels and you can accept that it will not reach every corner. Neither choice replaces a detail sander for a narrow inside angle, and neither has the rapid-cutting behavior of a belt sander.
Do these 3 things before closing this tab:
1Scan for outdated or missing drivers - takes under a minute2Repair Windows errors before they cause bigger problems3Fix the driver behind crashes, sound loss and screen glitchesWhen a belt sander is the better choice
A belt sander is designed for high material removal. Bosch DIY identifies belt sanders for that role, making them useful when a large surface must be leveled or a rough board needs substantial material taken off quickly. The same aggressiveness that saves time can remove too much material, leave deep scratches or create a dip if the tool is held in one place.
Belt sanders also have specific hazards. OSHA identifies contact with abrasive surfaces, fine dust and in-running rolls or nip points as risks. Keep hands, loose clothing and jewelry away from the belt and its rollers, maintain a stable stance, and follow the exact operating sequence in the product manual. A belt sander is a task-specific tool, not an automatic upgrade from a random orbital.
Use a belt sander when
- A broad, flat area needs rapid rough sanding or leveling.
- You can support the work securely and keep the tool moving in a controlled path.
- You have a plan for changing to a less aggressive sander or abrasive for the finishing stage.
Choose another type when
- The work is a small corner, narrow edge or delicate profile.
- You need a controlled final finish rather than rapid removal.
- You cannot keep the belt and rollers clear of your hands, clothing and nearby objects.
Detail, delta and multi-sanders for corners
Detail or delta sanders use an edged, often triangular pad. The pointed end reaches inside corners and around small awkward sections where a round random-orbit pad leaves an unsanded strip. Bosch DIY groups edged plates and multi-sanders with this kind of corner work.
Rank #3
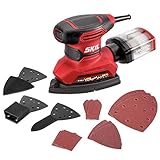
- POWERFUL - With a 1. 2 amp motor and 13,500 orbits per minute, it's able to deliver a smooth performance over a variety of sanding applications.
- VERSATILITY ON THE QUICK - This 4-in-1 detail sander comes with an additional 3 detail attachments for fine finishing large surfaces corners/edges and any surface contour. These attachments are easy to change with no tool needed.
- TOUGH ON DUST - Between its micro-filtration system and the 1-1/4" dust port for vacuum attachment you can choose your preferred way to keep dust away.
- EASY SANDING SHEET CHANGE - Hook and loop system for simple and quick sanding sheet changes.
- LOW VIBRATION - Ergonomic design and a soft rubber grip your hand stays comfortable while counterweight balance reduces hand fatigue from vibration. All so that you can work longer.
That access comes at a trade-off: the small pad covers little area per pass. Use it after a larger sander has prepared the open surface, or choose it from the outset when the project is mostly trim, window corners, spindles or other confined shapes. Confirm the replacement sheet shape and attachment system before buying consumables.
Recommended Free Tools
Buying checklist: match the machine to the abrasives
The pad is the interface between the motor and the work. Canadian Tire’s shopping guidance highlights lightweight handling, perforated pads, hook-and-loop discs and dust-collection or vacuum fit. Check each of these against the exact model rather than assuming accessories are interchangeable.
- Define the surface. Record whether it is broad and flat, narrow, edged, curved or cornered.
- Define the removal job. Distinguish light paint preparation, ordinary smoothing, rough sanding and leveling. The more material you need to remove, the more carefully you should consider a belt sander and its control requirements.
- Choose pad shape and size. Round discs suit open areas; sheet pads suit flat finishing; triangular or edged pads suit corners. A larger pad covers more area, while a smaller one reaches tighter spaces.
- Verify the attachment. Match hook-and-loop discs or the required sheet-clamping method. Do not force a disc that does not seat flat.
- Verify the hole pattern. Perforations must line up with the tool’s dust passages if you expect collection through the pad.
- Plan your grits. Buy abrasives intended for the material and stage of work. Use a removal-appropriate grit first and a finer grit for the finish, following the abrasive maker’s instructions.
- Check extraction fit. Confirm the hose diameter, adapter and tool port before relying on a vacuum connection.
- Assess ergonomics. Compare weight, grip, balance and whether the controls can be reached without changing your hand position.
- Check availability. Make sure replacement discs or sheets in the required size, hole layout and grit are easy to source where you live.
Dust collection is control, not a guarantee
A collection bag or connected vacuum can reduce the dust released around the work, but it does not make sanding dust-free. OSHA notes that sanding dust can remain difficult to control and discusses ventilation and extraction approaches. Keep the work area ventilated, connect extraction when the tool and hose are compatible, and prevent dust from migrating into occupied rooms.
OSHA’s woodworking guide reproduces a NIOSH 1996 figure of “approximately 90 percent” reduction in dust emissions for a particular additional-exhaust system with a slotted pad compared with an aspirator-controlled random-orbital hand sander. The guide says that device was not commercially available. Treat the figure as evidence about that tested control system, not as a typical retail-sander performance claim.
Before switching on
- Fit the correct abrasive and make sure it lies flat and is securely attached.
- Connect the compatible dust bag, hose and adapter, then check that airflow is not blocked.
- Ventilate the room and isolate nearby furniture, electronics and freshly painted surfaces from dust.
- Wear the protective equipment required by the product manual and your local rules, and keep bystanders away from the work area.
Safe operating sequence
- Read the manual. Identify the approved abrasive size, attachment, switch operation, guarding and extraction connection for your model.
- Secure the work. Clamp or otherwise support the board, door or panel so it cannot slide into the pad or belt.
- Inspect the tool. Do not use it with a damaged cord, pad, belt, guard, switch or collection fitting.
- Start clear of the surface when the manual requires it. Hold the tool with both hands if specified and keep fingers away from the abrasive.
- Set a controlled speed. If variable speed is provided, choose a setting appropriate to the material and abrasive rather than automatically using maximum speed.
- Keep moving. Use light, even pressure. Let the abrasive cut; pressing harder can clog the abrasive, overheat the surface or create uneven removal.
- Stay clear of pinch points. With a belt sander, keep hands, clothing and jewelry away from in-running rolls and the moving belt.
- Stop before adjustments. Switch off, unplug or isolate the power as directed before changing abrasives, clearing a blockage or inspecting the pad.
- Clean safely. Use the collection system and a method approved for fine dust; do not blow settled dust into the air around other people.
OSHA’s portable-tool regulation includes switch and guarding requirements for covered tool classes in US workplaces. Those rules are workplace requirements, not a complete consumer safety code; for a home project, follow the product manual and applicable local rules as well.
The Tool Desk
Outbyte PC Repair FREERepair Windows errors before they cause bigger problemsFix Now →Outbyte Driver Updater FREEScan for outdated or missing drivers - takes under a minuteDriver Scan →Rank #4
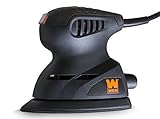
- Features a 3.75 x 5.5 inch pad with an angled tip for precision work
- Powerful one-amp motor provides 13,500 OPM
- Lightweight design weighs in at a mere two pounds
- Dust collection port helps minimize loose sawdust
- Velcro base pad allows for simple sandpaper removal and installation
Practical choices for common painting projects
Preparing a flat door or cabinet side
Use a random orbital sander for the broad faces, selecting a disc that matches the pad diameter, hole pattern and hook-and-loop interface. Connect compatible extraction, keep the tool moving and switch to a finer abrasive for the final preparation. Use a detail sander by hand around inside corners that the round pad cannot reach.
Leveling a rough board or removing substantial material
Use a belt sander when rapid removal is genuinely required and the work can be held securely. Make controlled passes without dwelling in one spot, then move to an orbital or random orbital sander for the smoother finish. Do not use the belt tool merely because it is faster; its aggressive cut and nip-point hazards raise the cost of a mistake.
Sanding trim, window corners or a small repair
Choose a detail or delta sander with a matching triangular or edged sheet. Its small footprint is an advantage in the corner and a disadvantage on a large panel, so change categories rather than trying to cover an entire room with it.
Common buying and use mistakes
- Buying by motor power alone: the pad shape, motion and abrasive interface determine whether the tool reaches the work and leaves the finish you need.
- Assuming one sander handles every surface: a random orbital is versatile, not universal; corners and heavy removal still need task-specific tools.
- Ignoring consumable compatibility: a disc with the wrong diameter, attachment or hole layout will not seat or extract correctly.
- Pressing down to make a sander work faster: excessive pressure can slow the abrasive, clog it and produce an uneven surface.
- Treating the dust bag as complete protection: ventilation and extraction reduce exposure but do not eliminate airborne fine dust.
- Using a belt sander like a finishing sander: its rapid cut can gouge a surface; reserve it for removal and follow with a less aggressive tool.
- Skipping the manual: switch, guard, belt, pad and hose arrangements vary by model, so generic handling assumptions can be unsafe.
Frequently asked questions
Is a random orbital sander the best first electric sander?
It is a sensible general-purpose starting category for broad flat surfaces and finishing, but it is not the best tool for every project. Add a detail sander for frequent corner work or a belt sander when substantial material removal is routine.
What’s actually slowing this PC down?
Pick the symptom - the matching free tool is one click away.
Can I use any sanding disc on a random orbital sander?
No. Match the disc diameter, hook-and-loop or other attachment method, hole pattern and grit to the exact tool and the job. A disc that does not align with the pad can reduce dust extraction and sit unsafely.
Best Value
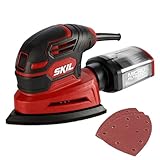
- Powerful– With a 1 amp motor and 12, 000 orbits per minute, it’s able to deliver a smooth performance over a variety of sanding applications.
- Tough on dust– Between its micro-filtration system and the 1-1 by4” dust port for vacuum attachment, you can choose your preferred way to keep dust away.
- EASY SANDING SHEET CHANGE– A hook and loop system allows for simple and quick sanding sheet changes. Adding sheet changes. Balance reduces vibration for improved comfort
- Low vibration– Through its ergonomic design and a soft rubber grip your hand stays comfortable while counterweight balance reduces hand fatigue from vibration. All so that you can work longer.
- Easy on and off– The dust sealed on and off switch makes a hassle-free, flip-of-the-switch during application.
Does connecting a vacuum make sanding dust-free?
No. Extraction is a control aid. OSHA still advises ventilation because fine dust can remain difficult to contain, even when a tool has a bag or vacuum port.
Why would I choose an orbital sheet sander instead of a random orbital?
Choose the sheet format when fine sanding on flat areas is the central task and the sheet-style pad suits your consumables. Choose random orbital when you need a more versatile round-disc tool for broad preparation and finishing.
What is the safest way to use a belt sander?
Secure the work, keep hands, clothing and jewelry away from the moving belt and in-running rolls, maintain ventilation and extraction, keep the tool moving under control, and follow the manufacturer’s operating and guarding instructions.
Frequently Asked Questions
How do I know whether my project needs a belt sander or a random orbital sander?
Choose a belt sander for rapid removal or leveling on a secure, broad surface. Choose a random orbital for general preparation and finishing where control and a smoother final pattern matter more than maximum removal.
What should I verify before ordering replacement sanding discs or sheets?
Verify the abrasive dimensions, attachment method, hole layout and grit against the exact sander model and the stage of your project.
Quick Recap

Product prices and availability are accurate as of the date/time indicated and are subject to change. Any price and availability information displayed on Amazon at the time of purchase will apply.

