Windows Errors? Fix Them Before They Spread
Repair common Windows errors and clear accumulated junk for a smoother, more stable PC - no reinstall needed.
Fix My PC Now →Free scan · no reinstall
ThatPainter is reader-supported. When you buy through links on our site, we may earn an affiliate commission. Learn More
As an Amazon Associate I earn from qualifying purchases.
Turn a clean coffee can into a wood-grain vase by cladding its outside with flexible veneer. Choose a continuous sleeve for an uninterrupted pattern and the fewest visible joins, or apply separate veneer bands for a striped look that uses shorter pieces. In either case, measure the can rather than relying on a standard size, cut on a mat with a sharp tool, and select an adhesive that suits both the veneer backing and the can’s painted or bare metal surface.
The veneer is decorative cladding, not a proven waterproof container. For fresh flowers, place a watertight jar or floral liner inside the can. The documented veneer-vase projects do not claim that their coverings or adhesives resist water (tesa’s “Beautiful Vase” project; Modern on Monticello’s veneer-covered vase).
#1 Best Overall

- Wood Veneer Sheets Variety Pack for Creative Projects: this wood veneer sheets variety pack includes 30 square veneer sheets in mixed brown colors, giving you multiple wood grain options in one set for marquetry, inlay, and woodworking designs
- Practical Dimensions: each of our wood veneer boasts a size of 7.9 x 7.9 inches/ 20 x 20 cm, the thickness is different due to wood reasons, about 1/50 inches/ 0.5 mm; These slim wood veneers are great for handcrafting enthusiasts, easy to cut into precise shapes, offering design flexibility; Suitable for intricate details, it supports smooth handling and accuracy for precise projects
- Natural Wood Veneer with Grain Texture: made from real wood, these wood veneer sheets feature natural grain patterns and color variations; Each sheet has its own look, adding authenticity and depth to finished pieces
- Wood Veneer for Marquetry, Inlay and DIY Crafts: the wood veneer for marquetry and inlay, as well as furniture accents, cabinet surfaces, box making, restoration work, and other DIY woodworking applications
- Unfinished Veneer Sheets for Custom Bonding: these veneer sheets do not include adhesive, allowing you to choose your preferred glue or bonding method based on your project needs and woodworking techniques
What you are making
This project gives a cylindrical coffee can a finished wood exterior while leaving you free to choose the pattern and seam location. A coffee can is a practical cylindrical base for this kind of upcycle: a related tin-can vase project covers a can with narrow wood strips, although those strips are thicker than veneer (Decorating with Less’s tin-can wood-strip vase). The instructions below adapt documented cylindrical-vase constructions to a coffee can; they are not a claim that one exact coffee-can model was tested.
Before cutting, decide whether you want the grain to read as one continuous wrap or as repeated horizontal sections. That choice determines how you measure, where joins will show, and which scraps can be used efficiently.
Option A: continuous veneer sleeve
A single piece of flexible wood veneer fabric wraps from the can’s bottom edge to its top edge. It gives the can the visual simplicity of one wood surface, with one vertical overlap seam. The tesa project uses this approach on a cylindrical vase: the maker measures the vessel’s height and circumference, adds material for an overlap, cuts on a mat, and fixes the cover with double-sided tape.
Option B: individual veneer bands
Several horizontal strips of flexible veneer edging circle the can. Each band can be a different grain direction or shade, and short remnants are more useful than they are with a full-height sleeve. A related cylindrical-vase tutorial measures and cuts separate strips, applies tacky glue, wraps each strip, and holds it temporarily with tape while the glue sets.
Rank #2

- REAL WOOD VENEER SHEET – ready to stain, real wood veneer sheets which are ideal for using when repairing or refacing furniture, cabinets and fine woodworking. High quality veneer sheets that will stand the test of time
- PAPER BACKED FOR EASY HANDLING – our veneer sheets are 10 mil paper backed to help you grip the veneer easier when working on your project. Easy to apply with super bonding adhesive, these veneer sheets are strong yet flexible and won’t split the grain when bent to fit to your requirements
- EASY TO USE CABINET VENEER SHEETS – these wood veneer sheets for cabinets are ready for you to easily stain match your existing furniture for a seamless, premium finish. Simply cut to size with a box knife and apply contact adhesive with a roller to achieve best results
- “A” GRADE” PREMIUM QUALITY – made from the highest “A” grade veneer quality, this flexible veneer sheet is ready to stain for your restoration and repair work. The overall thickness of .024”
- VERSATILE AND COST-EFFECTIVE VENEER SHEETS – our wood veneer sheets can be used for a wide variety of projects including cabinets, resurfacing tables and general repair. Simple to use, these are a cost-effective way of restoring your projects back to their former glory without having to replace them
Choose the construction before buying or cutting
| Decision | Continuous sleeve | Individual bands |
|---|---|---|
| Coverage | One piece can cover nearly the full height of the can. | Coverage is divided into the number and width of bands you install; narrow gaps can reveal the can. |
| Visual pattern | One uninterrupted wood-grain field with a single vertical join. | Segmented horizontal pattern; bands can be aligned, staggered, or varied. |
| Cutting precision | Requires an accurate height and circumference cut over a larger piece. | Each strip is smaller, but every strip still needs a straight edge and a neat join. |
| Seam placement | One long overlap seam is easiest to hide at the back. | Each band has its own join; line all joins up at the back or rotate them for a deliberate pattern. |
| Attachment shown in related projects | Double-sided adhesive tape is used for a veneer-fabric cover. | Tacky glue and temporary tape are used for veneer edging. |
| Best use of scraps | Works best when you have one piece taller than the can. | Works well when your veneer is available in short lengths or remnants. |
The sources do not establish comparative cost, durability, water resistance, or completion time for a coffee-can version. Treat the table’s design differences as practical construction inferences, not measured performance results.
Materials and tools
- A clean cylindrical coffee can with its label and residue removed.
- Flexible wood veneer fabric for a sleeve, or flexible wood veneer edging for bands. These are the direct material categories used by the related projects (tesa and Modern on Monticello).
- A ruler or straightedge long enough to span the can.
- A measuring tape, flexible string, or a strip of paper for checking the circumference.
- A cutting mat or other surface intended for craft-knife work.
- A sharp craft knife or suitable cutter; scissors can be useful for flexible veneer fabric.
- Masking tape for holding a trial wrap and temporary positioning.
- Double-sided adhesive tape for a veneer-fabric cover, or a compatible tacky craft adhesive for veneer edging. Confirm that the adhesive bonds to your veneer backing and the can’s exterior before committing to the full wrap.
- A separate watertight jar or liner if the finished piece will hold fresh flowers.
Prepare the coffee can safely
- Empty and wash the can, then let it dry completely. Adhesive needs a clean, dry surface; grease, syrup, paper dust, and moisture can interfere with bonding.
- Remove the label and its glue without gouging the metal. Wipe away any remaining residue and allow the surface to dry.
- Inspect the rim and base. Run a finger carefully around the outside edge without pressing into it. If there is a sharp burr, handle the can with care and keep hands clear while you work; the cited craft projects do not prescribe one universal rim-treatment method, so do not assume a particular fix is required.
- Set the can upright on a flat surface and mark a discreet “back” position. Keeping the sleeve overlap or each band’s join there makes the front easier to compose.
- Check the veneer’s grain direction and flexibility. Bend a small offcut gently around the can. If it cracks, splinters, or lifts from its backing, do not force it around the curve; choose a more flexible veneer format or use narrower bands.
Measure a continuous sleeve
Measure the can itself, not the nominal volume printed on the label. You need two dimensions:
- Height: Measure from the lower edge where the veneer will stop to the upper edge where it will stop. Decide whether you want the veneer flush with both edges or set back slightly.
- Circumference: Wrap a strip of paper or string around the straight cylindrical section, mark where it meets, then measure that length with a ruler. This avoids errors caused by guessing from the can’s diameter.
Cut the veneer to the measured height and to the measured circumference plus enough extra width for an overlap seam. The tesa instructions explicitly allow an overlap; their exact overlap dimension belongs to that project and should not be treated as a universal specification for every coffee can.
Do these 3 things before closing this tab:
1Fix the driver behind crashes, sound loss and screen glitches2Repair Windows errors before they cause bigger problems3Scan for outdated or missing drivers - takes under a minuteMake a paper test piece first if the veneer is expensive or has a directional pattern. Wrap the paper around the can, mark the back seam, and confirm that the top and bottom edges land where you intend. Transfer those dimensions to the veneer only after the test fits.
Rank #3
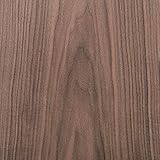
- REAL WOOD VENEER SHEETS – ready to stain, real wood veneer sheets which are ideal for using when repairing or refacing furniture, cabinets and fine woodworking. High quality Wood Veneer Sheet that will stand the test of time.
- PEEL & STICK FOR EASY APPLICATION – our Wood Veneer Sheets are ultra flexible and they are bonded to paper backing which, when peeled off, will provide a strong adhesive that will stick to any Rotary surface. Easy to apply with super bonding self adhesive, these veneer sheets are strong and flexible, it won’t split the grain when bent.
- EASY TO USE CABINET VENEER SHEETS – these wood veneer sheets for cabinets are ready for you to easily stain, match your existing furniture for a seamless, premium finish. Simply cut to size with a box knife and apply with a stiff bladed scraping tool or wooden block to achieve best results.
- “A” GRADE” PREMIUM QUALITY AND SIZING INFO – made from the highest “A” grade veneer quality, Real Wood Veneer Sheets, this flexible Wood Veneer Sheet is ready to stain for your restoration and repair work. The overall thickness is 0.4 MM
- VERSATILE AND COST-EFFECTIVE VENEER SHEETS – our Wood Veneer Sheet can be used for a wide variety of projects including cabinets, resurfacing tables and general repair. Simple to use, these are a cost-effective way of restoring your projects back to their former glory without having to replace them.
Install the continuous sleeve
- Place the veneer on the cutting mat with the intended outside face protected according to the material maker’s directions. Use a ruler as a guide and make a controlled cut with a sharp cutter. Several light passes are safer and cleaner than forcing one deep pass through a flexible sheet.
- Dry-wrap the cut piece around the can. Align one vertical edge with your marked back position, check the top and bottom edges, and confirm that the other edge reaches far enough to overlap. Trim only after you have checked the fit.
- Apply the chosen double-sided tape or other compatible adhesive to the can or veneer as directed for that product. Keep adhesive away from the visible seam edge so it does not squeeze out when the overlap is pressed down.
- Starting at the back, press the veneer onto the can gradually. Work around the cylinder in short sections, smoothing from the attached area toward the loose area to reduce bubbles and diagonal drift.
- Bring the final edge over the starting edge to form the overlap. Press the seam firmly and hold it with masking tape while the adhesive reaches its stated initial set, if needed.
- Inspect the top and bottom edges. If a corner lifts, press it back down rather than stretching the veneer. Leave the can undisturbed for the adhesive’s full cure or set time.
Double-sided tape is the attachment method shown for the veneer-fabric cover in the tesa project. Tape strength varies by backing, coating, and metal finish, so a small hidden test is prudent before covering the whole can.
Measure and install individual bands
Plan the layout
Decide how many bands you want and how much metal, if any, should remain visible between them. Measure the usable height, divide it into the desired band widths and gaps, and mark light reference lines on a paper template rather than drawing directly on the veneer. Equal-width bands create a regular pattern; mixed widths make the grain a stronger design feature.
Cut each strip
- Wrap a paper strip around the can and mark the circumference. Add a small join allowance so the veneer ends meet or overlap neatly at the back.
- Transfer that length to the veneer edging and cut on a mat with a ruler and sharp cutter. Keep the long edges square; a skewed edge becomes obvious when several bands are stacked.
- Label each strip on its back with its intended position. This prevents accidental changes to a planned grain sequence.
Glue and hold the bands
- Apply a thin, even layer of compatible tacky glue to the area for one band. Avoid flooding the surface; excess adhesive can squeeze from the join or soak into an exposed edge.
- Wrap the strip around the can, align its height with your reference marks, and bring the ends together at the back.
- Use masking tape to hold the strip while the glue sets. The related veneer-edging tutorial uses temporary tape in this way.
- Repeat from the bottom upward, checking that each new band is parallel to the previous one. Wipe away any squeeze-out immediately with the method recommended for your adhesive.
- Leave the completed can still until the adhesive has set fully. Remove the temporary tape slowly so it does not lift a veneer edge.
If you want the joins to disappear, align them in one rear column and orient the grain consistently. If you want a more graphic finish, rotate the joins around the can and vary the band widths intentionally rather than letting irregular cuts dictate the pattern.
Finish the edges and protect the use case
Veneer edges are most vulnerable where they meet the can’s rim and base. Press down any lifted edge while the adhesive is still workable, and do not sand aggressively through a thin veneer face. A narrow top or bottom reveal can make small measurement differences less noticeable than trying to force every edge perfectly flush.
Rank #4

- Wood Veneer Sheets Variety Pack for Creative Projects: this wood veneer sheets variety pack includes 30 square veneer sheets in mixed brown colors, giving you multiple wood grain options in one set for marquetry, inlay, and woodworking designs
- Thin Square Wood Veneers, Easy to Cut and Shape: each wood veneer sheet measures 12 x 12 inches/ 30.5 x 30.5 cm with varied thickness (approx. 0.5 mm), making these veneers easy to cut, trim, and shape for detailed craft and woodworking projects
- Natural Wood Veneer with Grain Texture: made from real wood, these wood veneer sheets feature natural grain patterns and color variations; Each sheet has its own look, adding authenticity and depth to finished pieces
- Wood Veneer for Marquetry, Inlay and DIY Crafts: the wood veneer for marquetry and inlay, as well as furniture accents, cabinet surfaces, box making, restoration work, and other DIY woodworking applications
- Unfinished Veneer Sheets for Custom Bonding: these veneer sheets do not include adhesive, allowing you to choose your preferred glue or bonding method based on your project needs and woodworking techniques
Use the finished object as a decorative outer vase. The cited projects do not establish that veneer coverings, tape, or craft glue are waterproof, and no water-resistance rating is provided for this coffee-can adaptation. For cut flowers, fill a separate watertight container and place it inside the veneer-covered can; keep spills off the veneer and dry the exterior promptly. For dried or artificial stems, the water issue is avoided, but the can should still remain stable and upright.
Independent reader supportYour contribution helps us test, update, and keep practical guides available for everyone.Troubleshoot common problems
The sleeve is too short to overlap
Do not stretch the veneer to make up the difference; stretching can pull the grain out of alignment or lift the edges. If the missing amount is small, recut a replacement with a proper overlap. If you cannot spare a full replacement, convert the design to a deliberate vertical accent strip or use separate bands, provided the resulting joins are securely attached.
The seam keeps opening
Check that the can was clean and dry, that the adhesive is compatible with the veneer backing and metal finish, and that the seam was held while the adhesive set. Remove loose adhesive only as the product instructions permit, test a fresh small area, and avoid loading the seam with pressure until fully cured.
The veneer wrinkles around the curve
Wrinkles usually begin when the wrap is attached too quickly or pulled sideways. Peel back only as far as the adhesive allows, realign the starting edge, and press in short sections while keeping the veneer relaxed. Narrower bands can accommodate a less-flexible material more easily than a full-height sleeve.
Best Value
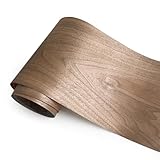
- Natural and beautiful: Wood veneer is a thin wooden sheet material produced by rotary cutting or sawing of logs, Has a natural woody feel,Different wood textures and tones can meet various design styles and aesthetic needs.
- Multifunctionality: Can be applied to various surfaces, suitable for refurbishment and production of furniture, cabinets, doors, speakers, and wall panels.
- Durable and Stable: The wood veneer uses backing materials to enhance durability and stability, making it less prone to deformation or cracking, and can maintain aesthetics and practicality for a long time.
- Flexible and Convenient: Its flexibility allows for easy installation on flat or curved surfaces, meeting design requirements of various shapes and sizes.
- Environmental protection and health: Wood veneer comes from wood, which is a renewable resource. The use of wood veneer conforms to the concept of green decoration and is conducive to sustainable development.
Bands drift upward or downward
Mark the band positions on a paper guide before gluing, and tape the first edge at several points around the can. Work one band at a time and verify its parallel alignment before moving to the next. If a band has already set crooked, do not force it off; removal may tear the veneer or its backing.
The can will not stand steadily
Check that the base is flat and that no adhesive, veneer edge, or folded tape is creating a bump underneath. A liner or jar placed inside should sit fully on the can’s base rather than pressing against one side.
Which version should you make?
Choose the continuous sleeve when you have a flexible piece tall enough for the can, want the calmest wood-grain field, and are comfortable making one large, accurate cut. Choose individual bands when you prefer a striped design, have short lengths of veneer edging, or want each section to be easier to position around the curve. Neither construction is established as more durable or more water-resistant by the cited projects; the deciding factors are your material, pattern, seam tolerance, and adhesive compatibility.
Quick Recap
Source projects for the techniques
- tesa, “Beautiful Vase” (updated July 10, 2023): cylindrical veneer-fabric cover, measuring by height and circumference with an overlap, and double-sided tape attachment.
- Modern on Monticello, “DIY Mid-Century Modern Inspired Wood Grain Veneer Covered Vase” (published roughly 2017): separate veneer edging strips, tacky glue, and temporary tape around a cylindrical vase.
- Decorating with Less, “How To Repurpose a Tin Can Into a Beautiful Wood Strip Vase” (published roughly 2015): related use of a tin can as a cylindrical vase base with wood strips rather than veneer.
Final check before adding flowers
- The veneer lies flat with no loose corners or open joins.
- The can stands level and the rim can be handled without contacting a sharp edge.
- The adhesive has reached its stated set or cure time.
- A watertight inner container is in place for fresh flowers.
- The veneer remains dry and is treated as a decorative finish, not as the water-holding surface.

Product prices and availability are accurate as of the date/time indicated and are subject to change. Any price and availability information displayed on Amazon at the time of purchase will apply.

