Recommended Free Tools
Windows Errors? Fix Them Before They Spread
Free scan · no reinstall
Outdated Drivers Are Slowing You Down
Free scan · exact hardware match
PC Slower Than It Used to Be?
Free scan · Windows 10 & 11
ThatPainter is reader-supported. When you buy through links on our site, we may earn an affiliate commission. Learn More
These 14 Halloween crafts keep the scary details out and the toddler-friendly actions in: stamping, smearing, tearing, scrunching, sticking, peeling and making handprints. You will find low-mess decorations, sensory process art and keepsakes, plus an explicit adult-prep note and a small-parts alternative for every project.
As an Amazon Associate I earn from qualifying purchases.
No craft can guarantee that every toddler will want to participate. For children between 12 and 36 months, the goal is a short, enjoyable invitation to explore materials—not a perfect pumpkin, ghost or bat. NAEYC describes process art as open-ended and focused on children’s choices and exploration rather than matching an adult-made example.
Quick chooser: which Halloween craft fits your toddler?
Use the age ranges as practical starting points, not strict developmental rules. A 12-month-old and a nearly 3-year-old may both be called toddlers, but they need very different levels of preparation and supervision.
#1 Best Overall

- Halloween Crafts for Kids: Includes 36 Halloween wooden cutouts, 12 colored pens, 4 glow-in-the-dark paints, 36 magnet stickers. There are a lot of cute designs such as pumpkin, ghost, spider web, tombstone, owl, skull, bat etc, DIY Halloween wooden magnets kit to meet your kid's creative needs
- Halloween Party Favors Glow in The Dark: The surprise is glow-in-the-dark paint, which will make wood crafts light up in the dark for a unique Halloween atmosphere as long as it absorbs enough light. Provide hours of fun for boys and girls, suitable as Halloween arts and crafts for kids ages 4-8 8-12
- Creative Halloween Gifts for Kids: Our 36 diy wooden magnets would be the best craft gift for children, families who love handmade wood products, packaged in an exquisite box, perfect Halloween toys for Halloween goodie bag stuffers, trick or treat gifts, Halloween basket stuffers, Halloween prizes and treasure box toys for Halloween classroom favors
- Halloween Activities for Kids: These kids Halloween crafts bulk is a lot of quantity for you to give to kids instead of candy, and very valuable for many kids in front of your door. Make their own Halloween wooden magnets decorations to decorate the home, such as refrigerator, iron windows
- Halloween Painting Craft Kits: Our wooden Halloween cutouts are made of natural wood, has been cut and polished for a smooth surface that can be colored easily, rest assured for kids to use. Have a different and imaginative Halloween with your kids, family and friends
- Young toddlers, approximately 12–24 months: The adult handles every cutting, drawing, gluing and setup step. The child mainly presses, paints, stamps, tears or chooses between two options.
- Older toddlers, approximately 24–36 months: Many children can help tear paper, place large shapes, use a chunky brush, peel painter’s tape with help and make simple color or placement choices.
- Around age 3: Some children can try simple cutting or weaving with close supervision, but a source’s age label does not override your child’s abilities or choking risks.
| Craft | Best age fit | Mess | Result | Toddler’s main action | Mouthing-child option |
|---|---|---|---|---|---|
| Apple-stamped pumpkins | 18–36 months | Medium | Process art | Stamping | Adult-controlled stamp |
| Fingerprint pumpkin patch | 12–36 months | Medium | Process art and keepsake | Pressing a fingertip | Chunky brush or sponge |
| Handprint ghost | 12–36 months | High | Keepsake | Making a handprint | Sponge print |
| Handprint spider | 18–36 months | High | Keepsake | Making overlapping prints | Painted spider shape |
| Handprint bat | 18–36 months | High | Keepsake | Making wing prints | Adult-painted paper bat |
| Paper-plate pumpkin | 12–36 months | Medium | Decoration | Choosing and placing shapes | Adult-controlled glue |
| Paper-plate ghost | 12–36 months | Low–medium | Decoration | Placing paper pieces | Adult-attached details |
| Tissue-paper suncatcher | 18–36 months | Low | Window decoration | Pressing paper onto contact paper | Paint on contact paper |
| Tape-resist spiderweb | 30–36 months | Medium | Process art | Painting and revealing | Adult handles all tape |
| Leaf monsters | 24–36 months | Low–medium | Nature collage | Choosing and sticking | Paper leaves |
| Torn-paper witch hat | 24–36 months | Low | Collage | Tearing and pressing | Large paper pieces only |
| Bubble-wrap pumpkins | 18–36 months | Medium | Sensory printmaking | Pressing textured material | Adult holds the wrap |
| Sticker wreath | 18–36 months | Very low | Decoration | Peeling and sticking | Large paper shapes |
| Cardboard-tube bat | Older toddlers with prep | Low–medium | Recycled-material decoration | Coloring or painting | Adult attaches every part |
Safety notes before you start
Small loose parts are a particular concern for children under 3. The U.S. Consumer Product Safety Commission explains its small-parts standard; do not rely on a homemade toilet-paper-roll test as a substitute for supervision and judgment. If your child mouths materials, remove small pieces entirely.
Outdated Drivers Are Slowing You Down
One free scan finds every outdated or missing driver and matches the right update for your exact hardware.Free scan · exact hardware matchPC Slower Than It Used to Be?
A free scan shows the junk files, broken settings and background clutter dragging Windows down - then fixes them in one click.Free scan · Windows 10 & 11Choose water-based art materials labeled for children whenever possible. For U.S. readers, the American Academy of Pediatrics recommends looking for “Conforms to ASTM D-4236” and the ACMI AP Seal. The ACMI AP Seal means the product has been evaluated by a board-certified toxicologist for intended use; it does not make paint edible or automatically suitable for face or body painting.
Avoid solvents, spray products, unlabeled or old supplies, permanent markers within reach, acrylic paint unless an adult is applying it, and loose powders that can become airborne. The CPSC art-and-craft safety guide provides additional guidance.
Use a washable mat, a smock and small portions of paint. Keep scissors, knives, glue bottles and cutting tools with the adult. Wash hands afterward, store supplies out of reach and let artwork dry completely before displaying it. Finished crafts containing loose details should also stay out of reach.
1. Apple-Stamped Jack-o’-Lanterns
Best for: 18–36 months Mess: Medium Type: Process art
Quick wins for a faster PC:
Clear out junk files and repair common Windows errorsFree Scan →Scan for outdated or missing drivers - takes under a minuteDriver Scan →Materials
- An apple cut in half by an adult
- Washable orange and green paint
- Black or white cardstock
- Scrap cardboard or a shallow tray
- Marker for the adult
Adult prep
Cut the apple before inviting your toddler over, protect the work surface and put a small amount of paint on scrap cardboard. Keep the knife completely out of the child’s reach.
What your toddler does
Your toddler dips or presses the cut apple into orange paint and stamps pumpkin shapes onto the paper. Older toddlers can help add green fingerprint stems.
Steps
- Place orange paint on the scrap cardboard.
- Dip the cut side of the apple into the paint.
- Help your child press it onto the paper to make pumpkin shapes.
- Let the prints dry.
- Offer green paint for stems, or add them yourself.
- Draw simple, smiling jack-o’-lantern faces after the paint dries.
Mouthing-child swap: Use a large washable sponge or another adult-held stamp instead of offering a paint-covered apple. Use a separate clean apple for eating; fruit covered in paint should not be eaten.
Display idea: Turn several prints into a pumpkin patch and write the date on the back. The uneven shapes are part of the child’s work.
Do these 3 things before closing this tab:
1Clear out junk files and repair common Windows errors2Scan for outdated or missing drivers - takes under a minute3Repair Windows errors before they cause bigger problemsThis apple-half method is documented in Parenting Patch’s apple-print pumpkin craft and Confidently Mom’s apple-stamped version.
2. Fingerprint Pumpkin Patch
Best for: 12–36 months Mess: Medium Type: Simple process art and keepsake
Materials
- White paper or cardstock
- Orange finger paint
- Green paint or a green washable marker
- Brown paint or paper for stems
Adult prep
Lightly draw several pumpkin ovals and put a small dab of orange paint on a washable tray. Have a damp cloth ready before you begin.
What your toddler does
The child repeats one easy action: pressing a fingertip inside a pumpkin shape. A 12-month-old may make only a few marks, and that is enough.
Steps
- Draw or lightly trace pumpkin ovals.
- Let your toddler make orange fingerprints inside the shapes.
- Add stems and grass after the fingerprints dry.
- Write your child’s name and the date on the back.
Mouthing-child swap: If you do not have a product whose label permits the intended skin contact, skip painting fingers. Use a chunky brush or a large sponge to fill the pumpkins instead. Even child-labeled “non-toxic” paint is not food.
Display idea: Keep this one as a yearly hand- or fingerprint record. Add the child’s age beside the date.
The pumpkin-patch arrangement uses green paint for vines, orange fingerprints for pumpkins and brown details, as shown by All Kids Network.
3. Handprint Ghosts
Best for: 12–36 months Mess: High Type: Keepsake
The Tool Desk
Outbyte Driver Updater FREEFix the driver behind crashes, sound loss and screen glitchesFind Drivers →Outbyte PC Repair FREERepair Windows errors before they cause bigger problemsFix Now →Materials
- Black or dark cardstock
- Child-labeled washable finger paint suitable for the intended skin contact
- White paint
- Optional black paint or an adult-held marker for details
Adult prep
Cover the table and have the dark paper ready. Read the paint label before putting it on skin. Do not assume that ordinary washable craft paint is face or body paint: for example, Crayola’s safety guide says its washable paints are not intended for body or face painting.
Rank #2
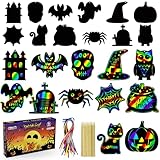
- Halloween Party Favors - Halloween Games,halloween goodie bag stuffers
- [Halloween Party Favors]: Get 48pcs of Halloween scratch papers with 12 unique patterns, 48 cords, and 10 wooden stylus in a vibrant gift box. Perfect for your Halloween craft projects, house decorations, or gift tags.
- [Magical Rainbow Art]: Scratch away the black coating to reveal bright colors and intricate patterns. Let your imagination run wild and create stunning designs with just a wooden stylus on the smooth black surface.
- [Safe and Durable]: Crafted from premium paper and natural wooden stylus, our rainbow art scratch paper set meets US Toy Standards and Safety Tests. Non-toxic, durable, and safe for kids to enjoy as crafts or Halloween party games.
- [Spooky Fun for Kids]: Featuring 12 Halloween-themed designs like Witch Hat, Skull, Ghost, Spider Web, and Pumpkin, these hanging gift paper tags are designed for kids to have a blast with arts and crafts during the Halloween season.
What your toddler does
You paint the child’s hand and help press it onto the paper. The fingers point downward to form the ghost’s trailing shape.
Steps
- Cover the child’s hand with the appropriate white paint.
- Press the hand onto dark paper with the fingers pointing downward.
- Let the print dry fully.
- Add eyes and a mouth with paint or a marker controlled by the adult.
- Add the child’s name and date.
Mouthing-child swap: Do not force painted hands toward a child’s mouth. Offer a white sponge print on black paper, or paint a ghost outline yourself while the toddler makes marks beside it.
Display idea: Give the ghost a friendly name such as “Happy Ghost” and hang it at the child’s eye level.
The downward-finger handprint method is shown by Fun Handprint Art.
4. Handprint Spider on a Web
Best for: 18–36 months Mess: High Type: Keepsake
Materials
- Dark or orange cardstock
- Black child-labeled washable paint suitable for the intended use
- White paper circles or white paint for eyes
- Marker for the adult
Adult prep
Draw a simple web in one corner of the paper and prepare a place for the child to wash hands immediately afterward.
What your toddler does
The toddler makes two sideways handprints. The overlapping palms form the spider’s body and the fingers become legs.
Free tools Windows power users keep installed
One-click scans. No signup required.
Steps
- Draw a simple web in one corner.
- Paint one hand black, avoiding the thumb if possible.
- Press it sideways onto the paper.
- Repeat with the other hand, overlapping the palms.
- Let the print dry.
- Add painted or drawn eyes and a smile.
Mouthing-child swap: Omit googly eyes, foam eyes, pipe cleaners and glitter glue. Paint or draw every detail, or make the spider with a large painted oval and adult-drawn legs.
Display idea: Add a speech bubble saying “Boo!” or “Hi!” rather than giving the spider a frightening expression.
See the two-handprint approach in Fun Handprint Art’s not-so-scary spider.
5. Friendly Handprint Bats
Best for: 18–36 months Mess: High Type: Keepsake
Materials
- White or light cardstock
- Black child-labeled washable paint suitable for the intended use
- Yellow or white paint for eyes and teeth
Adult prep
Place the paper horizontally and prepare the paint in a shallow tray. Plan to draw the face after the handprints dry.
What your toddler does
The child makes two black handprints with the palms overlapping. The fingers become the bat’s wings.
Steps
- Paint both hands black.
- Press them onto the paper so the palms overlap and the fingers form wings.
- Let the print dry.
- Add two bright eyes and a tiny smile.
- Add a moon or stars with paint if desired.
Mouthing-child swap: Use an adult-painted paper bat and let the toddler add large crayon marks around it. Avoid loose glitter, small stars and detachable eyes.
Display idea: Use cheerful colors around the bat and call it a “sleepy bat” instead of making it menacing.
What’s actually slowing this PC down?
Pick the symptom - the matching free tool is one click away.
The overlapping black handprints and painted details are shown in The Best Ideas for Kids’ handprint bat and Fun Handprint Art’s Halloween handprint collection.
6. Paper-Plate Pumpkin Face
Best for: 12–36 months Mess: Medium Type: Decoration
Materials
- Paper plate
- Orange washable paint or orange tissue paper
- Large black paper shapes
- Green paper for the stem
- Glue stick, used by the adult or an older toddler with help
Adult prep
Paint the plate orange in advance if you want a shorter activity, or set out a small amount of paint. Cut large triangles, circles and rectangles for facial features.
What your toddler does
The child chooses where to put the large eyes, nose and mouth. There is no need for the face to be symmetrical or even pumpkin-like.
Rank #3

- [Halloween Decorations]Halloween Stickers - Halloween Party Favors,halloween goodie bag stuffers
- Halloween Party Favors: Dive into the Easter spirit with 24 sheets of vibrant and safe Halloween stickers in 8 exciting designs like pumpkins, ghosts, bats, and more - offering endless possibilities for decorating pumpkins, treat bags, and cards.
- Spooktacular Halloween Fun: Unleash your child's imagination and let them create their own spooky masterpieces with these easy-to-peel stickers, perfect for Halloween parties, trick-or-treating, or school activities - adding a touch of fun and creativity to the season.
- Versatile Halloween Decor: From pumpkins to witches, these stickers can be used for decorating windows, walls, or any Halloween-themed crafts, ensuring your home is transformed into a haunted wonderland that will impress both kids and adults alike.
- Safe and Colorful Delights: Crafted from premium quality materials, these Halloween stickers are non-toxic, odorless, and boast vibrant colors that won't fade - providing a safe and enjoyable crafting experience for kids and peace of mind for parents.
Steps
- Paint the plate orange, or cover it with orange paper.
- Let it dry if painted.
- Offer a few large pre-cut shapes.
- Let your child choose where to place the features.
- Attach the pieces with glue and add a paper stem.
Mouthing-child swap: Use only large paper pieces, keep the glue in your hand and remove scraps as soon as the activity ends. For a child who mouths paper, let the toddler paint the plate and add the face later.
Display idea: Hang several plates together to create a gallery of different expressions.
Paper-plate pumpkins with orange paint or paper and pre-cut facial shapes appear in Happy Toddler Playtime’s paper-plate ideas and Gathered’s toddler Halloween roundup.
7. Paper-Plate Ghost With Streamers
Best for: 12–36 months Mess: Low–medium Type: Decoration
Free tools Windows power users keep installed
One-click scans. No signup required.
Materials
- Paper plate
- Short white or light-colored crepe-paper strips
- Black paper for eyes and mouth
- Glue or glue stick
Adult prep
Pre-cut short streamers and large face pieces. Keep the strips away from the child’s neck and do not use the craft as something to wear.
What your toddler does
The toddler helps place the face and presses streamers onto glue at the bottom of the plate.
Steps
- Prepare a friendly face from large black paper shapes.
- Let the child help attach the eyes and mouth.
- Glue short streamers to the bottom of the plate.
- Add paper arms if wanted.
- Hang the ghost indoors once dry.
Mouthing-child swap: Skip loose streamers and have the adult attach them, or let the toddler paint vertical lines on the plate instead. Never let a child wear or wrap paper strips around the neck.
Display idea: Hang the ghost on an interior wall or door, not from a reachable crib, cot or play-area cord.
Windows Errors? Fix Them Before They Spread
Repair common Windows errors and clear accumulated junk for a smoother, more stable PC - no reinstall needed.Free scan · no reinstallOutdated Drivers Are Slowing You Down
One free scan finds every outdated or missing driver and matches the right update for your exact hardware.Free scan · exact hardware matchThe paper-plate, crepe-paper and simple-face format is included in Happy Toddler Playtime’s Halloween craft collection.
8. Tissue-Paper Pumpkin Suncatcher
Best for: 18–36 months with adult preparation Mess: Low Type: Window decoration and sensory collage
Materials
- Clear contact paper
- Orange and green tissue paper
- Black paper pumpkin outline
- Tape
- Scissors for the adult
Adult prep
Cut the pumpkin outline and a piece of contact paper slightly larger than it. Tape the contact paper sticky-side up before bringing your toddler to the table.
What your toddler does
The child scrunches or presses tissue-paper pieces onto the sticky surface. Older toddlers can choose between orange and green.
The Tool Desk
Outbyte PC Repair FREERepair Windows errors before they cause bigger problemsFix Now →Outbyte Driver Updater FREEScan for outdated or missing drivers - takes under a minuteDriver Scan →Steps
- Cut a pumpkin outline from black paper.
- Cut contact paper slightly larger than the outline.
- Tape it down sticky-side up.
- Place the black outline on the contact paper.
- Let the child add tissue-paper pieces inside the pumpkin.
- Cover the back with a second sheet of contact paper.
- Trim the edges and place the finished decoration in a window.
Mouthing-child swap: Do not offer loose tissue pieces to a child who mouths objects. The adult can place the pieces one at a time, or the child can apply washable paint to the contact paper with a sponge instead.
Display idea: Place it where daylight can shine through, but keep the finished piece out of reach if the edges can be peeled.
Contact paper is used instead of glue in Happy Toddler Club’s tissue-paper pumpkin; a second contact-paper layer and approximately 1-inch tissue-paper squares are also described by All Kids Network.
9. Tape-Resist Spiderweb Plate
Best for: Approximately 30–36 months, with adult assistance Mess: Medium Type: Process art
Materials
- Paper plate
- Painter’s tape or washi tape
- Watercolors
- Paintbrush
Adult prep
Lay out the tape design before the child begins. The adult should create the spokes, manage the tape and supervise every removal step.
What your toddler does
The child paints over the taped plate and watches the web appear when the tape is removed. This is a reveal activity, not a project the toddler can set up independently.
Steps
- Place tape lines from the center of the plate toward the edge.
- Add curved or angled strips between the spokes.
- Let your toddler paint over the whole plate.
- While the paint is slightly damp, help peel off the tape.
- Let the plate dry completely.
Mouthing-child swap: Keep every piece of tape in the adult’s hands and substitute a plain plate for a child who tries to chew tape. The toddler can paint the plate while you draw a web afterward.
Display idea: Add a large drawn spider only after the painting is finished; leave off small plastic spiders.
Do these 3 things before closing this tab:
1Clear out junk files and repair common Windows errors2Scan for outdated or missing drivers - takes under a minute3Repair Windows errors before they cause bigger problemsHappy Toddler Playtime labels this technique for age 3 and up with adult assistance, which is a useful reminder not to treat every online “toddler” project as suitable for a young 1-year-old.
Rank #4

- Halloween Crafts for Kids: The ornament crafts for kids includes 12 packs in total,There are 6 style, bat,owl, pumpkin,spider,spooks,cat.A lot of foam stickers enough quantity to meet needs on a Halloween activity for kids,kids can make their own Halloween crafts! It comes with a Halloween-themed gift box; no additional wrapping is needed.
- High Quality Material: Our Halloween craft set is made of premium EVA foam material. It can be pasted and peeled off multiple times, which is soft and lightweight, safe and environmentally friendly, harmless to children.These mini Halloween craft kits are funny and simple items to enrich your kids' holiday season life.
- Easy to Make: Each Halloween craft kit comes with its own self-adhesive paper for pasting, no glue needed, easy to make, no mess. Also it can easily peel off and stick, so children can change the design according to their ideas, let their creativity run wild!
- DIY Craft Project for Kids : Our Halloween foam stickers suitable for children over 3 years old, this creative Halloween craft kit can train children's hands-on ability and imagination. Design their own unique crafts,and hanging Halloween tree,mantle, window border, door, bed, and Halloween party decorations, creating joyous festival atmosphere in your house ,it a great Halloween decorations for kids .
- Wide Application: This Halloween craft kit are great Halloween gifts for kids boys girls. Can be used for Halloween party supplies, birthday gifts, school tasks, class rewards, craft group activities, scrapbooking and so on. Perfect for a rainy day activity,your kids or students will be glad to receive these funny craft kits, and you can enjoy some relaxing craft time together.
10. Leaf Monsters or Leaf Pumpkins
Best for: 24–36 months Mess: Low–medium Type: Nature collage
Materials
- Large, clean, dry leaves
- Paper
- Glue stick or adult-applied liquid glue
- Large paper shapes
- Marker for the adult
Adult prep
Inspect leaves for dirt, mold, sharp stems and fragments. Choose broad leaves that are not brittle, and prepare large paper eyes, mouths, hats or stems.
What your toddler does
The child chooses a leaf and helps turn it into a friendly monster, pumpkin, cat or witch.
Recommended Free Tools
Steps
- Collect a few leaves together.
- Glue one leaf to the paper.
- Let your toddler choose large paper features.
- Attach the pieces and add a face with a marker.
- Display the leaf characters after the glue dries.
Mouthing-child swap: Use paper leaves cut by the adult instead of real leaves if your child mouths or tears natural materials. Keep small leaf fragments off the table.
Display idea: Make a row of “friendly forest monsters” with the child’s chosen names.
Leaf-based Halloween characters appear in Happy Toddler Playtime’s toddler craft ideas; PBS Kids also suggests fall activities using natural materials.
11. Torn-Paper Witch Hat
Best for: 24–36 months Mess: Low Type: Tearing and collage
Materials
- Black, purple, orange or yellow construction paper
- Large witch-hat outline
- Glue stick
- White cardstock
Adult prep
Draw or pre-cut a large hat outline. Apply glue yourself in small sections if your toddler is likely to squeeze out a large amount.
What your toddler does
The toddler tears construction paper and presses the pieces onto the glued hat. The pieces do not need to cover every area.
Steps
- Prepare a large witch-hat outline.
- Let your toddler tear construction paper into pieces.
- Spread glue over one section at a time.
- Press the torn pieces onto the hat.
- Add a paper band or buckle using large shapes.
Mouthing-child swap: Offer only a few large pieces at a time, keep the glue under adult control and remove every loose scrap afterward. For younger children, tearing is enough; do not expect a fully covered hat.
Display idea: Use purple and orange rather than all black for a bright, less-frightening result.
A construction-paper, glue and template version is included in Happy Toddler Playtime’s simple Halloween crafts.
Independent reader supportYour contribution helps us test, update, and keep practical guides available for everyone.12. Bubble-Wrap Pumpkin Prints
Best for: 18–36 months Mess: Medium Type: Sensory printmaking
Materials
- Bubble wrap
- Orange and green washable paint
- Pumpkin outline or plain cardstock
- Tray
Adult prep
Cut a manageable piece of bubble wrap and place it in a tray. Use a small amount of paint so the texture remains visible rather than becoming a puddle.
What your toddler does
The child presses textured bubble wrap onto paint and then onto the paper. The popping sensation and print reveal provide the sensory element.
Quick wins for a faster PC:
Clear out junk files and repair common Windows errorsFree Scan →Fix the driver behind crashes, sound loss and screen glitchesFind Drivers →Steps
- Put orange paint on the bubble-wrap side.
- Help your toddler press it onto a pumpkin outline.
- Add green paint for a stem or leaves.
- Let the print dry.
- Draw a simple face afterward if desired.
Mouthing-child swap: Hold the bubble wrap yourself and remove it immediately after printing. If the child bites or tears it, switch to a large sponge or apple stamp.
Display idea: Leave the textured print without a face, or add one large smiling face after it dries.
The textured pumpkin-print method is included in Happy Toddler Playtime’s Halloween craft collection.
13. Sticker Halloween Wreath
Best for: 18–36 months Mess: Very low Type: Decoration and sticking activity
Recommended Free Tools
Best Value

- Great Value Set: The 332PCS Halloween crafts pack contains 200 pcs Foam Halloween Stickers, 40pcs Foam Craft Pumpkins(15pcs pumpkins, 5 witch hats, 5pcs ghostes 5pcs cat, 5pcs spider web, 5pcs owl), 24pcs wiggle googly eyes, 22pcs sticker 40pcs Black Cords and 6 Color Pens (Black, Red, Purple, Green, Blue, Orange) in a paper box.
- Soft Material: The Halloween foam pumpkin craft kit is made of EVA, which is non-toxic and reliable, durable and smooth materials very great for you and your kids crafts, and can be kept for a long time.
- Proper Dimension: The foam pumpkin for crafts is approx. 5.30 x 6.0 inches, with orange color, good size for kids to decorate. This pumpkin decorating supplies was an enjoyable activity for all kids ages.
- Halloween DIY Crafts: The blank pumpkin decorating stickers can be draw or write something you want. You can work with your child to complete the painting and writing, and this will inspire your kids imagination. Then pasted it to doors, trees, ceiling of home or classrooms or any place you want to decorate.
- Wide Application: This DIY Halloween Sticker is suitable for Halloween party decoration supplies, craft making and so on, can be applied to Halloween cards, bullet in boards, classroom prizes, Halloween games, Halloween themed party decoration, DIY craft project works, also applied as a suprising or fun Halloween activites for kids, friends or family.
Materials
- Paper plate
- Large Halloween stickers
- Ribbon or a paper strip for hanging
- Scissors and hole punch used by the adult
Adult prep
Cut the center from the plate, punch the hole and attach the hanger after the decorating is finished. Choose large stickers; tiny sticker sheets are not appropriate for a mouthing child.
What your toddler does
The toddler peels and places stickers around the plate ring. Younger toddlers may need you to lift an edge of the backing first.
Steps
- Cut the center out of the paper plate.
- Offer a few large stickers at a time.
- Let your toddler cover the ring.
- Add a ribbon or paper hanger out of the child’s reach.
- Display the wreath on an interior door or wall.
Mouthing-child swap: Stickers are not food and their backings can be choking hazards. Use adult-held large paper shapes instead, or let the child make paint marks on the ring while you add the decoration later.
Display idea: Keep it on a wall or door where the child can see it but cannot pull off and mouth the pieces.
The large-sticker wreath format is presented as suitable for little hands in Gathered’s toddler Halloween craft roundup.
14. Cardboard-Tube Friendly Bat
Best for: Older toddlers with adult preparation; independent participation is more suitable for preschoolers Mess: Low–medium Type: Recycled-material craft
Materials
- Cardboard tube
- Black paper
- Glue
- Washable paint or crayons
- Adult-pre-cut wings and ears
Adult prep
Cut the tube if necessary and pre-cut the wings and ears. The adult handles all scissors, folding and gluing. Offer the toddler only the coloring or painting step.
What your toddler does
The child colors or paints the tube and chooses where the adult should attach the large wings and ears.
What’s actually slowing this PC down?
Pick the symptom - the matching free tool is one click away.
Steps
- Prepare the tube and cut out large wings and ears.
- Let your toddler paint or color the tube.
- Allow it to dry.
- Attach the wings and ears yourself.
- Draw a friendly face or add large paper eyes.
Mouthing-child swap: Use crayons on a flat paper bat if the tube is being chewed. Keep glue, paper scraps and all detachable features with the adult.
Display idea: Place the bat on a high shelf or attach it to a wall rather than hanging it by a long cord.
The Craft Train’s paper-roll bat requires adult cutting, folding and gluing. A similar Crayola cardboard-tube Halloween project is labeled for ages 4 and up, so this belongs in the adult-prep category for toddlers—not the independent-craft category.
Make Halloween cute instead of scary
Halloween reactions vary. Some children enjoy pretend monsters; others are unsettled by masks, dark rooms, loud sounds or unfamiliar costumes. PBS Kids recommends letting hesitant young children explore Halloween gradually and using pretend play in ways that help them stay in control.
- Use smiling faces, rounded shapes and bright or pastel colors.
- Call them “Happy Ghost,” “Sleepy Bat” or “Silly Spider.”
- Choose pumpkins, leaves, friendly monsters and colorful bats.
- Leave off fake blood, realistic wounds, aggressive expressions and frightening details.
- Skip startling light or sound effects, especially on decorations within the child’s reach.
- Let the child decide whether a character gets a face at all.
How to keep the activity toddler-sized
Prepare one step at a time rather than putting every material on the table. Offer two paint colors instead of an entire set, and expect a 12–24-month-old to participate for only a few minutes or a handful of marks. The activity is complete when the child loses interest—not when the sample is reproduced.
Comment on what the child is doing instead of judging the result: “You pressed the apple down,” “You chose orange,” “You made three fingerprints,” or “Those paper pieces are overlapping.” This preserves the process and avoids turning an open-ended craft into a correction exercise. NAEYC’s toddler sensory-art guidance similarly emphasizes giving children opportunities to explore and manipulate materials.
If your toddler refuses the craft
- Hates messy hands? Switch handprints or finger painting to a chunky brush, sponge stamp, apple stamp, stickers or contact-paper collage. Never force a handprint.
- Mouths everything? Use paint, large paper and adult-controlled tools only. Remove googly eyes, pom-poms, beads, dry sensory fillers, tiny stickers, glitter, pipe cleaners and loose tissue pieces.
- Loses interest immediately? Make a three-minute invitation: one sheet of paper, one color and one action. Stop while it is still manageable.
- Does not resemble the example? Do not repaint or correct it. Add adult details only after the child is finished, and preserve the original marks.
- Wants a glow effect? Use a window suncatcher or an adult-held flashlight. Do not give a toddler loose LED tea lights, button batteries or battery-powered decorations.
Three final safety checks
- Check the materials: Use children’s art products according to their labels. “Non-toxic” does not mean edible, and an art product is not automatically suitable for face or body painting.
- Check the loose parts: Remove small pieces before the child begins, not just after they have been glued down. Magnets can cause severe intestinal injuries or death if swallowed, and button-cell batteries can cause serious internal burns in as little as two hours. See the CPSC magnet warning and its button-cell battery safety information.
- Check cords and cleanup: Use short pieces of yarn or paper during the activity. Do not let string be worn, wrapped around a neck or left dangling in a play area; CPSC advises keeping cords out of babies’ and toddlers’ reach.
When the art is dry, make a small “spooky gallery” with the child’s name and date. Display the fingerprints, crooked faces and unexpected color choices together—the point is to preserve what your toddler explored, not to decide which craft looks most like the adult sample.
Frequently Asked Questions
What are the best Halloween crafts for a 1-year-old?
Start with fingerprint pumpkin patches, handprint ghosts if the product label permits the intended skin contact, or adult-prepared sponge and paint stamping. The adult should handle all cutting, glue and setup, and the child should use only materials that are being actively supervised.
Which Halloween crafts are best for a toddler who still mouths objects?
Choose fingerprint or sponge painting, adult-controlled stamping and handprint alternatives made with appropriate child-labeled materials. Omit googly eyes, pom-poms, beads, buttons, mini spiders, glitter, dry beans, rice, pasta, pipe-cleaner pieces, tiny stickers, magnets and button batteries.
What paint is appropriate for toddler crafts?
For U.S. readers, the American Academy of Pediatrics recommends water-based supplies and checking for “Conforms to ASTM D-4236” and the ACMI AP Seal. Always follow the product’s intended-use instructions: non-toxic or AP-certified does not mean edible, and ordinary craft paint should not automatically be used as face or body paint.
How do I make Halloween crafts less frightening for a sensitive child?
Use smiling faces, bright colors and friendly names such as Happy Ghost or Sleepy Bat. Avoid gore, realistic wounds, fake blood, aggressive expressions and startling sounds or lights. Let the child explore gradually and choose whether a character gets a face.
The Bottom Line
The easiest place to start is the fingerprint pumpkin patch for a very young toddler, the sticker wreath for a low-mess activity, or apple stamping for a short process-art session. For a keepsake, choose a handprint only if your child is comfortable with messy hands and the paint label supports the intended use. Whatever you make, let the toddler’s marks—not the sample—be the finished art.
Quick Recap

Product prices and availability are accurate as of the date/time indicated and are subject to change. Any price and availability information displayed on Amazon at the time of purchase will apply.




