Free tools Windows power users keep installed
One-click scans. No signup required.
ThatPainter is reader-supported. When you buy through links on our site, we may earn an affiliate commission. Learn More
These 22 pumpkin carving ideas range from simple faces and dotted lanterns to scraped reliefs, layered silhouettes, paired pumpkins, and a no-carve mummy alternative. Match the design to the pumpkin’s shape, transfer the pattern before cutting, and use a battery-operated light for a straightforward Halloween glow.
The best pumpkin carving ideas are not limited to the familiar triangular eyes and toothy grin. This collection includes beginner-friendly faces, glowing perforated patterns, scraped relief designs, paired pumpkins, unusual shapes, and a no-carve alternative. Choose a design that suits your pumpkin, transfer the outline before cutting, and use a battery-operated LED light for the simplest display.
Before you carve: choose the pumpkin and prepare the station
Match the pumpkin to the design. Smooth, round pumpkins are useful for faces and symmetrical patterns; tall pumpkins give lettering and vertical scenes more room; squat pumpkins suit sleepy expressions; and white, gray, green, miniature, or naturally warty pumpkins can contribute color and texture before you make a single cut. Choose one with a firm rind, a sturdy stem, and no bruises, punctures, mushy spots, or soft areas.
Outdated Drivers Are Slowing You Down
One free scan finds every outdated or missing driver and matches the right update for your exact hardware.Free scan · exact hardware matchWindows Errors? Fix Them Before They Spread
Repair common Windows errors and clear accumulated junk for a smoother, more stable PC - no reinstall needed.Free scan · no reinstall#1 Best Overall
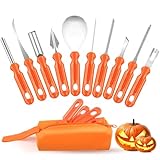
- 👻 Essential for Spooky Halloween Fun--Pumpkin carving remains a beloved Halloween staple, and our premium carving kit streamlines the craft with improved safety and convenience. Ditch risky household knives and craft intricate, eye‑catching Jack‑O'‑Lanterns with total ease.
- 🛠️ Complete 10‑in‑One Professional Carving Set--This all‑round 10‑piece toolkit suits novice crafters and seasoned carvers alike, containing a serrated pulp scooper, double‑sided saw, curved cutting saw, pumpkin drill, V‑groove chisel, arc etching tool and bent carving knife. Paired with a neatly stitched storage pouch fitted with heavy‑duty zippers, it keeps all tools sorted and well‑protected for seasonal reuse.
- ⚙️ Premium Stainless Steel, Exceptional Durability--Each carving implement is forged from sturdy stainless steel via high‑temperature reinforcement craft, delivering sharp cutting performance and outstanding wear resistance. Built to withstand repeated annual use for casual hobbyists and dedicated Halloween enthusiasts.
- ✋ Ergonomic Halloween‑Style Non‑Slip Grips--Boasting festive bright orange PP handles with anti‑slip texture, these tools ensure steady, comfy holding for detailed precision carving. Cut cleanly with minimal force to extend your tools’ service life.
- 🎁 Ideal Family‑Focused Halloween Gift--Spark warm family bonding and creative fun with this practical pumpkin carving kit, an impeccable seasonal gift choice for all ages. Crafted with safety prioritized; adult supervision is required for kids under 13 for secure carving activities.
Cover a stable, flat, well-lit work surface with newspaper, cardboard, or a wipeable drop cloth. Gather a washable marker or chalk marker, a paper template if needed, a scraper or scooper, a bowl for pulp, towels, and purpose-made carving tools. Kent Fire and Rescue Service recommends purpose-made pumpkin tools rather than kitchen knives. A pumpkin carving kit can be a practical way to gather purpose-built saws, scrapers, scoopers, and small detail tools in one place.
- Choose the opening: A top opening is familiar and convenient for many designs. A bottom opening preserves the stem and can allow the pumpkin to sit over the light source. A side opening can work when the design or display requires it.
- Transfer the pattern first: Tape on a paper stencil and mark its lines with dots, or draw the design with a washable chalk marker. Marked outlines are easier to control than trying to cut a complex image freehand.
- Let an adult carve: Keep hands and tools dry, work in a clean, dry, well-lit area, and cut away from the body. Leave small connections where parts of the design need to remain attached. Kent Fire and Rescue Service advises leaving a substantial shell to help the pumpkin hold its shape; treat its specific guidance as a practical recommendation, not a universal engineering rule.
- Scoop and clean: Once the adult has opened the pumpkin, scoop out the seeds and loose pulp with a spoon or scraper. Save the seeds separately if you plan to use them.
- Light it after cleanup: Wipe the outside, clear the work area, and place the light inside only when the carving station is tidy.
Safety first
The U.S. Consumer Product Safety Commission (CPSC) recommends that adults do the carving while children help with tasks such as tracing a design or scooping. Do not let children use sharp carving tools. Adults should use purpose-made pumpkin tools, keep hands and tools dry, and cut away from the body. These recommendations are consistent with guidance from the American Academy of Orthopaedic Surgeons (AAOS).
Battery-operated LED tea lights, small pumpkin LEDs, and LED string lights are the default choice for a fuss-free glow. CPSC recommends battery-operated lights or glow sticks rather than an open-flame candle. If you do use a candle, never leave it unattended and keep it away from curtains, decorations, and other combustibles.
Easy pumpkin carving ideas
1. Classic toothy grin
Start with a simple face featuring large eyes and a broad mouth. Make the cutouts widely spaced, particularly around the teeth, so there are fewer thin bridges of rind to preserve. This familiar design is forgiving of small variations and reads clearly from the sidewalk.
Quick wins for a faster PC:
Fix the driver behind crashes, sound loss and screen glitchesFind Drivers →Repair Windows errors before they cause bigger problemsFix Now →Scan for outdated or missing drivers - takes under a minuteDriver Scan →2. Sleepy-eyed pumpkin
Carve half-closed eyes, a small nose, and a relaxed, slightly curved mouth. A squat, round pumpkin gives this expression a gentle, drowsy character. Keep the eyelids thick so they remain sturdy when you lift out the pieces.
3. Spooky cat silhouette
Transfer a cat outline with recognizable ears, a curved back, and a tail. A template helps keep the silhouette legible, especially around the narrow ears and tail. For a larger porch arrangement, use two pumpkins to create a cat-and-moon or cat-and-companion scene.
4. Moon and stars
Cut or scrape a crescent moon, then add stars with a skewer, small punch tool, or pumpkin drill. Vary the size and spacing of the holes instead of arranging every star in a perfect grid. Kent Fire and Rescue Service notes that cookie cutters can help make simple repeated shapes. Hollowing from the bottom can preserve the pumpkin’s stem while leaving room for an LED light beneath it.
5. Bat flying across the moon
Use a template to draw a bat with clean wing shapes, then either cut the silhouette through the rind or scrape around it for a subtler relief effect. Small perforated stars around the bat add points of light without requiring a highly detailed face.
Recommended Free Tools
6. Polka-dot glow
Create rows of holes across the pumpkin with a suitable apple corer, skewer, or drill bit. Vary the spacing and diameter for a relaxed pattern. Kent Fire and Rescue Service mentions an apple corer or drill bit for dot patterns; an adult should handle these tools. This is a good choice when you want an attractive glow but do not want to manage a recognizable illustration.
Rank #2

- 【10 Professional Pumpkin Carving Kit】 The package includes Pumpkin scooper X 1, Small saw X 2, Pumpkin drill X 1, Etching tool X 1, Double-sided saw X 1, Carving Knife X 1, Small Knife X 1, Carving Tools X 2. The different specifications of craving kits will create interesting Halloween pumpkin designs. Tools can be neatly organized and stored in the sturdy zippered nylon carrying case after use.
- 【High-quality Stainless Steel】 10pcs carving set are made by premium stainless steel, thicker than normal carving tools, will not break. Non-slip handle design, easy to grip plastic handle make carving any pattern a breeze. The durable material ensure the tools can be re-used for many years.
- 【Safe & Easy to Use】 The easy-grip handle, and sharp & sturdy antirust blade of our pumpkin carving kit is designed specifically for carving your own Halloween jack-o-lantern pumpkins. Suitable for adults and children. Children use tools that require adult supervision. Not recommended for children under 7 years old.
- 【Carve Perfect Jack-O-Lanterns】 Our 10 pieces of pumpkin tools have different functions, so they can help you cut and create realistic 3D pumpkin details, such as hair, teeth, nose and eyes, to make the pumpkin character look expressive. Let your pumpkin lantern stand out from the crowd and play happily on this Halloween
- 【Have Fun with Family】 Halloween won’t be completed without carving pumpkins and jack-o'-lanterns! Creating a jack-o-lantern is a fun job, our pumpkin carving kit has 10pcs, can allow you to cooperate with your families and friends at the same time, enjoy the happy Halloween pumpkin carving time.
7. Ghost face
Two oval eyes and an elongated mouth are enough to create a clearly recognizable ghost. Slightly tilt the eyes or vary their size for personality, but leave generous space between the openings so the design remains strong when moved.
8. Witch-hat pumpkin
Carve a simple face, buckle, or belt motif, then finish the display with a purchased or handmade witch hat. The hat is an accessory rather than part of the carving, so it adds height and theme without requiring extra cuts in the pumpkin.
Intermediate pumpkin carving ideas
9. Monster with uneven eyes
Make the mismatched expression intentional: one eye can be round and wide while the other is narrow or crooked, with teeth of different sizes below. Sketch several versions with a washable chalk marker before cutting so the off-center face looks playful rather than accidental.
10. Pumpkin diptych
Use two pumpkins as pieces of one connected image: a cat, skeleton, pair of eyes, or monster with a long grin. Draw the full composition on paper first, then mark a few alignment points on both pumpkins. Place them close together on the porch and check the proportions before making the cuts.
11. Skeleton arm or hand
Trace a skeleton-arm or hand template, then scrape away only the surface of the rind around the bones. The resulting relief effect is more controlled than cutting every bone completely through and creates a softer, shaded glow. Keep the scraped sections broad enough to be visible from a distance.
12. Haunted-house window
Build a vertical scene with a crooked house, glowing windows, a moon, and a few bats. A tall pumpkin gives the composition room to stack several levels. Cut the windows through for bright points of light and use larger scraped areas for the walls or sky.
Rank #3

- Complete Halloween Pumpkin Carving Kit – Includes 4 safe and durable carving tools plus 12 stencil patterns to help you design spooky, silly, and creative jack-o’-lanterns for Halloween.
- Perfect for Halloween Decorations – Ideal for carving pumpkins for porches, parties, haunted houses, trick-or-treat night, and fall festivals; create glowing pumpkin decorations that set the mood.
- Fun for Kids & Adults – Family-friendly kit makes pumpkin carving safe, easy, and enjoyable; great Halloween activity for children, teens, and adults to enjoy together.
- Endless Carving & Decorating Ideas – Use included stencils or create your own designs for ghosts, witches, bats, monsters, and other classic Halloween icons; perfect for DIY Halloween décor.
- Must-Have Halloween Essential – Durable, reusable pumpkin carving tools ensure you’re ready for Halloween traditions year after year; the ultimate kit for jack-o’-lantern carving and decorating.
13. Crescent-moon face
Carve a crescent outline and give the moon a profile with a nose, brow, and small mouth. Surface etching around the face can create a shaded transition between the bright cut edge and the darker rind. This design works particularly well when the pumpkin’s natural curve follows the crescent.
14. Jack-o’-lantern within a jack-o’-lantern
Carve a large outer face, then add a smaller face or geometric motif inside one cheek or forehead. The layered design creates two scales of detail. Keep the inner shape comfortably away from the outer cut line so the surrounding rind does not become too fragile.
15. Lettered porch pumpkin
Carve a short word such as “Boo” or “Eek,” or use a family initial. A tall pumpkin helps vertical letters remain legible. Transfer the lettering with a stencil, leave plenty of space between characters, and use a bold type style rather than thin, decorative strokes.
16. Fanged vampire
Give the pumpkin narrow eyes, a widow’s peak, and two prominent fangs. Make the teeth thick enough to survive handling, and keep the upper and lower cutouts separated by strong bridges of rind. A dark cape or simple fabric collar around the base can reinforce the character without additional carving.
Advanced and detail-focused pumpkin carving ideas
17. Starry-night relief
Scrape broad areas of rind instead of cutting them all the way through, then add holes and starbursts for contrasting brightness. Relief work preserves more of the pumpkin wall and lets you create different levels of glow. Kent Fire and Rescue Service describes shaving the skin rather than cutting through to create a two-tone, deeper-looking effect. Etching or linocut tools can help with controlled surface work, but they still require careful handling by an adult.
What’s actually slowing this PC down?
Pick the symptom - the matching free tool is one click away.
18. Woodland owl
Transfer an owl silhouette, scrape feather lines across the body, and cut only the eyes through the rind. The limited full cutouts make the eyes the nighttime focal point while the etched feathers provide texture in closer light. Choose a pumpkin with enough uninterrupted surface for the wings and head.
19. Ribbed pumpkin face
Let the pumpkin’s natural ribs guide the face. Align the nose or brow with a raised ridge, and use the neighboring grooves to suggest cheeks or a furrowed expression. This technique is design-led rather than tool-led: the pumpkin’s existing contours supply much of the character.
Rank #4
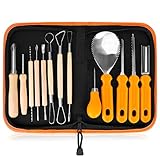
- 13-PIECE ALL-IN-ONE PROFESSIONAL SET: Dominate any pumpkin carving contest with 13 master-grade tools! This heavy-duty kit includes 6 double-sided stainless steel detail sculptors,2 sharp heavy duty stainless steel pumpkin scoop tool with scraper, 2 sturdy tooth saws, 2 precision hole punches, and 1 detail engraving pen. This kit has everything you need.
- PREMIUM STAINLESS STEEL & ERGONOMIC GRIP: Engineered for professional-grade performance year after year. Crafted from solid, high-tensile stainless steel, these tools are built to last without rusting, bending, snapping, or pitting. The ergonomically designed, non-slip handles provide maximum comfort, precision control, and confidence for intricate carving.
- SAFE & MEMORABLE FAMILY CRAFTING: Create unforgettable Halloween traditions with a fun activity the whole family can enjoy! With varying tool sizes and specialized blunt-edge designs for scooping and punching, there’s a perfectly safe task for everyone. Ditch the dangerous kitchen knives and enjoy a safer, smoother crafting experience.
- LUXURY WRISTLET STORAGE BAG INCLUDED: Keep your tools organized, protected, and highly portable. Our premium leather storage case features dedicated slots for each tool and a convenient wristlet strap. Whether you're heading to a neighborhood carving block party or helping with a school DIY project, you can carry your kit completely hands-free.
- 100% Service】We’re dedicated to enhance your carving experience. Our aim: 100% satisfied customers. However, if you’re not happy with your Pumpkin Carving Set, you can return it anytime. We’ll ask no questions.
20. Warty monster
Choose a naturally warty or irregular pumpkin and let its surface determine the eyes, scars, or teeth. A bump can become a nose, a deep groove can become a scar, and an uneven patch can suggest a cheek. Because the texture is already doing visual work, the cuts can remain simple.
21. Geometric lantern
Combine diamonds, triangles, circles, and narrow slits in a repeating pattern. Mark the grid before cutting and maintain enough rind between openings for structural strength. Test the spacing on one section first; a pattern that looks comfortably open on paper can become crowded when wrapped around the pumpkin.
22. Layered silhouette scene
Create a foreground-and-background composition such as a cemetery, haunted tree, or flying-bat scene. Use surface scraping for distant forms and full cutouts for the focal silhouette. Varying the technique gives the finished pumpkin depth without requiring every element to be cut through.
No-carve and hybrid pumpkin alternative
If you want a Halloween decoration without sharp-tool work, make a painted or fabric-covered pumpkin instead. One mummy-style approach uses glow-in-the-dark craft medium, glue, googly eyes, cheesecloth, scissors, and a drop cloth. Wrap or layer the cheesecloth to suggest bandages, add the eyes, and follow the instructions for the particular craft medium.
This option is no-carve, but it is not automatically supervision-free. Children still need adult guidance with scissors, glue, craft products, and cleanup. Other no-carve approaches include painting a face, adding a monogram, covering a pumpkin in dots or stripes, or combining paint with a small number of adult-made perforations for a hybrid design. Look for no-carve pumpkin craft materials such as washable markers, paint, glue, cheesecloth, and decorative eyes when assembling the project.
Independent reader supportYour contribution helps us test, update, and keep practical guides available for everyone.How to transfer a design cleanly
- Measure the visible face: Decide which side will point toward visitors and mark the usable area, avoiding deep ribs or damaged patches when possible.
- Scale the template: A simple design can be enlarged on paper. Keep small details larger than you think you need, especially if the pumpkin will be viewed from several feet away.
- Secure the paper: Cut small relief slits around a curved template so it sits more smoothly against the pumpkin.
- Dot the lines: Use a blunt transfer tool or similar method to mark the outline, then remove the paper and connect the dots with a washable chalk marker.
- Label the pieces: For complicated scenes, lightly mark areas to cut through, areas to scrape, and areas to leave intact.
Pumpkin carving stencils or Halloween template sets are especially useful for silhouettes, lettering, cats, bats, skeletons, and layered scenes. They reduce the need to freehand a design and make it easier to plan the bridges that hold the rind together.
Lighting and display tips
Use battery-operated LED tea lights, small pumpkin LED lights, or LED string lights. LEDs can be positioned without putting an open flame inside the pumpkin, and string lights can work well when several pumpkins are grouped together. Glow sticks and tap lights are other possible light sources; follow the instructions for whatever light you choose.
Place the finished pumpkin on a stable surface away from doorways, steps, and places where it could be kicked or knocked over. For a porch or entryway, group pumpkins at different heights, use one larger pumpkin as the visual anchor, and repeat one color or motif across the collection. A bat, moon, or geometric pattern repeated on two or three pumpkins can make a display feel coordinated without making every carving identical.
Best Value

- 【13 Professional Pumpkin Carving Kit】 The package includes 8 x double-sided sculpting tools, 2 x sharp sturdy tooth saws, 1 x heavy duty scooper, 1 x etching tool, 1 x drill. The different specifications of craving kits will create interesting Halloween pumpkin designs. Tools can be neatly organized and stored in the sturdy zippered nylon carrying case after use.
- 【High-quality Stainless Steel】 13pcs carving set are made by premium stainless steel, thicker than normal carving tools, will not break. Non-slip handle design, easy to grip plastic handle make carving any pattern a breeze. The durable material ensure the tools can be re-used for many years.
- 【Safe & Easy to Use】 The easy-grip handle, and sharp & sturdy antirust blade of our pumpkin carving kit is designed specifically for carving your own Halloween jack-o-lantern pumpkins. Suitable for adults and children. Children use tools that require adult supervision. Not recommended for children under 7 years old.
- 【Carve Perfect Jack-O-Lanterns】 Our 13 pieces of pumpkin tools have different functions, so they can help you cut and create realistic 3D pumpkin details, such as hair, teeth, nose and eyes, to make the pumpkin character look expressive. Let your pumpkin lantern stand out from the crowd and play happily on this Halloween
- 【Have Fun with Family】 Halloween won’t be complete without carving pumpkins and jack-o'-lanterns! Creating a jack-o-lantern is a fun job, our pumpkin carving kit has 13pcs, can allow you to cooperate with your families and friends at the same time, enjoy the happy Halloween pumpkin carving time.
How to help a carved pumpkin last
Keep uncarved pumpkins cool, dry, and ventilated, and avoid storing them against damp surfaces. Once a pumpkin is carved, its lifespan depends on outdoor temperature, rain, humidity, the pumpkin’s original condition, and how much of the rind has been removed. There is no universal number of days that applies to every carved pumpkin.
A vinegar spray is sometimes suggested as a preservation tip for carved designs. Treat it as a source-attributed method that may help in some circumstances, not as a guaranteed way to prevent spoilage. Inspect the pumpkin regularly and remove it from display when it becomes soft, unstable, or unpleasant to handle.
The Tool Desk
Outbyte Driver Updater FREEScan for outdated or missing drivers - takes under a minuteDriver Scan →Outbyte PC Repair FREERepair Windows errors before they cause bigger problemsFix Now →A quick design-picker
| If you have… | Try… |
|---|---|
| Very little carving experience | A toothy grin, ghost face, polka-dot glow, or sleepy-eyed pumpkin |
| A tall pumpkin | Lettering, a haunted-house window, or a layered vertical scene |
| A warty or irregular pumpkin | A warty monster or ribbed face that uses the natural texture |
| Several pumpkins | A diptych, repeated moon-and-star pattern, or coordinated silhouettes |
| Time for surface detail | Starry-night relief, a woodland owl, or a crescent-moon face |
| No desire to use sharp tools | A painted, mummy-style, or other no-carve pumpkin |
Final checklist before the pumpkin goes outside
- The pumpkin is firm, intact, and suited to the chosen design.
- The pattern was transferred before cutting.
- Fragile bridges of rind are thick enough to support the design.
- The inside is clear enough for the chosen light.
- The exterior and display surface are clean and dry.
- The LED light works and is positioned securely.
- The pumpkin is stable and away from steps, doors, and flammable materials.
- Adults handled the carving, and children were supervised during tracing, scooping, or craft projects.
Frequently Asked Questions
What is the easiest pumpkin carving idea for beginners?
For a first project, try a classic toothy grin, sleepy-eyed face, ghost face, polka-dot glow, or witch-hat pumpkin. These designs use broad, recognizable shapes and do not depend on many delicate cuts.
What should I use to light a carved pumpkin?
Battery-operated LED tea lights, small pumpkin LED lights, or LED string lights are the simplest default options. CPSC recommends battery-operated lights or glow sticks rather than open-flame candles.
How can children safely participate in pumpkin decorating?
Adults should handle carving. Children can help trace a template or scoop out the pumpkin, with adult supervision, but should not use sharp carving tools.
How long will a carved pumpkin last outside?
There is no universal lifespan. Temperature, rain, humidity, the pumpkin’s condition, and the amount of rind removed all affect how long a carved pumpkin remains presentable. Keep it cool and dry before carving, and remove it when it becomes soft or unstable.
The Bottom Line
For the most dependable result, choose a pumpkin whose shape supports the design, transfer the outline before cutting, and combine full cutouts with scraped or perforated details. Let an adult carve with purpose-made tools, and use a battery-operated LED light on a stable display surface for a safer, clear Halloween glow.
Quick Recap

Product prices and availability are accurate as of the date/time indicated and are subject to change. Any price and availability information displayed on Amazon at the time of purchase will apply.




