ThatPainter is reader-supported. When you buy through links on our site, we may earn an affiliate commission. Learn More
These 41 pumpkin stencil ideas cover the full range from forgiving beginner faces to detailed relief portraits, dragons, constellation maps, and no-carve painted designs. Start with a firm pumpkin and a bold pattern, then choose between cutting through the rind, etching a lighter design, drilling dots, or decorating the surface with paint or vinyl.
Before you choose a design
The easiest pumpkin stencils use large openings, sturdy bridges, and bold shapes. Narrow lines, tiny cutouts, dense detail, and a strongly curved pumpkin make any pattern harder. Decide first whether you want a through-cut jack-o’-lantern, a shallow etched or relief-carved design, a drilled pattern, or a completely no-carve painted stencil.


As an Amazon Associate I earn from qualifying purchases.
Choose a firm, mature pumpkin with an unblemished rind and a stable base. Avoid pumpkins with soft spots, cracks, bruises, or a wobbly bottom. A relatively flat front makes stencil transfer easier. Because carved pumpkins can mold and collapse in warm or wet weather, carve close to the date you plan to display them and bring outdoor displays inside during severe weather.
How to use a pumpkin stencil
- Choose the pumpkin. Turn it until you find the flattest, most visible face, then check that it sits securely.
- Clean and dry the rind. Dirt or moisture can make a marker, tape, paint, or vinyl adhere poorly.
- Size the design. Print or draw the stencil so it fits the visible face without wrapping too far around the sides.
- Attach and transfer it. Tape the stencil in place. Trace it with a washable or dry-erase marker, use a transfer wheel, or poke small holes along the lines with a pushpin.
- Mark the bridges. Bridges are the sections that must remain attached. They keep the centers of letters, eyes, and other interior shapes from falling out.
- Cut slowly. Use a pumpkin saw or small serrated carving tool. Cut from the center of a section toward a corner rather than forcing the tool through a tight turn.
- Etch when a through-cut is too fragile. Remove only the outer rind to create a lighter-colored line or shaded area. Do not cut all the way through.
- Clear the inside. Remove loose pieces and thin unusually thick areas from the inside so light can pass through.
- Light it last. Check that the pumpkin is stable and that the lighting product and battery compartment are intact before putting it inside.
A basic setup can include a scoop, pumpkin saw, etching tool, washable marker, tape, and a battery-powered light. A complete pumpkin carving kit may combine those supplies with stencils and electronic candles, which can be convenient for beginners; treat bundled lights as a safety item to inspect, not an automatic guarantee of suitability.
14 beginner-friendly carved pumpkin designs
- Classic triangle-face jack-o’-lantern. Use large triangular eyes, a simple triangle nose, and a broad smiling mouth. Keep every opening wide for the most forgiving first stencil.
- Sleepy eyes. Carve curved eyelids and a small mouth for a calm expression. This design suits a short, squat pumpkin particularly well.
- Surprised face. Use round eyes, a small oval nose, and one large circular mouth. The simple geometry transfers and cuts easily.
- Goofy toothy grin. Make a wide mouth with a few large square teeth rather than many tiny teeth. Thick bridges will make the grin more durable.
- Winking pumpkin. Pair one large open eye with one curved, closed eye and add a raised eyebrow for personality.
- Ghost silhouette. Carve one large floating ghost with a rounded head and flowing lower edge. Start with broad curves instead of narrow tendrils.
- Bat in front of a moon. Cut a solid bat silhouette and a circular moon. The two strong shapes will read clearly when illuminated.
- Witch hat. Carve or etch a pointed hat, buckle, and curved brim. A shallow relief version is easier and less fragile than cutting every detail through.
- Crescent moon and stars. Cut one large crescent and several broad stars. Varying the star sizes creates a simple celestial display.
- Friendly cat face. Use triangular ears, almond-shaped eyes, and whisker slits. Etch the whiskers instead of cutting them out completely.
- Spiderweb. Etch most web lines into the rind and cut only a few anchor openings. This reduces the chance of delicate web sections breaking.
- “Boo” lettering. Choose thick block letters and leave generous bridges between characters. A short word stays more legible than a long message.
- Polka-dot pumpkin. Transfer a regular grid of circles, then make the holes with a screwdriver, low-speed drill, or dedicated pumpkin drill tool. This creates a knife-light design with a pleasing glow.
- Leaf border. Arrange broad leaves around the upper or lower edge. Use simple veins and avoid fine botanical lines for a stronger stencil.
13 intermediate stencil ideas
- Howling wolf. Place a wolf profile against a large moon. Use a recognizable silhouette and add only a few etched fur lines.
- Owl on a branch. Carve the owl’s eyes and outer silhouette, then etch feather rows and a branch. Simplify feathers into large graphic bands.
- Raven and crooked branch. Use a solid bird silhouette with an etched branch and a few cut-through gaps in the background.
- Flame border. Repeat flame shapes around the lower half of the pumpkin. Alternating large and small flames makes the pattern easier to cut.
- Haunted house. Combine a roofline, windows, door, and moon. Keep much of the house solid so the pumpkin wall remains strong.
- Cemetery scene. Use two or three tombstones, a crooked fence, and a crescent moon. Suggest distant layers with etched lines instead of many separate cutouts.
- Monster under the bed. Carve a bed frame or doorway with eyes peeking from the darkness. A few bright openings are more effective and durable than detailed anatomy.
- Skeleton hands. Create two simplified hands reaching around the front. Use broad fingers and thick bridges between them.
- Vampire mouth. Carve a mouth with two prominent fangs and etch the surrounding lips. This is sturdier than cutting numerous small teeth.
- Witch’s cauldron. Use a wide cauldron silhouette, three rising bubbles, and a few etched wisps of steam.
- Potion bottle. Carve a bottle outline and etch a label such as “Poison” or “Boo Brew.” Painting the label is an easy way to preserve tiny lettering.
- Pumpkin inside a pumpkin. Carve a smaller jack-o’-lantern face inside a larger pumpkin outline. You can also create the effect with several pumpkins in a stacked display.
- Autumn sunflower. Etch petal texture and cut selected petals through the rind. Leave the center broad and solid so the flower remains recognizable.
14 advanced and statement designs
- Acorn and oak leaves. Combine an acorn with a leaf cluster for an autumn design that feels seasonal without being overtly scary.
- Geometric starburst. Arrange repeated diamonds or triangles around a central point. A ruler or printed stencil helps keep the symmetry consistent.
- Name or family monogram. Use one large initial or a short family name in a bold block font. Test-print the size before transferring it to the pumpkin.
- Detailed feather. Etch the shaft and barbs, then cut through only the widest sections. Fine feather borders require a narrow tool and patience.
- Dragon profile. Build the head, horns, and jaw from one strong silhouette, then etch scales and smoke. Avoid isolated tiny scales that can collapse.
- Grim reaper scene. Create a hooded silhouette with a scythe against a moon. Keep the scythe shaft thick enough to survive cutting and handling.
- Tombstone with lettering. Use a large tombstone and a short inscription such as “RIP” or “Eek.” Experienced carvers can combine through-cut letters with shallow shading.
- Medusa or mythic face. Build the face from large eyes and a central silhouette, then etch serpents around the hairline. Keep the snakes connected to the main design.
- Three-dimensional relief portrait. Remove thin layers of rind to create highlights, midtones, and shadows without cutting through the wall. This requires experience and specialized sculpting tools.
- Under-the-sea pumpkin. Combine a sea turtle, bubbles, coral, and waves. Use the orange rind as a middle tone and cut only selected elements through.
- Galaxy or constellation map. Drill stars in several sizes and connect them with etched lines. Several pumpkins can represent different constellations.
- Multi-pumpkin haunted house. Use separate pumpkins as windows, towers, or characters instead of forcing one dense scene onto a single curved surface.
- Pumpkin arch or walkway sequence. Repeat bats, flames, leaves, or moons in several sizes to create a coordinated path. Repetition often looks more polished than unrelated designs.
- No-carve painted stencil. Transfer the design with chalk or a washable marker, then paint it, apply adhesive vinyl, or add craft materials instead of cutting. This is the best option for a mess-free display or a pumpkin that must last longer.
Choose the right idea for your project
| Goal | Good choices | Why they work |
|---|---|---|
| First pumpkin | Classic face, sleepy eyes, surprised face, ghost, moon and stars | Large shapes and minimal bridges make mistakes less costly. |
| Children participating | Polka dots, large faces, painted stencils, broad ghosts | Children can scoop and trace while an adult handles cutting. |
| Porch display | Flame border, repeated moons, bats, leaves, or a multi-pumpkin scene | Repeating shapes create a coordinated display from a distance. |
| No specialized carving skill | Painted stencil, vinyl design, etched spiderweb, drilled dots | These approaches reduce intricate knife work. |
| Experienced carver | Relief portrait, dragon, detailed feather, constellation map, cemetery scene | They reward layered shading, precise transfer, or multiple cut levels. |
Tools and lighting that match the design
You do not need every tool for every idea. A small saw and scoop are enough for a basic face. Add an etching tool for spiderwebs, feathers, fur, relief shading, and lettering. A washable marker or dry-erase marker is useful for transferring a pattern; a transfer wheel or pushpin helps with dense outlines.
For drilled dots, constellation stars, and perforated borders, a low-speed drill and small drill-bit set can produce consistent holes, but the tool is optional and should be operated by an adult. A pumpkin carving tool set is a sensible alternative to buying a complete kit if you already have stencils and only need a saw, scoop, or etching tool.
Use battery-operated LED tea lights or glow sticks where possible. The U.S. Consumer Product Safety Commission and the National Fire Protection Association recommend battery-operated lights or glow sticks rather than open flames in jack-o’-lanterns. If you use a real candle, keep it away from combustible decorations, never leave it unattended, and place the pumpkin where it cannot be knocked over.
Pay particular attention to button-cell batteries. Keep loose batteries and any accessible battery compartment away from children. The research for this article identifies an April 9, 2026 CPSC recall involving a Besslly Halloween pumpkin carving kit sold on Amazon because its tea-light batteries could be accessed easily. Check the current recall notice, product warnings, and the condition of the battery compartment before using any bundled light; availability and safety information can change during Halloween season.
Safe carving and longer-lasting display
- Adults should handle saws, drills, and other sharp or powered tools. Children can scoop pulp with a spoon, hold the stencil, or trace the pattern.
- Cut on a stable, well-lit surface, and keep your free hand out of the tool’s path. Do not force a blade through a tight curve.
- Leave thick bridges around letter centers, narrow limbs, teeth, fingers, and other pieces that would otherwise become detached.
- Carve close to the planned display date, especially in warm or wet conditions.
- Bring carved pumpkins indoors during severe weather and discard them when the rind becomes soft, moldy, or unstable.
- Check that the pumpkin sits firmly before adding a light, particularly on stairs or a walkway.
A simple decision rule
If the design contains mostly circles, triangles, broad lettering, or one-piece silhouettes, it is probably suitable for a first attempt. If it contains many isolated islands, thin bridges, tiny lettering, or detailed shading, convert some lines to etching or choose a larger pumpkin with a flatter face. When in doubt, simplify the stencil: a bold silhouette lit well usually looks better than a highly detailed pattern whose bridges break during cutting.
Independent reader supportYour contribution helps us test, update, and keep practical guides available for everyone.Frequently Asked Questions
What is the easiest pumpkin stencil for a beginner?
The easiest pumpkin stencils are classic triangle faces, sleepy eyes, surprised faces, ghosts, crescent moons with stars, “Boo” lettering, and polka dots. They use large shapes with fewer narrow bridges and small cutouts.
The Tool Desk
Outbyte PC Repair FREERepair Windows errors before they cause bigger problemsFix Now →Outbyte Driver Updater FREEFix the driver behind crashes, sound loss and screen glitchesFind Drivers →How can children safely participate in pumpkin decorating?
Adults should do the cutting and any drilling. Children can scoop out pulp, hold or tape the stencil, and trace its lines. Choose a design with large openings, and keep loose button-cell batteries and accessible battery compartments away from children.
Can I use these ideas without carving the pumpkin?
Yes. Transfer a design with chalk or a washable marker, then paint it, apply adhesive vinyl, or add craft materials. A no-carve stencil is less messy and usually preserves the pumpkin longer than cutting it.
What light is safest inside a carved pumpkin?
Battery-operated LED tea lights or glow sticks are the safer choice recommended by the CPSC and NFPA. If using an open-flame candle, keep it away from combustible decorations, never leave it unattended, and make sure the pumpkin cannot be knocked over.
The Bottom Line
For a dependable first project, choose a firm pumpkin and a large-shape design such as a classic face, ghost, moon, or “Boo” lettering. Transfer the stencil clearly, preserve sturdy bridges, and use battery-operated lighting. Experienced carvers can move into relief portraits, dragons, constellation maps, and layered scenes; anyone wanting a low-mess option can paint or apply vinyl instead of cutting.
Quick wins for a faster PC:
Repair Windows errors before they cause bigger problemsFix Now →Fix the driver behind crashes, sound loss and screen glitchesFind Drivers →Clear out junk files and repair common Windows errorsFree Scan →Quick Recap
Best Value

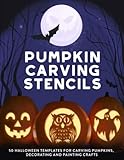
- Package Content: You will receive 50 pumkin carving stencils, each Halloween stencils is 6 inches and square,equipped with a chain, Halloween stencils for crafts can meet your holiday decoration needs and add fun to your Halloween celebration
- Good Quality Materials: These Halloween stencils for crafts are made of good quality materials, which has good durability and can be reused after cleaning. The edge of the Halloween stencils for painting is carefully cut to ensure smooth and non-stinging, so that you can enjoy DIY with peace of mind
- Halloween Theme Design: The Halloween drawing stencils have a variety of Halloween expression patterns, which will bring you more creativity of Halloween template and unleash your decorative imagination. The Halloween stencils for painting are equipped with exquisite chain, which is more convenient for you to hang and display DIY works and add a strong atmosphere to the festival
- Easy to Use: These pumkin carving stencils are hollow. You can fix the Halloween stencils on pumpkins, paper, clothes or any other places you want to decorate, and then spray patterns with pens or spray guns as needed to easily create a Halloween atmosphere
- Widely Used: Halloween stencils can be carved not only on pumpkins, but also ideal for paper, wood, handicrafts, cards, candy bags and T-shirts,the Halloween stencils for crafts can be used to create various patterns, adding festival atmosphere to Halloween

Product prices and availability are accurate as of the date/time indicated and are subject to change. Any price and availability information displayed on Amazon at the time of purchase will apply.




