Do these 3 things before closing this tab:
1Repair Windows errors before they cause bigger problems2Fix the driver behind crashes, sound loss and screen glitches3Clear out junk files and repair common Windows errors
ThatPainter is reader-supported. When you buy through links on our site, we may earn an affiliate commission. Learn More
You can make Easter décor today without power tools, complicated sewing, or a trip for specialist supplies. This list includes 45 beginner-friendly projects for tables, doors, mantels, windows, baskets, porches, and children’s spaces. Each idea is marked by active-time category, drying needs, skill level, mess, reusability, and safety considerations.
Important: “Today” means the day you decide to make the project. The time labels are practical planning categories, not hands-on tests; allow extra time for shopping, boiling, dye soaking, paint drying, adhesive curing, and cleanup.
As an Amazon Associate I earn from qualifying purchases.
Choose a project before you start
Need something finished immediately? Try 1, 3, 4, 5, 8, 9, 10, 15, or 16.
Best for a table: Choose 1–11, 36, 40, or 41.
Best for a front door: Choose 23–32. Use weather-resistant materials only on a covered porch unless the project is specifically protected.
#1 Best Overall
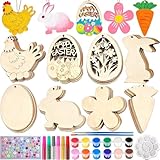
- Complete Easter Craft Kit: This all-inclusive Easter wooden painting kit features 40 pieces of smoothly sanded blank wood cutouts, including 8 charming Easter shapes (hen, bunny, Easter egg, flower, carrot) with 5 pieces each. Unleash your imagination with this complete DIY set that comes ready with color paints, sparkling glitter and hanging ropes, allowing you to create personalized Easter ornaments that showcase your unique artistic style.
- Family Easter Craft Activity: Enjoy a relaxing creative escape with this family-friendly kit. Adults will love the detailed painting, providing an opportunity to sit with the kids in their life and create together. The finished pieces become treasured family-made Easter home decorations, filled with love and memories.
- Premium Wood Material for Lasting Memories: Our 40 wooden Easter ornaments to paint are crafted from high-quality, natural unfinished wood. Each piece boasts a splinter-free surface that has been meticulously sanded for a perfect painting experience. These durable wooden blanks hold paint vividly, ensuring your handmade Easter decorations look beautiful year after year.
- Versatile Easter Hanging Decorations for Any Setting: Transform your home with these DIY Easter ornaments. Create a stunning Easter tree decorations DIY project by hanging them on branches, string them into a garland for your mantel, or display them on Easter wreaths, windows, and dining chairs. Perfect for Easter party supplies and spring centerpieces, these lightweight wood ornaments add handcrafted warmth to table settings, gift wraps, and even outdoor patios.
- Unique Handmade Gift Idea for Easter Celebrations: Surprise your loved ones with the gift of creativity! This Easter craft kit makes a thoughtful present for Easter basket stuffers, party favors, or hostess gifts. Whether for a craft-loving friend or as a group activity for spring parties, this DIY Easter craft set offers a personal touch that goes beyond ordinary sweets, creating cherished keepsakes and lasting memories.
Best for children: Choose 12, 13, 15, 20, or 22, with an adult handling cutting, wire, hot glue, and small parts.
Best with household or recycled materials: Choose 3, 12, 13, 14, 15, 20, 21, 22, or 33.
Best for reuse next year: Choose 15, 17, 18, 24–26, 29, 33–35, 42, or 43.
For a coordinated look, repeat just three colors—a base neutral, one pastel or bright color, and one natural tone such as raffia, kraft paper, wood, or greenery. Baby blue, egg trees, bunny wreaths, and flocked bunny styling are current decorating directions, but they are options rather than rules; a branch tree, botanical eggs, or a paper-flower display gives you a less pastel and less bunny-centered result. See the current trend overview from Good Housekeeping for inspiration, without assuming that store stock or prices will remain the same.
Before making anything: choose the right egg
- Hard-cooked eggs: Use food-grade dye or another edible decorating product. Refrigerate them within two hours and use them within seven days. Do not eat eggs that were hidden outdoors or left out during a hunt; bacteria on the shell can transfer to the edible portion. See USDA shell-egg guidance and its Easter food-safety advice.
- Blown-out raw eggs: These are fragile craft shells, not automatically safe food containers. Wash your hands, use uncracked refrigerated eggs, avoid splashes, and clean the shell and work surface carefully. Use a separate batch of eggs for eating.
- Plastic eggs: Use them only as craft materials. They are useful for garlands, wreaths, weights, and displays but should not be treated as food-safe containers unless the manufacturer specifically says they are.
- Wooden, papier-mâché, foam, or ceramic eggs: These are the easiest choices for paint, buttons, decoupage, and long-term décor. Keep painted or glued craft eggs away from food.
For anything that will be eaten, the simplest rule is to decorate one set of food-safe eggs and use a second set of craft eggs for décor.
10-minute table decorations and no-specialty-supply ideas
1. Bunny napkins
Supplies: Square napkins, raffia or twine, and a small wooden bead or paper nose. Optional: pink marker or paint.
- Mark a small wooden bead pink; for the fastest version, use a ready-colored bead or paper circle.
- Fold the napkin diagonally and roll it from the point into a narrow tube.
- Bend the roll into a U shape.
- Tie raffia around the center and thread the bead through the tie.
- Fray the raffia into whiskers and place the napkin on each setting.
Use cloth napkins for a washable version or paper napkins for a disposable last-minute setting. The project is shown by Country Living.
2. Bunny napkin rings from paper or raffia
Supplies: Cardstock or a paper bag, scissors, marker, tape or glue, and raffia, twine, or a strip of cardstock.
Recommended Free Tools
- Cut a pair of long bunny ears from cardstock and add an inner-ear shape with marker.
- Cut a strip wide enough to circle the rolled napkin.
- Tape or glue the ears to the strip.
- Wrap the strip around the napkin and secure it with tape, a staple, or a paper fastener.
Replace the paper band with tied raffia for a softer, more natural look. The styling idea is included by Homes & Gardens. Keep staples away from children.
3. Spring-sprig jars
Supplies: Budding branches, greenery, or supermarket flowers; mismatched jars, glasses, or bottles; water; and an optional ribbon.
- Wash and dry the containers.
- Trim the stems to different heights.
- Place one or two stems in each vessel.
- Group the jars on a tray, runner, or cake stand.
Use paper flowers, dried stems, or faux greenery if you need a no-watering arrangement. For cats, check the exact plant species before bringing it indoors; never assume a spring bouquet is pet-safe.
Outdated Drivers Are Slowing You Down
One free scan finds every outdated or missing driver and matches the right update for your exact hardware.Free scan · exact hardware matchPC Slower Than It Used to Be?
A free scan shows the junk files, broken settings and background clutter dragging Windows down - then fixes them in one click.Free scan · Windows 10 & 114. Handmade floral place cards
Supplies: Cardstock, scissors, marker, and optional flower stickers, stamps, or a small paper flower.
- Cut cardstock into rectangles and fold each one into a tent.
- Draw or stamp a simple flower, egg, leaf, or cross-free spring motif.
- Write each guest’s name in a clear contrasting color.
- Add a paper flower or a verified-safe fresh flower only at serving time.
For a more grown-up palette, use cream cardstock, olive green, and one muted accent instead of pastel colors. Homes & Gardens offers the underlying place-card styling at this décor guide.
5. Egg-cup bouquets
Quick wins for a faster PC:
Repair Windows errors before they cause bigger problemsFix Now →Scan for outdated or missing drivers - takes under a minuteDriver Scan →Supplies: Egg cups, tiny flowers or greenery, water, and a tray or narrow runner.
- Place egg cups on a stable tray.
- Add a small amount of water to each cup.
- Trim flowers short enough to sit upright.
- Arrange the cups in a row or cluster.
Use paper flowers or dried botanicals if a spill-free display is important. The compact centerpiece concept appears in Martha Stewart’s Easter décor ideas.
6. Daffodil candy cups
Supplies: Yellow paper or cupcake liners, a small cup, scissors, tape or glue, and wrapped candy.
- Cut rounded or pointed petal shapes from yellow paper or flatten a cupcake liner.
- Wrap the petals around the outside of a small cup.
- Secure the petals with double-sided tape or craft glue.
- Fill the cup with wrapped candy and place it beside a name card.
Do not put loose candy directly against paint, glue, or unknown craft materials. The flower-cup idea is adapted from Martha Stewart.
7. Plastic-egg tablecloth weights
Supplies: Plastic eggs, wrapped candy or another safe weight, ribbon, and clips or ties.
- Fill each egg with enough weight to keep the tablecloth from lifting.
- Close the eggs securely.
- Tie ribbon around each egg or attach it to a clip.
- Fasten the weights to the tablecloth edge.
Use this only where children, pets, and wind cannot turn the eggs into loose choking or trip hazards. Do not use food as a weight if insects or animals can reach it. The original concept appears in Martha Stewart’s décor guide.
8. DIY candy stands
Supplies: A plate or shallow bowl, an overturned candlestick or footed dish, and removable museum wax.
- Check that the plate and base sit flat and are not cracked.
- Apply small amounts of removable museum wax between the contact points.
- Center the plate on the overturned base.
- Test stability before adding candy.
Use a low arrangement rather than a tall one around children or pets. Keep unwrapped food on a clean liner or use wrapped treats. A similar upcycled stand is included in Country Living’s Easter decoration roundup.
9. Bunny favor bags
The Tool Desk
Outbyte Driver Updater FREEScan for outdated or missing drivers - takes under a minuteDriver Scan →Outbyte PC Repair FREEClear out junk files and repair common Windows errorsFree Scan →Supplies: Paper bags, scissors, marker, tape or glue, and optional pom-pom tails.
Rank #2

- Creative DIY Craft Kit: This hanging Easter eggs kit features an innovative combination of materials to make it easier for you to operate. Each set includes 16 foam eggs;10 colors of gem stickers, including drop, round, pearl-shaped, etc, with a quantity of more than 3000; 16PCS of four-color ribbons, 3PCS of glue dot, enough quantity to satisfy your creative needs.Suitable for 14+ years old
- Unique DIY Design: You can use your imagination to make unique creations according to your needs. Use shiny gems to create stripes, flowers, leaves, and other spring-breath patterns on the foam Easter eggs to create a unique Easter gift, also a beautiful decoration for your dining table, Easter tree, or Easter basket
- Premium Material and Size: These glitter Easter eggs are made of foam, 2.3in high and about 1.57in diameter, safe, lightweight, and easy to hang. Gem stickers are made of acrylic, bling making your home more beautiful and lively. The combination of ribbons and glue dots makes the hanging more sturdy and difficult to fall
- Easy to Make: These Easter crafts are easy to make. You only need to stick the gems for the foam eggs according to your ideas. Say goodbye to finger pain caused by pressing pins, and then stick the ribbon on the foam eggs with glue dot is finished, not only sturdy and beautiful, but also very simple, allowing you and your family to enjoy the time and fun of making it
- Wide Range of Applications: You can not only display these Easter eggs decor in the living room, dining table, tree, basket, window, or door, but also add a festive atmosphere to your home, classroom, and party, filling your home with laughter. You can also use it for arts and crafts group activities or as a gift for your family or friends
- Cut two ear shapes into the open top of each paper bag.
- Add inner-ear color with marker or paper.
- Draw a face or attach a large paper nose.
- Fill the bag, cinch it below the ears, and add a tail.
For children under three, omit detachable pom-poms and other small pieces. Use a paper circle for the tail instead. See the favor-bag project at Country Living.
10. Carrot napkin rings
Supplies: Orange paper or felt, green paper strips or ribbon, scissors, and tape or glue.
Free tools Windows power users keep installed
One-click scans. No signup required.
- Cut an orange tapered shape or a wide band that can circle a napkin.
- Fold or roll it around the napkin.
- Secure the seam with tape or a paper fastener.
- Add green strips or ribbon at the top.
Use orange fabric scraps tied around the napkin if you have no felt. Keep the carrot simple so it reads as table décor rather than a bulky favor.
11. Grass-in-vessels display
Supplies: Wheatgrass or another suitable living plant, small glasses or goblets, and a tray.
- Place the living grass in a watertight liner or small pot.
- Set each plant inside a glass or goblet.
- Arrange the vessels on a tray to contain water.
- Use the display as a green centerpiece or backdrop for craft eggs.
Do not call seed-grown grass a same-day project. The vessel display is drawn from Country Living’s Easter ideas.
PC Slower Than It Used to Be?
A free scan shows the junk files, broken settings and background clutter dragging Windows down - then fixes them in one click.Free scan · Windows 10 & 11Outdated Drivers Are Slowing You Down
One free scan finds every outdated or missing driver and matches the right update for your exact hardware.Free scan · exact hardware matchPaper, cardboard, and recycled-material decorations
12. Paper-plate stained-glass eggs
Supplies: Paper plate, scissors or craft knife, translucent tissue paper or colored cellophane, glue or tape, and string.
- Cut an egg-shaped opening from the plate, leaving a surrounding frame.
- Attach translucent paper behind the opening.
- Add paper trim, dots, or stripes to the front.
- Punch a hole and hang it in a window.
Use tape rather than wet glue when guests are arriving soon. Keep knives with an adult. The paper-plate window project is included in Country Living’s easy Easter crafts.
13. Paper-plate Easter wreath
What’s actually slowing this PC down?
Pick the symptom - the matching free tool is one click away.
Supplies: Paper plate, ribbon, rickrack, washi tape or markers, cardstock, scissors, glue or tape, and twine.
- Cut the center from the paper plate to make a ring.
- Wrap or tape ribbon, rickrack, or washi tape around the ring.
- Cut paper eggs in several sizes and add stripes or spots.
- Glue or tape the eggs to the ring.
- Punch a hole and add twine for hanging.
Use cardboard from a shipping box for a sturdier ring. Untreated paper is best for an indoor door or covered porch only. Find the source project at Country Living.
14. Egg-carton wreath
Supplies: Paper egg carton, cardboard or a craft ring, scissors, paint or markers, glue, and ribbon.
- Cut individual paper cups from the carton and notch or shape their edges into petals.
- Paint or color the cups.
- Cut a ring from cardboard or use a purchased craft ring.
- Glue the cups around the ring and add ribbon.
- Let the adhesive dry before hanging.
Leave the cartons unpainted for a natural kraft-paper look. This repurposing idea is represented in Country Living’s DIY Easter decorations.
15. Paper bunny garland
Supplies: Cardstock or paper packaging, pencil, scissors, string or ribbon, tape, and optional paper tails.
- Make one bunny silhouette as a template.
- Trace and cut repeated bunnies from cardstock.
- Add tails with markers or larger paper circles.
- Tape or clip the bunnies to string.
- Hang the garland across a shelf or mantel.
Use eggs, flowers, or simple geometric shapes instead of bunnies for a more neutral spring decoration. The garland concept appears in Martha Stewart’s décor guide.
16. Plastic-egg garland
Supplies: Coordinating plastic eggs, ribbon, twine, or cord, and optional paper leaves, bows, or tassels.
- Gather eggs in two or three colors.
- Use existing holes in the eggs where possible.
- Thread them onto ribbon or twine.
- Space the eggs evenly and tie knots or bows between them.
- Add paper leaves or tassels and hang the garland.
Do not drill through brittle plastic when a pre-existing opening or a simple tie will work. Keep loose eggs and small parts away from children under three. The reuse idea is covered by Our Daily Craft.
17. Fabric carrot garland
Do these 3 things before closing this tab:
1Repair Windows errors before they cause bigger problems2Fix the driver behind crashes, sound loss and screen glitches3Clear out junk files and repair common Windows errorsSupplies: Orange fabric or felt, green fabric or ribbon, scissors, twine, and fabric glue, staples, or needle and thread.
- Cut repeated carrot shapes from orange fabric or felt.
- Add green tops with fabric scraps or ribbon.
- Attach the shapes to twine with glue, staples, or a few stitches.
- Space the carrots along the garland and hang it.
Use glue for a same-day version and sewing only when durability matters more than speed. Avoid calling fabric glue instant; follow its drying instructions. The carrot-garland concept is listed by Country Living.
18. Spring bunting
Supplies: Cardstock, fabric scraps, felt, or old clothing; scissors; string; tape or clips; and markers.
- Cut triangles or repeated egg and bunny shapes.
- Add the word SPRING, EASTER, or one letter per flag if desired.
- Tape, clip, or fold the flags over string.
- Hang the bunting where it will not block a doorway.
For a less holiday-specific display, use only flowers, leaves, and the word SPRING. Vintage-inspired bunting is shown in Country Living’s Easter décor ideas.
19. Hanging egg chain
Supplies: Paper, papier-mâché, wooden, plastic, or blown eggs; ribbon or cord; and tape or existing holes.
- Choose lightweight eggs appropriate for the hanging surface.
- Attach ribbon through existing holes or secure it around each egg.
- Make several short strands or one long chain.
- Hang it across a mirror, mantel, or doorway with removable hooks or tape suitable for the surface.
Use paper eggs for the fastest, safest version. Avoid heavy eggs over seating or busy walkways. The hanging egg concept is included in Martha Stewart’s Easter décor collection.
Recommended Free Tools
Rank #3

- 18 Sets Easter cross decoration DIY foam stand-up cross Easter Craft Kits, including 18 pcs foam cross cutouts in 6 assorted shapes, each shape has 3 pcs, 18 pcs foam base in 6 colors, 63 pcs self-adhesive easter printed foam stickers, 6 pcs self-adhesive foam alphabet stickers sheets in 6 colors, 24 pcs easter egg shaped glitter foam stickers in 3 colors, 100 pcs craft pom-poms, 1 sheet artificial rhinestone stickers, and 100 pcs adhesive dots.
- Color: Easter Cross Shaped Foam Cutouts, foam bases and foam letter stickers are in fuchsia, orange, yellow, apple green, blue and purple. Easter printed foam stickers feature bunnies, chicks, eggs, sheeps, and flowers in assorted Easter colors. Glitter foam egg stickers are in fuchsia, yellow gold and teal. Glitter pom-poms are red, orange, yellow, apple green and white. Plain pom-poms are pink, yellow, light green, turquoise and lilac.
- Size: Foam Easter crosses measure appr. 8.3" in length, 6.1"-7" in width and 4mm in thickness. Foam bases measure appr. 4" in length, 2" in width and 0.4" in thickness. Easter foam stickers are appr. 1", 1.5" and 2", measured from the longest side of the shapes. Letters of the alphabet foam stickers are appr. 0.4"-0.8" in diameter. Glitter foam egg stickers are appr. 1" x 0.8" (LXW). Glitter pom-poms are appr. 0.4" in diameter. Plain pom-poms are appr. 0.6" in diameter.
- Material: Foam Cross Easter Craft Kit is made of EVA foam. Self-adhesive letters and stickers come with adhesive backs that make application to any material simple. With soft and safe material, this kit is perfect for kids' classroom activity, Sunday school activity, and so on.
- Celebrate the Resurrection with this Easter Foam Cross Craft Kit. Perfect for Easter party activity, classroom activity, Sunday school, VBS, church activity, First Communion Retreat craft, and other religious gatherings. Kids can create stand-up crosses of faith by adding stickers and embellishments as they wish, meanwhile learning lessons on Jesus or any theological lessons. Celebrate Easter by decorating your house with them or giving them in Easter baskets! Copyright (c) Winlyn.
20. Tissue-paper chick centerpiece
Supplies: Yellow tissue or crepe paper, paper scraps, tape or glue, and a basket, egg carton, or shallow bowl.
- Crumple or shape yellow tissue paper into small chick bodies.
- Add paper beaks, wings, and eyes.
- Secure the details with tape or glue.
- Arrange the chicks in a basket, carton, or bowl.
Use drawn eyes instead of detachable pieces for younger children. This paper-chick approach is represented in Country Living’s craft roundup.
21. Coffee-filter flowers
The Tool Desk
Outbyte PC Repair FREERepair Windows errors before they cause bigger problemsFix Now →Outbyte Driver Updater FREEScan for outdated or missing drivers - takes under a minuteDriver Scan →Supplies: Coffee filters, markers or diluted color, scissors, pipe cleaners or wire, and a cup or jar.
- Layer several filters and fold them into quarters.
- Trim the edges into rounded or pointed petals.
- Color the edges with markers or diluted paint.
- Pinch the center and secure it with a pipe cleaner or covered wire.
- Fluff the layers and arrange the flowers.
Use markers for less moisture and faster display. Keep wire ends covered and out of reach of children. The coffee-filter flower concept is found in Country Living’s Easter decorations.
22. Hatching-chick paper display
Supplies: Paper plates or cardstock, yellow paper, scissors, paper fasteners, markers, and tape.
- Cut a zigzag shell opening in one paper plate or sheet.
- Attach it to a second plate with paper fasteners so it can open and close.
- Cut out a paper chick and place it behind the opening.
- Add eyes and a beak, then line up several hatching displays.
Use large drawn features rather than beads or pompoms. Keep the adult in charge of scissors and fasteners. See Country Living’s paper-plate Easter crafts.
Wreaths and door décor
For an exposed outdoor door, paper, tissue, untreated cardboard, candy, and fresh floral foam may fail in rain or wind. These ideas are safest on an indoor door or covered porch unless you replace fragile parts with sealed, weather-resistant materials and secure the finished piece to a load-rated hook.
23. Mossy nest wreath
Supplies: Wreath form, ribbon, shallow tart tins or small nest shapes, decorative moss, faux eggs, and craft adhesive or low-temperature glue.
Quick wins for a faster PC:
Clear out junk files and repair common Windows errorsFree Scan →Fix the driver behind crashes, sound loss and screen glitchesFind Drivers →Repair Windows errors before they cause bigger problemsFix Now →- Wrap the wreath form with ribbon.
- Attach the shallow tins or nest shapes at one side.
- Fill them with decorative moss.
- Add faux eggs and secure the arrangement.
- Let adhesive set before hanging.
Use paper shred or raffia in place of synthetic moss. The nest-wreath concept is included in Country Living’s Easter wreath guide.
24. Plastic-egg wreath
Supplies: Plastic eggs, foam, grapevine, or cardboard ring, ribbon or reusable ties, and optional glue.
- Arrange the eggs around the ring before attaching them.
- Tie them to the form with ribbon, cord, or reusable cable ties.
- Use glue only for gaps that will not hold with ties.
- Add one large bow or a few paper leaves.
- Test the weight before hanging.
Removable ties preserve the eggs for next year better than permanent glue. The plastic-egg wreath is one of the reuse ideas at Our Daily Craft.
Crashes, No Sound, or Screen Glitches?
Random freezes, missing sound and display glitches usually trace back to one bad driver. Find and replace yours safely.Free scan · under a minuteWindows Errors? Fix Them Before They Spread
Repair common Windows errors and clear accumulated junk for a smoother, more stable PC - no reinstall needed.Free scan · no reinstall25. Scrap-fabric wreath
Supplies: Wreath form, fabric scraps, scissors, ribbon, and optional paper or felt eggs.
- Cut or tear fabric into consistent strips.
- Tie the strips around the form.
- Concentrate the fabric in one section if you want a lighter, less bulky wreath.
- Add a bow or a few large eggs.
Use old shirts or pillowcases for a plastic-free, low-cost version. Choose tightly tied fabric for an indoor door and protect it from rain. Find the related concept at Country Living.
26. Tulip wreath
Supplies: Wreath form, faux tulips or other artificial blooms, ribbon, and floral wire or ties.
- Arrange the faux flowers before attaching them.
- Push stems into the wreath form or secure them with ties.
- Cluster most of the flowers on one side for a relaxed shape.
- Finish with ribbon and trim any visible wire.
Faux flowers avoid watering and can stay on the door beyond Easter. For a more natural palette, use cream, green, and one muted flower color. See Country Living’s wreath ideas.
27. Watering-can wreath
Supplies: Lightweight watering can, sturdy hanging ribbon or hook, faux flowers, and optional floral foam.
Do these 3 things before closing this tab:
1Fix the driver behind crashes, sound loss and screen glitches2Clear out junk files and repair common Windows errors3Scan for outdated or missing drivers - takes under a minute- Check that the watering can is light enough for the door hook.
- Hang it from the handle before filling it.
- Arrange faux flowers inside the opening.
- Secure the stems if the display is exposed to wind.
For fresh flowers, use a sealed, leak-resistant inner container and protect the door from water. A lightweight can is safer than a full metal container. The idea appears in Country Living’s Easter wreath roundup.
28. Pool-noodle bunny wreath
Supplies: Pool noodle, wire or pipe cleaners, ribbon, faux flowers, tape, and optional hot glue.
- Form one section of noodle into a circular bunny head.
- Shape ears from additional noodle sections supported by wire.
- Join the pieces with tape, covered wire, or adhesive.
- Hide joins with ribbon or flowers.
- Secure the finished wreath to a sturdy hook.
Adults should handle wire, cutting, and hot glue. A low-temperature glue gun reduces burn risk but still requires supervision. The current bunny-wreath trend is covered by Good Housekeeping.
What’s actually slowing this PC down?
Pick the symptom - the matching free tool is one click away.
29. Bunny-ear yarn wreath
Supplies: Wreath form, yarn, cardboard, foam, or covered wire for ears, scissors, and ties or glue.
- Wrap yarn around the wreath form, keeping the strands close together.
- Cut two ear shapes from cardboard or foam.
- Cover the ears with yarn and attach them to the form.
- Add a contrasting inner-ear piece or ribbon.
Use cardboard ears and ribbon ties if you cannot use hot glue. The yarn-wreath idea is represented by Parade.
Rank #4

- EASTER FOAM STICKERS SET : You will get 12 pieces of foam Easter wreath with 225 glitter foam Easter stickers, 200 assorted Easter foam crafts stickers, a roll of 15ft of pink ribbon. Enough quantity and beautifully matched to meet your various Easter crafting and classroom home activity art project gift.
- DIY EASTER CRAFT KITS : These round Easter craft foam wreath bases are 4 colors, Easter foam crafts stickers set featuring hatching chick, Easter eggs, bunny, carrots, flowers and butterflies, which full of spring colors, perfect for classroom home activity art project gift.
- QUALITY MATERIAL: Foam Easter egg ornaments are made of soft EVA foam and Easter egg bunny foam stickers come with adhesive backs to make Easter project simple. Just peel Easter eggs bunny chick foam stickers to stick on the wreath, and hanging on the wall, front door, windows and other place to add strong atmosphere to your home.
- SUITABLE SIZE : Easter foam shapes stickers set craft kits include all Easter craft supplies you need, Foam Easter wreath base is 6.3 inch in diameter, Easter eggs rabbits foam stickers approx. 1 to 3 inch, suitable for you to create you own Easter foam wreath signs craft.
- IDEAL EASTER FAVOR : Easter foam crafts are perfect for Easter Day party, Easter classroom activities, family projects, daycare and other spring gatherings, these self-adhesive egg rabbit bunny foam stickers also can be used for Easter basket stuffers, Easter party favors, envelopes, scrapbooks, etc.
30. Egg-tray door wreath
Supplies: A sturdy deviled-egg tray or shallow tray, paint or markers, ribbon, adhesive, and small craft eggs or paper accents.
- Clean and dry the tray.
- Paint or color it, or leave it plain for a vintage look.
- Add ribbon and a few paper or faux accents.
- Attach hanging cord through a strong point.
- Confirm that the tray and decorations are not too heavy for the hook.
Keep this indoors unless the tray is weather-resistant. Do not use a food-contact tray after applying craft paint or glue. The tray-wreath concept is listed by Country Living.
31. Basket wreath
Supplies: Shallow woven basket, strong ribbon or hook, paper or faux flowers, and optional sealed inner container.
Free tools Windows power users keep installed
One-click scans. No signup required.
- Test the basket and handle for strength.
- Hang the empty basket and check its balance.
- Fill it with paper or faux flowers.
- Secure the contents so wind cannot scatter them.
If using fresh flowers, put the water in a sealed inner container and check frequently for leaks. Avoid a heavy, water-filled basket on a lightweight door. See Country Living’s wreath source.
32. Embroidery-hoop floral wreath
Supplies: Embroidery hoop, fabric or ribbon, small faux flower arrangement, floral wire or ties, and ribbon.
- Stretch fabric through the hoop or wrap the hoop in ribbon.
- Arrange a small cluster of flowers on one side.
- Secure the stems with floral wire or ties.
- Add a hanging ribbon and trim anything sharp.
The compact scale works well in a rental or small apartment. Do not attach heavy wet flowers to a lightweight hoop. The small floral wreath idea appears at Country Living.
Egg trees, centerpieces, and mantel displays
33. Branch egg tree
Supplies: Branches, vase or tea tin, floral foam, stones or other stabilizer, lightweight decorative eggs, and ribbon.
- Place branches in a vase, tea tin, or sturdy container.
- Stabilize them with floral foam, stones, or another suitable filler.
- Tie ribbon to lightweight eggs.
- Hang the eggs at varied heights.
- Set the tree on a stable tray away from doorways and high-traffic areas.
For an inexpensive natural version, use fallen branches and paper eggs. Egg trees are often described in lifestyle coverage as connected with German and Swedish decorating traditions; present that as cultural context rather than a universal origin story. See Country Living’s Easter tree guide.
34. Foam-cone egg tree
Supplies: Foam cone, decorative eggs, moss or paper shred, ribbon, and low-temperature glue or suitable craft adhesive.
- Arrange the eggs around the cone before gluing.
- Attach them from the bottom upward.
- Fill obvious gaps with moss, paper shred, or ribbon.
- Let adhesive cool or cure before moving the tree.
- Place it on a stable tray.
Use paper eggs and removable double-sided tabs if you want to reuse the cone. Keep hot glue with an adult. This egg-tree treatment is highlighted by Good Housekeeping.
35. Pom-pom egg tree
Supplies: Branches, vase, yarn eggs or yarn-wrapped egg shapes, ribbon, and stabilizing filler.
Recommended Free Tools
- Place branches in a stable container.
- Make or gather yarn eggs in solid, striped, or dotted patterns.
- Tie ribbon or yarn loops to the eggs.
- Hang them on the branches.
Use large yarn eggs rather than tiny pom-poms around young children. The branch-tree concept is included in Country Living’s Easter tree ideas.
36. Egg nest display
Supplies: Raffia, moss, paper shred, or clean twigs; a bowl, basket, cake stand, or tray; and decorative eggs.
- Coil or layer the nest material into a shallow shape.
- Place it in the chosen vessel.
- Add decorative eggs in a loose cluster.
- Set the display away from the edge of the table.
Use kraft-paper shred or fabric strips for a plastic-free substitute. Do not use a nest made from loose twigs where sharp ends can catch hands. The nest display is featured in Martha Stewart’s Easter décor ideas.
Recommended Free Tools
37. Mini egg topiary
Supplies: Foam ball or preserved-moss form, small faux eggs, greenery, small pot, and floral picks, ties, or adhesive.
- Place the foam ball or moss form in the pot.
- Arrange greenery and eggs before attaching them.
- Use floral picks or removable ties for a reusable version.
- Fill visible gaps and stabilize the pot on a tray.
Replace glued eggs with removable picks whenever possible. Keep tiny eggs away from unsupervised children and pets. The topiary concept comes from Country Living.
38. Bunny planter or flowerpot rabbit
Do these 3 things before closing this tab:
1Fix the driver behind crashes, sound loss and screen glitches2Repair Windows errors before they cause bigger problems3Scan for outdated or missing drivers - takes under a minuteSupplies: Flowerpot, cardstock or foam ears, paint or markers, tape or adhesive, ribbon, and faux flowers, wrapped candy, or a small plant.
- Clean and dry the pot.
- Add ears, eyes, whiskers, and a bow with paper, paint, or markers.
- Let wet paint dry before filling it.
- Use it for faux flowers, wrapped candy, or a plant.
Use a paper sleeve around a plain jar if you rent and do not want a permanent painted pot. Keep small facial pieces attached firmly. A flowerpot rabbit appears in Parade’s budget Easter ideas.
39. Flocked-bunny makeover
Supplies: Plain bunny figurine, ribbon, paper flowers, faux flowers, fabric scraps, and removable adhesive or ties.
- Choose one plain bunny as the focal point.
- Add a ribbon bow, paper flower crown, or small fabric accessory.
- Secure the accessory without permanently damaging the figurine.
- Place it beside a branch, jar, or nest display.
For a less sugary look, use linen ribbon, dried-looking faux foliage, or a monochrome bow. Flocked-bunny styling is one of the current directions noted by Good Housekeeping.
40. Oversized egg vase
Best Value

- Easter Crafts for Kids: Package includes 10pcs wooden Easter bunny cutouts (size 6.2 inches x 5.2 inches), wood bunny feet slices, 12 colors paints, 2 brushes, a pack of googly eyes stickers, and a rhinestone sticker. Wooden Easter crafts kit meet your kid's creative needs
- Easter Bunny Decor: Easter wooden cutouts are designed in bunny shape, super cute and adorable. Comes with small wooden pieces to help the bunny stand up to display after painting. Your kids will have fun creating, to make eye-catching Easter bunny decorations
- Creative Easter Gifts for Kids 4-8 8-12: Easter bunny craft kit is a great gift for Easter, kids birthday party, Easter activities, crafts classroom, which can bring a happy and warm festival atmosphere for your kids, family and friends, creating more fun for your holiday
- DIY Easter Arts and Crafts: Design your own Easter wood bunny and create unique Easter decor with any color of paints and diamond stickers you like. Arts and crafts supplies kit can be used as Easter crafts, spring crafts, Easter basket stuffers, spring home decorations, holiday party favors and Easter table centerpieces
- Quality Material: Unfinished wood bunny slices are made of premium quality natural wood, safely, not easy to break or deform, both sides and edges with nice polished process, no harm to the skins. Great for painting, dyeing, writing, designing, decorating
Supplies: Large decorative egg, paper-mâché shell, or hollow vessel; waterproof inner container; flowers or greenery; and filler for stability.
- Put a sealed glass, plastic, or metal container inside the hollow egg.
- Stabilize the inner container with filler so it cannot tip.
- Add water only to the inner container, never directly into an unsealed paper-mâché shell.
- Arrange flowers or use faux stems for a dry display.
Test the waterproofing before placing the piece on furniture. Do not put craft paint or glue where it can contact food. The oversized egg-vessel idea is included in Martha Stewart’s Easter décor collection.
41. Egg candleholders
Supplies: Wooden or purpose-made egg-shaped candleholders, battery-operated candles, and a stable tray.
- Check each holder for cracks and wobbling.
- Place flameless candles in the holders.
- Arrange them on a stable, nonflammable tray.
- Keep paper, moss, ribbon, flowers, children, and pets away from any heat source.
If you use a real flame, keep the candle at least 12 inches from anything that can burn, keep it stable and attended, and extinguish it when leaving the room or going to bed. The U.S. Fire Administration and NFPA provide candle-safety guidance. For this project, flameless candles are the better choice.
Decorative eggs
42. Button eggs
Supplies: Wooden, plastic, or papier-mâché eggs, buttons, paint or markers, and craft glue.
- Color the craft eggs or leave the surface natural.
- Plan button bands, clusters, dots, or full coverage.
- Attach the buttons with craft glue.
- Let the eggs dry before placing them in a bowl or hanging them.
Do not use wet hard-boiled eggs for this project if you need them ready today. Keep buttons away from children under three. The button-egg idea is included in Country Living’s DIY Easter decorations.
43. Decoupage eggs
Supplies: Papier-mâché or wooden eggs, patterned napkins, wrapping paper, wallpaper scraps, or botanical paper; scissors; decoupage medium; and a brush.
What’s actually slowing this PC down?
Pick the symptom - the matching free tool is one click away.
- Cut or tear paper motifs into manageable pieces.
- Brush a thin layer of decoupage medium onto the craft egg.
- Lay on the paper and smooth from the center outward.
- Add a thin top coat and let the egg dry fully.
Use small pieces to avoid wrinkles and keep the surface light. For a painting-focused variation, paint the egg one solid color first, then add a single paper botanical motif. The vintage decoupage approach is shown by Country Living.
44. Natural botanical-dyed eggs
Supplies: Hard-cooked eggs, dye materials such as beets, onion skins, red cabbage, turmeric, coffee, or berries; saucepan; water; strainer; white vinegar; rack or paper towel; and a refrigerator.
- Add the dye material to water in a saucepan, bring it to a boil, then simmer for 15–60 minutes depending on the desired strength.
- Strain the liquid and add about 1 tablespoon of white vinegar.
- Submerge the hard-cooked eggs until the color develops.
- Dry them on a clean rack or paper towel.
- Refrigerate within two hours if they will be eaten.
Expect muted, uneven botanical colors rather than bright commercial pastels. Use food-grade ingredients and clean equipment for edible eggs. Follow the tested method from University of Illinois Extension; the American Egg Board also provides food-egg dyeing guidance.
Free tools Windows power users keep installed
One-click scans. No signup required.
45. Radish eggs
Supplies: Decorative eggs, pink paint or dye, paper or twine roots, green crepe paper, scissors, and glue or tape.
- Paint or color part of the egg pink, or start with a pink craft egg.
- Cut narrow paper or twine roots.
- Cut green crepe-paper leaves and fold them slightly for shape.
- Attach the roots and leaves to the narrow end.
- Arrange the radish eggs in a basket or shallow bowl.
Use wooden or papier-mâché eggs rather than food eggs. This garden-inspired alternative is based on the radish-egg project at Country Living.
How to adapt the ideas to your supplies, home, and style
No craft supplies? Start with the kitchen and recycling bin
Paper plates, printer paper, cardboard packaging, grocery bags, jars, glasses, kitchen twine, napkins, branches, egg cartons, coffee filters, markers, and crayons can produce the paper wreaths, garlands, place cards, jars, egg trees, and flowers above. The paper-plate, egg-carton, branch, and napkin projects are especially useful when shops are closed or you are decorating at the last minute.
The Tool Desk
Outbyte Driver Updater FREEScan for outdated or missing drivers - takes under a minuteDriver Scan →Outbyte PC Repair FREEClear out junk files and repair common Windows errorsFree Scan →Cannot use hot glue?
Use double-sided tape for lightweight paper, clothespins or binder clips for garlands, ribbon ties for wreath accents, paper fasteners for moving paper plates, and removable adhesive hooks or strips appropriate for the surface and load. Craft glue is not an instant replacement: it may need drying or curing, so label the project as “start today; finish after drying.”
Want plastic-free Easter décor?
- Replace plastic eggs with paper, papier-mâché, wooden, or cardboard eggs.
- Use a cardboard ring instead of a foam wreath form.
- Choose twigs, raffia, and paper shred instead of synthetic moss.
- Use fabric scraps or felt instead of plastic ribbon.
- Make paper flowers instead of buying faux flowers.
These substitutions make a project lower-plastic, but do not call it fully zero-waste unless you have also considered the adhesive, coating, trim, packaging, and purchased components.
Want reusable décor?
Choose wooden or papier-mâché eggs, fabric carrots, felt bunting, yarn wreaths, faux flowers, branch trees, paper designs that store flat, and removable ties instead of permanent glue. Avoid describing hard-cooked eggs, candy-filled décor, fresh flowers, or wet floral arrangements as long-term reusable pieces.
Want less pastel, less bunny-themed, or more religiously neutral décor?
Use cream, brown, olive, terracotta, yellow, or deep blue with natural wood and greenery. Swap bunnies for leaves, flowers, birds, radishes, branches, or abstract eggs. A spring bunting that says SPRING rather than EASTER, a botanical-dyed egg bowl, or a branch tree with plain paper eggs can remain seasonal without relying on a particular symbol or pastel palette.
Painting tips for craft eggs and paper décor
- Use acrylic or craft paint on wooden, papier-mâché, and many plastic craft surfaces only after checking the surface and testing a small area.
- Apply thin coats rather than one thick coat when you need a smoother finish.
- Use washable tempera or crayons for supervised children’s paper projects.
- Never use craft paint, decoupage medium, buttons, glue, or unknown coatings on eggs intended to be eaten. Use food-grade dye and food-safe handling instead.
- Paint a single accent color on only one part of a display—such as the inner ear, egg stripe, or pot—to make mismatched household materials look intentional.
Safety checklist before guests arrive
Children and small parts
Beads, buttons, pompoms, detachable bows, tiny plastic eggs, wire, and other loose pieces should not be left with unsupervised children under three. The U.S. Consumer Product Safety Commission treats small parts as a choking and aspiration concern in children’s products. An adult should handle sharp scissors, craft knives, hot glue, wire, and paper fasteners.
Candles and heat
Battery-operated candles are the best choice around paper, moss, fabric, flowers, children, and pets. If you use a lit candle, place it in a stable holder at least 12 inches from anything that can burn, never leave it unattended, and extinguish it before leaving the room or going to bed. Follow the U.S. Fire Administration and NFPA guidance.
Cats and Easter flowers
Easter lilies are toxic to cats. The ASPCA warns that exposure can cause vomiting, lethargy, kidney failure, and death. Do not bring Easter lilies indoors, including mixed bouquets that may contain lilies or shed pollen. For any other plant, check the exact species with a reliable veterinary or poison-control source rather than assuming all spring flowers are safe. Paper flowers, branches without lilies, and flameless candles are simpler choices in a cat household.
Outdoor displays
Wind can lift paper and lightweight plastic; rain can destroy tissue, paper, and untreated cardboard; sun can fade dyes; water can damage doors; candy can attract insects and animals; and a heavy wreath can exceed the capacity of a hook. Use waterproof or sealed materials, faux flowers, secure ties, a covered porch, and a stable load-rated hanger. A project that works on a covered porch may not be suitable for exposed weather.
Windows Errors? Fix Them Before They Spread
Repair common Windows errors and clear accumulated junk for a smoother, more stable PC - no reinstall needed.Free scan · no reinstallOutdated Drivers Are Slowing You Down
One free scan finds every outdated or missing driver and matches the right update for your exact hardware.Free scan · exact hardware matchFood-safe eggs, craft eggs, and blown eggs: the short version
| Egg type | Use it for | Key rule |
|---|---|---|
| Hard-cooked | Eating, natural dyeing, food-safe decorating | Use edible dye, refrigerate within two hours, and generally use within seven days. |
| Blown-out raw shell | Paint, decoupage, hanging décor | Handle as a raw-egg project; it is not automatically safe to eat or serve. |
| Plastic | Garlands, wreaths, weights, displays | Craft use only unless the product specifically identifies food-safe use. |
| Wood, papier-mâché, foam, or ceramic | Paint, buttons, decoupage, reusable displays | Keep craft coatings and adhesives away from food. |
Storing reusable decorations after Easter
- Remove candy, fresh greenery, water, and other consumables before packing.
- Let painted, glued, and decoupaged pieces dry completely.
- Wrap fragile eggs individually in tissue or clean paper.
- Store paper garlands flat and wreaths in a box large enough to avoid crushing them.
- Label the box by room or project so next year’s decorating starts with what you already own.
Frequently Asked Questions
Which Easter decorations can I finish in 10 minutes?
Start with bunny napkins, spring-sprig jars, floral place cards, egg-cup bouquets, DIY candy stands, bunny favor bags, paper bunny garlands, plastic-egg garlands, and carrot napkin rings. Use ready-made or already-dry materials; paint, dye, and wet glue add time.
Can decorated Easter eggs still be eaten?
Only if they were decorated with food-grade or edible products and handled as food. Keep hard-cooked eggs refrigerated within two hours and generally use them within seven days. Do not eat eggs that were hidden or left out during a hunt. Craft eggs decorated with paint, glue, buttons, or decoupage should not be eaten.
What can replace a hot-glue gun?
Use double-sided tape for lightweight paper, ribbon ties or reusable cable ties for wreaths, clothespins or binder clips for garlands, and paper fasteners for moving paper parts. Craft glue can work, but it may require drying or curing and is not an instant substitute.
Which Easter flowers are dangerous to cats?
Easter lilies are especially dangerous to cats and can cause kidney failure or death. Do not bring them indoors, including in mixed bouquets. Check the exact species of any other plant before using it in a cat household; paper or verified-safe alternatives are easier choices.
What is the best reusable Easter decoration?
Branch egg trees with lightweight craft eggs, fabric carrot garlands, felt bunting, yarn or scrap-fabric wreaths, faux-flower wreaths, and paper garlands stored flat are strong reusable options. Use removable ties instead of permanent glue where possible.
The Bottom Line
For the biggest visual effect with little construction, make a branch egg tree. For the fastest table change, fold bunny napkins, add spring-sprig jars, or make place cards. For children, choose a paper-plate wreath or hatching-chick display. For next year, choose fabric, yarn, wood, papier-mâché, faux flowers, or paper designs that store flat. In a cat household, skip Easter lilies and use paper flowers, egg garlands, branches, and flameless candles instead.
Quick Recap

Product prices and availability are accurate as of the date/time indicated and are subject to change. Any price and availability information displayed on Amazon at the time of purchase will apply.




