Free tools Windows power users keep installed
One-click scans. No signup required.
The Tool Desk
Outbyte PC Repair FREEClear out junk files and repair common Windows errorsFree Scan →Outbyte Driver Updater FREEFix the driver behind crashes, sound loss and screen glitchesFind Drivers →ThatPainter is reader-supported. When you buy through links on our site, we may earn an affiliate commission. Learn More
For flying geese units that fit together cleanly, focus on three things: use one construction method’s measurements from start to finish, sew consistently, and square each unit before assembly. A standard unit is twice as wide as it is tall: the central triangle is the goose, and the two side triangles are the wings.

As an Amazon Associate I earn from qualifying purchases.
1. Choose a construction method that suits the quilt
Flying geese can be made by piecing triangles, sewing and flipping squares onto a rectangle, or using a four-at-a-time no-waste method. The best choice depends on how many units you need, the fabric’s print direction, and how you prefer to handle diagonal seams.
- Triangle piecing: Sew separately cut goose and wing triangles together. This gives you control over individual pieces, but exposes bias edges earlier in the process.
- Sew-and-flip: Place squares on a rectangle, stitch along marked diagonals, and flip the triangles into position. It makes one unit at a time and keeps bias edges enclosed until after sewing.
- Four-at-a-time: Arrange one large square with four smaller squares to make four units in one setup. It can be efficient for a batch, but the fixed fabric layout may not suit directional prints or fussy-cut motifs.
Annie’s illustrates all three approaches and their workflows: flying-geese construction methods.
#1 Best Overall

- Made in the USA with high quality acrylic and precision measurements ensuring accuracy for your quilting, sewing, patchwork, and crafting projects.
- Creative Grids exclusive non-slip grip allows you to easily slide the ruler over the fabric until positioned correctly. Then, when slight pressure is applied, the grip holds the ruler in place, eliminating slipping while you cut.
- Easy to read markings.
- Cutting instructions for eight different sizes are printed right on the tool along with their finished sizes.
- Comes with fully illustrated step by step instructions for two different methods.
2. Check the cutting formula before cutting a batch
Measurements differ among tutorials, especially when methods include different amounts of oversizing or trimming. Choose one complete pattern or chart and follow its cutting sizes, sewing instructions, and trimming steps together; do not combine formulas from different methods.
For Annie’s published four-at-a-time formula, cut one center square equal to the finished unit width plus 1 1/4 inches, and four wing squares equal to the finished unit height plus 7/8 inch. For four units that finish at 2 × 4 inches, that means one 5 1/4-inch square and four 2 7/8-inch squares. These are instructions for that particular method, not universal flying-geese measurements. See Annie’s full method and measurements.
Rank #2

- 8-in-1 Versatility: Effortlessly create eight different finished sizes ranging from 1/2 * 1 inch to 4 * 8 inches. With all cutting requirements printed directly on the ruler, you can skip the math and get straight to sewing.
- Dual-Method Efficiency: Whether you prefer making four units at a time for speed or oversizing your blocks to trim them down to "quilt-show" perfection, our ruler supports both popular construction methods with ease.
- Flat & Stable Cutting Alignment Crafted from premium, heavy-duty acrylic that sits perfectly flat on your cutting mat. The rigid profile provides a steady, even edge to guide your rotary cutter or shears, ensuring a uniform and secure press over your fabric layers for highly accurate cutting.
- Crystal Clear Markings: Engineered with high-contrast, easy-to-read guidelines. The specialized markings are clearly labeled for different sizes, making it simple for both beginners and pro quilters to align their fabric perfectly every time.
- Durable & Compact Design: Measuring 8.5 * 8.5 inches, this ruler is crafted from high-quality, heavy-duty acrylic. It’s the perfect size for your cutting mat and built to withstand years of rotary cutting without losing its edge or clarity.
3. Mark the diagonal and sew consistently
For the four-at-a-time method, mark the diagonal guides on the smaller squares. Align the pieces right sides together as the instructions show, then sew on both sides of each marked line. After sewing, cut on the line to separate the units.
What’s actually slowing this PC down?
Pick the symptom - the matching free tool is one click away.
Seam placement varies by tutorial: AQS specifies stitching 1/4 inch from the marked line, while National Quilters Circle uses a scant 1/4 inch in its precision workflow. Use the allowance specified by your chosen method, and sew a sample if you are unsure how your seam allowance affects the finished size.
Follow the steps in one workflow rather than borrowing a seam allowance from one tutorial and trimming instructions from another: AQS flying-geese tutorial and National Quilters Circle’s precision workflow.
4. Keep the fabric stable while piecing
Match the pieces carefully, with right sides together, and pin or secure them if that helps prevent shifting. Press toward the small triangles when the selected instructions call for it. Handle diagonal edges gently: stretching them can make accurate alignment more difficult.
Rank #4

- The product includes: You will receive one Flying Goose patchwork ruler. No need to manually calculate the fabric size for each Flying Goose patch; Simply align the ruler with the markings to cut, significantly reducing the difficulty for beginners and improving patchwork efficiency
- Multi-size Compatibility: Covering a size range from 1.5 inches to 10.5 inches, it accurately matches different sizes of Flying Goose patchwork pieces, accommodating the size requirements of various patchwork projects such as quilts and cushions
- Reliable Material: Made of acrylic material, the laser-engraved markings are clear, wear-resistant, and have smooth, burr-free edges. It offers high measurement and cutting accuracy and is not easily deformed or broken, suitable for long-term use. Ensuring the accuracy of your quilting, sewing, patchwork, and handicraft projects
- Multi-functional Compatibility: In addition to the core Flying Goose patchwork, the markings can also help mark commonly used 1/4-inch and 1/2-inch seam allowances in patchwork, suitable for handicrafts. Suitable for DIY, sewing, and other fabric craft creations
- A sewing helper: This product makes quilting a flying goose pattern a breeze. Highly recommended for all sewing enthusiasts. Whether you're a beginner or an experienced quilter, you can easily get started
Triangle piecing exposes bias edges earlier than sew-and-flip or four-at-a-time construction. In those two methods, the bias edges remain enclosed until after the stitching, which can make the early handling steps less demanding. The construction comparison is described in Annie’s method guide.
5. Trim using the peak and seams as guides
Trimming is easier when the peak and diagonal seams stay in consistent positions. A flying-geese ruler can use those features as alignment references. National Quilters Circle demonstrates trimming two sides, turning the unit, aligning it again, and trimming the remaining sides: see its ruler-based trimming sequence.
Best Value
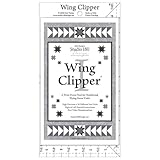
- Perfect Flying Geese—Every Time – Use the Fast Flying Geese technique to make four accurate units from just five squares, then trim to perfection with the Wing Clipper ruler. Item # DT07, Ruler Size 5 ½ x 10 ½
- Trim for Precision & Seam Accuracy – Each unit is sewn slightly oversized and trimmed after pressing, ensuring perfect size and ideal seam placement—no more wonky points.
- 10 Finished Unit Sizes Included – Create Flying Geese from ½” x 1” up to 5” x 10”, with heights finishing in half-inch or whole-inch increments.
- Easy to Use for All Quilters – Features fine, easy-to-read lines, illustrated step-by-step instructions, and trimming guides for both right- and left-handed quilters.
- Learn Visually with Free Videos – Includes free online video tutorials covering construction and trim-down techniques, plus access to companion patterns for even more design options.
A specialty ruler is optional. With a standard acrylic ruler, use the unfinished dimensions required by your pattern and check that the peak remains consistently positioned. For stitch-and-flip units, American Patchwork & Quilting describes placing the ruler a quarter inch from the sewn lines when trimming: read the stitch-and-flip trimming instructions.
If you make flying geese often, Creative Grids lists its Ultimate Flying Geese Tool (CGRDH4) with eight sizes printed on the tool and illustrated instructions for two methods. Those are manufacturer-listed features, not a requirement for making accurate units: Creative Grids Ultimate Flying Geese Tool.
6. Square each unit before joining it to the quilt
Before assembly, compare every unit with the pattern’s required unfinished width and height. Check that the peak is centered and that the sides are square. Trimming each piece individually makes size differences visible while there is still time to correct them, rather than carrying those differences into a block or border.
PC Slower Than It Used to Be?
A free scan shows the junk files, broken settings and background clutter dragging Windows down - then fixes them in one click.Free scan · Windows 10 & 11Outdated Drivers Are Slowing You Down
One free scan finds every outdated or missing driver and matches the right update for your exact hardware.Free scan · exact hardware matchFor a large batch, you can line units up carefully along a cutting-mat guide and trim multiple pieces, as shown in AllPeopleQuilt’s flying-geese instructions. Keep the ruler and units aligned as you work so the same unfinished dimensions and point placement are maintained throughout.
Quick Recap

Product prices and availability are accurate as of the date/time indicated and are subject to change. Any price and availability information displayed on Amazon at the time of purchase will apply.




