Windows Errors? Fix Them Before They Spread
Outbyte PC Repair · freeRepair common Windows errors and clear accumulated junk for a smoother, more stable PC - no reinstall needed.
Fix My PC Now →ThatPainter is reader-supported. When you buy through links on our site, we may earn an affiliate commission. Learn More
To make flowers out of paper, choose one of four methods: shape individual crepe-paper petals for realism, wrap a fringed crepe strip for speed, accordion-fold 10–12 tissue-paper sheets for a fluffy pom-pom, or roll cardstock for a sturdy sculptural bloom. All four methods can be made by hand; a Cricut is optional.
The right method depends on the result you want. Crepe paper responds to stretching and shaping, tissue paper creates volume with layers, and cardstock holds a firm graphic form. The instructions below cover materials, hand-cut steps, optional machine use, video-friendly shaping techniques, and common repairs.
Key takeaways
- Individual-petal crepe paper makes the most shaped and realistic flowers, but each petal must be cupped, curled, and attached separately.
- Continuous or fringed crepe paper creates repeated petals quickly and is easier than building a bloom one petal at a time.
- Layered tissue paper is the easiest choice for large, fluffy pom-pom flowers used in parties, classrooms, garlands, and backdrops.
- Rolled cardstock makes sturdy, graphic flowers by hand; a Cricut or other cutting machine is optional, not required.
- A crepe paper flower making kit can simplify material sourcing, but individual supplies work just as well when you already own scissors, wire, and tape.
Which paper flower method should you choose?
The best method depends on whether you value realism, speed, softness, or durability. Choose individual-petal crepe paper for a shaped bouquet, fringed crepe paper for quick layered blooms, tissue paper for fluffy hanging decorations, and cardstock for firm flowers used on cards, walls, or in shadow boxes.
Quick wins for a faster PC:
Repair Windows errors before they cause bigger problemsFix Now →Fix the driver behind crashes, sound loss and screen glitchesFind Drivers →| Method | Best paper | Difficulty | Appearance | Main tools | Best for |
|---|---|---|---|---|---|
| Individual-petal crepe | Crepe paper | Medium | Shaped and realistic | Scissors, floral wire, floral tape; pencil optional | Bouquets, realistic décor, gifts |
| Continuous or fringed crepe | Crepe paper | Easy to medium | Full and layered | Scissors, floral wire, floral tape; round tool optional | Quick blooms and repeated flowers |
| Tissue-paper pom-pom | Tissue paper | Easy | Soft, fluffy, and voluminous | Tissue paper, chenille stem or wire, scissors | Party décor, garlands, classroom crafts |
| Rolled or machine-cut cardstock | Medium-weight cardstock | Easy by hand; medium with a machine | Sturdy, graphic, and sculptural | Scissors or cutting machine, glue; quilling or scoring tool optional | Wall art, cards, shadow boxes, durable décor |
A paper flower does not need a cutting machine. Lia Griffith states, “You do not need a Cricut or any cutting machine,” and describes a machine as “a nice-to-have, never a must.” Lia Griffith’s beginner paper-flower roundup also includes step-by-step video workshops and identifies the paper used in each tutorial.
#1 Best Overall
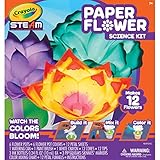
- DIY PAPER FLOWERS CRAFT KIT: This science kit features everything needed to make 12 Wicking Paper Flowers, as well as a guide with step-by-step instructions.
- CRAYOLA STEAM KITS: Hands-on learning experiences that allow kids to be creative are fun and educational
- GIFT FOR KIDS: The magic of these color changing flowers is something beautiful to behold This craft kit makes a great gift for girls and boys on birthdays, holidays, and more.
- EDUCATIONAL TOY: Crayola STEAM kits are perfect for educational play and at home learning
- SAFE AND NONTOXIC: Ideal for kids, ages 7 and up
What supplies do you need to make paper flowers?
Start with the supplies required by the method rather than buying every possible craft tool. Crepe-paper flowers generally need crepe paper, sharp scissors, floral wire, and floral tape. Tissue pom-poms need tissue paper, a chenille stem or wire, and scissors. Rolled cardstock flowers need medium-weight cardstock, scissors, and glue.
- Crepe paper: Best when petals need to be cupped, curled, stretched, or pleated.
- Tissue paper: Best for lightweight, fluffy flowers made from multiple accordion-folded layers.
- Medium-weight cardstock: Best for firm, graphic shapes that must hold their form.
- Floral wire: Use it when the flower needs a stem.
- Floral tape: Use it to bind the center, petal bases, and stem. Stretching the tape slightly helps it grip the wire and paper.
- Scissors: Sharp scissors make cleaner petal edges and reduce tearing. Fringe scissors are optional for repeated cuts.
- Pencil or round tool: Use a pencil to curl crepe-paper edges or another straight, rounded tool to shape cardstock.
- Glue: Craft glue or hot glue secures rolled cardstock; hot glue is especially useful when the base must set quickly.
- Chenille stem or string: A chenille stem ties the center of a tissue flower; string is useful when the finished flower will hang.
If you are starting from nothing, a crepe paper flower making kit or a coordinated set of crepe paper, floral wire, floral tape, and templates can reduce the guesswork. Use a kit as a sourcing shortcut, not as a requirement, and check its actual contents before buying because brands and bundles vary.
How do you make an individual-petal crepe-paper flower?
Make an individual-petal crepe-paper flower by shaping and attaching petals one at a time around a wired center. The method takes longer than the other crepe technique, but it gives you the greatest control over petal size, curve, spacing, and realism. Martha Stewart defines this approach simply: “The single-petal method, as its name implies, is used to build a flower petal by petal.” Martha Stewart’s crepe-paper flower tutorial demonstrates the construction.
Free tools Windows power users keep installed
One-click scans. No signup required.
Materials
- Crepe paper for petals and leaves
- Floral wire
- Floral tape
- Sharp scissors
- A pencil for curling edges, if desired
- A stamen material or small paper center, if desired
Steps
- Prepare the center. Attach a paper center or stamen to the end of floral wire.
- Cut the petals. Cut the required petal and leaf shapes. When a template specifies a direction, keep the crepe-paper grain or ridges aligned with the length of the petal.
- Cup each petal. Place your thumbs near the center of a petal and gently stretch the paper. Cupping opens the ridges and creates a concave shape that can hold the flower’s center.
- Curl the outer edge. Wrap the edge around a pencil for a soft, rounded profile. Cupping changes the overall hollow shape; curling changes the rim, so the two motions are not interchangeable.
- Pleat or pinch the base. Narrow the bottom of a petal when the flower needs a tighter attachment point. Pleating adds controlled folds rather than a general curve.
- Attach the first petals. Stretch floral tape slightly and wrap it around the stamen. Place a petal against the center and tape across its base.
- Build the bloom. Add petals one at a time around the center, overlapping or spacing them according to the flower shape you want.
- Finish the stem. Continue wrapping floral tape down the wire and add leaves where desired.
The key shaping motion is gentle stretching, not forceful folding. A close-up video should show the paper changing from a flat cutout into a cupped petal so beginners can see how little pressure is needed.
How do you make a continuous or fringed crepe-paper flower?
Make a continuous or fringed crepe-paper flower by cutting repeated petals along one long strip, wrapping the strip around a center, and shaping the petals after attachment. The technique is faster because several petals are connected and secured at once.
Materials and steps
- Cut a strip. Cut a long strip of crepe paper and fringe or scallop one edge into repeated petal shapes.
- Add dimension. Gently stretch the strip or curl the petal edges with a pencil or another round tool.
- Wrap the center. Place the uncut edge against a prepared stamen or floral-wire center and wind the strip around it, keeping the petal bases aligned.
- Secure the strip. Wrap floral tape around the base of the strip.
- Fan the petals. Spread and shape the attached petals so the flower does not look like a tightly wound coil.
- Finish the stem. Wrap floral tape down the wire and add leaves if you want a stemmed flower.
A related Paper Mart video-supported construction uses separate teardrop and heart-shaped petals rather than one fringed strip. The 2025 tutorial specifies 4 teardrop petals and 6 heart-shaped petals, with both petal types approximately 7–8 inches tall; the teardrops are approximately 3 inches wide and the hearts approximately 7 inches wide. Paper Mart’s 2025 crepe-paper flower tutorial shows the cupping, pencil-curling, wiring, and outer-petal attachment sequence.
Rank #2

- Complete Craft Kit – Includes flower petals, stems, dye tablets, droppers, and instructions to create vibrant paper flowers for fun science and art
- STEM Learning Fun – Kids discover capillary action and color mixing while designing unique blossoms, blending hands-on science with creative arts and crafts
- Safe Materials – Child-safe, BPA-free components with dyes ensure a safe, mess-free play experience for young scientists and little creators
- Boost Creativity – Encourages fine motor skills, color recognition, and imaginative fun. A screen-free activity that strengthens family bonding while making crafts together
- Unique Handmade Gift – Each flower becomes a one-of-a-kind creation children can proudly give to friends or family, a heartfelt gift that celebrates creativity
For a full bloom using a continuous strip, keep the strip’s lower edge snug against the center while wrapping. If the base wanders up or down, the flower will have uneven petal heights and may loosen when you try to fan it.
PC Slower Than It Used to Be?
A free scan shows the junk files, broken settings and background clutter dragging Windows down - then fixes them in one click.Free scan · Windows 10 & 11Crashes, No Sound, or Screen Glitches?
Random freezes, missing sound and display glitches usually trace back to one bad driver. Find and replace yours safely.Free scan · under a minuteHow do you make paper flowers with tissue paper?
Make tissue-paper flowers by stacking approximately 10–12 sheets, accordion-folding the stack, tying the center, rounding the ends, and separating the layers one at a time. The result is a large, soft pom-pom flower rather than a botanically detailed bloom. JOANN’s tissue-paper project instructions use this layered accordion-fold approach; the accessed page does not display a publication year.
Materials
- Approximately 10–12 sheets of tissue paper
- A chenille stem, floral wire, or string
- Scissors
- Optional glue, wire, or string for hanging or mounting
Steps
- Stack the sheets. Align approximately 10–12 sheets of tissue paper into one neat pile.
- Accordion-fold the pile. Fold the stack back and forth across its width until you have one compact fan.
- Tie the center. Wrap a chenille stem or wire around the middle and twist it closed. Use string instead if the flower will hang.
- Shape the ends. Trim both ends into rounded or pointed petal profiles. Rounded ends create a softer pom-pom; pointed ends create a sharper silhouette.
- Separate the layers. Carefully pull one tissue layer toward the center, then repeat on the opposite side. Continue gradually until the flower is open.
- Fluff the bloom. Adjust both sides until the layers form a balanced, full shape.
- Mount the flower. Use string to hang it, or attach a stem if you want it in a bouquet.
Tissue paper is forgiving and fast, which makes this the strongest choice for a party backdrop, classroom project, garland, or large arrangement. Tissue paper is less suitable when you want individually shaped petals or a realistic flower profile.
How do you make a rolled cardstock flower without a Cricut?
Make a rolled cardstock flower without a Cricut by drawing or printing a spiral template on medium-weight cardstock, cutting along the spiral, rolling from the outside inward, and gluing the base. Hand-cutting is a complete method, not merely a backup plan; a machine mainly improves repeatability and helps with intricate patterns or large batches.
Hand-cut steps
- Prepare a spiral. Draw or print a spiral flower template on cardstock.
- Cut the shape. Cut carefully along the spiral line, keeping the strip continuous.
- Roll the flower. Begin at the outer edge and roll the strip inward. Roll tightly for a compact bud or more loosely for an open bloom.
- Glue the base. Add glue to the underside or base and hold the roll until the adhesive sets.
- Shape the layers. Curl, spread, or loosen the outer layers to change the flower’s openness.
For a machine-cut variation, Cricut’s official 3D-flower instructions use cardstock, a cutting machine, scoring, a quilling tool, glue, and optional floral wire. Cricut’s 3D flower tutorial explains how to curl the petals with a quilling tool or another straight edge. A separate Cricut cardstock flower project demonstrates a one-cut flower that is rolled and secured with hot glue.
What’s actually slowing this PC down?
Pick the symptom - the matching free tool is one click away.
If you are making only a few flowers, scissors and a template are enough. A cutting machine becomes useful when identical flowers, intricate cuts, scored folds, or a large quantity matter more than minimizing equipment. If you choose machine cutting, Cricut recommends removing excess paper first and peeling the mat backward to help keep cardstock flatter.
Rank #3

- CREATE A BEAUTIFUL FLOWER BOUQUET! This DIY flower bouquet kit lets kids create paper flowers using colorful dyes. A fun blend of science and art, this hands-on activity inspires creativity while making exciting DIY projects at home.
- EVERYTHING INCLUDED FOR 15 FLOWERS! One of the best art kits for kids, this set includes pre-cut flower sheets, stems, cotton dye tubes, dyes, flower centers, gloves, a bouquet display box, and written plus video instructions.
- A CREATIVE GIFT KIDS LOVE! Perfect for birthdays, rainy days, and homeschool fun, this kit doubles as a kids mothers day craft and spring crafts activity. Kids can create colorful paper flowers to display, share, or gift with pride.
- FUN STEAM LEARNING THROUGH COLOR! Explore capillary action and color mixing with exciting science experiments for kids. Designed for girls & boys, this hands-on activity encourages creativity, discovery, and learning through play.
- BUILDS CREATIVITY & CONFIDENCE! Kids strengthen focus, coordination, and creative thinking while designing colorful bouquets. Watching colors blend creates a magical experience that makes crafting, learning, and self-expression more exciting.
What is the difference between crepe paper, tissue paper, and cardstock?
Crepe paper is the most shapeable, tissue paper is the softest and fluffiest, and cardstock is the firmest. The material determines how much the finished flower can be stretched, how well it holds a sculptural edge, and how naturally it fits a bouquet or decorative installation.
| Paper | How it behaves | Choose it when | Limit |
|---|---|---|---|
| Crepe paper | Can be gently stretched, cupped, curled, and pleated | You want shaped petals or a realistic-looking bloom | Overstretching can tear the paper |
| Tissue paper | Folds into many lightweight layers and fluffs into volume | You want quick, inexpensive, soft party décor | It does not provide detailed individual-petal structure |
| Cardstock | Holds firm rolled, folded, and graphic shapes | You want wall art, cards, shadow boxes, or durable décor | It does not stretch into naturally cupped petals like crepe paper |
Paper choices can extend beyond these four methods. Martha Stewart’s paper-flower roundup includes projects using crepe paper, tissue paper, coffee filters, cardstock, and paper bags. The roundup also lists a rose made with 8 coffee filters for one full bloom, according to the page updated in 2025.
How can you fix common paper-flower problems?
Most paper-flower problems come from too much force, insufficient shaping, or an unsecured center. Use the material-specific fix below before rebuilding the flower.
Free tools Windows power users keep installed
One-click scans. No signup required.
| Problem | Likely cause | Fix |
|---|---|---|
| Crepe petals tear | The paper is being pulled too hard or cut with dull scissors | Use sharp scissors and stretch gently near the center instead of pulling forcefully at the edge. |
| The flower looks flat | The petals were attached without shaping | Cup the centers and curl the outer edges before or after attachment. |
| The stem is loose | The tape is not gripping the wire and petal bases | Stretch floral tape slightly as you wrap the center and continue down the stem. |
| The tissue flower is lopsided | Layers were pulled out mostly from one side | Separate layers gradually, alternating sides, then fluff both halves. |
| The cardstock flower unrolls | The base was not held while glue set | Add glue at the base and hold the roll in position until it is secure. |
| Cardstock sticks to the cutting mat | Excess paper is still attached or the mat is being peeled upward | Remove excess paper first and peel the mat backward to keep the cardstock flatter. |
How should you film or follow video steps?
A useful paper-flower video should show the material transformation, not only the finished result. Begin with a materials shot and one finished example of each method, then use an overhead view for cutting and a close-up view for cupping, curling, pleating, tying, rolling, and gluing.
- Open with the comparison: Show the four finished flowers and identify the fastest, fluffiest, most realistic, and most durable options.
- Demonstrate individual-petal crepe: Show cupping, curling, pleating, and floral-tape attachment close to the camera.
- Demonstrate fringed crepe: Show how one strip creates repeated petals and how the strip wraps around the center.
- Demonstrate tissue paper: Show the accordion fold, center tie, end trimming, and layer separation.
- Demonstrate cardstock: Show the hand-cut spiral roll, then briefly show the optional machine-cut and scored variation.
- End with the choice: Display all four flowers side by side and recommend one by project type.
Which paper flower method is best for your project?
Choose the method by the finished object rather than by the tool you happen to own:
- Bouquet or realistic décor: Use individual-petal crepe paper because the petals can be cupped, curled, and spaced individually.
- Fast repeated blooms: Use continuous or fringed crepe paper because one strip creates multiple petals at once.
- Party backdrop, garland, or classroom activity: Use tissue paper because layered accordion folds create large volume quickly.
- Card, wall art, shadow box, or durable decoration: Use rolled cardstock because cardstock holds a firm graphic shape.
- Making flowers without a Cricut: Use scissors and templates for either crepe paper or cardstock. A machine is optional.
- Making many identical or intricate cardstock flowers: Consider a cutting machine, scoring tool, and quilling tool for repeatability and detailed cuts.
The practical recommendation is straightforward: choose crepe paper for realistic shaped petals, tissue paper for quick fluffy décor, cardstock for sturdy rolled or sculptural flowers, and a cutting machine only when repeatability or intricate cutting justifies the extra equipment.
Rank #4

- ✓ COMPLETE 150-PIECE FLOWER ORIGAMI KIT: Experience the ultimate paper folding adventure with our specialized kit. Unlike standard paper origami kits, our set includes 100 sheets of vibrant folding paper, 20 bendable stems, 30 buttons, and jewels to create a full 3D paper bouquet. It’s the all-in-one solution for creative girls crafts and art lovers.
- ✓ SCREEN-FREE HOMESCHOOL & FAMILY FUN: Unplug and unleash creativity with this versatile origami kit for kids ages 8-12. It is the ideal homeschool project, educational after-school art activity, or collaborative family time craft. Providing hours of mindful, creative play, it’s a favorite for boys, girls, and beginners of all ages.
- ✓ BOOST CONFIDENCE WITH EASY STEP-BY-STEP GUIDES: Master the art of the flower origami kit with our detailed, illustrated instruction book. Specifically designed for origami for kids and origami for adults, the easy-to-follow diagrams guide you through creating stunning tulips and lilies. Perfect for building fine motor skills and hand-eye coordination.
- ✓ PREMIUM CRAFT SUPPLIES FOR DIY PROJECTS: Our high-quality, colorful origami paper holds sharp creases without tearing, ensuring your 3D creations last. This set doubles as a girls craft kit and a professional-grade paper flower kit, making it a standout choice among generic kits for its unique floral theme and professional, artistic results.
- ✓ ULTIMATE SUMMER ACTIVITIES & GIFTS: Keep young minds actively engaged all vacation long with hands-on stem projects for kids ages 8-12! This 150-piece bouquet set serves as the perfect boredom-buster for indoor summer activities, backyard camp days, or unique birthday surprises. It is the top-rated choice for parents searching for screen-free summer arts and crafts for kids and rewarding summer crafts for kids ages 8-12 that double as meaningful, personalized gifts that family and loved ones will cherish forever.
Frequently Asked Questions
How do you make easy paper flowers for beginners?
The easiest paper flowers for beginners are layered tissue-paper pom-poms and hand-rolled cardstock flowers. Tissue pom-poms require only tissue paper, scissors, and a chenille stem or wire, while cardstock flowers require a spiral template, scissors, and glue.
How do you make paper flowers without a Cricut?
You can make paper flowers without a Cricut by cutting crepe-paper petals or a cardstock spiral with scissors. A cutting machine is optional and is mainly useful for intricate patterns, scoring, repeatability, or making many flowers.
What paper is best for paper flowers?
Crepe paper is best for realistic paper flowers because crepe paper can be gently stretched, cupped, curled, and pleated. Tissue paper is better for soft, fluffy pom-poms, while cardstock is better for firm graphic or sculptural flowers.
What supplies do you need to make paper flowers?
The basic supplies for paper flowers are paper, sharp scissors, and glue or floral tape. Stemmed crepe-paper flowers also need floral wire and floral tape; tissue pom-poms need a chenille stem, wire, or string; rolled cardstock flowers need medium-weight cardstock and glue.
The Bottom Line
Bottom line: Individual-petal crepe paper gives the most realistic result, fringed crepe paper is faster, tissue paper is easiest for fluffy decorations, and cardstock is best for sturdy graphic flowers. You can make every method by hand; a Cricut is useful for scale and precision but never essential.
Crashes, No Sound, or Screen Glitches?
Random freezes, missing sound and display glitches usually trace back to one bad driver. Find and replace yours safely.Free scan · under a minuteWindows Errors? Fix Them Before They Spread
Repair common Windows errors and clear accumulated junk for a smoother, more stable PC - no reinstall needed.Free scan · no reinstallQuick Recap

Product prices and availability are accurate as of the date/time indicated and are subject to change. Any price and availability information displayed on Amazon at the time of purchase will apply.




