Free tools Windows power users keep installed
One-click scans. No signup required.
PC Slower Than It Used to Be?
A free scan shows the junk files, broken settings and background clutter dragging Windows down - then fixes them in one click.Free scan · Windows 10 & 11Crashes, No Sound, or Screen Glitches?
Random freezes, missing sound and display glitches usually trace back to one bad driver. Find and replace yours safely.Free scan · under a minuteThatPainter is reader-supported. When you buy through links on our site, we may earn an affiliate commission. Learn More
Yes, you can print on glossy photo paper—provided the paper matches your printer technology and supported thickness. For most home inkjet printers, the reliable method is to load the printable side in the direction specified for your tray, select the exact paper size, choose a glossy or photo-paper media setting, preview the image, and print one test sheet first.
Do not assume that every glossy sheet works in every printer. Inkjet photo paper is not a safe substitute for laser media, paper-feed direction varies by printer, and the wrong media setting can cause dull color, smearing, wrinkles, excess ink, or paper jams.
Before you print: confirm the paper and printer are compatible
The first question is not “Which print setting should I choose?” It is “Is this paper made for this printer?”
#1 Best Overall

- Professional Grade: Prepare to be amazed at the vibrant and detailed prints of our photo paper 8.5 x 11
- Buy In Bulk & Save: Each pack of photo paper 8.5 x 11 glossy contains 100 sheets, providing sample supply for your photo printing projects
- Brilliant Quality: Every sheet of our photo paper guarantees a spectacular print
- Ready to Print: Our glossy photo paper 8.5 x 11 is compatible with any inkjet printer
- Satisfaction Guarantee: We are committed to your satisfaction; If our photo printer paper does not meet your expectations, we promise to make it right
Inkjet paper versus laser paper
Most glossy photo paper sold for home photography is designed for inkjet printers. Do not put ordinary inkjet photo paper into a laser printer. HP specifically warns that inkjet photo paper can damage an HP Laser printer because laser printers use heat to fuse toner to the sheet. A laser printer may accept glossy media specially labeled for laser use, but that is a different product category. Check the paper packaging before loading it.
For a general purchase, look for the wording “glossy photo paper for inkjet printers”. Verify the printer technology, sheet size, and thickness before ordering. A paper that works in one inkjet model may still be too thick for another model or tray.
Also check your printer’s manual for:
- Supported paper sizes, such as 4 × 6 inches, 5 × 7 inches, Letter, or A4
- Maximum paper weight or thickness
- Whether glossy media must use a rear, manual, or single-sheet feed
- Whether the printer has a dedicated photo tray
- Whether borderless printing is supported for the chosen size
If you need paper, compare glossy photo paper for inkjet printers by technology, size, finish, and thickness rather than choosing solely by price.
Step 1: Identify the printable side
Glossy photo paper normally has one coated, printable side. It is usually the glossier or whiter side, while the reverse may be duller, slightly gray, or marked with a logo. However, the side that faces up or down during loading depends on the printer and tray.
For example, Epson instructions for referenced models specify loading glossy paper with the whiter, glossier side facing up. A Canon G3030 manual also specifies the print side facing up in portrait orientation. Other Canon feed arrangements require the glossy side to face down. HP likewise distinguishes between rear-feed and front-feed loading directions.
Therefore, the printer’s manual takes priority over the generic “glossy side up” rule. Search the manual for loading photo paper, printable side, or glossy paper. Relevant examples include Epson’s paper-loading documentation, Canon’s G3030 loading instructions, and HP’s photo-paper loading guidance.
If both sides look similar, mark a corner very lightly with a pencil, print a test page, and check which side received the image. Handle the sheet by its edges: fingerprints, oils, and scratches are especially visible on a glossy coating.
Step 2: Prepare and load the paper
- Flatten curled sheets. Curled photo paper can skew, jam, or fail to feed correctly.
- Separate the sheets. Fan the stack gently if the sheets cling together, but avoid rubbing the printable surfaces.
- Choose the recommended tray. Use the photo tray, rear feed, manual feed, or single-sheet feed if your printer specifies one for thick media.
- Remove or isolate plain paper. If the printer automatically uses the paper in its main tray, make sure the job is directed to the tray containing the glossy paper.
- Adjust the guides. The guides should touch the edges without bending the paper.
- Do not overfill the tray. Thick or coated media often has a lower capacity than ordinary office paper.
Some photo papers are best loaded one sheet at a time. A Canon manual, for example, lists a 20-sheet limit for a particular 4 × 6-inch glossy product and warns that stacking can mark the printable side or interfere with feeding. Your printer’s limit may be different; follow its instructions rather than applying that number universally.
The Tool Desk
Outbyte Driver Updater FREEScan for outdated or missing drivers - takes under a minuteDriver Scan →Outbyte PC Repair FREEClear out junk files and repair common Windows errorsFree Scan →Step 3: Select the correct print settings
Open the print dialog and match the settings to the paper you actually loaded. The labels vary between drivers, but these controls are usually found under Printer Properties, Preferences, Media and Quality, Paper/Quality, or Print Settings.
Rank #2

- Photo Paper Package: 36 sheets of glossy photo paper, 8.5×11 inch, industry standard 180gsm/48lb, single-sided printing and blank back side for recording or writing something; compatible with inkjet printers and dye ink
- Glossy Finish: our glossy photo paper features its a reflective finish, that adds a professional and attractive touch and makes every picture look like a work of art; the printed photos and graphics are so outstanding
- Leave Vivid Colors: thanks to the good ink absorption of the picture paper, the printed photos come out vibrant colors and sharp details that truly come to life; remain beautiful landscapes and impressive moments forever
- Instant Dry: due to the advanced super cast coating, the ink on prints dry quickly without smearing and jamming; plus, the prints retain their vibrant color over time; makes your memories and designs shine in their full glory
- Wide Application: perfect for printing photos to record important and sweet moments, and also ideal for printing detailed graphics, various greeting cards, posters, chip bags, flyers, brochures, calendars, baby book
| Setting | What to choose | Why it matters |
|---|---|---|
| Printer | The actual printer you are using | Different printers may have different media profiles and tray options. |
| Tray or source | The tray containing the glossy paper | Prevents the printer from pulling plain paper from another tray. |
| Paper size | The exact loaded size: 4 × 6, 5 × 7, Letter, A4, or another supported size | Controls positioning, scaling, and borderless availability. |
| Media type | Glossy photo paper or the closest matching photo preset | Changes ink coverage, drying behavior, and paper handling. |
| Quality | High, Best, Professional, or Maximum DPI for important photos | Usually improves detail and color, although it uses more ink and takes longer. |
| Color | Color for color artwork or photographs; grayscale only when intended | Prevents an accidental black-and-white print. |
| Borderless | On only when supported and desired | Borderless printing can enlarge the image and crop its edges slightly. |
| Orientation | Portrait or landscape to match the image | Prevents rotation or unexpected positioning. |
| Scaling | Actual Size, Fit, or Fill deliberately | Determines whether the whole image appears or the paper is filled by cropping. |
Do not leave the media type set to Plain Paper. The driver uses this setting to determine how much ink to apply and how the printer handles the sheet. Plain-paper settings can produce weak or dull results on glossy stock; an unsuitable high-ink setting can cause smearing, wrinkling, or excessive ink.
Which glossy preset should you select?
The exact names differ by manufacturer. Look for options such as:
- Photo Paper Glossy
- Glossy Photo Paper
- Premium Glossy Photo Paper
- Photo Gloss Paper
- High-Gloss Photo Paper
Match the preset as closely as possible to the paper’s finish and weight. Standard glossy paper should not automatically be assigned the heaviest premium setting. Epson, for example, separates standard glossy, premium glossy, ultra-premium glossy, and semi-gloss media in its paper tables. HP similarly distinguishes paper categories and warns that an unsuitable setting can apply too much ink or use an incompatible black-ink mode.
Do these 3 things before closing this tab:
1Fix the driver behind crashes, sound loss and screen glitches2Repair Windows errors before they cause bigger problems3Scan for outdated or missing drivers - takes under a minuteIf the exact brand is not listed, choose the closest finish and weight. Test the result. If the print wrinkles or remains overloaded with ink, try a thinner compatible category—but change one setting at a time so you know what solved the problem.
Step 4: Prepare the image before printing
Printer settings cannot restore detail that is missing from a low-resolution image. Start with the largest, clearest source file available, especially when printing a painting, scanned artwork, or reference photograph.
Check size and resolution
At the intended print dimensions, around 300 pixels per inch is a useful quality target for detailed photo output, although acceptable results depend on the image, viewing distance, and printer. Avoid enlarging a small web image to fill a large sheet; it may look soft or pixelated.
For artwork, inspect the image at the size you intend to print. A scan or photograph may need cropping, straightening, dust removal, brightness adjustment, or color correction before it is sent to the printer.
Check the aspect ratio
A 4 × 6-inch sheet has a different shape from a Letter or A4 sheet. If your image and paper have different aspect ratios, you must choose between:
Rank #3

- This vibrant, glossy photo paper gives you crisp, clear photos that are High quality without the High cost - an Economical choice for great prints
- An Economical choice for great prints
- This vibrant, glossy photo paper gives you crisp, clear photos
- This vibrant, glossy photo paper gives you crisp, clear photos that are high quality without the high cost, an economical choice for great prints
- Fit: Shows the entire image but may leave white margins.
- Fill: Covers the paper but crops part of the image.
- Actual Size: Preserves the specified dimensions and may leave unused space.
- Custom crop: Lets you decide exactly which edges are removed.
Preview the print before confirming. This is particularly important with borderless mode, which may enlarge the image slightly to eliminate white edges.
Keep color management simple
A monitor emits light while a glossy print reflects it, so the two will not look identical even when the printer is working correctly. For ordinary home printing, the printer manufacturer’s default color mode or an sRGB-oriented workflow is a practical starting point.
If your editing application manages color and the printer driver also applies a strong correction, the image may receive two competing adjustments. Advanced users can use application-managed color with the correct printer-and-paper profile when one is available. Otherwise, select one color-management method, print a test, and avoid repeatedly resizing or recoloring the file in several applications.
Quick wins for a faster PC:
Fix the driver behind crashes, sound loss and screen glitchesFind Drivers →Clear out junk files and repair common Windows errorsFree Scan →Scan for outdated or missing drivers - takes under a minuteDriver Scan →Step 5: Print a test sheet
Before using a whole pack of expensive paper, print one sheet. A test reveals the most common problems immediately:
- The wrong side was loaded
- The image is rotated
- The printer is using the wrong tray
- The photo is cropped unexpectedly
- The colors or brightness need adjustment
- The media setting is applying too much or too little ink
Use a small 4 × 6-inch sheet when appropriate, or print a reduced section of a larger image. Allow the sheet to dry before judging it. Examine the print under normal viewing light rather than directly comparing it with a bright monitor.
Printing from Windows, macOS, and mobile devices
Windows
- Open the image in your chosen photo or graphics application.
- Choose Print and select the correct printer.
- Open Printer Properties, Preferences, or More Settings.
- Set the paper size, source tray, glossy/photo media type, quality, color, orientation, and scaling.
- Review the preview, then print one test sheet.
Some Windows applications expose only basic controls. If you cannot find media type or tray selection, open the printer’s full preferences from the system print dialog or the manufacturer’s printer software.
macOS
- Open the image and choose File > Print.
- Select the correct printer and paper size.
- Expand the print dialog if necessary.
- Open Media & Quality or the printer-specific settings.
- Choose the glossy/photo media type, quality, color mode, borderless option, and scaling.
- Check the preview and print a test sheet.
The labels and available settings depend on the installed driver. If the dialog does not offer glossy media choices, check whether the manufacturer’s current driver or print utility is installed.
Mobile apps
In a phone or tablet app, look under Paper, Paper Type, More Settings, Quality, Color, Borderless, and Tray. Mobile apps sometimes hide advanced options or silently choose a default paper type, so verify the settings rather than assuming the app has detected your paper.
Rank #4
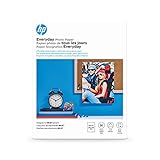
- Create affordable photo projects with a bright, glossy finish
- Customize photos with easy-to-use editing tools and print from your phone with HP Smart app
- Handle durable, quick-dry photos right from the printer
- Make memories last with photos that resist fading for decades when printed with Original HP Ink
How to prevent smears and protect the finished print
Do not rub the surface immediately after printing. Handle the sheet by its edges and give it time to dry. Avoid stacking fresh prints face-to-face, since the coated surfaces can transfer ink or stick together.
When you finish, remove unused photo paper from the tray and return it to its original package or a clean plastic bag. Paper left exposed in a tray can absorb humidity, curl, and become more difficult to feed. Store both unused sheets and finished prints away from heat, high humidity, and direct sunlight. Claims about fade resistance or archival life depend on the specific paper, ink, storage conditions, and manufacturer testing; they should not be treated as universal guarantees.
Troubleshooting glossy photo printing
The image is blank, faint, or dull
- Confirm that the coated side was loaded correctly.
- Make sure color printing is enabled.
- Check ink levels and run the printer’s nozzle check if colors are missing.
- Change Plain Paper to the correct glossy/photo media type.
- Verify that the paper is intended for your printer’s ink technology.
A glossy surface can still look dull when the printer is using an unsuitable paper profile or ink combination. HP’s troubleshooting guidance also notes that the wrong paper or black-ink category can produce weak or easily removed results.
What’s actually slowing this PC down?
Pick the symptom - the matching free tool is one click away.
The ink smears or wipes away
- Confirm that the sheet is inkjet-compatible, not laser-only or incompatible stock.
- Select a glossy photo-paper preset.
- Allow more drying time and avoid touching the image.
- Try the closest compatible paper-weight setting rather than automatically choosing the heaviest option.
- Check whether the driver has selected an unsuitable matte-black or other ink mode.
If the problem continues on known-compatible paper, check the printer for clogged nozzles, alignment problems, or a maintenance requirement.
The paper wrinkles or looks saturated
Too much ink may be reaching the sheet. Confirm that the paper type is correct and try a compatible thinner category. Also verify that the paper is within the printer’s supported thickness range. Do not keep increasing quality if the result is already saturated; maximum quality is not always the best media match.
The paper jams, skews, or will not feed
- Flatten curled sheets.
- Align the stack and set the guides correctly.
- Reduce the number of sheets.
- Use the rear or manual feed if the manual recommends it for thick paper.
- Check for paper scraps or a previous jam.
Canon specifically warns that curled or misaligned paper can cause feeding problems. If a sheet stops inside the printer, follow the model’s jam-removal procedure instead of pulling hard on the paper, which can damage the feed mechanism or tear the coating.
The photo is cropped or positioned incorrectly
Check the selected paper size, orientation, borderless mode, and scaling option. Compare the image’s aspect ratio with the paper’s ratio. Choose Fit for the whole image, Fill when edge-to-edge coverage matters more than preserving every edge, or crop the image manually before printing.
Brand-specific paper examples
Brand-matched paper can simplify media selection, but it is not automatically compatible with every printer from that brand. Confirm the exact model, size, feed path, and supported weight.
Best Value

- VALUE PACK - 30 Sheets of 8.5" x 11" glossy photo paper
- WEIGHT - Industry standard 200 gsm/53 lb. paper for your photo printing needs
- VERSATILE - Compatible with inkjet and laser jet printers; for PHOTO printing, inkjet printers are recommended.
- QUALITY - Smooth finish for fast drying, even ink-absorption
- LASTING IMPRESSION - Not every image is worthy of becoming a photo; Print those that matter.
| Printer brand | Relevant paper examples | Important qualification |
|---|---|---|
| HP | HP Everyday Photo Paper Glossy, HP Advanced Photo Paper Glossy, and HP Premium Plus Glossy Photo Paper | Use only with compatible HP inkjet models and select the matching or closest driver category. |
| Epson | Epson Photo Paper Glossy, Premium Photo Paper Glossy, or Ultra Premium Photo Paper Glossy | Epson’s media tables distinguish among finishes and weights; select the corresponding preset where available. |
| Canon PIXMA | Canon glossy photo paper and model-supported PIXMA photo media | Loading direction and supported products vary by PIXMA model and tray. |
For example, HP’s product pages describe several glossy lines as inkjet-compatible, while Epson documentation maps named glossy products to particular driver presets. These are examples, not universal recommendations. Manufacturer claims about drying, fade resistance, or longevity should be read in the context of the specified ink and storage conditions.
A reliable quick checklist
- Is the paper made for inkjet or laser printing, and does that match your printer?
- Is the sheet size and thickness supported?
- Which side is printable, and should it face up or down in this tray?
- Is the paper flat, clean, and loaded without overfilling?
- Is the correct tray selected?
- Is the exact paper size selected?
- Is the media type set to glossy/photo rather than plain paper?
- Are quality, color, orientation, borderless, and scaling intentional?
- Does the preview show the complete image or the crop you want?
- Have you printed one test sheet before using the rest of the pack?
Frequently Asked Questions
Can I use glossy photo paper in any printer?
No. Ordinary glossy photo paper is generally made for inkjet printers and should not be used in a laser printer. Even among inkjet printers, the paper must fit the supported size, thickness, tray, and media specifications.
Should glossy photo paper face up or down?
It depends on the printer and feed tray. Some rear-feed printers require the glossy side up, while some front-feed arrangements require it down. Follow the model-specific manual rather than relying on a universal rule.
Recommended Free Tools
Why is my glossy print smearing?
Check that the paper is compatible with the printer, select a glossy/photo media preset instead of Plain Paper, allow more drying time, and avoid touching the surface. If the print is saturated, test a more suitable or thinner paper-weight category.
Can I print borderless photos on glossy paper?
Usually only when both the printer and the selected paper size support borderless printing. Borderless mode may enlarge the image slightly and crop the edges, so inspect the preview first.
What is the best setting for glossy photo paper?
Use the exact paper size, the tray containing the paper, the closest glossy or photo-paper media type, and High or Best quality for important images. The best preset depends on the paper’s finish and weight, so test before printing a batch.
The Bottom Line
For dependable glossy prints, match the paper to the printer, load the coated side exactly as the manual specifies, select the correct size and glossy media preset, preview the crop and orientation, and test one sheet first. Most failures come from incompatible paper, the wrong printable side, an incorrect tray, or a plain-paper setting—not from the glossy finish itself.
Free tools Windows power users keep installed
One-click scans. No signup required.
Quick Recap

Product prices and availability are accurate as of the date/time indicated and are subject to change. Any price and availability information displayed on Amazon at the time of purchase will apply.




