PC Slower Than It Used to Be?
What’s actually slowing this PC down?
Pick the symptom - the matching free tool is one click away.
Outbyte PC Repair · freeA free scan shows the junk files, broken settings and background clutter dragging Windows down - then fixes them in one click.
Run a Free PC Scan →ThatPainter is reader-supported. When you buy through links on our site, we may earn an affiliate commission. Learn More
Yes—an iPhone can capture excellent Northern Lights photographs. The reliable approach is to use the rear main camera at 1x, let Night mode start the exposure, stabilize the phone on a tripod, focus on a distant subject, and shorten the exposure when moving auroral rays begin to smear. No single ISO or shutter speed works for every iPhone or every display.
The forecast, darkness, cloud cover, phone stability, and aurora movement matter more than copying a settings recipe. Use a sequence of exposures so you have both a sharp frame and a brighter frame to choose from.
What you need for a successful aurora photo
An iPhone can capture convincing Northern Lights photographs, including color that looks faint or nearly absent to your eyes. The phone is not creating aurora activity, however: the result depends on a dark and clear location, enough geomagnetic activity, a stable camera, and an exposure that suits how quickly the aurora is moving.
Four conditions matter most:
- Geomagnetic activity: NOAA’s planetary Kp index is a rough indicator, not a promise. Lower Kp values usually keep the aurora closer to the polar regions; stronger activity can move it farther toward the equator.
- Darkness: City glow, nearby lamps, haze, precipitation, and a bright Moon reduce contrast. Find the darkest safe location with an unobstructed view.
- Timing: Displays commonly become more active around local midnight, but auroras can appear earlier or later and may brighten, fade, or last only briefly.
- Weather: A strong forecast is useless if clouds cover the sky. Check both an aurora forecast, such as NOAA’s Aurora Dashboard, and a local cloud and precipitation forecast.
Use a forecast to decide when to go, not to guarantee a photograph. Be patient, check the sky repeatedly, and give yourself time to set up safely. A phone’s computational photography can record a faint aurora more clearly than human vision, so a weak-looking display may still produce a useful image.
#1 Best Overall

- 75in Extendable Camera Tripod: This tripod for camera phone can extend to a height of 75 inches by adjusting the flip locks, which can be quickly adjusted to any desired height to meet the needs of various shooting scenarios. Both the ball head and center column are equipped with level for easy real-time level calibration, ensuring perfectly level shots.Good Digital Camera Accessory Kits for you.
- 3-in-1 Detachable Center Column: The center column supports quick detachment, allowing for flexible use as a monopod or selfie stick (Max Height:43.9 in / 111.5 cm). Camera phone tripod stand can also be installed upside down for low-angle macro shooting. This 3-in-1 multi-functional design simplifies shooting equipment, saves carrying space, and enhances practicality and cost-effectiveness, making it suitable for travelers, outdoor enthusiasts, and content creators.
- 3-Level Angle Adjustment For Various Terrains: The camera tripod legs can be adjusted to three angles using the angle adjustment locks, allowing it to spread almost horizontally to achieve a minimum height of 15.35in(39cm) for low-angle shooting. Each leg adjusts independently in both angle and length, ensuring the tripod stand steadily on stairs, rocky trails, or uneven ground—making it ideal for outdoor-photographers and hikers shooting in unpredictable environments.
- Remote Control & Flexible Ball Head: Equipped with a 360° ball head, which supports free rotation in both horizontal and vertical directions. When shooting vlogs or live streams, you can flexibly switch angles and landscape/portrait modes without moving the tripod. In addition, this phone tripod has a built-in remote control with a maximum 10m control distance. Whether it's selfies, group photos, or long-distance shooting, one-button control makes shooting easier and more convenient.
- Sturdy & Stability: Constructed from aluminum alloy, this DSLR camera tripod features thickened tubes and anti-slip rubber feet that provide stronger grip on various surfaces, effectively preventing image shake. Its bottom hook allows for hanging weights, increasing counterweight and further enhancing overall stability, ensuring smooth footage even outdoors.[Max load 8kg/17.64lb (vertical) or 3kg/6.61lb(45° tilt)]
Best iPhone aurora settings at a glance
| Control | Starting choice | Change it when… |
|---|---|---|
| Mode | Photo | Use a manual camera app only when the native app does not provide enough control. |
| Lens | Rear main camera at 1x | Try the ultrawide only when it produces a better composition and remains sharp. |
| Night mode | Automatic; begin with the longest available duration | Shorten it when rays or curtains become blurred. |
| Focus | A distant subject, star, or light; lock focus where possible | Refocus after changing lenses or if stars look soft. |
| Exposure | Start with the automatic choice | Lower it if the sky turns gray or bright aurora loses structure. |
| Flash | Off | Normally never use it for the sky. |
| Live Photos | Off while using Night mode | Enabling it can deactivate Night mode. |
| Stability | Tripod or rigid surface | Never hand-hold a multi-second aurora exposure if sharpness matters. |
| Shutter | Three-second timer or Bluetooth remote | Use a remote when touching the phone still causes movement. |
| Capture strategy | Several frames at more than one duration | Take shorter exposures as the display becomes faster or brighter. |
Prepare before the display starts
- Check the forecast and the sky. Look at NOAA’s Aurora Dashboard or another reputable space-weather source, then confirm local cloud cover. Treat app alerts as invitations to look outside, not as guarantees.
- Choose a safe, dark viewpoint. Avoid traffic, unstable shorelines, cliffs, thin ice, and unfamiliar terrain. A clear view north is useful in many locations, but the best direction depends on your latitude and the shape of the display.
- Charge everything. Multi-second exposures, a bright screen, cold temperatures, and repeated shooting can drain a phone quickly.
- Clean the lens. Fingerprints, frost, and condensation create glowing halos around bright stars and lights. Carry a microfiber lens cleaning cloth and check the lens again after moving between indoor and outdoor temperatures.
- Set up before the sky becomes dramatic. Turn on the Camera grid and level controls in Settings > Camera if you want help keeping the horizon straight. A level horizon is particularly valuable when the image includes a shoreline, mountain, cabin, or other strong foreground line.
Useful, optional field equipment
The most valuable accessory is a smartphone tripod with Bluetooth remote. Apple recommends a tripod or stable surface for clearer Night mode detail, and NASA includes a tripod among its aurora-photography essentials. Choose a secure clamp that fits your phone and a tripod that will not flex in wind. A remote lets you trigger the shutter without pressing the phone.
A portable phone power bank is useful for a long night, particularly in cold weather. Verify whether your iPhone uses USB-C or Lightning and carry the correct cable. A red-light headlamp makes tripod setup easier while preserving more night vision than a bright white beam. These items improve preparation and comfort; none can compensate for clouds, light pollution, or a weak display.
Use the rear main camera first
Start with the rear camera at 1x. On most iPhones, the main camera gives the strongest low-light result because it generally has the best combination of sensor performance, lens brightness, and computational processing. Avoid digital zoom: it enlarges blur and noise rather than revealing more auroral detail.
Recommended Free Tools
Use the ultrawide lens when the aurora fills a large part of the sky or when the wider perspective makes the landscape more compelling. It can be less effective in darkness on some models, so test the 1x and ultrawide views before the display peaks. If the phone switches lenses automatically, return to the lens that produced the cleaner test frame.
Include a small amount of foreground rather than photographing an empty sky. Trees, a mountain, a cabin, a shoreline, or a person viewed safely from a distance gives the aurora scale. Keep headlights, streetlights, and bright windows outside the frame whenever possible. A level horizon and a foreground silhouette usually communicate the scene better than an aggressively zoomed crop.
Native Camera app: step-by-step workflow
Night mode is the best starting point for most iPhone owners. Apple says it activates automatically in low light on supported iPhones; current support documentation begins with iPhone 11 and later, although the available lenses and controls vary by model and iOS version.
- Open Camera and select Photo. Use the rear main lens at 1x.
- Confirm that Night mode appears. The Night mode icon and suggested duration should be visible in a sufficiently dark scene. The exact available duration depends on the iPhone, lens, light level, and software.
- Stabilize the phone. Place it on a rigid surface or mount it in a tripod. Make sure the clamp does not press buttons and that wind cannot shake the setup.
- Begin with the longest available Night mode duration. Tap the Night mode control and adjust the duration if your model allows it. This is a test, not a permanent setting. A faint, slow arc may benefit from a longer exposure, while a bright, rapidly moving curtain may need much less time.
- Set focus deliberately. Tap a distant light, mountain edge, or star if the Camera app can identify it, then touch and hold to invoke AE/AF Lock where available. Do not focus on a nearby branch or the phone’s preview of the aurora. Take a test frame and inspect stars or distant edges at full magnification.
- Adjust exposure if necessary. Drag the exposure control down slightly if the sky becomes gray, city lights clip, or the aurora loses its ribbon-like structure. Raise exposure only when the aurora is too dim and the phone is completely stable.
- Use a timer or remote. Set the Camera timer to three seconds as a starting point. Apple also provides five- and 10-second timer options. A Bluetooth remote is useful when even the timer does not eliminate movement caused by pressing the phone.
- Shoot a sequence. Take several frames rather than trusting one exposure. Review briefly, then recheck framing and focus after a major change in brightness or movement.
The number shown by Night mode is a starting point, not a guarantee of sharpness or brightness. Night mode may combine information over several seconds, but it cannot freeze an aurora that is changing position during that interval. A tripod stops phone movement; it does not stop auroral movement.
The Tool Desk
Outbyte Driver Updater FREEFix the driver behind crashes, sound loss and screen glitchesFind Drivers →Outbyte PC Repair FREERepair Windows errors before they cause bigger problemsFix Now →Rank #2

- 【Sturdy and Stable】: Made of premium aluminum alloy and stainless steel, Liphisy phone tripod with remote keeps your device stay securely in place for still shots and video recording.
- 【Multi-angle Shot】: With a max height of 64”, this tripod stand with a 210-degree rotation head and 360-degree rotation holder allows you to capture shots from any angle, catering to different photography needs.
- 【Wireless Remote Included】: Package includes a wireless remote that connects to your cell phone easily, making it a breeze to snap photos or video recordings.
- 【Height Adjustable】: The height of this cell phone tripod with remote can be adjusted from 17” to 64” and the easy lock mechanism makes it really easy to set up. It gives you an excellent vantage point for capturing photos and videos.
- 【Wide Application】: Compatable with different phone and camera, this tripod is great for photography and video recording, perfect for travel and home use.
Match the exposure to the aurora’s motion
The right exposure is a compromise between gathering enough light and retaining the aurora’s shape. Use this practical sequence:
| What you see | What to try | Why |
|---|---|---|
| Faint, slow-moving arc | Keep the automatic Night mode duration or try a longer exposure. | More collected light can reveal color and a darker foreground. |
| Bright, fast curtains or rays | Shorten the exposure and take more frames. | A shorter interval preserves sharper folds and rays. |
| Sharp landscape but smeared aurora | Shorten the exposure; do not blame the tripod. | The blur is caused by auroral motion, not necessarily camera shake. |
| Blurred stars and landscape | Improve tripod stability, use the timer or remote, and keep the phone untouched. | The entire camera moved during the exposure. |
| Gray sky or washed-out green | Lower exposure, move away from lights, or wait for darker conditions. | Too much ambient light or exposure can remove contrast and structure. |
For every important composition, try a short test sequence: one frame at the automatic Night mode duration, one shorter frame, and one frame with more foreground. Compare the sharpness of the stars and landscape with the definition of the aurora. This is more reliable than copying one fixed setting from another photographer’s phone.
When a manual camera app helps
A third-party manual camera app is optional. Consider one if the native Camera app does not expose enough control over shutter speed, ISO, or focus, or if you want to repeat a precise setup across several scenes. The native app is often simpler and can produce excellent results without additional software.
NASA’s smartphone astrophotography guidance describes a manual workflow that begins near 10 seconds and ISO 800. Treat those values as a starting point for a manual app, not as required iPhone settings. High ISO can reveal a dim aurora but also increases grain, and a 10-second exposure may blur an active display. Reduce the shutter time when the aurora moves quickly; lower ISO or exposure when nearby light makes the sky bright.
Quick wins for a faster PC:
Scan for outdated or missing drivers - takes under a minuteDriver Scan →Repair Windows errors before they cause bigger problemsFix Now →Fix the driver behind crashes, sound loss and screen glitchesFind Drivers →NASA has cited apps such as Northern Lights Photo Taker and NightCap as examples of smartphone tools that can provide longer-than-10-second exposures. App names, compatibility, pricing, and capabilities can change, so check the current App Store listing and verify that the app supports your iPhone before relying on it in the field.
If the manual app offers manual focus, focus on a distant light or star and move the focus toward infinity. Take a test frame and zoom in to check the stars. A green preview is not proof that the image is focused.
Flash, Live Photos, and ProRAW
Keep flash off
Flash cannot illuminate an aurora that is many miles away. It can distract other viewers, spoil the dark-sky atmosphere, and add an unwanted foreground highlight. Leave it off.
Rank #3

- Innovative Pentagonal Tube Design – Engineered for stability and portability, this lightweight (2.6 lbs/1.18 kg) tripod features a unique pentagonal-shaped tube for enhanced durability and easy folding. With a compact 19.6 ''/50 cm folded size, it’s effortless to carry, making it ideal for travel, outdoor shoots, and professional use, even on rugged terrains
- Universal Phone & Tablet Compatibility – Designed for versatility, the 2-in-1 adjustable holder securely accommodates both smartphones and tablets with a firm grip, thanks to its high-quality plastic construction and thick rubber padding. Perfect for video recording, live streaming, online meetings, vlogging, and photography
- Extended Height & Precision Control – Adjustable from 18.9''/48 cm to 75''/190 cm, this tripod offers a wide range of shooting heights. A 360° rotatable 3-way pan head enables smooth panning, tilting, and wide-angle shots, while the built-in bubble level ensures perfect alignment for professional-grade results
- Flexible Shooting Angles – Capture every moment with complete horizontal and vertical rotation, allowing for dynamic compositions. Whether for photography, videography, live streaming, or creative projects, this tripod adapts to your needs
- Wireless Remote for Seamless Operation – The included Bluetooth remote provides hands-free control from up to 472'', ensuring effortless group photos, selfies, and video recordings without the need for manual operation
Turn off Live Photos while using Night mode
When Night mode is active, Apple says Live Photos and flash are not active by default. Manually enabling either can deactivate Night mode. For a dark-sky still image, a conventional Night mode photograph is usually the more useful choice.
Use ProRAW only when you intend to edit
ProRAW is an advanced option for compatible Pro models, not a universal iPhone feature. Apple documents ProRAW on iPhone 12 Pro and later Pro models with iOS 14.3 or later. It retains more image information for adjusting exposure, color, and white balance in compatible editing workflows, but it does not automatically make the aurora brighter or sharper.
Choose ProRAW when you plan serious editing and have enough storage. Use the standard HEIF/JPEG-style capture when you want smaller files, quick sharing, and a straightforward workflow. Apple’s ProRAW documentation also notes that camera conditions such as Night mode can constrain resolution; in the documented Night mode case, the image is saved at 12 MP. Exact behavior depends on the iPhone model and software.
Cold-weather procedure
Cold affects both battery life and handling. NASA recommends carrying an extra battery or power bank and keeping it warm in a pocket because cold batteries lose power quickly. Keep the phone accessible but protected from snow, moisture, and accidental drops. A case that remains easy to grip is more useful than a bulky accessory that makes the phone difficult to mount.
- Charge the iPhone before leaving and keep the power bank close to your body rather than exposed on the tripod.
- Limit unnecessary screen brightness and repeated long previews.
- Do not repeatedly move the phone from a warm pocket into freezing air if you can avoid it; temperature changes encourage condensation.
- Check the lens for frost or moisture before each sequence.
- After returning indoors, place the phone in a sealed bag or case and let it warm gradually before exposing it to humid indoor air. This is a precaution, not a guarantee that condensation will occur.
NASA’s broader packing advice also includes warm layers, blankets, snacks or hot drinks, and a red headlight. Photographing the sky is not worth becoming cold, lost, or distracted near a hazardous location.
A composition sequence that gives you usable choices
Do not spend the whole display chasing a single perfect frame. Capture three kinds of composition:
- Establishing frame: Use the widest useful field of view and include enough landscape to show where the photograph was made.
- Balanced frame: Keep the horizon below the center when the sky is the subject, and place the brightest auroral structure slightly off-center rather than directly in the middle.
- Tighter detail: Move closer or use the native 1x field of view to emphasize rays and color. Avoid aggressive digital zoom, which magnifies noise and motion blur.
At each composition, capture several frames at two or more exposure lengths. Auroras can change between shots, and a single frame may coincide with a dimming phase, a passing cloud, a focus error, or a small vibration. Review only long enough to check focus, clipping, and movement; extended screen use drains the battery and reduces your dark adaptation.
Rank #4

- LIGHTWEIGHT FOR TRAVEL:Compactness when stored and weighs only 3.3 lbs/1.5 kilograms, easy to move around with a strapped carrying bag; Flip leg lock for SUPER FAST SETUP. Great for a vlogger and YouTuber
- UPGRADED SOLID CONSTRUCTION: Made of aluminum alloy, THICKER leg tube than the ordinary tripod, sturdy adequate for long exposure work and keep the camera steady. Using it in the field and yard for photos
- TRIPOD AND MONOPOD COMBINED UNIT: Takes about 5 seconds to go from the tripod into 55in monopod and reduces the weight of travel. Pay one, get two functions. Perfect for amateur photographers and travelers
- VERSATILITY OF FUNCTIONALIT: Height from 21"-72" can use it with binoculars for star viewing, family and home movies; 4-section column legs are able to stretch out to be tall enough to find the right height
- SMOOTH 3-WAY SWIVEL HEAD: 360 degree panning and titling with horizontally and vertically, easy to change directions at different angles. A EXTRA UNIVERSAL ARCA SWISS MOUNTING PLATE AS to easily swap cameras
Editing the finished photograph
Edit to restore the scene, not to turn it into neon. Apple’s Photos tools provide adjustments for lighting, filters, cropping, rotation, and perspective. ProRAW gives compatible workflows more latitude over exposure, color, and white balance.
- Lower highlights if bright green or white areas have lost their internal texture.
- Raise shadows modestly to reveal a foreground silhouette without making the night look like daylight.
- Correct color carefully. A slight green or magenta cast can be adjusted, but do not assume every color in a computationally processed image matches what the eye saw.
- Apply moderate noise reduction. Excessive reduction can erase stars and fine auroral structure.
- Use saturation and clarity sparingly. Heavy adjustments exaggerate compression artifacts and create an unnatural, hard-edged band.
- Straighten and crop last. Preserve the horizon and make sure the crop does not imply that digital zoom produced detail the original frame did not contain.
If you are using the photograph as a painting reference, save an untouched original alongside the edited version. The edited file may be useful for showing structure, but computational brightening and saturation can exaggerate the aurora’s apparent color and intensity.
Troubleshooting common failures
The entire image is blurry
Check for tripod movement, a loose clamp, wind, or contact with the phone during capture. Use a rigid surface, a three-second timer, or a Bluetooth remote. If the tripod is stable but only the aurora is soft, the next problem is probably motion rather than camera shake.
The aurora is a featureless green smear
Shorten the exposure and take multiple frames. A long exposure can record the aurora’s movement as one soft band. Also lower exposure slightly if the brightest areas are clipping.
The stars are out of focus
Autofocus may have hunted in the dark. Tap a distant light or star, lock AE/AF where the native app permits it, or set focus near infinity in a manual app. Test every lens after switching from 1x to ultrawide.
The sky is gray instead of black
Move farther from artificial light, wait for darker conditions, and reduce exposure. Clouds and haze can also reflect city or Moon light. A high Kp reading cannot overcome a completely cloudy sky.
The iPhone cannot find Night mode
Make sure the scene is genuinely dark, select Photo mode, and try the supported rear lens. Night mode support begins with iPhone 11 according to Apple’s current documentation, but the feature is not available on every older model or every lens. If the phone is compatible and Night mode still does not appear, update iOS if practical and check the current Apple support guidance for your model.
Best Value
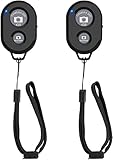
- CONVENIENT AND EASY HANDS-FREE SHUTTER CONTROL FOR MOBILE DEVICES: Perfect for taking selfies and steady tripod shots.【Update】: compatible with Instagram and Snapchat(long press for taking video and short press for photo
- SMALL ENOUGH TO KEEP ON A KEYCHAIN OR IN YOUR POCKET: The remote is very small and lightweight, so it is convenient to carry with you
- OPERATIONAL UP TO 30 FEET (10M): Take photos even when at a distance from your device
- COMPATIBLE WITH ANDROID 4.2.2 OS AND UP / APPLE IOS 6.0 AND UP: Option to use in-built app or Google Camera 360 app
- COMPATIBLE WITH WIDE RANGE OF DEVICES: Including iPhone17 17 pro 17pro max 17 air, iPhone 16,16 Pro,16 Pro max, iPhone 15 15 pro 15 Pro max , 14, 14pro, 14 pro max, 13 13 pro max, iPhone 12 pro max, 12 pro, 12, 11, 11 pro, 11 Pro max, Xs, Xs max, XR, X, 8, 8 Plus, 7, 7 Plus, 6, 6 Plus, ; iPad 3, 4,5,6, Mini , Pro, Air; Samsung Galaxy S24 S23,S22,S21,S10, Note 20, NOTE 10 NOTE 10 PLUS S9+, S9, S8, S7, S7 Edge, S6, ; and other smart andriod device.
The battery drops suddenly
Cold is the likely cause, especially when the screen is bright and the phone is taking repeated long exposures. Keep the phone and power bank insulated, reduce screen use, and carry a compatible charging cable. Do not let a low battery force you to remain in an unsafe location.
Limits and realistic expectations
An iPhone can make aurora photography accessible, but it cannot guarantee a result from every display. Image quality changes substantially with iPhone generation, lens, software, darkness, aurora brightness, cloud cover, light pollution, and motion. Newer phones generally have more capable low-light processing, but a stable older supported iPhone in a dark location can outperform a newer phone used handheld under city lights.
A digitally brightened image is also not identical to the visual experience. The camera may show green, purple, or red color that your eyes barely detect, particularly during a faint display. Preserve that distinction when sharing the photograph or using it as a visual reference.
Crashes, No Sound, or Screen Glitches?
Random freezes, missing sound and display glitches usually trace back to one bad driver. Find and replace yours safely.Free scan · under a minutePC Slower Than It Used to Be?
A free scan shows the junk files, broken settings and background clutter dragging Windows down - then fixes them in one click.Free scan · Windows 10 & 11The most dependable formula is therefore not “use this one ISO and shutter speed.” It is: find a dark, clear viewpoint; use the rear 1x camera; stabilize the phone; start with Night mode; focus on something distant; shorten the exposure when the aurora moves; and capture a sequence of frames.
Frequently Asked Questions
Which iPhone models can photograph the Northern Lights?
Night mode is available on iPhone 11 and later according to Apple’s current support documentation, but the exact lenses and controls vary by model and iOS version. ProRAW is more limited: Apple documents it for iPhone 12 Pro and later Pro models with iOS 14.3 or later. Older unsupported phones may need a compatible manual camera app, but results are not guaranteed.
Do I need a manual camera app for aurora photography?
No. The native Camera app’s Night mode is usually enough, especially when the phone is stable. A manual app is useful when you need direct shutter, ISO, or focus control. NASA’s manual workflow begins near 10 seconds at ISO 800, but those are starting points, not universal settings; shorten the exposure when the aurora moves quickly.
Why does my iPhone show more aurora color than my eyes?
Yes. A phone can collect light over several seconds and computationally process a faint scene, while human vision is less sensitive to color in very low light. The resulting photograph may show green or other auroral color more clearly than you saw it. That does not mean the camera image exactly represents the real-time visual experience.
Free tools Windows power users keep installed
One-click scans. No signup required.
Can a tripod stop the Northern Lights from blurring?
A tripod prevents the phone, stars, and landscape from blurring because of camera movement. It cannot freeze the aurora itself. If the landscape is sharp but the aurora is smeared, shorten the exposure and capture more frames.
The Bottom Line
The short version: use the rear 1x camera, keep flash and Live Photos off, mount the iPhone on a stable tripod, begin with Night mode’s suggested long exposure, and shorten it when moving rays blur. Take several frames at different durations, protect the battery from cold, and treat forecasts as probabilities rather than promises.
Quick Recap

Product prices and availability are accurate as of the date/time indicated and are subject to change. Any price and availability information displayed on Amazon at the time of purchase will apply.




