Do these 3 things before closing this tab:
1Scan for outdated or missing drivers - takes under a minute2Repair Windows errors before they cause bigger problems3Fix the driver behind crashes, sound loss and screen glitches
ThatPainter is reader-supported. When you buy through links on our site, we may earn an affiliate commission. Learn More
There is no single “CMYK document mode” switch in Adobe InDesign. Unlike Illustrator, InDesign can contain CMYK, RGB, Lab, grayscale, spot-color, and mixed-ink content in the same document. To prepare an InDesign file for CMYK printing, check the document’s swatches, placed images, imported artwork, transparency settings, spot colors, and final PDF output.
There is no single “CMYK document mode” switch in Adobe InDesign. Unlike Illustrator, InDesign can contain CMYK, RGB, Lab, grayscale, spot-color, and mixed-ink content in the same document. To prepare an InDesign file for CMYK printing, you must check the document’s swatches, placed images, imported artwork, transparency settings, spot colors, and final PDF output.
The safest workflow is to ask the printer for its required CMYK output profile, PDF/X standard, total ink-coverage limit, bleed specifications, and proofing requirements. Then inspect the InDesign file and export the PDF using those exact specifications.
The Tool Desk
Outbyte PC Repair FREEClear out junk files and repair common Windows errorsFree Scan →Outbyte Driver Updater FREEFix the driver behind crashes, sound loss and screen glitchesFind Drivers →What “in CMYK” means in InDesign
InDesign does not restrict an entire document to one color space. A process-color swatch may be defined with RGB, HSB, Lab, or CMYK values, and process colors are ultimately converted according to the color-management settings and output profile. A placed photograph can remain RGB while native InDesign objects use CMYK swatches.
#1 Best Overall

- 𝗣𝗥𝗢𝗙𝗜𝗟𝗜𝗡𝗚 𝗦𝗣𝗘𝗘𝗗 & 𝗔𝗖𝗖𝗨𝗥𝗔𝗖𝗬: The strip reading Spectrocolorimeter creates custom profiles in minutes with easy-to-read targets for color and black and white. Includes the improved SpyderGuide for convenience in creating profiles easily and accurately
- 𝗜𝗡𝗧𝗨𝗜𝗧𝗜𝗩𝗘 𝗣𝗥𝗢𝗙𝗜𝗟𝗘 𝗖𝗥𝗘𝗔𝗧𝗢𝗥: Usability is so improved in this step-by-step process you don't need an extra manual - it's quite intuitive!
- 𝗘𝗡𝗛𝗔𝗡𝗖𝗘 𝗣𝗥𝗜𝗡𝗧 𝗣𝗥𝗘𝗖𝗜𝗦𝗜𝗢𝗡: Unique SpyderProof function gives you a series of carefully selected images to evaluate detail from a photographer's point of view. Profile Softproof available for each unique printer profile.
- 𝗖𝗢𝗠𝗣𝗟𝗘𝗧𝗘 𝗘𝗗𝗜𝗧𝗜𝗡𝗚 𝗖𝗢𝗡𝗧𝗥𝗢𝗟: Take total control of your print output and achieve gallery-quality prints with Datacolor Spyder Print, the leading calibration and profiling tool for photographers and designers.
- 𝗘𝗟𝗘𝗩𝗔𝗧𝗘 𝗬𝗢𝗨𝗥 𝗪𝗢𝗥𝗞𝗙𝗟𝗢𝗪: Datacolor and Adobe work hand-in-hand to offer the complete package for your photography workflow. Get a complimentary Adobe Creative Cloud Photography plan - 90 day trial with your Spyder purchase. A redemption code will be sent upon Spyder activation.
That means there are two different goals that are often confused:
- CMYK-only source content: every relevant image, graphic, swatch, and effect is inspected and, where required, converted before delivery.
- CMYK-controlled output: the PDF is converted or preserved according to the printer’s specified destination profile, and the resulting separations are verified.
Many professional print workflows use color-managed RGB photographs and convert them during PDF export. Other printers specifically require pre-converted CMYK images. Neither approach is automatically correct; the printer’s workflow and paper condition determine the right choice.
1. Start with the Print intent
When creating a new file, choose Print in the New Document dialog rather than Web or Digital Publishing. This establishes print-oriented defaults and is a sensible starting point for a printed publication.
However, Print intent does not convert every future asset to CMYK. It does not change the color mode of photographs you place, imported Illustrator artwork, or every existing swatch. An existing document also cannot be made completely CMYK simply by changing its document setup. Treat the file as a collection of separate color-bearing elements that need inspection.
2. Create or edit process swatches as CMYK
For colors that must use explicit CMYK percentages, create a CMYK process swatch:
- Choose Window > Color > Swatches.
- Create a new swatch or open an existing swatch’s options.
- Set Color Type to Process.
- Set the color mode to CMYK.
- Enter the required cyan, magenta, yellow, and black values, then save the swatch.
For example, a printer or brand guide might specify C=100, M=70, Y=0, K=0. Applying that swatch to InDesign objects gives those objects explicit process-color values.
A CMYK swatch does not convert linked photographs or imported graphics. It only controls the objects that use the swatch. Also check whether the swatch is a Process color or a Spot color; those produce different separations.
Crashes, No Sound, or Screen Glitches?
Random freezes, missing sound and display glitches usually trace back to one bad driver. Find and replace yours safely.Free scan · under a minutePC Slower Than It Used to Be?
A free scan shows the junk files, broken settings and background clutter dragging Windows down - then fixes them in one click.Free scan · Windows 10 & 11Process colors versus spot colors
Process colors are printed using the standard cyan, magenta, yellow, and black plates. A spot color uses an additional premixed ink and normally creates an additional plate. A document containing CMYK plus one Pantone ink, varnish, metallic ink, or fluorescent ink is not a four-plate-only CMYK job.
Rank #2

- ACHIEVE TRUE COLOR - Ensures your monitor displays colors accurately, critical for photography, design, and video editing, with unlimited gamma, whitepoint, and brightness settings. Standard Calibration provides professional-grade results in 90 seconds, or New Deeper Calibration measures more points across the grayscale for an average 30%+ accuracy improvement (varies by display).
- OPTIMIZE DISPLAY PERFORMANCE - Calibrate a wide range of backlight types including Wide LED, Standard LED, OLED, QD-OLED, Apple Liquid Retina XDR, and Mini LED, with support for brightness up to 12,000 nits, ensuring consistent and accurate color across all your screens.
- ENHANCE WORKFLOW EFFICIENCY - Projector Calibration feature allows for accurate color representation during presentations, while Display Analysis/MQA provides comprehensive screen quality assessment. Export 3D LUTs (.cube) for compatible video monitors, with support for Rec.709, Rec.2020, and DCI-P3.
- WIDE DEVICE COMPATIBILITY - Supports unlimited number of displays (per computer capability) and offers native USB-C connection plus an included USB-A adapter, ensuring seamless connectivity with modern laptops and desktop computers for streamlined use. StudioMatch and SpyderTune keep color consistent across multi-monitor setups.
- USER-FRIENDLY SOFTWARE - Features an intuitive interface supporting 10 languages, including English, Spanish, French, German, Chinese and Japanese, making calibration accessible to a global audience. Existing SpyderPro users upgrade to the new software free.
When choosing or communicating a process color, a printed CMYK color guide can be more useful than judging an uncalibrated monitor. Coated and uncoated paper can make the same nominal CMYK values appear substantially different. A printed guide is a reference—not a replacement for the printer’s profile, contract proof, or press proof.
3. Inspect every placed image and imported graphic
Check the Links panel and the original files for every photograph, logo, illustration, and other linked asset. InDesign can place Photoshop files in RGB, CMYK, Lab, and grayscale modes, and Illustrator files can be RGB or CMYK. An RGB asset can remain RGB in the InDesign workflow until it is converted during output.
For each asset, determine which of these situations applies:
- The printer requires CMYK source images: open RGB photographs in Photoshop and convert them using the printer’s supplied CMYK profile.
- The printer supports a managed RGB workflow: preserve the embedded profiles and let the approved PDF workflow handle conversion.
- The printer has not specified a workflow: ask before converting. A generic CMYK profile may be wrong for the press, paper, ink limits, and printing process.
Do not convert every image merely because CMYK sounds safer. RGB-to-CMYK conversion can reduce the gamut and change saturated blues, greens, oranges, and other colors. Recheck the converted images visually and against an appropriate proof or printed reference.
4. Decide what to do with spot colors
First determine whether each spot color is intentional. A spot may represent an approved brand ink, metallic or fluorescent ink, varnish, white ink, or another specialty production effect. Converting it to process color without approval can change the appearance and remove a required production plate.
Convert an unintended spot color permanently
- Open Window > Color > Swatches.
- Open Swatch Options for the spot swatch.
- Change Color Type from Spot to Process.
- Confirm the resulting CMYK values and update the objects that use the swatch if necessary.
This changes the swatch in the InDesign document and is appropriate when the spot color was accidental or the source file should become process-only.
Convert a spot color only for output
If the source swatch needs to remain a spot color for another use, use Window > Output > Separations Preview, open Ink Manager, and set the spot color to be treated as process for output. This is useful when the printer is managing the final conversion or when you do not want to alter the source swatch permanently.
Do not use either conversion method on an approved specialty color without confirming with the print provider. A CMYK simulation may not reproduce the appearance of metallic, fluorescent, or specially formulated ink.
Rank #3
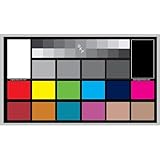
- SUPERIOR ACCURACY - Ensures precise color calibration with professional-grade chips, delivering consistent and reliable results for video production.
- ENHANCED IMAGE QUALITY - Optimizes video quality using 16:9 aspect ratio charts, allowing for detailed adjustments and accurate color reproduction.
- INCREASED DURABILITY - Constructed with robust materials, the Digital Kolor Pro charts are designed for long-term use, resisting wear and tear in demanding environments.
- WIDE COMPATIBILITY - Versatile calibration tool compatible with various cameras and editing software, making it an essential asset for diverse video workflows.
- SIMPLE AND EASY TO USE - Streamlines the color correction process with intuitive chart layouts, enabling quick and efficient calibration for both beginners and experts.
If the decision concerns a Pantone color rather than a production error, a spot-to-CMYK comparison guide can help you compare the spot color with its closest process simulation. It shows a comparison, not a guarantee that the printed result will match on your specific stock and press.
5. Set the transparency blending space for print
For a print workflow, check Edit > Transparency Blend Space and choose Document CMYK when that matches the printer’s instructions.
This controls how transparent objects blend; it does not convert every RGB image, swatch, or imported graphic in the document. A file can use Document CMYK blending and still contain RGB assets. Treat this setting as one part of color management, not as proof that the document is entirely CMYK.
Quick wins for a faster PC:
Repair Windows errors before they cause bigger problemsFix Now →Scan for outdated or missing drivers - takes under a minuteDriver Scan →6. Inspect the separations in InDesign
Use Window > Output > Separations Preview and choose Separations. The panel lists the Cyan, Magenta, Yellow, and Black process plates, along with any spot plates.
Use the visibility controls to isolate plates and look for:
- unexpected spot-color plates;
- objects missing a color component;
- white objects that are set to overprint;
- black text or objects with unintended rich-black mixtures;
- transparent objects that blend or separate unexpectedly;
- artwork that appears on a plate when it should not.
Separations Preview also helps inspect total ink coverage. Excessive coverage can contribute to drying problems, setoff, and color shifts. Do not apply a universal maximum: obtain the limit from the printer for the specific press and paper.
On-screen separations are an inspection tool, not a substitute for a contract proof or physical press proof. They cannot show every production characteristic, including all trapping, marks, halftone behavior, and the way the chosen stock will absorb ink.
Recommended Free Tools
7. Run a printer-specific Preflight profile
Open Window > Output > Preflight. InDesign can report problems involving Color, Links, Images, Text, and Objects. Use Preflight Options or Define Profiles to create or select a profile that matches the job.
Rank #4
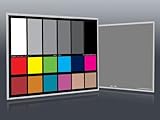
- Professional version of our popular DKK Card with n-Chrome coated color targets
- The color patches are 100% coated with DGK's n-Chrome process, allowing for a much higher level of color saturation, luminance, and accuracy, while getting rid of metamerism.
- Includes 2 DKC-Pro Cards - Each with Precision 12% and 18% Gray reference for white balance plus 18-Color patches for superior digital color correction
- For use with software such as Adobe Photoshop and Lightroom
A useful print profile may check for:
- RGB colors or RGB images when the printer requires CMYK-only content;
- unintended spot colors;
- missing or modified links;
- insufficient image resolution;
- overset text;
- transparency and overprint conditions;
- ink coverage above the printer’s specified limit, when supported by the workflow.
Do not assume that a generic “CMYK-only” profile is appropriate. It could incorrectly flag an intentional spot varnish or a managed RGB image workflow. Configure the profile from the printer’s written specifications.
8. Export the PDF with the correct destination profile
- Choose File > Export.
- Select Adobe PDF (Print).
- Choose the PDF preset or PDF/X standard requested by the printer.
- Open the Output section and review the color-conversion settings.
InDesign’s relevant output choices include:
| Setting | What it does |
|---|---|
| No Color Conversion | Preserves the color data rather than converting it during export. Whether this is correct depends on the printer’s managed workflow. |
| Convert to Destination | Converts process colors to the selected destination profile. |
| Convert to Destination (Preserve Numbers) | Converts where profiles differ while preserving certain native or untagged values. It is not the same as unconditionally converting every object. |
| Destination | Identifies the RGB or CMYK output profile representing the final printing condition. |
| Profile Inclusion Policy | Determines which profiles are embedded in the exported PDF. |
If the printer specifically says that the PDF must be converted to CMYK, select Convert to Destination and choose the exact CMYK profile supplied or specified by that printer. Do not choose U.S. Web Coated SWOP or another familiar profile simply because it is available. The destination profile represents a particular press, paper, and ink condition; the wrong one can change the color appearance.
[Press Quality] and PDF/X-4:2008 are examples of print-oriented choices, but the printer’s specification takes precedence. PDF/X is a delivery standard, not a universal “make this CMYK” command. PDF/X-4 supports live transparency and color management, while other PDF/X variants impose different requirements. Use the version and output intent requested by production.
9. Verify the exported PDF, not just the InDesign file
After exporting, inspect the PDF in a suitable preflight or output-preview application, such as Acrobat Pro’s Output Preview if it is available to you. Confirm all of the following:
- the expected Cyan, Magenta, Yellow, and Black plates are present;
- no unintended RGB objects remain;
- no unexpected spot plates remain;
- the correct output-intent profile is embedded or declared;
- overprint behavior is intentional;
- total ink coverage meets the printer’s limit.
The source and PDF checks are complementary. A source document may intentionally contain mixed color data that is converted during export. Conversely, the exported PDF can preserve or introduce color conditions that need their own inspection.
Independent reader supportYour contribution helps us test, update, and keep practical guides available for everyone.Common mistakes
Looking for File > Document Color Mode
That single document color-mode command belongs to Illustrator’s workflow, not InDesign’s. InDesign supports mixed color spaces, so inspect the actual objects and control the output process.
Assuming a CMYK swatch converts photographs
A CMYK swatch affects objects using that swatch. It does not convert linked RGB photographs or imported RGB artwork. Check those files separately.
Free tools Windows power users keep installed
One-click scans. No signup required.
Converting every spot color
Spot colors may be intentional brand inks, metallics, fluorescent colors, varnishes, or other specialty plates. Ask the printer before converting them.
Best Value

- SPECIFICATIONS: Monitor calibration colorimeter with Easy 1 2 3 software workflow, USB C connection, compact body approx. 34mm tall x 37mm diameter, adjustable counterweight for screen placement, supports up to 2 displays, brightness target selection including Native or Photo with before and after check.
- EASY SETUP: Guided 1 2 3 workflow makes calibration fast and approachable, helping photographers and creators achieve more accurate color without complicated settings, so you can edit with confidence and trust what you see on screen.
- COLOR ACCURACY: Corrects common monitor color shifts to deliver truer tones and more reliable contrast, improving consistency across editing sessions and helping your images look closer to final output on other screens and devices.
- DUAL DISPLAY SUPPORT: Calibrates up to 2 monitors for matching color across a multi screen workspace, ideal for photo editing, video work, and creative setups where consistent viewing on both displays matters.
- BEFORE AFTER CHECK: Built in comparison view lets you instantly see the difference after calibration, making it easy to confirm improved accuracy and maintain consistent results by repeating the process on a regular schedule.
Choosing a familiar CMYK profile automatically
There is no universally correct CMYK profile. The right destination depends on the actual printing condition. Ask for the profile, PDF/X requirement, total-area-coverage limit, bleed, and proofing instructions.
Trusting the monitor as proof
Most monitors display a different and often broader gamut than the selected print condition. A calibrated, color-managed display improves decisions, but it does not prove that a PDF is CMYK or predict every press result. A printed CMYK reference, printer-supplied proof, and correct output profile are more useful production references.
Quick CMYK print checklist
- Choose the Print intent for a new document.
- Ask the printer for its CMYK profile, PDF/X requirement, ink limit, bleed, and proofing requirements.
- Use CMYK process swatches for colors that require explicit CMYK values.
- Inspect linked photographs and imported graphics for RGB content.
- Review swatches for unintended spot colors.
- Set Edit > Transparency Blend Space > Document CMYK when required by the workflow.
- Inspect process and spot plates in Separations Preview.
- Check transparency, overprint, and total ink coverage.
- Run a printer-specific Preflight profile.
- Export with the printer’s destination profile and requested PDF/X settings.
- Preflight the exported PDF before sending it to production.
Further learning
If you are still learning InDesign’s broader print-production workflow, an InDesign training book can help with document setup, links, styles, preflight, and PDF export. It should supplement—not replace—the printer’s specifications, color profile, and proof.
What’s actually slowing this PC down?
Pick the symptom - the matching free tool is one click away.
Frequently Asked Questions
Does InDesign have a document-wide CMYK mode?
No. InDesign supports mixed color spaces in one document. Use CMYK process swatches where needed, inspect placed assets, and control color conversion during PDF export.
Will creating a CMYK swatch convert my images?
A CMYK swatch only affects the InDesign objects that use it. It does not convert linked RGB photographs or imported RGB artwork.
Which CMYK profile should I choose when exporting?
Ask the printer for the exact destination profile, PDF/X standard, total ink-coverage limit, bleed, and proofing requirements. The correct profile depends on the press, paper, and ink condition.
Do all images in an InDesign print file need to be CMYK?
Not necessarily. An RGB image may be intentionally preserved for conversion in a color-managed PDF workflow. Convert it before placement only when the printer requires pre-converted CMYK images.
PC Slower Than It Used to Be?
A free scan shows the junk files, broken settings and background clutter dragging Windows down - then fixes them in one click.Free scan · Windows 10 & 11Crashes, No Sound, or Screen Glitches?
Random freezes, missing sound and display glitches usually trace back to one bad driver. Find and replace yours safely.Free scan · under a minuteHow can I verify that the final PDF is CMYK?
Use Separations Preview in InDesign and a PDF preflight or Output Preview tool after export. Check for unexpected RGB content, spot plates, overprint behavior, output intent, and excessive ink coverage.
The Bottom Line
You cannot make an InDesign file “CMYK” with one document-wide switch. Prepare it for the intended print workflow by checking swatches, images, imported artwork, spot colors, transparency, and separations, then export with the printer’s exact CMYK destination profile and verify the final PDF.
Quick Recap

Product prices and availability are accurate as of the date/time indicated and are subject to change. Any price and availability information displayed on Amazon at the time of purchase will apply.




