ThatPainter is reader-supported. When you buy through links on our site, we may earn an affiliate commission. Learn More
Hand piecing means sewing quilt-block patches together by hand. Mark the seam lines on the wrong side of each patch, align the pieces right sides together, and join them with small running stitches. The essential supplies are simple, and accuracy comes mainly from matching the marked points and sewing on the lines—not from forcing every stitch to be identical.
What hand piecing means
Hand piecing is the process of sewing fabric patches together by hand to make quilt blocks and, eventually, a quilt top. You mark the seam line directly on the wrong side of each fabric piece, place matching pieces right sides together, and join them with small running stitches.
Hand piecing is not the same as hand quilting. Piecing constructs the patchwork top; quilting later joins the completed top to batting and backing. It is also different from English paper piecing (EPP), in which fabric is basted around temporary paper shapes before the prepared pieces are joined.
The Tool Desk
Outbyte Driver Updater FREEFix the driver behind crashes, sound loss and screen glitchesFind Drivers →Outbyte PC Repair FREEClear out junk files and repair common Windows errorsFree Scan →#1 Best Overall

- SEWING AND QUILTING RULER: Large acrylic ruler for precise measurement, with highlighted seam allowances, easy-to-read measurement lines, and broken grid lines for fabric edge visibility
- PRECISION ART SUPPLIES: Ideal for measuring and making precise cuts through fabric; Bold 3" x 18" measuring grid makes measurements easy to read with speed and accuracy; Non-slip vinyl feet can be removed or added for secure cuts
- LONG LASTING AND RELIABLE: Thick acrylic material for lasting durability after sustained use; Fiskars craft supplies and materials are built to last
- QUALITY TOOLS FOR ARTS AND CRAFTS: From scissors and cutting mats, rotary and paper cutters, to classroom essentials, scissors for kids, and quilting and scrapbooking supplies, Fiskars crafting tools are designed to help you express yourself
- INCLUDES: 1 Fiskars 3" x 18" Acrylic Sewing Ruler; Full lifetime warranty
The essential technique is simple: align the marked seam lines and matching points, sew precisely on those lines, and avoid stretching the fabric. You do not need a sewing machine or a large collection of specialist tools to begin.
What you need to hand piece
- Fabric patches: Quilting cotton is a forgiving choice for a first block.
- A thin needle: Thin sharps or betweens work well, and many hand piecers like a size 10 sharps needle. Needle size is a preference, not a universal requirement.
- Fine thread: Use a strong quilting or piecing thread. A fine 50-weight piecing thread is a useful option because it creates relatively flat, low-bulk seams.
- Fine pins: Extra-fine pins hold matching points while making smaller holes than thicker pins.
- Fabric scissors: These are enough for cutting a first practice block.
- A marking tool: You need a way to draw accurate seam lines on the wrong side of the fabric. Choose one appropriate for your fabric and pattern, and follow its removal instructions.
For anyone who wants to cut many patches accurately, a rotary cutter, self-healing mat, and acrylic ruler are useful conveniences rather than requirements. A coordinated quilting setup might include a 45 mm rotary cutter, a 12-by-18-inch mat, and a 6-by-12-inch ruler with fine grid and angle markings. Use the tools you already have for a small practice unit, then add cutting equipment if you decide to make more blocks.
If you are buying supplies, start with hand-piecing quilting needles and fine thread rather than assuming a branded kit is necessary. The method works with basic sewing supplies when the needle is comfortable and the fabric pieces are accurately prepared.
Before sewing: cut and mark the patches
- Choose a simple pattern. A square-based block with straight seams is the easiest place to learn. Use a small practice unit instead of beginning with an entire quilt.
- Cut the patches accurately. Inaccurate cutting makes matching difficult no matter how carefully you sew. If the pattern supplies templates or cutting dimensions, follow those instructions.
- Mark the seam lines. On the wrong side of each patch, draw the sewing line specified by the pattern. The marked line is more important than trying to estimate a generic quarter-inch seam allowance. Do not change the seam allowance unless the pattern tells you to.
- Mark matching points. Mark corners, triangle points, notches, or other places where seams must meet. These points give you something precise to align.
- Check the grain. Keep outside edges on the straight of grain where possible. Triangle pieces often contain bias edges, which can stretch; when the design permits, arranging a straight-grain edge against a bias edge helps reduce handling and distortion.
How to hand piece a seam
1. Place the pieces right sides together
Lay the two patches with their right sides facing each other. Align the marked seam lines, not merely the outside edges. Match the marked corners or other matching points first.
Do these 3 things before closing this tab:
1Fix the driver behind crashes, sound loss and screen glitches2Repair Windows errors before they cause bigger problems3Scan for outdated or missing drivers - takes under a minuteInsert a fine pin through the first pair of matching points and, if needed, through the remaining points along the seam. On a short straight seam, one pin at the starting corners may be enough; you can use the needle to align the opposite corners as you sew. Avoid adding so many pins that the fabric becomes distorted.
2. Thread the needle
Begin with about 12 inches of thread. A shorter length is easier to control and is less likely to tangle or weaken from repeated handling. Thread the needle and make a small knot at the end.
Rank #2

- Premium Thick Acrylic Construction Made of high grade transparent acrylic material, this quilting ruler set features a sturdy, wear resistant build that resists cracking, warping and bending for long term daily use. The clear design offers full visibility of fabric underneath, while smooth polished edges protect hands and fabric from snags or damage, ideal for frequent sewing and quilting projects.
- Precise Clear and Crisp Green Markings Equipped with sharp, fade resistant green measurement markings and clear grid lines, including 1/8 inch incremental scales, 90 degree right angle and 45 degree diagonal guides for ultra precise cutting and measuring. The high contrast green scale stands out clearly on both light and dark fabrics, eliminating reading errors and ensuring flawless piecing, trimming and block squaring every time.
- Complete Multi Size Square Set Includes 4 essential square quilting rulers in 3.5", 5", 6.5" and 10.5" sizes, covering all daily quilting, sewing and fabric crafting needs. From small patchwork details and trimming tiny blocks to large fabric cutting and full quilt block finishing, this all in one set meets the demands of beginners, hobbyists and professional quilters alike.
- User Friendly and Stable Design Lightweight yet durable structure ensures easy handling and maneuverability during crafting. The flat balanced design stays securely in place when cutting with rotary cutters, no unwanted shifting or sliding. Each ruler is easy to use for all users, with easy to read numbering and clear measurement guides for hassle free operation.
- Multi Purpose Sewing and Craft Tool This versatile acrylic quilting ruler set is perfect for quilting, sewing, fabric cutting, patchwork, scrapbooking and other DIY craft projects. Compatible with all standard rotary cutters and cutting mats, it is a must have essential tool for sewing rooms, craft studios and classrooms. A practical and thoughtful gift for sewing enthusiasts, quilters and craft lovers.
3. Anchor the starting point
Insert the needle from the top through both layers at the marked starting point. Make a small backstitch to secure the thread. Start exactly at the matching point if another seam will later intersect there.
4. Sew a short running stitch
Work along the marked seam line with a small running stitch, passing the needle in and out through both layers. You can load several stitches onto the needle before pulling the thread through, but keep enough control to prevent the layers from shifting.
A commonly taught target is a stitch about one-eighth inch long. Treat that as a practical guide rather than a pass-or-fail measurement: staying accurately on the marked line and keeping the pieces aligned matter more than making every stitch identical.
5. Check the underside as you go
Turn the work over occasionally. The stitches should follow the corresponding marked seam line on the lower patch as well as the line on the upper patch. This check catches shifting layers, particularly on longer or curved seams.
6. Finish at the marked endpoint
Sew only to the marked matching point. Do not continue into the seam allowance beyond it, because that point may need to meet another seam. Secure the end with two small backstitches, then trim the thread while leaving a short tail.
Press the joined unit
After sewing, press the joined unit according to the pattern instructions. Pressing helps the patchwork lie flat and makes the next alignment easier. There is no single pressing direction that suits every block: the best direction depends on how later seams intersect and on the pattern’s instructions.
Rank #3
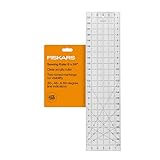
- ARTS AND CRAFTS STAPLE: Fiskars Sewing Ruler (6 in. x 24 in.) is an ideal size for cutting fabric from the bolt
- PRECISION ART SUPPLIES: Clear ruler has incremental grid lines and two-toned markings for visibility on light and dark material. 30-, 45- and 60-degree line indicators make it easy to cut at perfect angles.
- LONG LASTING AND RELIABLE: Fiskars craft supplies and materials are built to last
- QUALITY TOOLS FOR ARTS AND CRAFTS: From scissors and cutting mats, rotary and paper cutters, to classroom essentials, scissors for kids, and quilting and scrapbooking supplies; Essential for holiday gift wrapping supplies
- INCLUDES: Fiskars Sewing Ruler; Limited Warranty
Inspect the seam after pressing. The fabric should lie reasonably flat, the corners should meet, and the stitches should remain on the marked lines without passing through the seam allowances. A slightly uneven stitch length does not automatically ruin a block if the alignment is accurate.
How to keep hand-pieced blocks accurate
- Prioritize matching points. Align corners and marked intersections before pinning the middle of a seam.
- Sew on the lines. The marked lines control the finished size more reliably than the raw outside edges.
- Do not sew through the seam allowances. Stop and secure the seam at its marked endpoint.
- Use a light touch. Pulling the thread tightly can draw the seam together and create puckers.
- Handle bias edges carefully. Avoid tugging, stretching, or repeatedly repositioning triangles and other bias-cut pieces.
- Press between stages. A flat unit is easier to measure, match, and sew to the next piece.
- Inspect before continuing. It is easier to unpick one incorrect seam than to correct a distorted block after several more pieces have been added.
Hand piecing compared with English paper piecing
| Method | How pieces are prepared | Useful when | Extra materials |
|---|---|---|---|
| Traditional hand piecing | Seam lines are marked directly on fabric, and fabric patches are sewn together. | You want a direct method for ordinary quilt blocks and straight seams. | Needle, thread, marking tool, fabric, and basic cutting and pinning supplies. |
| English paper piecing | Fabric is basted around temporary paper shapes; the prepared shapes are then joined. | You are working with difficult geometric shapes, hexagons, or a highly portable project. | Paper templates, basting supplies, plus needle and thread. |
Neither method is a universal replacement for the other. If your pattern instructs you to mark and sew fabric directly, it is describing traditional hand piecing; if it supplies paper templates to wrap with fabric, it is describing EPP.
A low-risk first project
Make one small square-based practice unit before committing to a full quilt.
- Choose two contrasting cotton fabrics.
- Cut two or more simple patches to the pattern’s dimensions.
- Mark the seam lines and matching points on the wrong side.
- Place two pieces right sides together and align their lines.
- Sew one seam with small running stitches.
- Press the unit as directed by the pattern.
- Check the corners, seam line, flatness, and finished measurements before adding another unit.
This exercise isolates the important skills—marking, alignment, tension, and endpoint control—without making a mistake expensive to fix.
The Tool Desk
Outbyte Driver Updater FREEFix the driver behind crashes, sound loss and screen glitchesFind Drivers →Outbyte PC Repair FREERepair Windows errors before they cause bigger problemsFix Now →Troubleshooting common problems
The corners do not match
Check that the matching points were marked correctly and that you aligned those points before pinning the rest of the seam. If the pieces shifted, remove the seam and repin through the matching points. Do not rely on trimming the outside edges to disguise an incorrectly placed seam.
The block is distorted
Confirm that the stitches followed both marked seam lines. Look for stretched bias edges, especially on triangles, and for thread pulled too tightly. Press the unit flat without forcing it into shape. If the distortion began at one seam, correct that seam before adding more pieces.
Rank #4

- All in one 4 piece quilting ruler kit for quilting sewing patchwork fabric cutting measuring and pattern making.
- COMPLETProfessional clear permanent scales deliver precise cutting accurate patchwork and high standard craft projects.E SET:Quilting rulers, perfect for various quilting projects
- Shatter resistant durable acrylic ensures stable rotary cutting repeated use and long lasting accuracy.
- Perfect for quilt block making patchwork assembly fabric trimming DIY sewing and home decoration projects.
- Necessary quilting tools sewing supplies fabric cutting tools and accessories for hobbyists and professionals.
The seam is bulky
Try a finer piecing thread and avoid unnecessarily long or doubled thread. A 50-weight thread is commonly used for piecing because it can produce a flat seam with less bulk, but the best choice also depends on the fabric and your comfort with the thread.
The thread breaks
Use a shorter length, try a strong piecing or hand-quilting thread, and secure the ends with small backstitches. A thread that repeatedly snaps may be too fine for the fabric, damaged from handling, or being pulled too forcefully.
Quick wins for a faster PC:
Clear out junk files and repair common Windows errorsFree Scan →Fix the driver behind crashes, sound loss and screen glitchesFind Drivers →The seam puckers
Loosen your sewing tension: the thread should secure the layers without gathering them. Recheck that the marked lines on both patches were aligned before sewing and that the fabric was not stretched while you worked.
The needle is uncomfortable
Needle choice is partly personal. Choose one thin enough for the fabric and easy for you to thread, hold, and control. A size 10 sharp is a useful starting point, not a mandatory specification.
Independent reader supportYour contribution helps us test, update, and keep practical guides available for everyone.Optional cutting tools and safe handling
If you are cutting repeated patches, a rotary cutter, self-healing mat, and acrylic ruler can make measuring and cutting more consistent. A 45 mm cutter is a common general-purpose size, while a 6-by-12-inch ruler is convenient for many small quilting cuts. These tools improve convenience and repeatability, but they are not needed for a first hand-pieced block.
Use a rotary cutter only on a suitable cutting mat, keep your free hand away from the blade path, and close or guard the blade whenever it is not in use. A sharp blade used correctly cuts more cleanly than a damaged one, but sharpness also increases the risk of injury. Store rotary cutters, needles, and pins where children and pets cannot reach them.
Best Value

- Size: 6 x 24"
- Clear Printed Lines for Precise Cutting
- Non-slip coated surface ensures good grip
- Sturdy and durable acrylic material
- Reasonable design angle lines and grid lines
Quick checklist before you sew
- Are the patches cut to the pattern’s dimensions?
- Are the seam lines marked on the wrong sides?
- Are all corners and matching points clearly marked?
- Are the pieces positioned right sides together?
- Have you aligned the marked lines rather than only the raw edges?
- Are bias edges supported and free from stretching?
- Is your thread short enough to control comfortably?
- Will you stop and backstitch exactly at the marked endpoint?
Bottom line
To hand piece, mark the seam lines on accurately cut fabric patches, place the patches right sides together, align their matching points, and sew the marked line with small running stitches. Secure the seam at its endpoint, press the unit according to the pattern, and inspect it before continuing. Start with a simple square-based block and focus on alignment and gentle handling; those skills matter more than achieving perfectly uniform stitches.
Frequently Asked Questions
Do I need special tools to hand piece?
No. You can begin with fabric, a thin needle, fine thread, pins, scissors, and a way to mark seam lines. A rotary cutter, cutting mat, and acrylic ruler are useful for repeated accurate cutting but are optional for a first practice block.
Is hand piecing the same as English paper piecing?
Traditional hand piecing marks seam lines directly on fabric and joins the patches with stitches. English paper piecing wraps fabric around temporary paper shapes before the prepared pieces are sewn together.
What needle should I use for hand piecing?
A size 10 sharps needle is a practical starting point, but needle choice is personal. Select a thin needle that suits the fabric and that you can thread and control comfortably.
What thread is best for hand piecing?
A fine, strong quilting or piecing thread is appropriate. 50-weight thread is often useful for piecing because it produces relatively flat, low-bulk seams, although pattern and fabric requirements may vary.
The Bottom Line
Hand piecing is fabric patchwork assembled by hand—not hand quilting and not English paper piecing. Mark the seam lines, align the matching points, sew directly on the lines with a short running stitch, secure the endpoints, and press according to the pattern. A needle, thread, fabric, pins, scissors, and a marking tool are enough to begin.
Quick Recap

Product prices and availability are accurate as of the date/time indicated and are subject to change. Any price and availability information displayed on Amazon at the time of purchase will apply.




