Free tools Windows power users keep installed
One-click scans. No signup required.
ThatPainter is reader-supported. When you buy through links on our site, we may earn an affiliate commission. Learn More
This project is best understood as a handheld plastic-extrusion welder, not a conventional craft 3D pen. Created by YouTube maker half-baked-research and covered by Hackaday on March 7, 2026, it combines a 3D-printer-style hot end, a brass nozzle, and a modified filament extruder in a pistol-like housing. The goal is to heat the joint and add matching molten filament at the same time—faster and more deliberately than an ordinary 3D pen.
What problem is this tool solving?
Joining two printed parts is often harder than making them. Cyanoacrylate can bond clean, close-fitting surfaces, but it is brittle and poor at filling gaps. Epoxy fills voids, yet adds cure time and creates a permanent material interface. An ordinary 3D pen can deposit filament over a seam, but its small heater and tip may transfer heat slowly into the printed walls.
The DIY tool takes a different approach: soften the parent plastic around the seam and feed compatible filament into that softened region. That can help when a part needs internal reinforcement, when two pieces cannot easily be clamped, or when a crack, missing wall, or awkward gap needs additional thermoplastic rather than a thin adhesive film.
#1 Best Overall
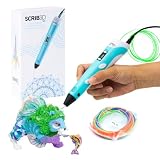
- [A GIFT FOR THE WHOLE FAMILY] Create, Draw, Doodle, and Build in 3D with this affordable yet high grade 3D pen. The new SCRIB3D P1 3D Pen helps improve spatial thinking, creativity and artistic skills. Great for quality family time and as a practical tool for making handmade gifts or decorations, or for everyday fixes around the home. The P1 Pen features a stepless speed function designed for optimal speed control no matter the task - whether slower intricate projects or faster infill work.
- [READY-TO-USE KIT] Includes 3 colors (30 feet) of PLA plastic to keep you Doodling for ages, as well as a power adapter, step-by-step manual, and a free stencil guide. Just plug in, heat it up and enjoy the fun of creating three-dimensional masterpieces. PLA is a versatile, easy-to-use printing plastic that is great for both first time and advanced users.
- [BEGINNER FRIENDLY] Plug the adapter into the back of the pen and choose your filament. The red light will turn on indicating warm up, this will take about 2-3 mins. Double click the forward button to start and feed the filament through the back of the pen. Once the filament has reached the nozzle of the pen, click forward to stop. Press and hold the forward button or double click for a continous flow. Once you have completed your design, press and hold the reverse button to retract filament.
- [MULTI-FUNCTIONAL] The SCRIB3D P1 Pen is temperature adjustable to accommodate multiple types of filament: PLA (160-210℃, 320-410°F) or ABS (210-235℃, 410-455°F). Unlike other 3D printing pens, the P1 has an easy-to-use stepless speed slider, designed for optimal speed adjustment. Perfect for any task, from slow & intricate projects to faster infill work.
- [SAFE & RISK FREE PURCHASE] The P1's ceramic nozzle and premium motor ensure safety and high performance without clogging. Equipped with 2 minute auto sleep function after 3D doodling stops, anti clogging features, and intititve controls ensure a seamless Doodling experience. 1 year guarantee and responsive customer service. Buy with 100% confidence. If there are any quality issues or you need getting started tips, please feel free to contact us and we'll be happy to help.
In practical terms, the project sits between a 3D pen and a plastic-welding gun. It is manually guided, but its important design priorities are heat delivery, feed rate, and seam access—not freehand drawing.
Why replace the pen tip with a printer hot end?
According to Hackaday’s project report, the creator replaced the relatively low-conductivity tip arrangement of a typical commercial 3D pen with a conventional 3D-printer hot end and brass nozzle.
That change matters for two reasons:
- More direct heat transfer: a metal nozzle can contact the edges of the seam and transfer heat into the nearby printed plastic.
- Higher material throughput: a modified printer-style extruder can push filament faster, allowing a reinforcing bead to be built without waiting for a small pen heater to recover.
The hot end is designed around a controlled melt zone. The nozzle melts and guides the filler while also acting as a compact heat source at the joint. This does not mean that every brass-nozzle tool will weld every polymer successfully. Heater power, thermal mass, temperature sensing, cooling, contact pressure, filament diameter, and control electronics all affect the result.
Why “plastic-extrusion gun” may be more accurate than “3D pen”
The familiar 3D pen is generally optimized for low-volume, fine, manual deposition. The featured device has a larger housing because it needs space for a more substantial extruder, hot end, wiring, and power electronics. That makes it potentially more capable for assembly and repair, but also heavier, hotter, and less delicate.
Do these 3 things before closing this tab:
1Repair Windows errors before they cause bigger problems2Scan for outdated or missing drivers - takes under a minute3Clear out junk files and repair common Windows errorsCalling it a pen communicates that the operator guides it by hand. Calling it an extrusion gun better describes the engineering trade-off: the device is meant to deliver heat and plastic to a seam with useful throughput.
What did the demonstration show?
The creator’s video compares several joining methods, with the strength testing beginning at approximately 13:38. In the demonstrated comparison:
- The DIY extrusion pen produced a stronger result than the ordinary 3D pen and superglue.
- The ordinary pen could join the pieces, but more slowly and awkwardly.
- Superglue produced a substantially weaker joint in that test.
- Traditional hot-air plastic welding produced the strongest result overall, according to the demonstration.
Those are useful comparative observations, not universal material-science conclusions. The available coverage does not provide numerical tensile or shear values, standardized specimens, repeated trials, or a complete test protocol. Important unknowns include the polymer formulation and brand, filament moisture, print orientation, wall thickness, joint geometry, bead dimensions, cooling time, load direction, number of repetitions, and failure location.
It is therefore accurate to say that the creator’s demonstrated test favored the DIY extrusion tool over an ordinary pen and superglue under those conditions. It is not accurate to claim a specific strength increase or to say that this tool always outperforms epoxy, adhesive, a hot-air welder, or every commercial pen.
Is it really welding?
The word “welding” is useful, but it deserves precision.
- Surface adhesion: molten filler sticks to a comparatively cold surface.
- Filler deposition: the tool adds material over a gap or seam, whether or not the base plastic fully melts.
- Melt bonding: heat softens both the filler and some of the parent material, allowing them to intermingle.
- Thermoplastic welding: the joint is formed by sufficient heat and pressure to fuse compatible plastic surfaces, often with a matching filler rod or filament.
- Adhesive bonding: glue forms a separate material layer between the parts rather than fusing the thermoplastic itself.
A bead placed on top of a cold wall may look welded while behaving more like a mechanical fillet or adhesive layer. Deep fusion depends on temperature, dwell time, pressure, joint preparation, and the polymer’s melt behavior. The DIY tool improves the operator’s ability to deliver heat and filler together; it does not remove the need for sound joint design.
Rank #2

- Turn your ordinary drawings into 3D works of art
- Stepless speed slider lets you regulate flow for optimal control of material while you're drawing
- New: ultrasonic sealed nozzle is nearly clog-proof and provides market leading durability
- The Super 3D Printing Pen is great for kids, artists and engineers of all ages
- Kit includes 3 colors of PLA plastic filament A/C adapter and slim, ergonomic touch pen with 1 year limited warranty
When does a filament extrusion welder make sense?
The concept is most compelling for repeated repair or assembly work involving compatible printed plastics:
- reinforcing a seam from inside an enclosure;
- joining parts that are difficult to clamp;
- filling a crack, gap, or incomplete wall;
- adding material before trimming or reshaping;
- repairing thin-walled assemblies where a broad hot-air stream could distort the part;
- building a substantial internal bead more quickly than a craft pen can.
Whenever possible, improve the joint before welding. A groove, overlap, tongue, scarf, or internal reinforcement path gives the molten material somewhere to occupy. A surface-only bead on a weak butt joint may fail at the interface or simply tear away from the wall.
Outdated Drivers Are Slowing You Down
One free scan finds every outdated or missing driver and matches the right update for your exact hardware.Free scan · exact hardware matchPC Slower Than It Used to Be?
A free scan shows the junk files, broken settings and background clutter dragging Windows down - then fixes them in one click.Free scan · Windows 10 & 11Use matching filament
The safest general rule is to use filler that matches the base plastic as closely as possible:
- PLA with PLA
- PETG with PETG
- ABS with ABS
- TPU with TPU, only with equipment and technique suitable for flexible filament
Color matching is not enough. Two plastics that look alike may soften at different temperatures or have poor interfacial compatibility. Mixed-material joints can also experience different shrinkage and cooling behavior. The available Hackaday coverage discusses PLA and PETG in the broader 3D-pen context, but exact material identification and settings for the featured test should not be assumed unless confirmed by the creator.
Commercial pens also impose their own restrictions. For example, 3Doodler’s Create+ compatibility guidance lists supported product-specific materials and recommends following the model’s material instructions. A commercial pen’s settings should not be transferred directly to an unverified DIY hot-end design.
A sensible general welding technique
Exact temperature, speed, and pressure depend on the tool and polymer, so the following is a process framework—not a settings chart for the featured project.
- Identify the base plastic. Do not begin with an unknown material if the repair will carry a meaningful load.
- Clean the joint. Remove dust, grease, loose strands, support residue, and weak or glossy surface material.
- Align and secure the parts. Use temporary fixtures or clamps where possible.
- Preheat the tool fully. Do not use the nozzle as a cold knife and then expect the first section to be representative.
- Tack the joint. Place small tacks at several points to preserve alignment before running a continuous bead.
- Heat both sides of the seam. Move the nozzle so the parent walls soften while matching filament is fed into the joint.
- Work in short sections. Pause before thin walls sag, discolor, or lose their shape.
- Let the joint cool without movement. A bead that is still soft can be pulled apart or twisted out of alignment.
- Trim or smooth after full cooling. Remove excess material only once the joint has solidified.
- Test on scrap first. Use the same filament and a similar wall thickness before attempting a visible or structural repair.
The most common mistake is treating filler as the whole joint. If the nozzle never heats the parent surfaces sufficiently, the result may be a strong-looking bead attached weakly to the print.
Why hot air can still produce a stronger weld
A hot-air plastic welder can heat a broader region around the seam. That larger heat-affected zone may allow more of the parent material to fuse, which helps explain why hot-air welding was strongest in the creator’s demonstration.
The same heat spread is its main disadvantage for printed parts. It can warp walls, soften thin sections, reduce dimensional accuracy, flatten unsupported geometry, or damage nearby details. The extrusion-welder concept is therefore not necessarily chasing maximum theoretical strength. Its appeal is localized heat with controlled filler delivery, particularly where broad heating would ruin alignment.
How it compares with other joining methods
Superglue
Cyanoacrylate is inexpensive, clean, and convenient for small rigid parts with close-fitting surfaces. It does not fuse the thermoplastic, is usually brittle, fills gaps poorly, and can leave visible whitening. The featured comparison found it much weaker than the DIY welding pen, but that result belongs to the demonstrated joint and test conditions.
Quick wins for a faster PC:
Scan for outdated or missing drivers - takes under a minuteDriver Scan →Repair Windows errors before they cause bigger problemsFix Now →Fix the driver behind crashes, sound loss and screen glitchesFind Drivers →Rank #3
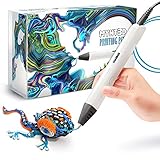
- Watch imagination come to life with the Professional 3D Pen
- Adjustable feed lets you regulate speed & flow for optimal control of material while you're drawing
- Temperature is adjustable in 1 degree increments from 140 to 230 C, for optimal fine-tuning
- Large, OLED display lets you monitor temperature of material to help you achieve a wide variety of effects
- Kit includes 3 colors of PLA plastic filament, A/C adapter and slim, ergonomic pen with 1 year limited warranty
Epoxy
Epoxy is useful when the parts are dissimilar, the joint has gaps, or a longer working and curing process is acceptable. It adds mass, can be messy, and cannot normally be remelted as a thermoplastic joint can. Its performance depends heavily on surface preparation and formulation.
Ordinary 3D pen
A conventional pen remains the easiest choice for occasional small repairs, decorative work, and fine manual deposition. It is already available, supported by a manufacturer, and simpler to use. Its limitations are slower deposition and less effective heating of the parent walls. Hackaday describes the ordinary pen as capable of welding, but slower and more fiddly than the featured tool.
PLA hot-glue-gun-style tool
A hot-glue-gun-like device that dispenses prepared PLA sticks can provide heavier extrusion for large internal beads, thick parts, and fast assembly. Hackaday has covered this approach in its discussion of printing sticks for a PLA hot-glue gun.
It is less attractive for narrow visible seams, intricate access paths, or work requiring standard 1.75-mm filament without preparing sticks.
What’s actually slowing this PC down?
Pick the symptom - the matching free tool is one click away.
Soldering iron or hot knife
These tools can blend a shallow seam or close a surface groove cheaply. They do not automatically add matching filler, and it is easy to gouge, contaminate, discolor, or overheat the print. They are better suited to blending and finishing than to depositing a controlled reinforcing volume.
Rotary-tool friction welding
Friction welding can use filament as a donor rod and may work well for some PLA repairs. It can be difficult to control in confined spaces and awkward orientations, however, and it provides a different heat-and-material process from a guided hot-end extrusion tool.
Independent reader supportYour contribution helps us test, update, and keep practical guides available for everyone.Important failure modes
Material mismatch
A bead can appear fused while remaining mechanically weak if the filler and base have incompatible melt behavior. Match polymer families and test on scrap.
Thin-wall collapse
Excessive dwell time, pressure, or heat can deform a wall before the filler supports it. This is where localized extrusion may have an advantage over hot air, but it is not immune to overheating.
The Tool Desk
Outbyte Driver Updater FREEScan for outdated or missing drivers - takes under a minuteDriver Scan →Outbyte PC Repair FREEClear out junk files and repair common Windows errorsFree Scan →Weak butt joints
A bead on the outside of a flat butt joint may fail at the interface. Add a groove, overlap, internal fillet, or other geometry when the design permits.
Layer-direction weakness
The weld may be stronger than the original print in one direction while the surrounding layer interfaces remain the actual failure point. A demonstration on one geometry cannot establish performance for every print orientation.
Rank #4

- [GREAT FOR GIFT-GIVING] Create, Draw, Doodle, Sketch, and Build like a Pro in 3D with our new SCRIB3D Advanced Pen. It features variable speed control, a large LCD screen to help monitor heat and ensure you have the correct settings, as well as a range of other engineering enhancements to ensure a smooth and accurate Doodling experience. Our most advanced 3D Printing Pen - designed for making accurate and creative 3d models and structures. The only limit is your imagination.
- [DESIGNED WITH COMFORT] Sleek and ergonomic design with curvature intended to fit your hand for the most comfortable 3D drawing experience on the market. The Advanced pen's "soft touch" surface is designed for optimal Doodling comfort. Features LCD display with buttons for loading / unloading and adjusting the temperature and speed, as well as 8 different speed options so you can regulate speed & flow for optimal control of line thickness while creating.
- [READY-TO-USE KIT] Includes 5 colors (15 meters ~50 feet) of PLA plastic, power adapter, step-by-step manual, and a free stencil guide. Just plug it in, heat it up and enjoy the unlimited fun of creating a three-dimensional masterpiece like a Pro. PLA is a versatile, easy-to-use printing plastic that is great for both first time and advanced users.
- [BEGINNER FRIENDLY] Plug the adapter into the back of the pen and choose your filament. The red light will turn on indicating warm up, this will take about 2-3 mins. Double click the forward button to start the pen and feed the filament through the back of the pen. Once the filament has reached the nozzle of the pen, click forward to stop the pen. Press the forward button once to start: click once to stop. Once you have completed your design, hold the reverse button to retract filament.
- [SAFE & RISK FREE PURCHASE] Built in safety features, anti clogging features, and intititve controls ensure a seamless Doodling experience. 1 year guarantee and responsive customer service. Buy with 100% confidence. If there are any quality issues or you need getting started tips, please feel free to contact us and we'll be happy to help.
Overheating
Repeated heating can discolor, embrittle, char, or otherwise degrade plastic. The project does not publish thermal profiles, so exact safe dwell times cannot be inferred.
Feed jams
A DIY tool can suffer from incorrect filament diameter, poor drive-wheel grip, heat creep, inadequate cooling above the melt zone, swelling filament, nozzle debris, or misalignment between the extruder and hot end. Clearances and feed-path design matter as much as heater temperature.
Recommended Free Tools
Safety is part of the design
This type of tool combines a high-temperature heater, a hot metal nozzle, moving gears, and potentially high-current power delivery. A project demonstration is not a safety certification.
A responsible build would require thermal cutoff protection, insulated wiring, strain relief, guarded gears, a mechanically secure hot end, a heat-resistant enclosure, and a nonflammable stand. Never leave a powered tool unattended, and keep the nozzle away from skin, cables, and combustible surfaces. 3Doodler’s Create+ manual likewise warns that the nozzle and nearby heated areas are hot.
Work with appropriate ventilation. 3Doodler’s material guidance recommends ventilation and notes that users may notice odors, particularly when working with ABS. Avoid treating smell as a reliable safety test.
Do not use an unvalidated plastic-welding repair for pressure vessels, safety-critical components, load-bearing vehicle parts, plumbing or fuel systems, high-temperature service, or anything whose hidden failure could injure someone or damage property.
Can you build this exact tool?
Not from the covered article alone. The creator had not released the design, so there is no verified downloadable enclosure, wiring diagram, firmware, exact component list, thermal settings, or validated bill of materials to reproduce the featured device faithfully.
An experienced maker could pursue the same broad architecture using a printer hot end, brass nozzle, filament drive, heater-control electronics, temperature sensor, motor driver, power supply, thermal protection, and a heat-resistant enclosure. That would be a new engineering project, not an exact copy. Beginners should not assume that combining printer parts automatically creates a safe handheld appliance.
What should you buy?
If you need an immediately available tool for occasional, low-volume work, a conventional 3D pen is the practical choice. As dated price signals observed on August 16, 2026, official storefronts listed 3Doodler Start+ Essentials from $49.99 and Flow Essentials at $79.99; 3DPen.com listed Create+ Standard at $39.99 and Pro+ models from $59.99. Prices, stock, regional availability, and compatibility can change.
Those products are alternatives, not replacements for the featured high-output DIY design. A commercial pen may use product-specific materials, nozzles, and temperature modes. For example, 3Doodler listed Create+ filament at $32.99 and a Create+ nozzle set at $14.99 on the cited date; these are accessories for compatible 3Doodler models, not automatically suitable parts for a homemade welder.
The Tool Desk
Outbyte Driver Updater FREEScan for outdated or missing drivers - takes under a minuteDriver Scan →Outbyte PC Repair FREERepair Windows errors before they cause bigger problemsFix Now →Choose by the job:
| Use case | Best first choice |
|---|---|
| Tiny cosmetic gap | Ordinary 3D pen or filler |
| Internal reinforcement of compatible printed parts | Matching-filament extrusion tool |
| Thick structural plastic repair | Hot-air welding or a dedicated plastic welder |
| Dissimilar materials | Epoxy or mechanical fastening |
| Thin visible seam | Adhesive, controlled iron blending, or a redesigned joint |
| Large-volume assembly | PLA hot-glue-gun-style tool |
| Flexible TPU | Material-specific equipment and testing |
The verdict
“DIY 3D Pen Is Born To Weld” is an interesting project because it addresses a real weakness of ordinary 3D pens: they can place filament on a joint without delivering enough controlled heat and material quickly enough for efficient repair. A printer-style hot end and brass nozzle make the concept more like a compact extrusion welder, with the potential for faster deposition and more localized heating.
Its demonstrated advantage is practical control, not proof that it replaces every joining method. Hot air reportedly produced the strongest joint in the comparison; adhesives remain useful for dissimilar or heat-sensitive materials; and an ordinary pen is still easier to buy and use for small jobs. The featured design also was not released, so readers should treat it as an inspiring engineering concept rather than a ready-to-build kit.
Quick Recap

Product prices and availability are accurate as of the date/time indicated and are subject to change. Any price and availability information displayed on Amazon at the time of purchase will apply.




