Quick wins for a faster PC:
What’s actually slowing this PC down?
Pick the symptom - the matching free tool is one click away.
Clear out junk files and repair common Windows errorsFree Scan →Scan for outdated or missing drivers - takes under a minuteDriver Scan →Repair Windows errors before they cause bigger problemsFix Now →
ThatPainter is reader-supported. When you buy through links on our site, we may earn an affiliate commission. Learn More
An Arduino mini CNC plotter is a small computer-controlled drawing machine—not a miniature CNC mill. The most practical beginner architecture is an Arduino Uno-compatible board running GRBL, a GRBL-compatible CNC Shield with separate stepper-driver sockets, two stepper motors for X/Y movement, and a documented servo or Z-axis solution for lifting the pen.
It can draw vector artwork, handwriting-style designs, diagrams, labels, signatures, and patterns on paper or card. It cannot reproduce raster images directly, produce printer-like filled areas without preprocessing, or safely mill and cut materials simply because the project is called “CNC.”
As an Amazon Associate I earn from qualifying purchases.
Do these 3 things before closing this tab:
1Clear out junk files and repair common Windows errors2Scan for outdated or missing drivers - takes under a minute3Repair Windows errors before they cause bigger problemsWhat an Arduino mini CNC plotter actually does
The machine follows paths calculated on a computer. A typical workflow is:
Vector drawing
    ↓
Inkscape or plotter/CAM software
    ↓
G-code
    ↓
Universal G-Code Sender or GRBL-Plotter
    ↓
Arduino running GRBL
    ↓
CNC Shield and stepper drivers
    ↓
X/Y movement plus pen lift
GRBL is open-source embedded CNC-control firmware. It parses incoming G-code, plans coordinated motion, and generates step and direction signals for the motor drivers. The Arduino is therefore not interpreting a picture or “drawing” pixels by itself; it is executing movement instructions sent over USB.
#1 Best Overall
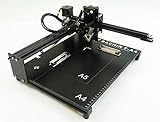
- Applicable system(s):XP/win7/win8/win10 ,Mac is not compatible. Supported Software: Bachin Draw, Please contact seller for support with software installation if necessary. NOTE: It is a plotter, not a printer.
- Imitation human writing: A drawing robot that can move a pen or other instrument to draw/write digital artworks on the flat surface like a human, no matter Chinese or English, etc.Support Over 100 Fonts, You Can Customize Your Fonts Too. You have to make fonts in the first place.
- Colorful layer painting: It can draw the pictures with many different colors. Good for making the posters.
- Open source: If you want to design your own XYZ plotter, the interface documentation can be provided (the detailed info., as below in the description) .Better for Repeat Jobs or Your Small Business
- Cross-disciplinary innovation :A research tool for creators, DIY enthusiasts, students, teachers, automation researchers, etc.p
Plotter versus other CNC machines
- Pen plotter: Moves a pen over a flat surface to trace paths.
- CNC router: Rotates a cutting tool and removes material. It needs much stronger mechanics, tooling, guarding, and safety provisions.
- Laser engraver: Uses a laser and requires substantially different optical and fire-safety controls.
- 3D printer: Deposits material layer by layer rather than tracing lines on a surface.
“CNC” describes computer-controlled motion. It does not automatically mean cutting, machining, or industrial precision.
What it can—and cannot—make
A mini plotter is well suited to:
- Line drawings and vector illustrations
- Greeting cards, labels, envelopes, and diagrams
- Handwriting-style output and signatures
- Geometric patterns and repeated designs
- Educational demonstrations of coordinates, motors, firmware, and G-code
- PCB marking or layout work that does not involve milling
It is a poor choice for:
- Photorealistic images without tracing, dithering, or other conversion
- Large filled areas with uniform ink coverage
- High-speed production
- Thick, warped, or uneven materials
- Reliable variable-pressure calligraphy without a compliant pen mechanism
- Drilling, routing, metal cutting, or woodworking
A raster photograph must first be vectorized, traced, converted to a line pattern, or otherwise preprocessed. Saving an SVG alone is not enough: the controller needs G-code containing movements and pen-lift commands.
Choose the machine architecture first
There is no single standardized “Arduino mini CNC plotter.” The name covers several designs.
| Design | Strengths | Trade-offs | Best for |
|---|---|---|---|
| DVD-drive or salvaged linear-slide plotter | Compact, inexpensive, educational, often uses lead screws | Very small drawing area and limited speed | First electronics or robotics demonstrations |
| Belt-driven gantry | Larger travel, higher speed, inexpensive motion hardware | Needs a rigid, square frame and correctly tensioned belts | Useful paper-size drawings and more ambitious builds |
| Lead-screw plotter | Good holding force and compact construction | Slower, more friction, and vulnerable to misalignment or binding | Small rigid machines and recycled mechanisms |
| Complete plotter kit | Faster assembly and more predictable mechanics | Less customization; documentation and included software vary | Readers who want to use a machine rather than design every part |
For a first general-purpose build, a belt- or lead-screw-driven frame with an Uno-compatible controller is the most transferable option. Choose a DVD-drive design when a tiny drawing area is acceptable and learning value matters more than capability.
Recommended parts list
Core electronics
| Part | Purpose |
|---|---|
| Arduino Uno Rev3 or compatible Uno-class board | Runs motion-control firmware and communicates over USB |
| GRBL-compatible CNC Shield V3 or equivalent | Routes step, direction, limit, and auxiliary signals |
| Two A4988 or DRV8825 driver modules | Drive the independent X and Y stepper motors |
| Two bipolar stepper motors | Move the X and Y axes |
| Pen-lift actuator | Usually a servo; alternatively a complete third linear Z axis |
| Separate motor power supply | Supplies the stepper drivers and motors |
| USB data cable | Connects the controller to the computer |
| Limit switches | Optional homing and travel protection |
Mechanical parts and tools
- Rigid frame, gantry, or salvaged linear mechanisms
- Belts, pulleys, lead screws, couplers, or linear slides appropriate to the chosen design
- Pen holder, preferably spring-loaded or otherwise compliant
- Flat drawing surface and paper clamps
- Multimeter, small screwdrivers, wire cutters, crimping or soldering equipment, and suitable fasteners
- Heatsinks or airflow for driver modules where required
NEMA 17 motors are common for belt and lead-screw machines, while tiny recycled plotters may use smaller geared steppers. Select motors by winding current, holding torque, shaft geometry, connector, and driver compatibility—not by the NEMA size alone.
Uno, Nano, or a newer Arduino?
Arduino Uno Rev3
The Uno is the safest starting point because classic GRBL was designed around the ATmega328P-based Uno platform and has extensive documentation. Official specifications include a 5 V operating voltage, 16 MHz clock, 14 digital I/O pins, six PWM-capable digital pins, six analog inputs, 32 KB flash, 2 KB SRAM, and 1 KB EEPROM. The official U.S. store showed a price of $27.60 on August 18, 2026; price, stock, tax, and shipping change by region and date. See the official Uno Rev3 documentation and store page.
Free tools Windows power users keep installed
One-click scans. No signup required.
Arduino Nano
A Nano saves space and is common in compact builds, but compatibility depends on the shield, bootloader, USB-to-serial chip, pin mapping, and firmware. Nano CNC Shield V4 boards deserve particular caution because published pin layouts and documentation can vary.
Rank #2

- The kit XY axis travel of this kit is 297×210mm, the same size as A4 paper. It is equipped with 42 step motor and MG90 servo.The recommended speed is 5000mm/minute.
- This kit uses the open source Arduino system, and can be used to write and draw on paper materials with related software. This kit requires the customer to assemble the test itself.
- This kit Support laser head expansion, provide firmware and source code.
- This kit has burned grbl0.9 version of writing and drawing firmware. Please burn the laser firmware yourself
- This kit is about 3kg, and the package size is 56 × 25 × 8cm
Uno R4 and other newer boards
Do not assume that an Uno R4 or another newer Arduino is a drop-in replacement for classic GRBL. Classic GRBL targets the ATmega328P architecture. A different microcontroller may require a different firmware build or CNC-control ecosystem.
CNC Shield V3 is not the Arduino Motor Shield
The common CNC Shield V3 is designed for plug-in A4988 or DRV8825 modules and provides separate stepper channels for a small GRBL machine. It is the normal inexpensive choice for independent X and Y motion.
However, “CNC Shield V3” is a generic product category. Inspect the actual schematic, labels, jumpers, and pin mapping. Many boards originated around older GRBL 0.9 conventions, while GRBL 1.1 changed some spindle-PWM and auxiliary-output assignments. GRBL-Plotter’s guide documents relevant firmware and shield differences.
The Tool Desk
Outbyte PC Repair FREEClear out junk files and repair common Windows errorsFree Scan →Outbyte Driver Updater FREEScan for outdated or missing drivers - takes under a minuteDriver Scan →The official Arduino Motor Shield Rev3 is a different product. It uses an L298P and is intended for two DC motors or one stepper motor. It is not the natural controller for a conventional two-axis GRBL plotter, which needs independent X and Y stepper-driver channels and an additional pen-lift output. The official European store showed €30.20 on August 18, 2026; regional pricing changes.
Recommendation: Use a GRBL-compatible CNC Shield with independent stepper-driver sockets for a conventional plotter. Use the Arduino Motor Shield only for custom motor-control experiments, not as the default plotter shield.
Power and wiring
The Arduino’s I/O pins cannot power stepper motors. Use the Arduino’s USB or regulated logic supply for the controller and a separate motor supply connected to the shield’s motor-power input. Confirm the shield’s polarity and voltage range before connecting anything.
The basic wiring is:
Computer ── USB ── Arduino Uno ── CNC Shield
                              ├── X driver ── X motor
                              ├── Y driver ── Y motor
                              ├── auxiliary/servo signal ── pen lift
                              └── optional limit-switch inputs

External motor supply ── CNC Shield motor-power input
Before applying power:
- Confirm every A4988 or DRV8825 module’s orientation. A reversed module can destroy the driver, shield, or related electronics.
- Set the driver current limit correctly for the specific module and motor.
- Install the required microstep jumpers consistently.
- Never insert or remove a driver while the shield is powered.
- Check motor-supply polarity with a meter.
- Keep exposed terminals insulated and provide strain relief.
- Ensure the servo has an adequate 5 V supply and shares signal ground with the controller where the selected design requires it.
For the motor connection, identify the two coil pairs. One coil must connect to one motor-output pair and the other coil to the second pair. A motor that only vibrates, clicks, or hums usually has incorrectly paired coils, a loose connector, an incorrectly seated driver, insufficient current, or a mechanically jammed axis.
Rank #3
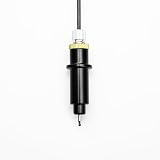
- Product Name: Pen Holder
- With pen refill
- Please compare the sizes and confirm before placing the order
- Compatible with Engraving Machine
- 1Pcs/Pack, Packing with Carton
Pen lift: the part generic tutorials under-explain
Ordinary GRBL is primarily designed around spindle and coolant outputs, not a hobby servo. A servo pen lift therefore requires a documented GRBL-servo fork, custom firmware, or an auxiliary output arrangement whose pin and command convention are known.
Before wiring the servo, establish all four of these details:
- Which exact firmware variant is installed?
- Which physical shield pin generates the servo signal?
- Which commands mean pen up and pen down?
- Does the selected sender preserve and transmit those commands?
Some builds use M3/M5; others use custom Z commands or a fork-specific convention. “Install GRBL and connect a servo” is incomplete advice. Arduino’s scalable pen-plotter example illustrates the kind of GRBL-servo adaptation used in this project category, but its exact firmware and wiring should not be assumed universal.
A stepper-driven Z axis is more compatible with ordinary three-axis GRBL, but adds a motor, driver, mechanism, weight, and complexity. For a pen-only machine, a servo is usually simpler if the firmware arrangement is documented and the power supply is adequate.
Recommended Free Tools
Firmware: install and verify GRBL
Classic GRBL is the usual starting point for an Uno-based plotter. The official flashing guide covers installing the GRBL library, opening the upload example in Arduino IDE, selecting the board and serial port, and uploading.
- Install Arduino IDE.
- Install or add the GRBL library.
- Open the GRBL upload example.
- Select the actual board and serial port.
- Compile and upload.
- Open a serial terminal or G-code sender.
- Confirm the controller produces the expected GRBL startup response.
Menu names can differ between Arduino IDE releases, so follow the current labels shown by your installed version rather than relying on an old screenshot.
Serial connection problems
- Use a USB data cable; some cables provide power only.
- Select the correct COM or serial port.
- Use the baud rate expected by the installed firmware.
- Close other programs that may be holding the port.
- Reset the controller after uploading.
- Install the appropriate USB-serial driver for clone boards, commonly a CH340-type interface.
GRBL-Plotter’s quick guide covers clone-board drivers, firmware upload, COM-port selection, and the expected startup response.
Rank #4

- Effortless Automation for Letters and Art: Transform your CNC into a fully automated writing and drawing machine, perfect for writing custom letters, creating intricate designs, and adding a personalized touch to any project
- Simple Installation: Designed for CNC enthusiasts, this module is easy to install and ready to use, instantly expanding your machine's capabilities with effortless customization
- Precision & Versatility: With this CNC module, enjoy precise lettering and detailed illustrations, ideal for both artistic projects and writing tasks
- Strong Compatibility: This drawing module works seamlessly with 42mm/52mm spindle CNC machines, making it the perfect upgrade for any CNC setup, from beginner to advanced.
- Expand Your CNC Potential: Bring your ideas to life with automated writing and drawing functions that turn your CNC from a cutting tool into a creative powerhouse, suitable for endless artistic exploration
Software workflow: vector art to pen movement
Inkscape is a practical free vector editor for creating paths, text, and shapes. A drawing must then be converted to plotter-compatible G-code through an extension, GRBL-Plotter, or another suitable tool.
Two commonly used control options are:
- Universal G-Code Sender, a cross-platform sender for GRBL and other CNC controllers.
- GRBL-Plotter, which converts graphics to G-code and provides GRBL machine-control features.
Check the complete chain before sending a job:
- Use vector paths rather than unconverted raster objects.
- Set the document and export units consistently, preferably millimeters.
- Confirm the drawing fits within the machine’s effective travel.
- Choose pen-up and pen-down commands matching the installed firmware.
- Inspect the generated G-code for unsupported commands, unexpected scaling, or incorrect units.
- Run the file with the pen lifted first.
Older tutorials may depend on Processing scripts, abandoned Inkscape extensions, Benbox, Windows-only utilities, or GRBL 0.8/0.9 assumptions. Treat those instructions as version-specific rather than universal. Arduino’s examples—including its fixed-belt plotter and mini drawing machine—show useful architectures, but software and pin conventions still need checking against the current hardware.
Independent reader supportYour contribution helps us test, update, and keep practical guides available for everyone.Commission the machine safely
1. Build and square the mechanics
Define the maximum paper size and effective X/Y travel before cutting or assembling the frame. Decide whether the paper moves or the pen carriage moves, then locate the pen lift, belts or lead screws, and optional limit switches. A flexible frame allows the pen to bounce and changes pressure during acceleration.
2. Test motors with the pen removed
- Jog X a small distance.
- Jog Y a small distance.
- Confirm each axis moves in the intended direction.
- Try progressively larger moves.
- Check for stalls, binding, belt slip, and travel beyond the frame.
- Test the pen-lift command separately.
Start with a square or cross, not a complex illustration. These shapes expose direction, scale, squareness, and pen-lift errors quickly.
3. Configure common GRBL settings
| Setting | Function |
|---|---|
$100, $101 |
X and Y steps per millimeter |
$102 |
Z steps per millimeter, if a Z axis is used |
$110, $111, $112 |
Maximum X, Y, and Z rates |
$120, $121, $122 |
X, Y, and Z acceleration |
$20 |
Soft limits |
$21 |
Hard limits |
$22 |
Homing cycle |
$23 |
Homing direction inversion |
Setting availability depends on the GRBL version and build. Query the controller with:
Crashes, No Sound, or Screen Glitches?
Random freezes, missing sound and display glitches usually trace back to one bad driver. Find and replace yours safely.Free scan · under a minuteWindows Errors? Fix Them Before They Spread
Repair common Windows errors and clear accumulated junk for a smoother, more stable PC - no reinstall needed.Free scan · no reinstall$$Save a value with a command such as:
$100=80The value is only an example. Calculate it for the actual motor, microstepping, pulley, belt pitch, or lead screw.
4. Calibrate steps per millimeter
- Mark the starting position of an axis.
- Command a known movement, such as 100 mm.
- Measure the actual movement.
- Apply the formula:
new steps/mm = old steps/mm × commanded distance ÷ actual distanceFor example, if an axis is set to 80 steps/mm, commanded to move 100 mm, and actually moves 96 mm:
Best Value

- Size: 11.5*31MM
- Material: Aluminium
- Its tongue and groove router bit set is truly versatile for your extra convenience.
- It clever anti kickback design ensures safe installation.
- Package Included: 1 x 11.5mm cutting plotter pen holder
80 × 100 ÷ 96 = 83.33 steps/mm approximatelyTest again in both directions. Persistent errors may instead indicate incorrect microstep jumpers, the wrong pulley tooth count, the wrong belt or screw pitch, mechanical slip, backlash, or lost steps caused by excessive acceleration.
5. Tune pen pressure and motion
Use a compliant or spring-loaded holder where possible. Excessive pressure causes dark starts and stops, paper buckling, motor stalls, rounded corners, and belt slip. Too little pressure causes gaps and faint lines. Begin at a slow feed rate and increase speed only after a simple test drawing is clean.
A4988 versus DRV8825
| Driver | Practical fit |
|---|---|
| A4988 | Common, inexpensive, and generally adequate for a small plotter. It still requires correct current adjustment and cooling. |
| DRV8825 | Offers higher microstepping options and may suit larger motors, but requires careful setup and is not automatically better for a small pen machine. |
Higher microstepping increases commanded resolution; it does not guarantee equivalent real-world accuracy. Backlash, frame rigidity, pen compliance, belt tension, motor resonance, and paper movement often dominate the finished drawing.
Symptom-based troubleshooting
| Symptom | Likely causes and checks |
|---|---|
| Motor vibrates or only hums | Coil pairs are wrong, a connector is loose, the driver is mis-seated, current is too low, or the axis is binding. |
| Motor skips during a job | Reduce acceleration and feed rate; check pen pressure, driver current, power supply, belt slip, and mechanical binding. |
| Axis moves backward | Invert the direction in firmware where supported, or reverse one complete motor coil pair. Do not swap only one wire from a coil. |
| Servo does not move | Ordinary GRBL may not provide the expected servo signal. Check firmware fork, signal pin, common ground, servo supply, and the sender’s command convention. |
| Drawing is mirrored or rotated | Check direction inversion, origin, work coordinates, machine coordinates, and artwork transformations. |
| Drawing scale is wrong | Check $100/$101, microstepping, pulley teeth, belt pitch, lead-screw pitch, and millimeter/inch settings. |
| Curves are rough | Look for backlash, loose belts, a flexible frame, excessive acceleration, poor G-code resolution, or a flexible pen holder. |
| GRBL rejects the file | Inspect unsupported commands, units, arc format, spindle/servo commands, and router-oriented G-code. Firmware and CAM command sets must match. |
| USB disconnects mid-job | Try a better cable; check motor noise, connectors, power, USB drivers, computer power management, and grounding. Avoid long unattended jobs until short files are reliable. |
Invalid or unsupported G-code and version-specific shield behavior are also covered in the GRBL-Plotter documentation.
DIY build or ready-made kit?
| Criterion | DIY | Kit |
|---|---|---|
| Cost | Potentially lower | Usually higher than raw parts |
| Learning value | Very high | Moderate to high |
| Documentation | Often fragmented | Centralized but variable |
| Mechanical quality | Depends on the builder | Usually more predictable |
| Customization | Excellent | Limited by the supplied frame |
| Time to first drawing | Longer | Usually shorter |
Buy a kit when fabrication, alignment, and sourcing are the main barriers. Build from parts when the goal is to understand stepper control, firmware, mechanics, and G-code. A kit is not automatically plug-and-play: verify that it includes the power supply, USB cable, pen-lift hardware, limit switches, firmware, and usable software.
Buying guidance
- Official Uno: Best when known board quality and official documentation matter. It does not solve mechanical, driver, shield, or servo compatibility by itself.
- Uno-compatible clone: Can be suitable for a budget project, but check the USB-serial chip, bootloader, regulator quality, and soldering.
- CNC Shield bundle: Inspect the exact schematic, driver type, jumpers, motor labels, and GRBL pin mapping rather than trusting a generic product title.
- Individual motors and drivers: Useful when choosing mechanics deliberately. Match motor current and driver settings.
- Complete plotter kit: Convenient for a faster first drawing, but check drawing area, documentation, included software, pen lift, and replacement parts.
- Different machine: Choose a purpose-built router, laser engraver, or printer when the intended result requires cutting, engraving, machining, or material deposition.
Parts prices vary by country, seller, shipping, and date. No fixed total project cost should be treated as universal. Free tools are sufficient for many builds: GRBL, Universal G-Code Sender, GRBL-Plotter, and Inkscape.
Final recommendation
For most beginners, build around an Arduino Uno-compatible board, a correctly documented GRBL CNC Shield, two A4988 drivers, two bipolar stepper motors, a separate motor supply, and a compliant pen holder. Add a servo pen lift only after selecting firmware that explicitly supports that servo, its pin, and its G-code convention.
This is an excellent project for learning motion control, vector workflows, and CNC fundamentals. It is a poor substitute for a printer or production machine, and the name “CNC” should not encourage anyone to use a lightweight pen plotter for milling or cutting. The quality of the result will depend as much on frame rigidity, calibration, pen pressure, paper, and artwork preparation as on the Arduino itself.
Quick Recap





