Do these 3 things before closing this tab:
Recommended Free Tools
1Fix the driver behind crashes, sound loss and screen glitches2Clear out junk files and repair common Windows errors3Scan for outdated or missing drivers - takes under a minute
ThatPainter is reader-supported. When you buy through links on our site, we may earn an affiliate commission. Learn More
A basic three-strut tensegrity prism uses three compression struts held apart by a network of nine tension connections. To build one, prepare equal dowels and matching tendons, follow a documented connection pattern, and increase tension gradually until the prism is balanced.
This guide explains the parts, routing, assembly, tuning, and safety checks for a small beginner model. There is no universal dowel length or tendon tension; consistent preparation and careful adjustment matter more than a single measurement.
What makes a tensegrity model different?
A tensegrity structure combines two kinds of members:
- Compression members: rigid struts such as wooden dowels. They push against the tension network but do not normally touch one another.
- Tension members: cords, elastic bands, or wire tendons. They pull around the structure and hold the struts in position.
The structure is stable because it is prestressed: before an external load is applied, the tendons are already under tension and the dowels carry compression. Every strut is mechanically held in place even though the model can look unsupported.
#1 Best Overall

- Understand the basics with these six wooden shapes: cube, cylinder, sphere, cone, triangular prism, and pyramid.
- Largest shape measures approx. 3"H.
- Packed in a bag.
- Recommended Grade(s):1-4
The word tensegrity became closely associated with Buckminster Fuller, who popularized the term in the early 1960s. The physical development of tensegrity sculptures also has important connections to artist and sculptor Kenneth Snelson. It is more accurate to distinguish the history of naming and popularization from the history of constructing the physical structures.
For a tabletop craft model, “stable” does not mean indestructible. Behavior depends on geometry, tendon lengths, material elasticity, attachment points, and prestress. A small change in cord length can make a model collapse or twist.
Why start with a three-strut prism?
A three-strut prism is a useful beginner project because it uses few parts while making the central idea visible. Once one prism works, you can try a more complex form or build compatible units into a tower.
The Tool Desk
Outbyte Driver Updater FREEFix the driver behind crashes, sound loss and screen glitchesFind Drivers →Outbyte PC Repair FREERepair Windows errors before they cause bigger problemsFix Now →Do not begin with a tower. A single unstable unit gives you no reliable way to tell whether the problem is the basic connection pattern, one tendon, or the connection between levels.
Materials for a first model
Use these as practical options, not universal specifications:
- Three straight wooden dowels of equal length. One model-making guide uses 9-inch (23 cm) dowels; another suggests roughly 6–9 inches. These are examples, not required dimensions.
- Tendon material. Elastic cord or rubber bands are forgiving of small measuring errors. Non-elastic polyester cord or wire can give more repeatable geometry but requires more accurate measuring and tuning.
- Anchors. Small eye screws, straight pins, box nails, or carefully made notches can work. Place them consistently on each dowel.
- Measuring tool and scissors. A ruler, measuring tape, or simple cutting template helps match tendon lengths.
- Needle-nose pliers and wire cutters. Useful for pins, eye screws, and wire loops.
- Optional masking tape, drill, and handsaw. Tape can help prevent splitting near the ends; a drill makes pilot holes for eye screws.
Elastic bands are convenient but not dimensionally precise. They can age, change with temperature, and take a set after repeated stretching. For a more repeatable model, use non-elastic cord or wire and allow more time for measuring and tensioning.
Rank #2

- 【Create Your Geometric Cathedral Architectural Model】 Bright floral chandeliers hang from the ceiling, radiating a warm glow. Paired with a modern checkered floor, it adds an elegant, retro charm. The semi-enclosed architectural structure creates a sense of independent privacy, making it exceptionally refined.
- 【Impressive LED Lighting Effects】This 3D wooden puzzle features built-in soft, warm lighting that filters through stained glass and rose windows, creating a mesmerizing halo. This shimmering effect lends the model a delicate and mysterious quality. The interplay of light and shadow makes the model shine like a work of art, adding a unique artistic atmosphere to your displays.
- 【A Relaxing and Enjoyable DIY Experience】 This puzzle is suitable for enthusiasts of all skill levels, offering a relaxed yet rewarding DIY challenge. Containing 111 pieces, it is recommended to assemble in approximately 2 hours, making it an ideal creative choice for personal leisure, relaxation, and stress relief.
- 【Premium Wood Material】Made from wood and PVC, safe and odorless. Exquisitely crafted, sturdy and durable. It serves as an elegant home decoration and is also an ideal gift for adult DIY enthusiasts.
- 【Free parts replacement service】 Rolife provides free replacement of broken parts. If you have any questions or concerns, we will assist you and offer solutions. Just ask us on the order page and we will respond within 12 hours.
Safety before you begin
- Wear eye protection when cutting or drilling dowels.
- Sand or cover sharp wire ends, pins, and cut eye screws.
- Keep fingers away from stretched rubber bands and elastic cord under tension.
- Use a stable work surface and secure the dowel before sawing or drilling.
- If you use glue, follow its label directions and provide ventilation.
- Keep small pins and cut wire away from young children.
Step 1: Prepare three identical struts
Cut three dowels to the same length. Apply masking tape near each cutting location to help reduce splintering. Lightly sand the ends, taking care not to remove noticeably different amounts from each dowel.
Windows Errors? Fix Them Before They Spread
Repair common Windows errors and clear accumulated junk for a smoother, more stable PC - no reinstall needed.Free scan · no reinstallOutdated Drivers Are Slowing You Down
One free scan finds every outdated or missing driver and matches the right update for your exact hardware.Free scan · exact hardware match- Mark equivalent anchor positions near both ends of every dowel.
- If using eye screws, drill small, centered pilot holes and install the screws to a consistent depth.
- If using pins or nails, make sure they are aligned and seated securely.
- If using notches, make them shallow and identical. Deep or sharp notches can weaken the dowel or cut an elastic tendon.
Label the struts 1, 2, and 3, and label their ends, such as 1A and 1B. This helps prevent accidentally reversing a strut and changing the model’s orientation.
Step 2: Make matching tendons
Do not cut each tendon by eye. Make a simple jig from scrap card or wood and use it to repeat the loop length. Leave enough extra material for the chosen knot or fastening method.
Prepare nine tension connections in matching groups. A jig and labels help keep corresponding tendon lengths consistent. The sources do not establish a universal tendon length or tension setting for every dowel size and material.
Step 3: Follow the nine-connection pattern
The standard three-strut prism has six nodes at the strut ends and nine tension connections: three around one triangular end, three around the other, and three linking the ends. NASA Tensegrity Robotics Toolkit documentation describes the prism using six nodes paired into three rods and nine exterior muscles; its example lists the string connections. Here, “tendons” means the physical tension-bearing cords, elastic, or wire used in a craft model.
Use a documented six-node/nine-tendon diagram for your chosen design. The cross-connections follow a consistent rotational pattern; do not improvise connections based only on which anchors are nearest. The struts should remain separated, and the two end groups should form rotated triangles.
Rank #3

- [ Classic Design ] - This is a 3D Vintage ship model wooden kit you can build by yourself. Its a lot of fun and a great sense of accomplishment when completed.The final product is great for displaying.
- [ Meticulous Workmanship ] - Made from natural wood. Using high-precision laser cutting technology, the parts are precise and easy to punch out of the sheet sand stay together without glue.
- [ Educational & Challenging Project] - Great family project. Assembly model set will bring the family together by keeping people away from eye-straining tablets, and instead promoting comprehensive brain development.
- [ Perfect gift & Room decor] - It is an ideal Christmas or Birthday gift for parents, lover, friends, etc.It is packaged wonderfully, easy to assemble, and the finished product creates a beautiful display for home, office, etc.
- [ Easy to Assemble] - With English instructions that are easy to follow, and have all pieces labeled and they are easy to locate and assemble.There are spares just in case. There is a dedicated after-sales team, If you have any questions, please feel free to contact us anytime. Do not worry.
Step 4: Assemble the prism loosely
- Attach one end group. Connect the appropriate ends of the three dowels with three tendons, keeping them loose enough to reposition.
- Attach the other end group. Connect the opposite ends with three tendons using the documented pattern.
- Add the three cross-connections. Follow the same rotational pattern throughout the prism.
- Check the arrangement. The dowels should not touch. If they do, correct the routing or lengths before adding tension.
- Center the struts. Rotate the dowels so the attachment points face the intended directions and the structure is not visibly leaning.
The model may look floppy at this stage. Establish the correct connection pattern before creating significant prestress.
Step 5: Tune the tension gradually
The goal is even, moderate tension, not maximum tightness.
- Shorten or tighten one tendon only slightly.
- Adjust its corresponding tendon on another side.
- Compare the shape and tension after each adjustment.
- Continue around the model rather than tightening one connection repeatedly.
With elastic cord, gently pluck matching tendons and compare their response. With wire, make small twists with pliers or a suitable tool and inspect the model after each adjustment.
A correctly tuned beginner model should have no visibly slack tendon, separated dowels, and a reasonably centered shape. A small, gentle disturbance should make it move and return toward its original shape. Stop once those conditions are met. Excessive tension can split a dowel, pull out an anchor, break an elastic member, or distort the geometry.
What to do when the model fails
The model collapses immediately
Check the connection pattern first. A missing tendon, incorrectly routed cross-connection, overly long cord, or uneven attachment points can prevent prestress from developing. Compare the loose assembly with the documented pattern; do not try to rescue incorrect routing by tightening harder.
The dowels touch
The network may be too loose, incorrectly routed, or unevenly adjusted. Inspect the tendons nearest the contact point, then retension them in small increments. Tightening one tendon can move several others.
Rank #4
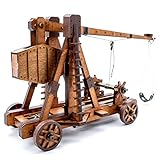
- Fun Mini trebuchet 3d puzzle: The 3d wooden puzzles Trebuchet is a cool playable toy. Based on the principle of embedded lever, the object can be ejected to the specified place through precise calculation, and people with strong practical ability can modify it to get a longer range.
- Easy Self-assembly: The instructions of wooden models puzzle are step-by-step guide video assembly tutorials. Everything in the kit is clearly marked and labeled so that assembly is as enjoyable as possible, you can develop your logical thinking and cultivate your hands-on ability.
- No Tools Needed: Unique 3d wooden puzzles for adults, laser-cut plywood, no toxic, environmentally friendly, smooth wooden board. All pieces are pre-cut, no tools are needed. All you need is super glue.
- Unique Crafts: Great wood model kits for adults as a craft decor your desk, arrtibute your visitor's eyes with this exquisite-looking. Imagine that you assemble the mini trebuchet models by your own hands.
- Gift Idea: This wooden puzzles can be done alone or with family, which is a nice gift for adults, teens, friends etc. on festival like birthday, graduation, anniversary, christmas.
The model twists or leans
Look for unequal tendon lengths, off-center anchors, dowels of different lengths, or a reversed strut. Numbering the ends and labeling matching tendon groups can help locate the error. Retune corresponding segments as a group.
The model is rigid but has the wrong shape
Rigidity alone does not prove the geometry is correct. If the model is firm but distorted, release some tension, compare the attachment pattern with the template, and check corresponding tendon lengths.
A cord breaks or a dowel splits
Reduce the tension and inspect sharp edges. Use pilot holes for eye screws, avoid forcing anchors into weak or split ends, and replace damaged or overstretched cord. A stronger cord is not automatically safer if the dowel or anchor cannot carry the added force.
Elastic cord, polyester cord, or wire?
| Material | Practical advantage | Trade-off |
|---|---|---|
| Rubber bands | Cheap, forgiving, easy to attach | Lengths vary; they age and may lose consistent behavior |
| Elastic cord | Easy first assembly and adjustment | Less geometrically precise than non-elastic material |
| Polyester cord | More repeatable than rubber bands | Requires more accurate measuring and tensioning |
| Wire | Compact and suitable for measured loops | Sharp ends, difficult adjustment, and little tolerance for dimensional error |
Handle wire with pliers and suitable wire cutters, and cover or bend every exposed end.
Independent reader supportYour contribution helps us test, update, and keep practical guides available for everyone.Painting and finishing the model
Build and tune the structure before painting. Paint can stiffen a tendon contact and make attachment marks harder to identify.
Recommended Free Tools
- Photograph or label the working configuration.
- Release tension carefully if you need to paint individual dowels.
- Apply a thin, even coat.
- Keep paint away from elastic contact areas and moving tendon loops.
- Allow the finish to dry fully before reassembly and retuning.
Different colors for struts and tension members can make the mechanics clearer.
Best Value

- 【Complex 319-Piece 3D Wooden Puzzles for Adults】 Challenge your mind with this intricate 3D wooden puzzle consisting of 319 precision-cut pieces. This mechanical model kit offers a rewarding DIY experience for hobbyists looking for a sophisticated brain teaser that combines engineering logic with hands-on fun.
- 【Manual Rotatable Axle & Vintage Steamboat Design】 This model ship kit to build for adults features a manually rotatable axle and paddle wheels. Inspired by vintage steamships, the design highlights a classic engineering aesthetic without the need for batteries, focusing on the tactile movement of the internal gears.
- 【Precision Wood Craft Kits & No Glue Required】 Made from high-quality wood materials, each part of this 3D model is laser-cut to ensure a seamless fit. Our wood craft kits are designed for a clean assembly process, resulting in a sturdy industrial art piece that showcases the refined texture of professional-grade wooden building kits.
- 【Sophisticated Desktop Decor & Industrial Style】 Once assembled, this retro boat model becomes a stunning desktop display for your office or home. Its minimalist and industrial-style look makes it a top choice for desk decor for men, adding an intellectual touch to any bookshelf or workspace.
- 【Perfect Engineering Gifts for Men & Model Collectors】 Whether for a birthday or a holiday, this steamboat kit is one of the most unique engineering gifts for men. It’s an ideal project for model ship enthusiasts and adult hobbyists who appreciate high-quality wooden models and the history of naval engineering.
Building more complex forms
After the three-strut prism is reliable, you can try a more complex form or a tower. More parts create more opportunities for small errors to accumulate. Use a measured design, label every end, make matching loops with a jig, assemble loosely, confirm the connection pattern, and tune matching tendon groups evenly.
A tower is not automatically stable just because each individual unit is stable. Adding levels changes the load path. Add one level at a time, check alignment, and retune the whole assembly.
DIY build or ready-made kit?
| Option | What to consider | Trade-off |
|---|---|---|
| DIY materials | You choose dowel size, anchors, and tendon material; you will need to measure and prepare the parts. | Flexible and adaptable, but assembly depends on your measurements and connection pattern. |
| Complete prism kit | Check included struts, number and type of tendons, tools required, instructions, and current stock. | Can simplify sourcing, but kit contents and availability vary. |
A Tensegrity Adventures kit listing described three pre-cut 1/4-inch wood dowel struts and nine tendons, with three elastic vertical tendons and six inelastic waist tendons; it also said pliers are required. The listing showed the kit sold out when researched, so check current availability and details before relying on it. The 1/4-inch dimension is an example from that listing, not a universal specification.
What’s actually slowing this PC down?
Pick the symptom - the matching free tool is one click away.
A compact build checklist
- Three straight, equal-length dowels are ready.
- Anchor points are consistent.
- Nine tendons follow one documented pattern.
- Strut ends are labeled.
- The structure was assembled loosely before tensioning.
- No dowels touch and no tendon is visibly slack.
- Tension was distributed through small, alternating adjustments.
- Sharp wire, pins, and tools are safely handled.
FAQ
How many struts and tendons does a basic prism use?
A standard three-strut prism uses three compression struts and nine tension connections: three around each triangular end and three between the ends. NASA Tensegrity Robotics Toolkit documentation describes this six-node, nine-connection arrangement.
What size dowels should I use?
Use three dowels of equal length. Published build examples differ: one uses 9-inch (23 cm) dowels, while another suggests roughly 6–9 inches. These are examples rather than universal requirements.
Can I build a tensegrity model without drilling the dowels?
Yes. Small pins, box nails, or carefully made notches can replace eye screws. Place anchors consistently and make sure they cannot pull out or cut the tendon.
Why do my tensegrity struts keep touching?
The network may be too loose, incorrectly routed, or unevenly tensioned. Check the connection pattern first, then adjust gradually rather than tightening one connection aggressively.
Should I use rubber bands or string?
Elastic cord or rubber bands are forgiving for beginners. Non-elastic cord or wire can provide more repeatable geometry but requires accurate tendon lengths and careful tuning.
Is a tensegrity model strong?
Strength is not universal. Performance depends on geometry, materials, scale, prestress, and loading. A tabletop model should not be treated as evidence that a larger structure is safe or suitable for a specific load.
Quick Recap

Product prices and availability are accurate as of the date/time indicated and are subject to change. Any price and availability information displayed on Amazon at the time of purchase will apply.




