Free tools Windows power users keep installed
One-click scans. No signup required.
ThatPainter is reader-supported. When you buy through links on our site, we may earn an affiliate commission. Learn More
A Christmas book nook is a miniature holiday scene made to sit between books or stand on its own, often with tiny lights. For a first project, choose a kit whose stated difficulty, piece count, estimated build time, finished dimensions, instructions and included electronics match your skill and display space. Measure the shelf before ordering, read the complete contents list, and treat seller-labelled “beginner” ratings as guidance rather than a guarantee.
As an Amazon Associate I earn from qualifying purchases.
This guide explains the main formats, compares the specifications published for several Christmas kits, and gives a practical build plan that works whether you buy a kit or create a custom scene.
What is a Christmas book nook?
A book nook is a small three-dimensional display designed to occupy the gap between books. A Christmas version turns that miniature space into a seasonal scene: a snowy lane, decorated shop, tree-filled room, village street or tiny house. Some designs are true shelf inserts; others are standalone room boxes, miniature houses, framed scenes, tins, music boxes or moving models. Those formats look related, but they do not all fit the same location or provide the same building experience.
Popular on Amazon

- Great Value Paint Brush Set: Soucolor 20 acrylic paint brushes come in 10 different sizes, making them ideal for fine detailing, model painting, rock painting, nail art, face painting, DIY crafts, and general art projects. The varied brush sizes give you better control for both delicate lines and broader color coverage, while the soft bristles deliver smooth, consistent results on acrylic, oil, watercolor, canvas, wood, ceramic, and more.
- Awesome Set of Paint brushes: Professional paint brushes can cover all of your needs. The multi-purposed brushes are ideal for Watercolor, Oil, Gouache, enamel, Acrylic Painting, Body, Nail, Face Painting, Miniature, Model, Wood, Glass, Cup, Ceramic, Fine work, Art class, Craft Art Painting, DIY Art Crafts etc.
- Soft and long-lasting: The bristles are soft and strong, with nickel metal ferrules and blue wooden handles. After cleaning, the bristles will become soft and fluffy again and will not fall off.
- Easy to clean: it’s very convenient to Wash well in soap and water. Retain shape after drying. the brushes hold up very well. Nice selection to beginners and professionals. Keep them clean and they last a long time.
- Perfect for All Painters & Occasions: Suitable for art beginners, hobbyists and professional artists. Great for art class, home creation, travel painting and DIY handmade projects. A practical art gift for students, teachers, family and craft lovers.
The distinction matters before you buy. A shelf insert must fit the width, depth and height of the gap between your books. A standalone house can sit on a desk or mantel even when there is no suitable shelf gap. A framed or tin scene may be easier to display but offers less walk-through depth. A moving or music-box design can add mechanisms and wiring that increase the work for a beginner.
Listings also use different definitions of “beginner.” One Christmas kit is described by its seller as intermediate despite having 200 pieces and a 6–8-hour estimate; another is labelled beginner with 245 pieces and a 4–6-hour estimate. Those are seller estimates, not standardized ratings or independently measured build times. [Book Nook World’s listing] [BookNookGifts’ listing]
Which Christmas book-nook format fits your display?
Pick the format by starting with the place where the finished model will live, then choose the level of mechanical and electrical complexity you are comfortable assembling.
| Format | Best location | What to expect | Beginner considerations |
|---|---|---|---|
| Shelf insert | Between books | A narrow, deep scene viewed from the front | Measure the opening precisely; depth and height can be as restrictive as width |
| Standalone miniature house or room box | Desk, shelf or mantel | A self-contained scene that does not need book support | Usually easier to place, but it may occupy more surface area |
| Music box or moving model | Display surface with room around it | May add a winding or motorized element | More parts and mechanisms can mean more troubleshooting |
| Framed scene | Wall, shelf or picture ledge | A shallow composition viewed through a frame | Less depth to assemble, but limited space for large miniatures |
| Scene in a tin | Desk, cabinet or gift display | A compact diorama with a small footprint | Small parts and tight working space require careful organization |
A kit described as fitting “between books” is not automatically suitable for every bookcase. Confirm the finished measurements in the product specification, not just the product photographs. The format overview from BookNookKit is useful for seeing how placement changes between shelf inserts, houses, room boxes and other designs.
How do the published Christmas kits compare?
The examples below show why a beginner should compare several facts at once. They are product-page claims accessed in November 2026, not independent tests.
| Listing | Seller-stated level | Pieces and estimated time | Published contents or features | Dimensions or placement information |
|---|---|---|---|---|
| Book Nook World Christmas DIY Book Nook Kit | Intermediate | 200 pieces; 6–8 hours | Pre-cut MDF pieces, pre-assembled LED light, paper decorations, electronic components and English instructions. The listing also mentions a dust cover and music feature. | 7.5 × 4.7 × 9.8 inches finished; intended as a miniature shelf scene |
| BookNookGifts Christmas DIY Book Nook Kit | Beginner | 245 pieces; 4–6 hours | Use the current listing for its complete contents and assembly information; specifications can change. | Dimensions are supplied on the listing; compare them with your available space before ordering |
| NOOKA Christmas House Book Nook Kit | Not stated in the supplied evidence | Not stated in the supplied evidence | Lighting and illustrated instructions are stated as included. | Check the current listing for finished measurements and placement |
The 200-piece example illustrates an important point: piece count alone does not determine difficulty. A kit can have fewer pieces but still require precise wiring, layered assembly or a mechanism. Conversely, a higher piece count may consist largely of flat, pre-cut parts. Use the seller’s difficulty label, the estimated hours, the instructions and the electronics list together.
Also popular on Amazon
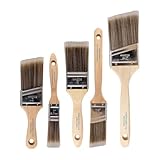
- COMPLETE 5-PIECE BRUSH SET FOR EVERY PAINTING TASK — Includes 1 Inch Flat, 1.5 Inch Angle, 2 Inch Flat, 2 Inch Angle Stubby, and 2.5 Inch Angle brush giving you every size professional painters use daily. Get all 5 for less than the price of a single brush from hardware store brands — professional grade performance at a fraction of the cost. Perfect for walls, trim, cabinets, doors, furniture, and detailed cutting-in work on any project.
- ZERO BRISTLE LOSS — GUARANTEED BY PRECISION ADHESIVE BONDING — Every bristle is locked in place with precision-set adhesive that keeps them in the brush — not in your paint job. The coated steel ferrule provides structural support while the adhesive bond ensures clean performance on every stroke. Premium SRT synthetic filaments load more paint and release it evenly for a smooth streak-free finish on walls, ceilings, and trim. Works with latex, oil-based paint, primer, sealer, and wood stain.
- INCLUDES THE ANGLE STUBBY MOST SETS LEAVE OUT — Professional painters know the 2 Inch Angle Stubby is the go-to brush for tight cabinet interiors, window sashes, inside corners, and detailed trim where standard angle brushes are too long. Combined with the 1.5 and 2.5 inch angle sash brushes you have precision cutting-in covered at every scale — baseboards, crown molding, door casings, and ceiling lines.
- FLAT BRUSHES FOR BROAD SMOOTH COVERAGE ON ANY SURFACE — The 1 and 2 inch flat brushes deliver even coverage on walls, furniture, shelving, doors, fences, decks, and wood surfaces. Ideal for applying primers, stains, varnishes, polyurethane, and specialty coatings. Solid wood handles provide all-day comfort and control for both professional contractors and weekend DIY homeowners tackling interior or exterior painting projects.
- TRUSTED BY PROFESSIONAL PAINTERS AND CONTRACTORS NATIONWIDE — Pro Grade delivers professional-grade results at a price that makes sense for crews who go through brushes on every job. Ideal for property managers, remodeling contractors, apartment turnover crews, maintenance teams, and commercial painting operations. Backed by thousands of verified reviews from working painters. Washable and reusable for multiple projects.
What should you check before ordering?
Use this checklist on the product page or downloadable instruction sheet. If an answer is missing, contact the seller before paying rather than assuming the item is supplied.
Crashes, No Sound, or Screen Glitches?
Random freezes, missing sound and display glitches usually trace back to one bad driver. Find and replace yours safely.Free scan · under a minuteWindows Errors? Fix Them Before They Spread
Repair common Windows errors and clear accumulated junk for a smoother, more stable PC - no reinstall needed.Free scan · no reinstall- Finished dimensions: Write down width, depth and height. Measure the shelf gap or display surface, then leave a little clearance so the model is not wedged tightly between books.
- Display format: Confirm whether the product is a shelf insert, freestanding house, room box, framed scene or another design.
- Difficulty and workload: Note the seller’s level, piece count and estimated hours. “Beginner” is a marketing label, not a universal standard.
- Structural materials: Check whether the kit uses pre-cut MDF, card, paper, wood or mixed materials. The materials affect how you handle, paint and glue the parts.
- Lighting and electronics: Find out whether LEDs, wiring, switches, connectors and a battery holder are included, and whether the lighting arrives pre-assembled.
- Power requirements: The Book Nook World example specifies three AAA batteries and says batteries are not included. Do not assume another kit uses the same number or battery type.
- Adhesive: The same listing says glue is excluded. Check the instructions for the adhesive type and buy only what that kit calls for.
- Instructions: Look for the language, diagrams and step sequence. NOOKA, for example, states that illustrated instructions are included, while other listings may provide different formats.
- Cover and extras: A dust cover can reduce cleaning, while a music feature or moving element may add complexity. Verify exactly what the current listing includes.
- Regional details: Product specifications, stock and delivery options can change by country. Recheck the live listing immediately before ordering.
What do you need for a first build?
Start with the kit’s own instructions, because they take precedence over generic craft advice. Set up a clear, well-lit table where small parts can remain undisturbed between sessions. A shallow tray or several labelled containers will keep similar pieces from mixing.
Have the adhesive named by the instructions, a fine brush or applicator if the kit calls for one, a pencil for marking, a ruler, scrap paper for protecting the table and the specified batteries if they are excluded. Keep a phone or camera nearby to photograph each completed subassembly; a reference image can help if you pause for several days. Do not substitute a power supply, battery type or connector merely because it looks similar.
Protect the work surface from glue and paint, keep liquids away from the electrical parts, and provide ventilation for any adhesive or coating that requires it. Small components can be a choking hazard, so keep them away from young children and pets while you work.
How do you build a Christmas book nook step by step?
The exact order differs by kit, but this sequence prevents most avoidable rework.
- Inventory every part. Spread the pieces out and compare them with the parts list. Keep factory labels or the instruction-page numbers visible. If something is missing or damaged, photograph it and contact the seller before gluing.
- Read the entire instruction booklet. Look for steps that must happen before walls close, such as threading LED wires or installing a switch. Mark those points with a removable note.
- Dry-fit the main structure. Assemble the base, side walls and roof without adhesive. Check that tabs, slots and panels align and that the finished footprint matches the stated dimensions.
- Plan the wiring route. Identify where the battery holder, switch and LED leads will sit. Feed wires through the specified openings while the structure is still accessible; forcing them through after the walls are fixed can damage the insulation.
- Build in small subassemblies. Construct furniture, trees, signs, windows and other details separately. Keep each group in its own tray and compare it with the illustration before attaching it to the scene.
- Paint or finish before final installation. If you are changing colours, test the paint on a spare or hidden area first. Keep coats thin so tabs and slots still fit, and let each coat dry before joining parts.
- Assemble the shell gradually. Apply only the amount of adhesive the instructions call for, align one joint at a time and allow it to set. Wipe excess immediately so it does not show through a lit panel.
- Install lighting and test at the instructed stage. Confirm polarity, connector seating and switch position before closing the last access panel. Use the specified batteries only for the final check.
- Add fragile decorations last. Paper ornaments, snow effects, tiny gifts and thin signs are easier to damage than the structural pieces. Fit them after the walls and wiring are secure.
- Inspect the finished scene. Check that it stands level, that no wires are pinched, that the switch remains reachable and that the model can be moved without loose parts sliding inside.
For a seller-estimated 4–6-hour project, plan two or three shorter sessions rather than rushing in one sitting. The 6–8-hour estimate attached to the intermediate 200-piece example likewise describes a workload, not a promise of how long every maker will take.
Also popular on Amazon
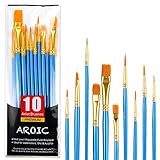
- 【All sizes of art brushes】: The 10 sizes of multi-functional brushes have various shapes, making the mixing color easier, which is very suitable for artists, students, teenagers, children and painters at all levels. Wonderful Present ideas for friends and family who like painting!
- 【general brush set】: Professional paint brush can meet all your needs. Multifunctional brush is very suitable for watercolor, oil, gouache, acrylic painting, body, nail, face painting, miniature, model, ceramics, arts and crafts painting, etc.
- 【high quality process】: It is designed with anti falling bristles, anti-rust nickel ferrule and solid wood handle. You can use the brush to focus on the painting and always be creative.
- 【easy to maintain】: After using the brush, it is very convenient to clean the brush with warm soapy water and reshape the tip of the brush. Air dry the brush and place it on top of the top for long use.
- 【100% satisfaction guarantee - buy now】1 packs of set brushes, you can also get friendly customer service, any questions feel free to contact us, within 24 hours to help you! There is no risk in buying our paint brush kit.
How should you handle the LED lighting?
Lighting is one of the most attractive features of a Christmas nook, but it is also the part most likely to cause frustration if installed late. Some listings describe a pre-assembled LED or included lighting; confirm whether your kit arrives wired or expects you to connect individual components.
- Trace the circuit first: Identify the LED leads, battery holder, switch and any connector shown in the diagram.
- Protect the cable path: Use the channels or holes provided. Do not crush a wire under a wall tab or pull it tight around a sharp MDF edge.
- Check polarity and batteries: Insert batteries in the orientation shown by the instructions. A light that does not turn on may simply have reversed polarity, an unseated connector or a switch in the off position.
- Test before closing: Turn the system on while the interior remains accessible. If it fails, remove power before reseating a connector or examining the route.
- Keep power components accessible: Position the holder so batteries can be changed without dismantling the model, following the kit’s layout.
- Remove batteries for long storage: Seasonal displays may sit unused for months. Removing batteries reduces the chance of leakage; store them separately according to the battery maker’s guidance.
Never connect a kit to a different voltage source or improvise a charger unless the manufacturer explicitly permits it. The three-AAA requirement reported for one Book Nook World listing applies to that listing, not to book nooks generally.
How can you paint and personalize the scene?
A kit gives you a defined architecture, but paint and small substitutions can make the result your own. Work from large surfaces to tiny accents: establish wall, roof and ground colours first, then add trim, signs, windows, snow and warm interior details.
Do these 3 things before closing this tab:
1Scan for outdated or missing drivers - takes under a minute2Repair Windows errors before they cause bigger problems3Fix the driver behind crashes, sound loss and screen glitchesDry-fit before painting any joint that must slide into a slot. Thick paint can close a narrow opening, and glue adheres less reliably to a heavily coated joining surface. Leave contact areas unpainted where the instructions indicate, or gently clear them before assembly.
For a cohesive Christmas palette, choose one dominant exterior colour, one secondary trim colour and a small accent colour for ornaments or shop signs. Warm lighting generally reads clearly against darker interiors, while pale walls and snow effects reflect more light. These are design choices rather than performance guarantees, so preview a colour on scrap material or an inconspicuous area.
Custom details can include a different paper sign, miniature presents, a hand-painted wreath or a tiny tree made from materials already listed in the instructions. Keep additions lightweight and clear of moving parts, switches, ventilation openings and LED lenses. A custom scene is not automatically easier than a kit; every extra detail adds another decision and another item to secure.
Also popular on Amazon

- 【KIDS PAINT BRUSHES SET】Anezus paint brushes for kids come with 10 pcs paint brushes of 5pcs round paintbrushes and 5 flat paint brushes with colorful handles, good for the young artist to explore their creativity in painting and crafting
- 【HIGH QUALITY PAINT BRUSHES FOR KIDS】These toddler paint brushes made of soft hog bristle, bright colored handles and rust proof ferrules. The bristles are firmly fixed in the kids paint brushes and no shedding. Each children paint brush measure 6 1/4 inches (16cm) in length and ferrules 1/2"(1.3cm) diameter, large enough for the little hand to grip and control
- 【WIDE APPLICATIONS】With combination of round and flat craft paint brushes for kids, work great with washable paint, tempera paint and acrylic paint. Great for arts and craft, rock, leather, gesso and ceramic, or body, nail and face art painting.
- 【EASY TO CLEAN 】After using paint brushes for acrylic, oil or watercolor painting, it’s very convenient to clean them with warm soapy water and reshape the paint brush tips. Keep these craft paint brushes clean and they last a long time.
- 【GREAT GIFT IDEA】Perfect for students, teens, kids, children and painters of all levels. Wonderful gift idea for girls, boys and kids who love painting! These all-purpose paint brushes for kids are ideal for kids' school projects, birthday parties, painting parties, art parties, back to school supplies, classroom decoration and more.
What are the most common beginner mistakes?
| Problem | Likely cause | Recovery |
|---|---|---|
| The nook does not fit the shelf | The buyer relied on photos or a generic “book nook” description | Compare the stated finished width, depth and height with the measured opening before ordering. If already built, use it as a standalone display rather than forcing it into the gap. |
| A wall or floor is crooked | Permanent glue was applied before a dry fit | Stop, support the joint squarely and follow the adhesive’s setting guidance. Do not force a dry joint that could split the MDF or card. |
| A tab no longer fits | Paint or glue accumulated on the joining surface | Remove excess only as the material and instructions allow; avoid shaving away structural material indiscriminately. |
| The LEDs stay dark | Reversed batteries, loose connector, trapped wire or a switch left off | Disconnect power, inspect the diagram and test each accessible connection in the instructed order. |
| Decorations disappear in the scene | Details were placed without checking the viewing angle | View the nook from normal shelf height before permanently fixing small items. |
| Parts go missing | Several subassemblies were mixed on one work surface | Use labelled trays or bags and return unused pieces to their original group after every session. |
| The build feels much harder than expected | The seller’s “beginner” label was treated as a standardized promise | Break the project into sessions, reread the next three steps before acting and ask the seller about unclear diagrams. |
How should you display and maintain a Christmas book nook?
Place the finished model on a stable, level surface away from direct heat, moisture and locations where books can press against its walls. A shelf insert should have enough clearance to slide out without catching on neighbouring spines. A standalone scene needs a footprint that will not be bumped when people reach for nearby objects.
Free tools Windows power users keep installed
One-click scans. No signup required.
Dust is especially visible on dark roofs and tiny ledges. If the kit includes a dust cover, use it when the display is not being viewed; the Book Nook World example lists one as a feature. Otherwise, use the gentle cleaning method recommended for the materials and keep liquid away from the electronics. Do not lift the model by a delicate roof, sign or wire; support the base with both hands.
At the end of the season, switch the lights off, remove batteries if the manufacturer’s instructions allow, photograph the arrangement and wrap loose decorations separately. Store the model in a dry box with padding that does not press against fragile parts. Recheck the structure and wiring before displaying it again.
Is a ready-made kit or a custom Christmas scene better for a beginner?
A ready-made kit is usually the more predictable starting point because the parts, dimensions and sequence are defined. It is a practical choice when you want a finished holiday display without designing the architecture. The trade-off is that you must accept the kit’s scale, layout and materials, and you still need to verify what the package excludes.
A custom scene offers control over the size, colour palette and subject. You can design a shallow insert for an unusual shelf, reuse materials you already own or create a scene that matches a particular book collection. The cost of that flexibility is planning: you must design the structure, source compatible lighting if desired, and solve fit and stability issues yourself.
For a first project, compare the two paths using the same questions: Where will it sit? How much uninterrupted time do you have? Are you comfortable with wiring? Do you want illustrated instructions? Would you rather follow a fixed design or make artistic decisions at every stage? There is no universally easiest format; the best choice is the one whose demands match your space and patience.
Also popular on Amazon

- 【162-Piece Bulk Set | Dual Brush System】Maximize versatility with 81 flat brushes (0.59 inch edge for bold strokes) and 81 round brushes (0.39 inch tips for details) – 3X more tools than standard kits! Pre-sorted in labeled compartments for instant access during painting sessions. Ideal for art classrooms, mural projects, and multi-artist households.
- 【Pro-Grade Durability | Zero Shedding Guarantee】 "Engineered with triple-crimped nylon bristles (43% higher resilience vs. standard) and aerospace aluminum ferrules tested for 10,000+ flex cycles. Lab-verified 0.01% shedding rate even with heavy impasto techniques – outperforms flimsy bristles in budget brushes."
- 【Multi-Scenario Readiness | Event & Daily Use】 Optimized for: Thanksgiving/Christmas face designs classroom projects ceramic decorating fabric printing and model painting; Lightweight plastic handles each reduce hand fatigue during prolonged sessions
- 【Effortless Maintenance | Long-Term Durability】 Clean with warm soapy water in 10 seconds; Reshape tips and air-dry vertically to preserve bristle integrity,After use, air-dry brushes thoroughly and store upright in the provided case to preserve bristle shape. The premium nylon filaments naturally regain their original form after each stroke. For cleaning, simply rinse in warm soapy water and gently reshape bristles with fingertips."
- 【Multiple Application】These acrylic paint brushes can be applied for most occasions,such as:watercolor,oil, gouache paint,face paint, acrylic paint, suitable for Thanks Giving Day, Christimas, Halloween face and body painting, canvas painting, fabric, rock, miniature, model, ceramics, arts and crafts painting, etc.
What is the simplest decision process for your first Christmas book nook?
- Measure the destination. Record the maximum width, depth and height, plus the clearance needed to remove the model.
- Choose the format. Select a shelf insert only if the gap suits it; otherwise consider a freestanding house, room box, framed scene or tin.
- Set a workload limit. Use the seller’s estimated hours and piece count to choose a project you can complete without rushing.
- Read the contents list. Confirm structural parts, decorations, lighting, instructions, glue and batteries.
- Check the electrical plan. Note the battery type, switch location and whether wiring is pre-assembled.
- Plan your sessions. Reserve a clean work surface and divide the build into inventory, structure, wiring, decoration and final inspection.
- Buy only compatible extras. Follow the kit’s instructions rather than substituting adhesives, batteries or power supplies by guesswork.
Following those steps prevents the two most expensive beginner errors: buying a model that cannot fit the intended location and discovering halfway through that essential supplies or instructions are missing.
What should you remember before you start?
A Christmas book nook succeeds when its scale, workload and display format suit the maker. Treat seller specifications as the starting evidence: one listed kit is 7.5 × 4.7 × 9.8 inches with 200 pieces and a 6–8-hour intermediate estimate, another is labelled beginner with 245 pieces and a 4–6-hour estimate, and another advertises lighting with illustrated instructions. Verify the live listing because contents and availability can change.
Measure first, inventory second, dry-fit before gluing, route the lighting while access remains easy, and add fragile seasonal details last. With those habits, a beginner can build a convincing miniature Christmas scene without needing to guess whether it will fit, what it needs or where the difficult steps are.
Recommended Free Tools
Frequently Asked Questions
Can I make a Christmas book nook without buying a kit?
Yes. You can design a simple shelf insert or room box from measured card, foam board or thin wood, then add paper scenery and miniature furniture. Plan the structure and lighting route before cutting; a custom build removes the kit’s parts list and instructions, so you become responsible for fit, stability and compatible power components.
How long does a Christmas book nook stay on display?
Many makers treat these scenes as seasonal décor, but the model can remain on display year-round if it is protected from dust, moisture, heat and pressure from neighbouring books. For long storage, switch off the lights, remove batteries where appropriate and cushion fragile details without compressing them.
What should I do if my book nook lights stop working after storage?
Start with the non-invasive checks: install fresh batteries of the specified type, confirm their orientation, move the switch through its full travel and reseat accessible connectors with power disconnected. If the wiring is damaged or the instructions do not cover the fault, contact the kit seller rather than replacing components with an unapproved power source.
Are Christmas book nooks suitable for children?
They contain small parts, sharp edges and sometimes battery-powered electronics, so suitability depends on the child’s age, dexterity and the manufacturer’s guidance. An adult should handle cutting, adhesives and wiring, supervise assembly and store loose pieces where young children and pets cannot reach them.
The Tool Desk
Outbyte Driver Updater FREEScan for outdated or missing drivers - takes under a minuteDriver Scan →Outbyte PC Repair FREERepair Windows errors before they cause bigger problemsFix Now →Quick Recap


