Free tools Windows power users keep installed
One-click scans. No signup required.
Do these 3 things before closing this tab:
1Clear out junk files and repair common Windows errors2Fix the driver behind crashes, sound loss and screen glitches3Repair Windows errors before they cause bigger problemsThatPainter is reader-supported. When you buy through links on our site, we may earn an affiliate commission. Learn More
Evenly spaced cross-hatch quilting does not require calculating every interval. Measure a paper strip to the edge of the area you want to quilt, fold it in half repeatedly, and transfer the fold positions to the quilt. Use a consistent 45-degree ruler alignment to establish one diagonal set, then add a perpendicular set to make the grid.
Cross-hatching is a background pattern of straight lines crossing to form a grid. Choose the grid density deliberately, prepare and baste the quilt sandwich, test your marking tool, and use a presser foot or built-in feed system suitable for your machine.
What cross-hatch quilting looks like
Cross-hatching is made from two sets of straight lines crossing diagonally. The lines form diamonds or a square-like grid, depending on their angle and spacing. The two directions should cross at approximately 90 degrees.
#1 Best Overall

- SEWING AND QUILTING RULER: Large acrylic ruler for precise measurement, with highlighted seam allowances, easy-to-read measurement lines, and broken grid lines for fabric edge visibility
- PRECISION ART SUPPLIES: Ideal for measuring and making precise cuts through fabric; Bold 3" x 18" measuring grid makes measurements easy to read with speed and accuracy; Non-slip vinyl feet can be removed or added for secure cuts
- LONG LASTING AND RELIABLE: Thick acrylic material for lasting durability after sustained use; Fiskars craft supplies and materials are built to last
- QUALITY TOOLS FOR ARTS AND CRAFTS: From scissors and cutting mats, rotary and paper cutters, to classroom essentials, scissors for kids, and quilting and scrapbooking supplies, Fiskars crafting tools are designed to help you express yourself
- INCLUDES: 1 Fiskars 3" x 18" Acrylic Sewing Ruler; Full lifetime warranty
The grid can cover an entire quilt or be used in a border, around appliqué, in sashing, or within a block. Treat bounded areas separately when they need different grid densities. On a rectangular area, the spacing across the two directions may differ; plan how the grid will end at the edges, using a design element or stop line if needed.
Supplies
- A quilt sandwich: quilt top, batting, and backing. Practice on a small sandwich made from scraps.
- Adding-machine tape or another long, narrow strip of paper.
- Scissors.
- A quilt-safe temporary marker or chalk tool tested on the project fabric.
- A setting triangle or acrylic ruler with a dependable 45-degree reference.
- A sewing machine with a compatible walking/even-feed foot or suitable built-in dual feed, where appropriate.
- Thread and basting supplies, such as pins or spray baste used according to its directions. A quilting guide bar or painter’s tape can help maintain spacing.
A walking or even-feed foot may help feed the quilt layers evenly; some machines have built-in dual feed that can serve a similar role. Compatibility and setup are machine-specific, so check the manual or manufacturer’s compatibility list.
The no-math paper-folding method
1. Identify and measure the area
Decide exactly where the grid will go and measure the edge along which you will place the spacing marks. If borders or sashing divide the area, treat each section separately when appropriate. A rectangular panel may need separate references for the two directions.
2. Cut a paper strip to that length
Cut a narrow strip of paper to match the measured edge. Measuring the strip is part of the method; the no-math benefit is that folding creates equal subdivisions without calculating each interval.
PC Slower Than It Used to Be?
A free scan shows the junk files, broken settings and background clutter dragging Windows down - then fixes them in one click.Free scan · Windows 10 & 11Outdated Drivers Are Slowing You Down
One free scan finds every outdated or missing driver and matches the right update for your exact hardware.Free scan · exact hardware match3. Fold the strip in half repeatedly
Bring the ends together and crease the center. Fold in half again, keeping the folds aligned. Each round of folding subdivides the strip into equal spaces:
| Folding pattern | Resulting spaces | Use |
|---|---|---|
| One fold in half | 2 | Very open lines |
| Two rounds of folding | 4 | Open grid |
| Three rounds of folding | 8 | Moderate grid |
| Four rounds of folding | 16 | Dense grid |
Choose the density that suits the project. More folds mean narrower spaces and more stitched lines; do not fold automatically until the strip is extremely small.
Rank #2
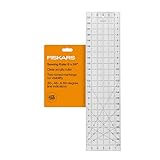
- ARTS AND CRAFTS STAPLE: Fiskars Sewing Ruler (6 in. x 24 in.) is an ideal size for cutting fabric from the bolt
- PRECISION ART SUPPLIES: Clear ruler has incremental grid lines and two-toned markings for visibility on light and dark material. 30-, 45- and 60-degree line indicators make it easy to cut at perfect angles.
- LONG LASTING AND RELIABLE: Fiskars craft supplies and materials are built to last
- QUALITY TOOLS FOR ARTS AND CRAFTS: From scissors and cutting mats, rotary and paper cutters, to classroom essentials, scissors for kids, and quilting and scrapbooking supplies; Essential for holiday gift wrapping supplies
- INCLUDES: Fiskars Sewing Ruler; Limited Warranty
4. Transfer the fold positions
Open the strip, mark each crease, and place the strip along the relevant quilt edge. Transfer the positions with a temporary marker or chalk tool. Test the tool on a scrap or concealed area of the same fabric and follow its removal instructions. Do not use a water-removable marker on fabric that cannot safely be washed.
5. Draw the first diagonal set
Use the ruler’s 45-degree reference to establish a line, aligning it consistently with a straight fabric edge. Repeat at the transferred marks to draw parallel lines. You can mark every line or use reference ticks with a quilting guide bar or machine guide. Painter’s tape is another possible guide.
For a narrow border, stop lines at the border edges unless you intend the grid to continue into neighboring sections.
6. Quilt the first direction
Install a compatible walking/even-feed foot or use the machine’s appropriate built-in feed system. Test-sew on a practice sandwich. A tutorial-recommended approach is to establish a line near the center and quilt outward, keeping the quilt supported so its weight does not pull against the needle. Follow your machine’s instructions for the feed system and attachments.
7. Add the crossing diagonal set
Establish a second line perpendicular to the first, near the center, then mark or guide the remaining parallel lines and stitch the other direction. Check the angle and spacing at the edges as well as the center. On a rectangular area, plan for the two directions to meet the boundaries as intended.
How to keep the grid even while sewing
- Baste thoroughly. Use a suitable method to hold the top, batting, and backing together. Follow spray-basting instructions.
- Press before making the sandwich. Correct wrinkles and fullness before quilting.
- Support the project. Keep the quilt on the table so its weight does not pull the layers.
- Use a manageable section. A border, block, or small project is easier to handle than a very large quilt.
- Keep a repeatable spacing reference. Use marked lines, a quilting guide bar, machine guide, or the previous stitched line.
- Inspect the backing often. Check for shifting, pleats, tucks, or thread nests as you work.
- Practice first. Use a small sandwich with the same materials and machine setup.
Choosing the right foot and ruler
Walking or even-feed foot: a common choice
For straight-line cross-hatching on a domestic machine, a walking or even-feed foot may help feed multiple layers evenly. Some machines offer built-in dual feed instead. Check machine instructions and compatibility before attaching or buying a foot.
Rank #3

- Premium Thick Acrylic Construction Made of high grade transparent acrylic material, this quilting ruler set features a sturdy, wear resistant build that resists cracking, warping and bending for long term daily use. The clear design offers full visibility of fabric underneath, while smooth polished edges protect hands and fabric from snags or damage, ideal for frequent sewing and quilting projects.
- Precise Clear and Crisp Green Markings Equipped with sharp, fade resistant green measurement markings and clear grid lines, including 1/8 inch incremental scales, 90 degree right angle and 45 degree diagonal guides for ultra precise cutting and measuring. The high contrast green scale stands out clearly on both light and dark fabrics, eliminating reading errors and ensuring flawless piecing, trimming and block squaring every time.
- Complete Multi Size Square Set Includes 4 essential square quilting rulers in 3.5", 5", 6.5" and 10.5" sizes, covering all daily quilting, sewing and fabric crafting needs. From small patchwork details and trimming tiny blocks to large fabric cutting and full quilt block finishing, this all in one set meets the demands of beginners, hobbyists and professional quilters alike.
- User Friendly and Stable Design Lightweight yet durable structure ensures easy handling and maneuverability during crafting. The flat balanced design stays securely in place when cutting with rotary cutters, no unwanted shifting or sliding. Each ruler is easy to use for all users, with easy to read numbering and clear measurement guides for hassle free operation.
- Multi Purpose Sewing and Craft Tool This versatile acrylic quilting ruler set is perfect for quilting, sewing, fabric cutting, patchwork, scrapbooking and other DIY craft projects. Compatible with all standard rotary cutters and cutting mats, it is a must have essential tool for sewing rooms, craft studios and classrooms. A practical and thoughtful gift for sewing enthusiasts, quilters and craft lovers.
Setting triangle or acrylic ruler: enough for the core method
The paper template creates the spacing. A setting triangle or acrylic ruler with a clear 45-degree line can establish and repeat the diagonal alignment; a specialty crosshair ruler is not required.
Ruler-work foot and crosshair ruler: optional setup
A ruler-work foot is distinct from a walking foot and is used for free-motion or ruler-guided quilting. A crosshair ruler can provide angular references for that approach, but neither tool is necessary for the paper-folding method. Check machine and foot compatibility.
Common problems and corrections
The grid is denser than expected
Fold the paper fewer times. Each additional round doubles the number of spaces and increases the amount of quilting.
The marker will not come out
Stop adding lines and check the marker’s removal instructions. Test marking tools on the same fabric before using them on the quilt; some fabrics cannot be washed safely.
Quick wins for a faster PC:
Fix the driver behind crashes, sound loss and screen glitchesFind Drivers →Clear out junk files and repair common Windows errorsFree Scan →The backing has puckers
Check the basting, backing, and quilt handling. Layers may have shifted or the quilt may have been pulled as it passed through the machine. Correct significant puckers before continuing.
The lines are evenly spaced but not parallel
Use the same ruler-to-edge relationship for every line, or follow a quilting guide or previous stitched line. Recheck the alignment at both ends.
Rank #4
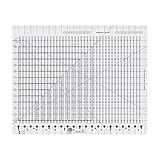
- Made in the USA with high quality acrylic and precision measurements ensuring accuracy for your quilting, sewing, patchwork, and crafting projects.
- Creative Grids exclusive non-slip grip allows you to easily slide the ruler over the fabric until positioned correctly. Then, when slight pressure is applied, the grip holds the ruler in place, eliminating slipping while you cut.
- Easy to read black and white markings, with cutting slots every 1/2in.
- Whole inch, half inch and quarter inch increments are marked. Additional markings for 1/4in and 3/4in cuts are also included.
- For quick reference, 1-1/2in cuts are highlighted with black stars and 2-1/2in cuts with black squares.
The crossing lines do not form a regular grid
The second direction may not be perpendicular, or its marks may have been transferred from an unsuitable edge. Establish the crossing direction carefully and plan how the grid meets the boundaries, especially on a rectangular area.
The presser foot does not fit
Do not force an attachment. Consult the machine manual and use a foot or adapter explicitly compatible with your model.
Where this method works best
The method is practical when the quilting area is bounded and you want evenly spaced background lines without calculating each interval. It works for small and medium quilts, appliqué backgrounds, borders, sashing, pillows, placemats, bags, wall hangings, and practice pieces. Large quilts are possible but require more support and repositioning.
Quick checklist
- Measure the edge of the area receiving the grid.
- Cut paper to that length and fold it in half until the spacing looks right.
- Mark the creases and transfer them to the quilt.
- Test the marking tool on the project fabric.
- Use a 45-degree ruler reference to establish the first diagonal set.
- Baste the sandwich and practice with the same materials.
- Quilt with the work supported, checking the backing as you go.
- Establish a perpendicular second direction and plan the grid at the edges.
- Remove marks according to the marker and fabric instructions.
Folding paper replaces division, but it does not eliminate measuring or the need for careful alignment. Choose a sensible density, mark safely, stabilize the sandwich, and use a repeatable spacing guide.
FAQ
What is cross-hatch quilting?
It is a grid made from two sets of straight quilting lines that cross diagonally, commonly used as a background design.
Does the no-math method require measuring?
Yes. Measure the edge of the quilting area so the paper strip matches it. Folding the strip creates equal subdivisions without calculating each interval.
Recommended Free Tools
Best Value

- All in one 4 piece quilting ruler kit for quilting sewing patchwork fabric cutting measuring and pattern making.
- COMPLETProfessional clear permanent scales deliver precise cutting accurate patchwork and high standard craft projects.E SET:Quilting rulers, perfect for various quilting projects
- Shatter resistant durable acrylic ensures stable rotary cutting repeated use and long lasting accuracy.
- Perfect for quilt block making patchwork assembly fabric trimming DIY sewing and home decoration projects.
- Necessary quilting tools sewing supplies fabric cutting tools and accessories for hobbyists and professionals.
How do I choose the grid spacing?
Fold the strip more times for more, closer-spaced lines, or fewer times for a more open grid. Choose a density that suits the project and plan the boundaries.
What presser foot should I use?
A compatible walking/even-feed foot is a common choice for straight-line quilting; some machines have built-in dual feed. Check your machine’s instructions.
Do I need a specialty crosshair ruler?
No. A suitable ruler with a 45-degree reference is enough for the paper-folding method. Specialty ruler-work tools are optional for a different quilting approach.
How do I know whether a quilting marker is safe?
Test it on a scrap or concealed area of the same fabric and follow its removal instructions. Avoid water-removable markers on fabric that cannot safely be washed.
What’s actually slowing this PC down?
Pick the symptom - the matching free tool is one click away.
The Bottom Line
Measure a paper strip to the quilting area, fold it to create equal intervals, transfer the marks, and use a consistent 45-degree reference for one diagonal set and a perpendicular second set. A compatible walking/even-feed foot or built-in dual feed may help manage the layers; specialty ruler-work tools are optional.
Quick Recap

Product prices and availability are accurate as of the date/time indicated and are subject to change. Any price and availability information displayed on Amazon at the time of purchase will apply.




