ThatPainter is reader-supported. When you buy through links on our site, we may earn an affiliate commission. Learn More
On iPhone, Apple Photos lets you use Markup to draw a shape over a photo, but its documented tools do not include a dedicated decorative-border command. On Mac, Photos Markup can add a simple outline; for an outer margin that keeps the whole image uncropped, use a border app that explicitly supports no-crop framing.
A drawn outline sits on top of the image, while an outer margin places the complete image on a larger canvas. Choose the method that matches the result you want.
How to add an outline on iPhone with Photos Markup
- Open the photo in Photos and tap Edit.
- Tap Markup.
- Add a shape or annotation and adjust it to create the outline you want.
- Tap Done to save the edit.
Apple’s iPhone Photos editing guide documents Markup for annotations and shapes, but not a dedicated decorative-border or outer-canvas control. Markup draws over the photo; it does not automatically add an even margin around the full image.
The Tool Desk
Outbyte PC Repair FREERepair Windows errors before they cause bigger problemsFix Now →Outbyte Driver Updater FREEScan for outdated or missing drivers - takes under a minuteDriver Scan →#1 Best Overall

- Photo Paper Package: 36 sheets of glossy photo paper, 8.5×11 inch, industry standard 180gsm/48lb, single-sided printing and blank back side for recording or writing something; compatible with inkjet printers and dye ink
- Glossy Finish: our glossy photo paper features its a reflective finish, that adds a professional and attractive touch and makes every picture look like a work of art; the printed photos and graphics are so outstanding
- Leave Vivid Colors: thanks to the good ink absorption of the picture paper, the printed photos come out vibrant colors and sharp details that truly come to life; remain beautiful landscapes and impressive moments forever
- Instant Dry: due to the advanced super cast coating, the ink on prints dry quickly without smearing and jamming; plus, the prints retain their vibrant color over time; makes your memories and designs shine in their full glory
- Wide Application: perfect for printing photos to record important and sweet moments, and also ideal for printing detailed graphics, various greeting cards, posters, chip bags, flyers, brochures, calendars, baby book
How to add a no-crop margin on iPhone
For a white, black, or colored margin around the complete photo, use a border app that says it preserves the full image without cropping. Choose the output ratio and border style, then check the preview and export behavior before saving.
- Install a border app and import the photo from Photos.
- Choose the target aspect ratio and border style or color.
- Confirm the preview fits the complete photo inside the new canvas rather than cropping it.
- Export the framed image and check the saved result.
No Crop – Simple Border is one option: its US App Store listing describes framing photos and videos without cropping, color and blurred borders, sharing, and Shortcuts or automation integration. The listing identifies support for iPhone and iPad; it does not establish Mac availability. Check the current App Store listing for compatibility, pricing, privacy disclosures, and export details.
Rank #2

- Excellent photo results with vibrant colors.
- Pack of 50 Sheets
Marginalia Photo Border NoCrop is a separate option. Its listing describes custom-color borders, aspect ratios, and no-crop framing. It identifies iPhone support and states Mac compatibility requires macOS 13.5 or later and an Apple M1 or later. Check its current App Store listing for device requirements, price, and other current details.
How to add an outline on Mac with Photos Markup
- Open the photo in Photos and double-click it.
- Click Edit, then click the Extensions button and choose Markup.
- Use a hollow rectangle shape and adjust its handles to fit the photo.
- Use Shape Style to adjust the line and Border Color to choose its color.
- Click Save Changes.
Apple says, “Use Markup to write or draw on a photo, add shapes, add stickers, crop, rotate, and more.” Its Mac Photos Markup guide describes the Markup workflow and shape controls. This creates an outline on the existing photo, not a larger canvas with extra space outside it.
Quick wins for a faster PC:
Fix the driver behind crashes, sound loss and screen glitchesFind Drivers →Repair Windows errors before they cause bigger problemsFix Now →Scan for outdated or missing drivers - takes under a minuteDriver Scan →Rank #3
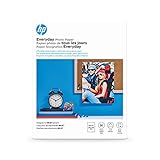
- Create affordable photo projects with a bright, glossy finish
- Customize photos with easy-to-use editing tools and print from your phone with HP Smart app
- Handle durable, quick-dry photos right from the printer
- Make memories last with photos that resist fading for decades when printed with Original HP Ink
Which method should you choose?
| What you want | Method | Important distinction |
|---|---|---|
| A simple outline on iPhone | Photos Markup | Draws a shape over the photo |
| An uncropped outer margin on iPhone | A border app that explicitly supports no-crop framing | Fits the complete photo inside a larger canvas |
| A simple outline on Mac | Photos Markup | Draws a shape over the photo |
| An uncropped outer margin on Mac | An image editor with canvas or frame controls | The cited Apple guide does not document a dedicated outer-margin command in Photos |
What should you check before choosing a border app?
- Compatibility: Check support for your specific iPhone, iPad, or Mac; do not assume support carries across devices.
- No-crop behavior: Confirm that the app fits the full image inside the canvas if you want to preserve every edge.
- Output: Preview the result and check export behavior before relying on it.
- Cost and privacy: Review the live listing for pricing, in-app purchases, and privacy disclosures, which may change.
FAQ
Can Apple Photos add a decorative border on iPhone?
Apple’s cited iPhone guide documents Markup for shapes and annotations, not a dedicated decorative-border command. Markup can draw an outline over the photo; use a no-crop border app for an outer margin.
How do I add a border to a photo on Mac?
In Photos, open the image, choose Edit, then Extensions > Markup. Add a hollow rectangle and adjust its line style and color. This is an outline annotation, not extra canvas space.
Rank #4

- Professional Grade: Prepare to be amazed at the vibrant and detailed prints of our photo paper 8.5 x 11
- Buy In Bulk & Save: Each pack of photo paper 8.5 x 11 glossy contains 100 sheets, providing sample supply for your photo printing projects
- Brilliant Quality: Every sheet of our photo paper guarantees a spectacular print
- Ready to Print: Our glossy photo paper 8.5 x 11 is compatible with any inkjet printer
- Satisfaction Guarantee: We are committed to your satisfaction; If our photo printer paper does not meet your expectations, we promise to make it right
How do I add a border without cropping my photo?
Use a border app that explicitly fits the full image inside a larger canvas. Check the preview to ensure the edges remain visible before exporting.
Quick Recap

Product prices and availability are accurate as of the date/time indicated and are subject to change. Any price and availability information displayed on Amazon at the time of purchase will apply.
Free tools Windows power users keep installed
One-click scans. No signup required.




