Windows Errors? Fix Them Before They Spread
The Tool Desk
Outbyte Driver Updater FREEScan for outdated or missing drivers - takes under a minuteDriver Scan →Outbyte PC Repair FREERepair Windows errors before they cause bigger problemsFix Now →Repair common Windows errors and clear accumulated junk for a smoother, more stable PC - no reinstall needed.
Fix My PC Now →Free scan · no reinstall
ThatPainter is reader-supported. When you buy through links on our site, we may earn an affiliate commission. Learn More
As an Amazon Associate I earn from qualifying purchases.
Yes—you can build a convincing solid-wood accent tabletop from inexpensive construction lumber instead of buying a finished replacement top. The practical method is to edge-glue boards into a panel, reinforce the underside with two furring strips, trace the table base with a controlled overhang, and cut the final shape with a jigsaw. The result can be stained, painted, or whitewashed to suit a room.
There are two important cautions before you buy wood. The published project used a 42-inch round top, but its materials list says 2×12 boards while its instructions say 2×10 boards. Resolve that discrepancy at the lumber counter, and inspect every board for twist, cup, knots, and damaged edges. Also predrill every screw hole, especially near knots: the project author later reported a split after driving screws without predrilling.
Popular on Amazon

- Great Value Paint Brush Set: Soucolor 20 acrylic paint brushes come in 10 different sizes, making them ideal for fine detailing, model painting, rock painting, nail art, face painting, DIY crafts, and general art projects. The varied brush sizes give you better control for both delicate lines and broader color coverage, while the soft bristles deliver smooth, consistent results on acrylic, oil, watercolor, canvas, wood, ceramic, and more.
- Awesome Set of Paint brushes: Professional paint brushes can cover all of your needs. The multi-purposed brushes are ideal for Watercolor, Oil, Gouache, enamel, Acrylic Painting, Body, Nail, Face Painting, Miniature, Model, Wood, Glass, Cup, Ceramic, Fine work, Art class, Craft Art Painting, DIY Art Crafts etc.
- Soft and long-lasting: The bristles are soft and strong, with nickel metal ferrules and blue wooden handles. After cleaning, the bristles will become soft and fluffy again and will not fall off.
- Easy to clean: it’s very convenient to Wash well in soap and water. Retain shape after drying. the brushes hold up very well. Nice selection to beginners and professionals. Keep them clean and they last a long time.
- Perfect for All Painters & Occasions: Suitable for art beginners, hobbyists and professional artists. Great for art class, home creation, travel painting and DIY handmade projects. A practical art gift for students, teachers, family and craft lovers.
What is the inexpensive solid-wood tabletop method?
The method turns several long boards into a wide glued panel, then cuts that panel to the outline of an existing table base. In the documented 42-inch round-table example, four-foot board sections were glued edge-to-edge in pairs. Two furring strips were then glued and screwed beneath the joined sections, creating a stable attachment area for the base. The base was placed on the panel, the outline was marked with an overhang, and the circle was cut with a jigsaw.
This is a practical replacement-top technique, not a promise that every piece of construction lumber will behave like kiln-dried furniture stock. The final appearance depends heavily on board selection, joint preparation, glue-up alignment, flattening, and the finish you choose.
What materials and tools do you need?
Use the following as a starting list for the documented project, not as a universal cut list. Verify the lumber dimensions and the diameter of your own base before purchasing.
| Item | Documented project specification | Why it matters |
|---|---|---|
| Boards | Materials list: two 2×12 boards, 8 feet long, cut into four-foot lengths. Instructions: 2×10×8-foot boards cut in half. | The inconsistency changes panel width and the amount of material available. Confirm the stock size and final geometry first. |
| Furring strips | Two 1×2 strips; the example cut them to 26 inches. | They reinforce the underside. The 26-inch length was specific to that base. |
| Wood glue | Enough for all long edge joints and the underside strips. | Creates the panel; use an adhesive suitable for interior woodwork and follow its label. |
| Screws | Twelve #8 screws, 1¾ inches long. | Secure the furring strips and the base. Predrill before driving them. |
| Clamps | At least 24 inches long. | Apply pressure across the edge joints while glue cures. |
| Drill and bits | A drill with a bit sized for pilot holes and a driver bit. | Pilot holes reduce the chance of splitting, particularly at knots and near edges. |
| Jigsaw | Use a new, smooth-cut blade. | Follows the traced outline and leaves a cleaner edge than a worn blade. |
| Sander and abrasives | Electric sander with 100- and 150-grit discs. | Levels joints and prepares the surface for finish. |
| Wood filler | Optional for small gaps. | Useful where a visible void remains, but it will not correct a badly mismatched joint. |
| Finish | Stain, paint, or a diluted paint whitewash. | Controls how much of the inexpensive lumber’s grain remains visible. |
The source project estimated its materials at “approximately $25.” That figure is undated and should not be treated as a current budget. Lumber, glue, fasteners, and finish vary by location and season, so price the list locally after resolving the 2×10/2×12 question.
How do you choose inexpensive boards that will glue into a flat panel?
Choose the straightest, most stable boards available and reject pieces that are badly twisted, cupped, bowed, split, or loose around large knots. Kristi Linauer, who documented the project, wrote: “Be sure to purchase the straightest boards possible. Warped boards will ruin a project.” That warning is especially important with a round top, because a large panel exaggerates small changes in alignment.
At the store, sight down each board from one end. Check both faces and the edges for a visible arc or propeller-like twist. Lay a pair of boards together edge-to-edge; if light passes through a long section of the seam, glue alone may not close the gap. Examine knots at the future perimeter and at every location where a screw might go. A sound knot can be decorative, but a weak or cracked knot is a poor place for a fastener.
Also popular on Amazon
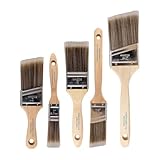
- COMPLETE 5-PIECE BRUSH SET FOR EVERY PAINTING TASK — Includes 1 Inch Flat, 1.5 Inch Angle, 2 Inch Flat, 2 Inch Angle Stubby, and 2.5 Inch Angle brush giving you every size professional painters use daily. Get all 5 for less than the price of a single brush from hardware store brands — professional grade performance at a fraction of the cost. Perfect for walls, trim, cabinets, doors, furniture, and detailed cutting-in work on any project.
- ZERO BRISTLE LOSS — GUARANTEED BY PRECISION ADHESIVE BONDING — Every bristle is locked in place with precision-set adhesive that keeps them in the brush — not in your paint job. The coated steel ferrule provides structural support while the adhesive bond ensures clean performance on every stroke. Premium SRT synthetic filaments load more paint and release it evenly for a smooth streak-free finish on walls, ceilings, and trim. Works with latex, oil-based paint, primer, sealer, and wood stain.
- INCLUDES THE ANGLE STUBBY MOST SETS LEAVE OUT — Professional painters know the 2 Inch Angle Stubby is the go-to brush for tight cabinet interiors, window sashes, inside corners, and detailed trim where standard angle brushes are too long. Combined with the 1.5 and 2.5 inch angle sash brushes you have precision cutting-in covered at every scale — baseboards, crown molding, door casings, and ceiling lines.
- FLAT BRUSHES FOR BROAD SMOOTH COVERAGE ON ANY SURFACE — The 1 and 2 inch flat brushes deliver even coverage on walls, furniture, shelving, doors, fences, decks, and wood surfaces. Ideal for applying primers, stains, varnishes, polyurethane, and specialty coatings. Solid wood handles provide all-day comfort and control for both professional contractors and weekend DIY homeowners tackling interior or exterior painting projects.
- TRUSTED BY PROFESSIONAL PAINTERS AND CONTRACTORS NATIONWIDE — Pro Grade delivers professional-grade results at a price that makes sense for crews who go through brushes on every job. Ideal for property managers, remodeling contractors, apartment turnover crews, maintenance teams, and commercial painting operations. Backed by thousands of verified reviews from working painters. Washable and reusable for multiple projects.
Inexpensive pine can save money, but it may have strong, uneven grain and soft areas that dent or absorb stain differently. The project author preferred the price of #2 pine yet later disliked how heavy the grain looked under stain. That is a finish decision, not evidence that pine is unsuitable; paint or a diluted whitewash can produce a more consistent appearance.
How should you prepare and arrange the boards?
Before spreading glue, lay the boards on a flat work surface and arrange them for the best face, grain flow, and joint fit. Mark the order lightly in pencil so the pieces return to the same positions. Turn adjacent boards so their growth-ring orientation alternates when practical; this does not guarantee a flat panel, but it can reduce the tendency for all boards to move in the same direction.
Inspect the mating edges. If an edge is visibly uneven, damaged, or rounded from handling, correct it with a jointer, handplane, or careful sanding setup if you have one. Do not try to force a severely warped board flat with clamp pressure alone. WOOD magazine Design Editor Jeff Mertz recommends correcting troublesome stock and preparing the mating edges before glue-up. He also recommends cauls clamped across a panel to help keep the faces aligned.
Dry-fit the complete arrangement first. Confirm that the combined width is sufficient for your planned diameter plus the overhang around the base. Because the source instructions and materials list name different board widths, do not copy a cut diagram until the actual boards and desired top size are settled.
How do you glue the tabletop panel?
- Protect the work surface. Lay the boards on a flat surface with room for clamps. Painter’s tape on the areas that will contact metal pipe clamps can help prevent glue and wood acids from staining the wood.
- Glue manageable sections. The documented project first glued boards edge-to-edge in pairs using clamps at least 24 inches long. This staged approach is easier to align than trying to control a large assembly all at once.
- Spread an even coat. Apply glue to the mating edge, covering it continuously without leaving dry pockets or large puddles. Keep squeeze-out manageable; excessive glue makes cleanup harder and can interfere with finish absorption.
- Clamp across the joint. Position clamps so pressure closes the seam rather than pulling the boards out of alignment. Add cauls across the top and bottom when needed to keep faces flush. Tighten until the joint closes, but do not crank so hard that all adhesive is forced out.
- Check alignment immediately. Sight across the faces and use a straightedge. Correct a step while the adhesive is workable; sanding a large height difference later wastes material.
- Allow the adhesive to cure according to its label. The source author left the paired sections clamped until the glue dried before removing them. Do not load, cut, or screw the assembly while the adhesive is still soft.
- Join the sections. After the paired sections have cured, bring them together to form the wider panel, again checking the face alignment and the overall width.
Some glue squeeze-out is normal. Remove the bulk at the appropriate stage for your adhesive rather than flooding the surface with water, which can raise the grain and spread residue.
Free tools Windows power users keep installed
One-click scans. No signup required.
How do you flatten a glued panel before cutting?
A glued panel may have a slight cup or small steps at the joints even when the glue bond is sound. Flatten it before tracing the circle. Bob Van Dyke of Fine Woodworking describes using a long handplane and a straightedge to identify and remove high areas; careful hand or power sanding can also work when the unevenness is modest.
Also popular on Amazon
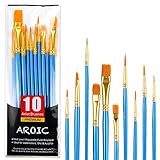
- 【All sizes of art brushes】: The 10 sizes of multi-functional brushes have various shapes, making the mixing color easier, which is very suitable for artists, students, teenagers, children and painters at all levels. Wonderful Present ideas for friends and family who like painting!
- 【general brush set】: Professional paint brush can meet all your needs. Multifunctional brush is very suitable for watercolor, oil, gouache, acrylic painting, body, nail, face painting, miniature, model, ceramics, arts and crafts painting, etc.
- 【high quality process】: It is designed with anti falling bristles, anti-rust nickel ferrule and solid wood handle. You can use the brush to focus on the painting and always be creative.
- 【easy to maintain】: After using the brush, it is very convenient to clean the brush with warm soapy water and reshape the tip of the brush. Air dry the brush and place it on top of the top for long use.
- 【100% satisfaction guarantee - buy now】1 packs of set brushes, you can also get friendly customer service, any questions feel free to contact us, within 24 hours to help you! There is no risk in buying our paint brush kit.
Use a straightedge in several directions, not just across one seam. Mark high spots with a pencil and remove only those areas, checking often. A belt sander can remove material quickly but is easy to dig into soft pine; an orbital sander is slower but more forgiving. Keep the panel supported so you do not sand a temporary bow into it.
If you have suitable shop machinery, a rough cut outside the final line followed by a guided router can produce a clean, consistent perimeter. That approach requires a stable workpiece and appropriate router support. The original project used an electric sander and a jigsaw, so those tools remain the straightforward option for a basic build.
How do you mark and cut a round replacement tabletop?
- Measure the base. Measure the widest part of the base and decide how much top should project beyond it. In the source project, the author used a 1¾-inch overhang. Treat that as her choice, not a universal rule.
- Center the base on the panel. Place the base upside down on the underside of the glued panel. Check the position from multiple directions so the base will sit where you want on the finished top.
- Trace the outline or a cutting guide. Mark the perimeter clearly. For a true circle, measure from the intended center to the required radius and use a reliable pivot-and-string or compass method rather than relying on an irregular base edge.
- Mark the underside attachment area. Identify where the furring strips and base will sit. Keep screws well away from the cut edge and from obvious knots or cracks.
- Rough-cut safely. Support the panel on sacrificial blocks so the blade will not strike the floor or workbench. Use a new smooth-cut jigsaw blade, keep the shoe flat, and let the tool advance without forcing it.
- Refine the edge. Sand the cut edge progressively until it is smooth and consistent. If the circle must be exceptionally precise, leave a small amount outside the line and use a guided router only if you have the skill and stable setup to control it.
Make the cut from the underside if that orientation gives you the cleanest visible face, and account for the jigsaw blade’s entry and exit tear-out. A test cut in scrap can show which face needs protection.
The Tool Desk
Outbyte Driver Updater FREEFix the driver behind crashes, sound loss and screen glitchesFind Drivers →Outbyte PC Repair FREERepair Windows errors before they cause bigger problemsFix Now →How do you attach the furring strips and table base without splitting the top?
Glue and screw the two furring strips beneath the joined sections to tie the panel together and provide a solid attachment zone. The example used 26-inch strips because they suited that particular base. Measure your own base and keep the strips clear of the final edge and any moving hardware.
- Position the strips on the underside and mark their locations.
- Apply glue where each strip contacts the panel.
- Drill pilot holes through the strip and into the tabletop. Countersink only as much as needed for the screw heads.
- Drive the #8, 1¾-inch screws evenly, checking that no point emerges on the finished face.
- Set the base in position, mark its attachment holes, and predrill those holes too.
- Attach the base from below, tightening until secure without crushing the soft lumber.
The author later reported that her top split from a knot near the edge and across the surface after she attached the base with screws without predrilling. She believed an unpredrilled screw driven into a weak spot caused the split and emphasized, “Pre-drill, pre-drill, and pre-drill!!!” That is her account of her project, not an independently verified diagnosis and not a guarantee that predrilling prevents every crack. It is nevertheless the most important avoidable warning in this build.
How do you sand and fill the tabletop?
Begin with 100-grit abrasive to level glue joints, remove pencil marks, and smooth the sawn edge. Spend extra time where boards meet; a joint that feels flat to a fingertip can still show as a line under stain or thin paint. Move to 150 grit for the final general pass and keep the sander moving so you do not create shallow dishes in soft pine.
Also popular on Amazon

- 【KIDS PAINT BRUSHES SET】Anezus paint brushes for kids come with 10 pcs paint brushes of 5pcs round paintbrushes and 5 flat paint brushes with colorful handles, good for the young artist to explore their creativity in painting and crafting
- 【HIGH QUALITY PAINT BRUSHES FOR KIDS】These toddler paint brushes made of soft hog bristle, bright colored handles and rust proof ferrules. The bristles are firmly fixed in the kids paint brushes and no shedding. Each children paint brush measure 6 1/4 inches (16cm) in length and ferrules 1/2"(1.3cm) diameter, large enough for the little hand to grip and control
- 【WIDE APPLICATIONS】With combination of round and flat craft paint brushes for kids, work great with washable paint, tempera paint and acrylic paint. Great for arts and craft, rock, leather, gesso and ceramic, or body, nail and face art painting.
- 【EASY TO CLEAN 】After using paint brushes for acrylic, oil or watercolor painting, it’s very convenient to clean them with warm soapy water and reshape the paint brush tips. Keep these craft paint brushes clean and they last a long time.
- 【GREAT GIFT IDEA】Perfect for students, teens, kids, children and painters of all levels. Wonderful gift idea for girls, boys and kids who love painting! These all-purpose paint brushes for kids are ideal for kids' school projects, birthday parties, painting parties, art parties, back to school supplies, classroom decoration and more.
Wood filler is optional for small gaps. Press it into a narrow void, let it dry fully, and sand it flush. Filler can absorb stain differently from surrounding wood, so test the intended finish on an offcut or hidden area first. It cannot compensate for a board edge that is badly bowed or a panel that is structurally open along a seam.
Quick wins for a faster PC:
Fix the driver behind crashes, sound loss and screen glitchesFind Drivers →Repair Windows errors before they cause bigger problemsFix Now →Vacuum or brush away dust and wipe the surface using a method compatible with your finish. Do not leave sanding dust in pores or around the perimeter; it can muddy a whitewash and make paint adhesion inconsistent.
Independent reader supportYour contribution helps us test, update, and keep practical guides available for everyone.Should you stain, paint, or whitewash the inexpensive pine?
Choose the finish according to the look you want, because inexpensive lumber can change dramatically from one treatment to another.
- Stain: preserves visible grain but highlights differences in porosity, knots, and sanding. The project author disliked the heavy grain of her #2 pine after staining.
- Solid paint: hides much of the color variation and is often the most forgiving choice when boards do not match perfectly. It still reveals dents and uneven edges, so surface preparation matters.
- Diluted paint whitewash: the author mixed white paint and water at roughly a 1:1 ratio, then dry-brushed white paint over it. This created the look she preferred after rejecting the stained appearance.
Her whitewash and dry-brush sequence is an example of one person’s aesthetic solution, not a finish guarantee. Test your ratio, brush pressure, and color on scrap from the same boards. A thin wash leaves more grain visible; a heavier coat moves the result toward opaque paint.
What problems are most likely, and how can you recover?
| Problem | Likely contributing factor | Practical response |
|---|---|---|
| Boards will not close along a seam | Warped stock or poorly prepared mating edges | Release pressure, inspect the edges, and correct the high spots. Do not rely on more clamp force to bridge a large gap. |
| One section sits higher than the other | No cauls or insufficient alignment during glue-up | Flatten the cured panel with a straightedge, handplane, or careful sanding before cutting the outline. |
| Glue line is obvious after finishing | Uneven joint, residual glue, or mismatched board absorption | Level the joint, remove residue, and test the finish on scrap. Paint or whitewash may disguise variation better than stain. |
| Jigsaw edge wanders | Dull blade, forcing the cut, or inadequate support | Install a new smooth-cut blade, support the panel, and make a controlled rough cut outside the line before refining. |
| Top cracks near a screw | Fastener too close to an edge or knot, or no pilot hole | Stop tightening, inspect the damage, and relocate or repair the attachment if structurally possible. Predrill future holes and avoid weak spots. |
| Top rocks on the base | Base is not centered, underside is uneven, or the panel is cupped | Recheck the base position and flatten the panel before final attachment. Do not use screws to pull a severely cupped top flat. |
Can this method make a rectangular or oval top?
Yes. The edge-glued panel and underside reinforcement do not depend on a circle; only the layout and cutting step change. Mark a rectangle or oval from the actual base, leave the desired overhang, and keep the screw locations away from corners, knots, and the final edge.
What’s actually slowing this PC down?
Pick the symptom - the matching free tool is one click away.
A rectangular top usually wastes less material than a large circle because the boards can be trimmed with less offcut. An oval requires a carefully drawn centerline and smooth, controlled curves. In either case, flatten the glued panel before marking the final outline.
Also popular on Amazon

- 【162-Piece Bulk Set | Dual Brush System】Maximize versatility with 81 flat brushes (0.59 inch edge for bold strokes) and 81 round brushes (0.39 inch tips for details) – 3X more tools than standard kits! Pre-sorted in labeled compartments for instant access during painting sessions. Ideal for art classrooms, mural projects, and multi-artist households.
- 【Pro-Grade Durability | Zero Shedding Guarantee】 "Engineered with triple-crimped nylon bristles (43% higher resilience vs. standard) and aerospace aluminum ferrules tested for 10,000+ flex cycles. Lab-verified 0.01% shedding rate even with heavy impasto techniques – outperforms flimsy bristles in budget brushes."
- 【Multi-Scenario Readiness | Event & Daily Use】 Optimized for: Thanksgiving/Christmas face designs classroom projects ceramic decorating fabric printing and model painting; Lightweight plastic handles each reduce hand fatigue during prolonged sessions
- 【Effortless Maintenance | Long-Term Durability】 Clean with warm soapy water in 10 seconds; Reshape tips and air-dry vertically to preserve bristle integrity,After use, air-dry brushes thoroughly and store upright in the provided case to preserve bristle shape. The premium nylon filaments naturally regain their original form after each stroke. For cleaning, simply rinse in warm soapy water and gently reshape bristles with fingertips."
- 【Multiple Application】These acrylic paint brushes can be applied for most occasions,such as:watercolor,oil, gouache paint,face paint, acrylic paint, suitable for Thanks Giving Day, Christimas, Halloween face and body painting, canvas painting, fabric, rock, miniature, model, ceramics, arts and crafts painting, etc.
How do you decide whether this is the right replacement-top approach?
Build this way when you can obtain reasonably straight lumber, have a flat place to glue it, and are comfortable sanding and cutting a large panel. It is attractive for an unusual base or a damaged top whose dimensions are worth preserving. The work is more involved than buying a finished panel, and the final price cannot be predicted from the old project estimate because current local lumber and finish prices vary.
Choose boards by straightness, twist and cup, knot condition, visible grain, width, and the amount of preparation they require—not by nominal price alone. Choose flattening tools based on your skills: a handplane can remove high areas efficiently, while careful power sanding is accessible but slower and easier to overdo. Choose stain, paint, or whitewash after deciding whether grain variation is a feature or a distraction.
How did the documented project turn out?
The source project produced a painted, whitewashed round top from edge-glued lumber and an existing base. Its author reported an approximately $25 materials estimate, but that number has no stated publication date and is not a current savings calculation. She also reported a later split associated, in her view, with attaching the base without predrilling. The durable lessons are therefore practical rather than promotional: resolve the lumber-size discrepancy, buy straight stock, align and flatten the panel, and predrill every attachment hole.
Do these 3 things before closing this tab:
1Scan for outdated or missing drivers - takes under a minute2Repair Windows errors before they cause bigger problems3Fix the driver behind crashes, sound loss and screen glitchesFrequently Asked Questions
Can I use a different board width than the source project?
Yes, but recalculate the panel width and confirm that the finished panel is large enough for your chosen diameter or outline. Because the source lists 2×12 boards but describes using 2×10 boards, measure the actual stock before cutting.
How long should the tabletop stay clamped?
Leave each glue-up clamped for the adhesive manufacturer’s stated cure time and do not stress the joint while it is still soft. The documented maker removed her clamps only after the glue had dried.
Do I need a router to make the round top?
No. The source project used a jigsaw with a new smooth-cut blade and then sanded the edge. A guided router is an optional way to refine a rough-cut perimeter when you have the equipment and a stable setup.
Why does stain look uneven on construction lumber?
Soft pine, knots, and differing grain absorb stain at different rates, so the color can become blotchy or emphasize heavy grain. A solid paint or a tested whitewash can give a more uniform appearance.
What should I do if the finished top is slightly cupped?
Identify the high areas with a straightedge, then remove them gradually with a handplane or careful sanding. Do not use base screws to force a badly cupped panel flat, because that can concentrate stress around fasteners.
Quick Recap


