What’s actually slowing this PC down?
Windows Errors? Fix Them Before They Spread
Repair common Windows errors and clear accumulated junk for a smoother, more stable PC - no reinstall needed.Free scan · no reinstallOutdated Drivers Are Slowing You Down
One free scan finds every outdated or missing driver and matches the right update for your exact hardware.Free scan · exact hardware matchPick the symptom - the matching free tool is one click away.
ThatPainter is reader-supported. When you buy through links on our site, we may earn an affiliate commission. Learn More
Paper patterns can become convincing rigid-looking props and costume armor, but only when the work is done in the right order: fit the design, assemble a clean cardstock shell, reinforce it for its intended use, apply thin coats of filler, sand progressively, prime, and then paint. Bondo is a surface-shaping material, not the frame of the armor and not certified protective equipment.
The most reliable beginner-to-intermediate workflow is to use Pepakura for geometry, paper or cardstock for the initial shell, fiberglass or lighter internal reinforcement where appropriate, Bondo Original Filler for broad surface shaping, glazing putty for tiny defects, and primer as the inspection stage before paint.
The Tool Desk
Outbyte PC Repair FREEClear out junk files and repair common Windows errorsFree Scan →Outbyte Driver Updater FREEFix the driver behind crashes, sound loss and screen glitchesFind Drivers →#1 Best Overall

- For DIY thermoforming: Kydex Thermoform Sheet is very similar to both Holstex and Boltaron in the way it forms when heated and molded around an object. Once cooled, this material will keep the shape of the item that was used to mold the shape into place. In its cooled state, it is very durable and light weight. It is used widely in thermoform holster making, cosplay costume creation, removable surface coverings, keel guard protectors, and much more.
- Texture: P1 Hair Cell | Type: T (A Grade): The texture applied to the surface of the Kydex sheet is referred to as P1 “Hair Cell”. This is a reference to the size and shape of the texture grain and is common on many Kydex items seen in the marketplace. P1 is the most common texture for holsters, sheaths, and other carry items. The texture on Kydex sheet is uniform across the surface of the material and produces a non-reflective, scratch resistant finish.
- Easy to form: To use Kydex thermoform sheet, score and cut a piece slightly larger than the object being covered. Heat the material to a 300-375 degree Fahrenheit range and place over object. Using forming foam, press the material around the object and allow it to cool in position. Once cooled, remove and sand edges to desired shape. (Detailed instructions included with order.)
- Made in U.S.A.: Kydex P1 textured thermoform sheet is proudly made in the U.S.A. Each sheet is individually packaged and inspected by our staff. We take the greatest of pride in the products that we offer and stand behind every item sold. Order with confidence!
- 100% Satisfaction Guaranteed: With over 20 years of experience in developing holster making accessories, the thermoform sheet material line offered by HolsterSmith is unsurpassed in the holster making and accessory industry. Our thermoform sheet materials are used by professional soldiers, police officers, public safety individuals, and holster makers worldwide. Each Kydex sheet is individually inspected and guaranteed for quality.
What this method is—and what it is not
Pepakura-based construction is a way to turn a three-dimensional model into a printable, foldable shell. Paper supplies the geometry; reinforcement supplies stiffness; filler hides seams and smooths transitions; primer exposes defects; paint supplies the finished appearance.
The finished object may look like metal, molded plastic, stone, or composite material, but its appearance does not change its engineering limits. Paper, fiberglass, polyester resin, and body filler should not be treated as a substitute for certified protective equipment. Do not use a finished build for fall protection, motorcycling, airsoft, occupational protection, impact protection, or any activity that requires safety-rated armor.
Before opening Pepakura: plan the build and the wearer
Decide what you are making and how it will be used. A decorative weapon shell, a wearable helmet, a chest plate, a shoulder piece, and a gauntlet do not need the same reinforcement or clearance. Separate hand-held and display-only parts from pieces that must move with the body.
Do these 3 things before closing this tab:
1Scan for outdated or missing drivers - takes under a minute2Repair Windows errors before they cause bigger problems3Fix the driver behind crashes, sound loss and screen glitchesMake a fit plan
- Measure the relevant part of the wearer: head circumference and height for a helmet, chest or torso dimensions for a breastplate, and forearm or hand dimensions for a gauntlet.
- Record the clothing, padding, wig, boots, or gloves that will be worn under or around the piece. A part that fits over a T-shirt may fail over a coat or costume layer.
- Plan clearance around the eyes, nose, neck, elbows, shoulders, wrists, knees, and footwear before printing.
- Decide where straps, elastic, buckles, magnets, padding, ventilation openings, and access cuts will go.
- For a helmet or mask, check sight lines, breathing room, neck clearance, and how the piece will be removed in an emergency.
A digitally accurate model can still be unwearable. Treat fitting as part of the design rather than a correction to make after the shell has been hardened.
1. Start with a usable 3D model
Pepakura Designer is not a general-purpose 3D modeling application. Its documented workflow begins with an existing three-dimensional model, imports that model, unfolds its surfaces, lets you edit the layout, and prints the resulting pattern. Common supported model formats include OBJ, 3DS, and STL.
When choosing a model, look for one with the shape and level of detail you actually need. A highly detailed digital model may produce hundreds of tiny pieces and fragile tabs. A simplified model with clear planes and manageable seams is often a better first build.
Pepakura can convert the model into numbered two-dimensional pieces. Matching edge numbers show which pieces belong together, while tabs provide gluing surfaces. The software allows pieces to be moved, rotated, joined, separated, and arranged for printing. Current official materials also describe a reference-avatar feature intended to help fit costume models to a wearer’s height and build; availability and controls can vary by software version, so check the current documentation for your edition.
If this will become a recurring part of your workflow, budget for a Pepakura Designer license rather than treating pattern preparation as an afterthought. The software is central to generating the printable pattern, but it does not replace measuring, test fitting, or modifying the finished costume.
2. Unfold, edit, and test the pattern
Unfolding is only the first layout pass. Inspect the pattern before printing the entire project.
Rank #2
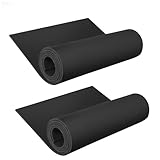
- 【Designed for Cosplay Projects】Large Size for Full-Scale Cosplay Builds – 16 x 59 inch EVA foam sheets provide enough surface area for armor pieces, helmets, props and costume details without needing multiple small sheets.Large Size for Full-Scale Cosplay Builds – 16 x 59 inch EVA foam sheets provide enough surface area for armor pieces, helmets, props and costume details without needing multiple small sheets.
- 【Durable & High Quality】Easy Cutting, Sanding & Shaping – The 5mm thickness balances flexibility and structure, making it suitable for cutting, shaping, painting and customizing handmade cosplay creations.
- 【Easy to Cut】:DIY Friendly Material – Easily cut, heat shape, sand and paint to create customized cosplay armor, costumes, crafts and decorative projects.
- 【Specification】:Length: 59 inch/ 1.5meter;Width: 16 inch/ 0.4meter; Thickness: 5mm;Quantity: 2 Pcs EVA foam with high Density 90 kg/m³
- 【Wide Application】: Versatile Craft Applications – Ideal for cosplay costumes, Halloween props, theater projects, handmade crafts, model making and creative DIY designs.
- Check the scale reference. Identify a known dimension in the model or create a reference measurement before unfolding. Without a known dimension, a pattern can be consistently wrong even when every paper piece lines up perfectly.
- Review the seam plan. Move or separate pieces when the default layout creates awkward joins, extremely narrow tabs, or seams in a high-stress area.
- Keep related pieces identifiable. Preserve part numbers and edge relationships. If you make manual changes, write down them down or save a new pattern version.
- Print a small test. Use ordinary paper for a test section or a scaled reference piece. Confirm that the printer has not applied automatic fit-to-page scaling.
- Test the wearer’s clearance. A torso section must allow breathing and arm movement. A helmet must allow vision and removal. A gauntlet must not block the wrist or hand.
Print at 100% scale unless the design specifically calls for another scale. If the test is wrong, correct the digital pattern or print settings before cutting expensive cardstock or beginning assembly.
3. Choose paper, cardstock, and tools
Ordinary printer paper is useful for test fitting, but cardstock is generally better for a final shell because it resists buckling and holds a fold more reliably. Heavier stock usually holds its shape better; lighter stock is easier to curve and form. The best weight depends on the model’s tabs, curvature, size, and reinforcement plan.
Make a small test section before committing to the complete print. This exposes problems such as tabs that are too small, folds that fight the curve, or cardstock that is too stiff for a tight helmet dome.
Basic tool list
- Sharp hobby knife or precision scissors
- Self-healing cutting mat
- Scoring tool, blunt stylus, or empty ballpoint pen
- Metal ruler for long straight cuts
- Paper clips, clamps, or low-tack tape for temporary positioning
- Adhesive selected for the paper and reinforcement method
- Disposable mixing surface and spreaders for filler
- Sandpaper or sanding blocks in a coarse-to-fine progression
- Primer and compatible paint system
- Padding, straps, ventilation materials, and fasteners for wearable parts
Mark part numbers, fold lines, and any important bend or grain direction before cutting. This is especially useful when a pattern has many visually similar pieces.
4. Cut, score, and assemble the paper shell
Use a sharp blade and several light passes instead of forcing one deep cut. A clean edge makes seams easier to close and reduces the amount of filler needed later.
Score mountain and valley fold lines before bending them. A scored line gives the cardstock a controlled hinge; trying to force every fold by hand can crush the edge or create an uneven curve. Keep track of which side of the line is intended to fold, especially when the pattern uses both inward and outward folds.
Dry-fit neighboring pieces before applying adhesive. Confirm that the edge numbers agree, that the curve continues smoothly, and that the next piece will still have room to attach. Temporary tape or clips can reveal a misassembled section before glue makes the error difficult to undo.
Choosing an adhesive
Fast-setting adhesive can make assembly convenient, but convenience is not the only consideration. Hot glue, contact cement, cyanoacrylate, and other adhesives differ in flexibility, fumes, bond behavior, working time, and how well they tolerate later reinforcement. Choose an adhesive that suits the paper, the amount of movement expected, and whether resin or filler will cover the joint.
Do not rely on filler to rescue a shell whose seams are badly aligned. Filler can smooth a correctly assembled transition; it should not be used as a substitute for missing paper, a misaligned edge, or a poorly supported joint.
5. Fit everything before making it rigid
Before adding resin, fiberglass, thick filler, or any other hard coating, test the assembled paper shell on the wearer or over a temporary form.
Quick wins for a faster PC:
Clear out junk files and repair common Windows errorsFree Scan →Scan for outdated or missing drivers - takes under a minuteDriver Scan →Rank #3

- Craft Clean Without the Waste: Skip the trial-and-error and stop tossing ruined foam scraps—our pre-cut EVA foam dowels ensure every piece is usable, helping you reduce waste while saving money and build time.
- EVA Foam That Bends to You: Flexible yet firm, these high-density foam rods easily contour to curves like shoulders, helmets, and props—just heat, bend, and glue into place for a smooth, tight fit.
- High-Density & Lightweight: Crafted from Foamory’s signature 85kg/m³ high-density EVA foam, these dowels offer durability without weight, making them ideal for wearables, props, and detail work.
- Cosplay-Ready Finishes: Clean 45-degree angled edges make these bevels perfect for armor outlines, helmet ridges, gauntlets, and layered costume builds.
- Shape Your Fantasy: Our bevels and dowels are made from the same high quality EVA foam sheets that you're used to. Combine with other cosplay materials like our foam clay for truly epic builds!
- Put on the clothing and padding that will actually be used.
- Check whether the wearer can walk, sit, raise both arms, bend the elbows, turn the head, and remove the piece without assistance.
- Confirm that eye openings, breathing openings, neck openings, and access points are large enough.
- Mark areas that rub or collide with joints.
- Install or at least mock up straps and padding before hardening.
- Make sure a helmet, mask, or chest piece has a safe release method if it becomes uncomfortable or damaged.
It is much easier to cut a paper opening, move a seam, or widen a joint before reinforcement. Once resin and filler have cured, every change creates more dust and may weaken the shell.
6. Choose reinforcement based on the part
There is no single correct reinforcement method for every Pepakura build. Use the lightest construction that provides enough shape retention for the intended costume or prop.
| Part or use | Possible approach | Trade-off |
|---|---|---|
| Small decorative detail | Cardstock shell with internal paper ribs, foam, or limited hot glue | Lightweight, but not suitable for heavy abuse or large unsupported spans |
| Wearable piece that must retain its shape | Internal ribs, foam, selected adhesive, or localized reinforcement | Usually lighter and easier to wear than a fully resin-coated shell |
| Large shell or crack-prone area | Fiberglass cloth or mat with polyester resin | More stiffness, weight, fumes, cure time, and sanding |
| Display prop with little handling | Paper or cardstock with targeted reinforcement | Less labor, but greater risk of dents or deformation |
Follow the resin’s current label and safety documentation for mixing, application, cure, and disposal. Do not add resin simply because more material feels stronger: excess resin increases weight and can create a shell that is unpleasant or unsafe to wear.
7. Make the shell rigid before applying body filler
This is the key surface-finishing rule: body filler belongs on a sufficiently rigid shell. If the paper or reinforcement flexes underneath it, the filler can crack, detach, or telegraph the movement through the paint.
For broad shaping and seam filling, Bondo body filler is a practical option for a rigid paper, fiberglass, or otherwise reinforced prop shell. Bondo Original Filler is a two-part filler mixed with cream hardener. Its consumer instructions describe small batches, an approximately three-to-four-minute working period, curing in about 20 minutes under stated conditions, progressive sanding, and priming after the repair. Actual working and cure times depend on the specific product, mix, temperature, and conditions; the current package instructions control.
Applying the main filler
- Prepare the surface. Remove loose paper, dust, and contamination. Make sure the shell is supported and will not move while the filler is being spread.
- Mix a small batch. Use the product’s specified ratio and mix only what can be applied within its working time. Do not guess at the hardener ratio or make a large batch for convenience.
- Start thin. Press a thin initial coat into seams and low areas so it adheres to the surface. Do not try to build the entire shape in one thick mass.
- Build in controlled layers. Let each layer cure as directed, then add material only where the surface remains low. Thin layers are easier to shape and less likely to crack than a thick unsupported mound.
- Shape after curing. Use sanding to refine the transition, not to compensate for a badly distorted paper form.
Body filler is for cosmetic shaping and surface repair. It is not a flexible coating, structural adhesive, impact-rated armor material, or load-bearing connector. Never use a thick layer of filler to create a structural frame or a mechanical hinge.
Recommended Free Tools
8. Sand in stages and control the dust
Begin with a coarse grit only when you need to shape cured filler. Move to a medium and then finer grit as the surface becomes even and you are preparing it for primer. The exact grit sequence depends on the filler, defect size, and finish, but jumping immediately to very fine paper can polish high spots while leaving low areas untouched.
Use a sanding block on broad curves and flat planes when possible. Fingers alone can create finger-shaped hollows. Frequently wipe or vacuum the surface and inspect it under a strong light held at a shallow angle. Angled light makes scratches, ridges, and low spots easier to see than overhead room lighting.
Rank #4

- Complete EVA Cosplay Foam Material Kit: includes a 47x14 inches black EVA foam board, 2mm and 5mm thick respectively, and a 15mm diameter x 2m long foam stick, providing cosplay enthusiasts with the basic materials needed to create armor, helmets, shoulder armor, bracers, masks, costume details and props
- Two Thicknesses for Layered Armor Builds:The 5mm EVA foam sheet is ideal for building armor structure, helmet bases and larger costume parts, while the 2mm sheet works well for raised details, layered patterns, trims, symbols, masks and decorative cosplay elements
- 15mm Foam Dowel for Clean Finished Edges:The round EVA foam dowel helps create smooth borders, helmet ridges, armor edges, shoulder details and raised trim lines, making DIY cosplay builds look more complete, dimensional and convention-ready
- Easy to Cut, Heat Shape and Paint:Made from high-density EVA foam that can be cut, sanded, glued, heat shaped and painted with common cosplay tools, this foam kit is suitable for beginners, hobby makers and experienced prop builders
- Ready for Summer Cosplay & Convention Season:Great for anime conventions, comic conventions, cosplay armor, LARP accessories, costume props, character outfits, fan events and early Halloween costume prep, helping makers start their next DIY build with versatile foam materials
Sanding body filler generates dust. NIOSH reported that body-filler sanding can produce substantial airborne dust and found that ventilated sanding equipment reduced average dust levels by approximately 11 times in one tested filler-sanding task. That result supports using local extraction where practical; it is not a guarantee that every vacuum or workshop will achieve the same reduction.
Use dust extraction for body filler sanding where practical, keep the work area cleanable, wear eye protection, and use respiratory protection appropriate to the dust. Do not dry-sand resin or filler in a living space. Wet sanding may reduce airborne dust for products that permit it, but it does not remove the need for skin, eye, respiratory, or waste-handling precautions.
9. Use glazing putty only for the last small defects
After the first shaping-sand pass, inspect the shell for pinholes, shallow scratches, nicks, and tiny dents. This is where glazing and spot putty for pinholes is more appropriate than another heavy coat of body filler.
Bondo Glazing & Spot Putty is positioned as a finishing product rather than a bulk filler. Official product information describes it for small surface imperfections and as a finishing layer over filler. The professional two-part formulation is described with roughly a five-minute working time and sanding after roughly 20 minutes, but product variants differ. Read the package and current technical data sheet for the exact formulation you have.
Spread it thinly over the defect, allow it to cure as directed, and sand it flush. If a depression is large enough to require a thick layer, return to the underlying geometry or the main body filler rather than forcing a spot putty product to do structural work.
10. Prime before deciding that the surface is finished
Raw filler is a poor judge of surface quality. Primer changes the color and sheen enough to reveal pinholes, scratches, uneven transitions, and texture differences that disappear against a patchy gray or tan filler surface.
- Remove sanding residue using a method compatible with the shell and coating system.
- Apply a compatible primer in thin coats according to its label.
- Allow the required flash, recoat, and cure time rather than immediately piling on more material.
- Inspect under strong angled light.
- Spot-fill remaining defects, sand them smooth, and re-prime.
Expect more than one primer-and-correction cycle on a large, smooth prop. That repetition is not wasted work; it is how the surface is inspected before the more visible color coats are applied.
Independent reader supportYour contribution helps us test, update, and keep practical guides available for everyone.11. Paint and weather deliberately
Once the primed surface is even, apply the base color in thin, controlled coats. Respect the paint system’s flash and cure instructions. Heavy coats can stay soft, run, wrinkle, or trap solvent beneath the surface.
Mask only after the underlying coat is ready for the next step. If a test piece is available, use it to check whether the masking material lifts the paint or whether the next coating attacks the previous one. Compatibility matters between primer, color coat, weathering products, and clear coat; do not assume that arbitrary products can be layered safely.
Make weathering tell the object’s story
- Chipped paint: Concentrate wear on corners, handles, exposed edges, and places where the fictional object would be handled.
- Oxidized metal: Use restrained color variation and buildup in recesses rather than applying the same brown wash everywhere.
- Soot: Keep it near vents, exhausts, muzzles, or heat sources in the design.
- Dust: Place it where the object meets floors, roads, boots, or dry environments.
- Grease and grime: Keep it around joints, hinges, grips, and maintenance points.
Dry brushing, washes, edge wear, masking, and clear coats can all work, but only when compatible with the underlying paint. Do not describe a coating as durable, flexible, waterproof, or skin-safe unless its product documentation supports that claim.
What’s actually slowing this PC down?
Pick the symptom - the matching free tool is one click away.
Best Value

- Versatile Crafting Foam: Perfect for Halloween costumes and cosplay, this 6mm Black Foam Roll allows you to craft unique costumes, armor, and detailed cosplay accessories. The high-density foam retains its shape and is effortless to manipulate
- Durability Of High Density Foam: Constructed from 100 kg/m³soft, closed-cell EVA foam, this Craft Foam Sheet is designed to maintain its form through wear and tear. Its surface is easy to clean, ensuring reusability
- Ideal for Diy Decorations: Utilize this Black Foam for crafting Halloween signs and banners. Its thick foam structure offers a robust base for intricate projects
- Effortless Cutting And Shaping: Measuring 14 x 39 inches, these foam sheets can be trimmed and customized to create detailed small props or large decorations with ease. Suitable for both adults and crafting enthusiasts
- Multi Functional Craft Material: Each foam mat is versatile and can be cut into desired shapes. This 6mm Craft Foam Roll is excellent for Halloween projects, costumes, and any DIY activity that requires reliable EVA foam. Beautiful creations begin here—DIY made easy for everyone
12. Install the wearable hardware and do a final fit
After the surface work is complete, install straps, buckles, padding, ventilation pieces, and removable sections. Keep hardware from creating pressure points against the wearer. A costume part should stay in position without making the wearer compensate with an awkward posture.
Repeat the full movement test in costume. Walk, sit, turn, bend, raise the arms, and practice removing the piece. Check for paint rub, sharp edges, loose hardware, blocked openings, and areas that become hot or uncomfortable. A beautiful finish is not a successful wearable build if the person cannot move or remove it safely.
Safety box: paper, filler, resin, dust, and spray coatings
Read the current product label, technical data sheet, and safety data sheet before using any filler, resin, solvent, primer, or paint. Formulations, hazard classifications, and instructions can vary by product number and geography.
- Work outdoors or in a dedicated, well-ventilated workspace. Do not use polyester filler, resin, solvent, or spray paint in a bedroom, kitchen, or poorly ventilated garage.
- Wear chemical-resistant gloves selected for the actual product, eye protection, and clothing that covers exposed skin.
- Product-specific Bondo safety documents identify hazards that can include flammability, eye irritation, reproductive toxicity, carcinogenicity, and target-organ toxicity. Do not generalize one product’s classification to every filler or resin.
- Select a properly rated respirator for sanding and solvent work based on the actual contaminant and task. NIOSH identifies styrene as a respiratory and systemic hazard and describes organic-vapor cartridge options only under stated concentration and respirator conditions.
- Dust protection and vapor protection are different functions. A particulate filter does not automatically protect against organic vapors, and an organic-vapor cartridge does not replace particulate filtration during sanding.
- Spray coatings can involve solvent vapors, mists, sensitizers, and fire hazards. Follow the coating’s safety information and applicable occupational guidance. Isocyanate-containing coatings require especially serious precautions, particularly in enclosed spaces.
- Keep ignition sources away from flammable coatings and solvents. Keep containers closed and dispose of resin-contaminated materials according to the label and local regulations.
Respiratory protection is not a universal shopping-list item. Fit, cartridge type, change schedule, ventilation, exposure concentration, and the specific product all matter. When the label or safety data sheet calls for controls beyond a hobby workspace, do not improvise a shortcut.
Common failures and the practical fix
| Failure | Likely cause | Better correction |
|---|---|---|
| Parts do not line up | The pattern was scaled, printed, or assembled inconsistently | Print a scale reference, confirm printer settings, and dry-fit neighboring pieces before bulk cutting |
| Armor is uncomfortable | Fit was not tested before hardening | Add openings, padding, straps, and joint clearance while the shell is still modifiable |
| Filler cracks | The substrate flexes, the filler is too thick, or surface preparation was poor | Reinforce first, apply thinner coats, and use a more flexible construction where movement is expected |
| The surface remains wavy | Large geometry errors are being corrected with filler | Fix the paper or reinforcement geometry, then use filler for surface refinement |
| The workspace becomes dusty | No local extraction or containment was used | Use extraction, a suitable respirator, eye protection, and cleanable work surfaces |
| Primer reveals endless defects | The surface was judged only by eye on raw filler | Prime early, inspect under angled light, spot-fill, sand, and re-prime |
| The costume becomes too heavy | Too much fiberglass, resin, filler, or hardware was added | Build a test section, reinforce only where needed, and weigh major components |
| Paint peels or wrinkles | Incompatible products, insufficient cure, or coats applied too heavily | Follow the coating system’s compatibility, recoat, and cure instructions |
A practical build checklist
- Define whether the object is wearable, hand-held, or display-only.
- Measure the wearer and account for clothing, padding, wig, gloves, and footwear.
- Choose a workable 3D model and save an unmodified original.
- Import the model into Pepakura, unfold it, and inspect the edge numbers and tabs.
- Set the intended scale and print a test section before the complete pattern.
- Print the final pattern on suitable cardstock at 100% unless the design specifies another scale.
- Mark numbers and fold directions, then cut and score carefully.
- Dry-fit neighboring pieces before gluing.
- Test the paper shell on the wearer or a temporary form.
- Add openings, straps, padding, ventilation, and joint clearance.
- Choose light reinforcement or fiberglass based on the part’s size, flex, and handling needs.
- Apply body filler only after the shell is sufficiently rigid.
- Shape with progressive sanding and control the dust.
- Use glazing putty for pinholes and small defects after the main sanding pass.
- Prime, inspect under angled light, correct defects, and prime again.
- Paint in thin compatible coats, then weather according to the fictional material.
- Complete a final movement, comfort, visibility, ventilation, and removal check.
What not to add to this workflow
Windows repair software is not part of making, fitting, reinforcing, or painting a Pepakura prop. If Pepakura or a printer fails because of an unrelated Windows problem, troubleshoot the operating system through ordinary vendor support and hardware checks; do not imply that a PC utility improves pattern quality or solves craft-material failures.
Likewise, a continuous streaming service is not needed to build costume armor. A creator who later records a build timelapse could evaluate a service such as StreamNeo for continuously looping recorded video on YouTube, but that is a publishing decision outside the construction workflow.
Frequently Asked Questions
Can I apply Bondo directly to printer paper?
It is a poor choice for an unsupported paper shell. Body filler should go over a sufficiently rigid, reinforced surface. If the substrate flexes, a thick filler layer can crack, detach, add unnecessary weight, and become difficult to sand.
Do all Pepakura costume builds need fiberglass resin?
No. Small decorative parts may need only cardstock, internal ribs, foam, or localized reinforcement. Fiberglass cloth or mat and polyester resin make more sense for larger shells, cracks, or parts that need extra stiffness and can tolerate the added weight, fumes, cure time, and sanding.
Quick wins for a faster PC:
Repair Windows errors before they cause bigger problemsFix Now →Fix the driver behind crashes, sound loss and screen glitchesFind Drivers →Clear out junk files and repair common Windows errorsFree Scan →What is the difference between Bondo Original Filler and glazing putty?
Original Filler is the broad shaping and filling product for a rigid shell. Glazing & Spot Putty is intended for finishing defects such as pinholes, shallow scratches, nicks, and small dents after the main filler has been shaped and sanded.
Why does primer reveal defects that were invisible before painting?
Raw filler often has uneven color and sheen that hide small scratches and pinholes. Primer creates a more uniform surface, making low spots, ridges, and texture differences visible so they can be corrected before the color coats.
Can finished paper-and-Bondo armor be used as protective armor?
No. It can be a convincing costume or prop, but it should not be treated as certified impact, ballistic, motorcycle, fall, occupational, or other protective equipment.
What kind of respirator should I use?
There is no universal respirator for every step. Sanding creates particulate dust, while resin, solvent, and some coatings create vapor or mist hazards. Select respiratory protection from the current product safety documentation and the actual task; particulate and organic-vapor protection are not interchangeable.
Free tools Windows power users keep installed
One-click scans. No signup required.
The Bottom Line
The finish comes from sequence, not from piling on more Bondo. Build and fit the paper geometry first, reinforce only as much as the part requires, use body filler in thin coats on a rigid shell, reserve glazing putty for small defects, control sanding dust, and let primer expose the work that still needs correction. The result can look remarkably convincing while remaining what it is: costume construction, not protective equipment.
Quick Recap





