PC Slower Than It Used to Be?
What’s actually slowing this PC down?
Pick the symptom - the matching free tool is one click away.
A free scan shows the junk files, broken settings and background clutter dragging Windows down - then fixes them in one click.
Run a Free PC Scan →Free scan · Windows 10 & 11
ThatPainter is reader-supported. When you buy through links on our site, we may earn an affiliate commission. Learn More


As an Amazon Associate I earn from qualifying purchases.
Yes—multiple quilting designs can work together in one quilt. Sketch them side by side first, then use scale, density, and placement to decide whether they should blend into a quiet texture or make a focal area stand out. For filled spaces, build from the largest motif to medium elements and small fillers so the coverage feels intentional.
The Tool Desk
Outbyte PC Repair FREEClear out junk files and repair common Windows errorsFree Scan →Outbyte Driver Updater FREEFix the driver behind crashes, sound loss and screen glitchesFind Drivers →Start with the quilt top, not the quilting motif
Look at the piecing, fabrics, focal point, and how the finished quilt will be used. Intricate piecing may need quilting that supports it rather than competes with it; open negative space can accommodate a stronger quilting design. Busy prints can camouflage stitch detail, while quilting on solid fabric is more likely to show clearly. These considerations are discussed in Epida Studio’s quilting tutorial and the Fresh Quilting handout on combining machine and hand quilting.
#1 Best Overall
- For a calm overall texture: choose motifs that feel compatible in style and keep their scale and density similar.
- For a focal hierarchy: give the area you want noticed a larger-scale or less-dense motif, and keep surrounding areas quieter.
- For a busy quilt top: use quilting to support the piecing, or reserve more visible designs for less crowded areas.
Sketch the designs together before stitching
Choose a small group of motifs you are comfortable quilting, then draw them on the same sheet. Kimberlee Tanner recommends comparing their style, scale, and density, and deciding whether they blend or contrast. A motif repeated at a different scale can also create a different visual effect. See Tanner’s tutorial on combining quilting designs.
- Take a photo of the quilt top.
- Draw candidate quilting lines over the photo to test how they relate to the piecing and to each other.
- Adjust motif size, spacing, or placement until the focal area reads clearly and the rest of the quilting feels supportive.
- If you are uncertain, simplify the plan rather than adding more competing motifs.
For straight or evenly spaced lines, Epida Studio describes using a ruler and Hera marker as one marking option; neither is essential for every design.
Build filled areas from large motifs to small fillers
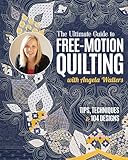
When a space needs to be filled, quilt the largest element first, then add medium elements, and use small motifs or lines to close remaining gaps. Angela Walters demonstrates this progression in AllPeopleQuilt’s interview transcript: the goal is even coverage, not a prescribed count or ratio of motifs.
Do these 3 things before closing this tab:
1Scan for outdated or missing drivers - takes under a minute2Repair Windows errors before they cause bigger problems3Fix the driver behind crashes, sound loss and screen glitches- Large element: place the main motif first so it establishes the movement and structure of the area.
- Medium elements: add the next size around it, balancing open and crowded spaces.
- Small fillers: use pebbles, back-and-forth lines, or another suitable small motif to fill leftover gaps.
Assess the gaps as you go; do not force a fixed number of small motifs into each space. The scale progression helps coverage stay consistent while allowing the design to respond to the actual area.
Independent reader supportYour contribution helps us test, update, and keep practical guides available for everyone.Vary patterns by area, direction, or technique
Different quilting styles do not have to be confined to separate quilts. Straight, wavy, vertical, and diagonal lines can coexist, as can machine and hand quilting. Varying the design by block, row, line direction, or scale can create a transition or distinguish a focal area from its background.
The Fresh Quilting handout describes combining machine and hand quilting, including using machine quilting to secure layers before adding hand quilting. Hand-quilted lines can add movement and serve as a secondary design, particularly when their contrast makes them visible. Choose the arrangement with the piecing and fabrics in mind so the added texture does not obscure the feature you want to preserve.
Choose spacing for the quilt’s materials and use
There is no single spacing figure that applies to every quilt. Follow the batting requirements and consider how the quilt will be used and washed. Two published examples illustrate why spacing should be treated as guidance, not a universal rule: Epida Studio says quilting “every 4″” is usually enough to hold together a frequently used quilt, while the Fresh Quilting handout’s author says she tends to space quilting lines about “½” to 1½” apart” for the example process. These are different authors’ instructional examples, not a standard that overrides the materials or project.
Quick Recap
A quick decision check before quilting
- Can you identify the focal point, or does the quilting risk creating a new one?
- Do the chosen motifs share a compatible style, or is their contrast clearly intentional?
- Will the motif scale and density create a unified texture or a deliberate hierarchy?
- Have you tested the placement on a photo or sketch, especially where designs meet?
- Does the planned spacing suit the batting and the quilt’s expected use and care?

Product prices and availability are accurate as of the date/time indicated and are subject to change. Any price and availability information displayed on Amazon at the time of purchase will apply.




