ThatPainter is reader-supported. When you buy through links on our site, we may earn an affiliate commission. Learn More
Paint your kitchen cabinets when the boxes, shelves, and layout are fundamentally sound and the problem is limited to color or surface wear. Replace them when you find water damage, delamination, failing joints, or a layout that no longer works. Refacing or ordering new doors is the middle option: it changes the look while preserving usable cabinet boxes.
As an Amazon Associate I earn from qualifying purchases.
The right choice depends less on the age of the finish than on cabinet condition, storage needs, surface material, budget, and how long you can lose normal kitchen access. The guide below gives you a condition check, realistic U.S. cost context, preparation and curing requirements, and a way to compare disruption before committing.
What is the practical difference between painting, refacing, and replacing cabinets?
Painting changes the existing finish. Refacing keeps the boxes but installs new doors and drawer fronts, often with veneer and new hardware. Full replacement removes the existing system and installs new boxes, doors, and drawers, allowing a new layout and changes to plumbing or electrical work.
Popular on Amazon
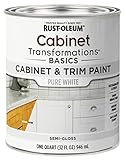
- CABINET TRANSFORMATION: Refresh outdated cabinets, vanities, furniture and trim with rich Pure White color and a smooth semi-gloss finish
- DURABLE PERFORMANCE: Easy-to-clean finish resists dirt and grime while standing up to household chemicals
- SMOOTH APPLICATION: Outstanding flow and leveling help create a beautiful finish with brush, roller, pad applicator or airless sprayer
- FAST PROJECT COMPLETION: Dries to touch in 30 minutes, recoats in 2 hours and is ready for normal use after 24 hours
- INTERIOR CABINET COATING: Ideal for kitchens, bathrooms, laundry rooms and other interior cabinet and trim applications
| Option | What changes | Best fit | Typical disruption | Main limitation |
|---|---|---|---|---|
| Paint existing cabinets | Color and surface finish; boxes, doors, and layout stay | Sound construction with cosmetic wear | Work areas are isolated during prep and curing; ordinary access is usually retained elsewhere | Cannot correct weak boxes, poor storage, or an unsuitable layout |
| Reface or replace doors | New doors and drawer fronts; often veneer and hardware on existing boxes | Sound boxes with an unacceptable style or badly worn fronts | A typical makeover takes three to five days, according to Home Depot | Existing box dimensions still limit storage and layout |
| Replace all cabinets | New boxes, doors, and drawers | Structural or water damage, poor layout, or major storage requirements | Kitchen access is usually limited for two to four weeks and can take longer when plumbing or electrical work is added, according to Home Depot | Highest demolition, cost, and coordination burden |
Painting is therefore a finish project, refacing is a cosmetic and component upgrade, and replacement is a space-planning project. Choosing a more expensive option will not solve a different problem unless the scope matches the defect.
How do I tell whether my cabinet boxes are sound enough to paint?
Inspect the parts that carry weight and receive moisture before you price paint. A flawless color cannot compensate for a box that is separating or a shelf that can no longer hold dishes.
Inspect the box structure
- Open every door and drawer and look for cracks at corners, loose joints, and backs pulling away from the sides.
- Press gently on bottoms, shelves, and hanging rails. Flexing, sagging, or movement around screws indicates a repair or replacement issue rather than a simple repaint.
- Look under the sink and beside the dishwasher for swollen particleboard, staining, soft spots, or bubbling laminate caused by leaks or steam.
- Check whether hinge screws still bite into solid material. Screws that spin without tightening may signal stripped or deteriorated substrates.
- Examine the floor-level toe-kick and cabinet ends for swelling or delamination; these areas often reveal chronic moisture first.
This Old House notes that paint cannot cure fundamental structural flaws. Small cosmetic dents can be filled and sanded, but movement, failed joints, or water-damaged panels should be priced as carpentry, refacing components, or replacement.
Quick wins for a faster PC:
Repair Windows errors before they cause bigger problemsFix Now →Scan for outdated or missing drivers - takes under a minuteDriver Scan →Check doors, drawers, and hardware separately
Doors that close squarely and drawers that run smoothly are good candidates for painting even when their color is dated. If the boxes are solid but doors are warped, chipped beyond economical repair, or stylistically wrong, measured replacement doors and drawer fronts can solve the visible problem without discarding usable boxes.
Does the current layout still work?
A makeover preserves the existing footprint. Replacement is the route when you need to move appliances, add landing space, alter work aisles, or run new plumbing and electrical services.
Questions to ask about storage
- Can you reach the items you use daily without unloading another cabinet?
- Are cookware, recycling, pantry goods, and small appliances assigned enough volume?
- Do door swings collide, or do drawers hit an island or appliance?
- Would pull-outs, a deeper drawer stack, or a taller pantry solve the problem within the current footprint?
If the answer is a hardware or insert upgrade, painting may still fit. If the answer requires different widths, heights, or locations, replacement gives the designer freedom that paint and refacing do not.
Also popular on Amazon

- Includes 30 featured and newest released color card. Sprayed on color to see our colors in your homes lighting for more accurate color choices.
- ALL-IN-ONE Paint - NO Sanding, NO Priming, NO Top Coat Required, Low Luster, Velvet Sheen Finish
- Interior/Exterior - Paint your whole house - Ideal for hard surfaces including walls, doors, cabinets, counters, furniture, metal, glass, ceramics and floor and wall tile
- Durable yet stretches to paint smooth fabrics, vinyl and leather
- Results cannot be guaranteed. Digital screens may not show color accurately. Product search "ALL-IN-ONE PAINT by Heirloom Traditions, Color Confidence Card", for an accurate color choice.
Account for service changes
New cabinets can accommodate a relocated sink, dishwasher, gas line, outlets, lighting, or ventilation. Existing cabinets can sometimes be modified, but those changes can erase the time and cost advantage of a cosmetic project. Confirm the plumbing and electrical scope before selecting paint simply because it has the lowest starting price.
Crashes, No Sound, or Screen Glitches?
Random freezes, missing sound and display glitches usually trace back to one bad driver. Find and replace yours safely.Free scan · under a minuteWindows Errors? Fix Them Before They Spread
Repair common Windows errors and clear accumulated junk for a smoother, more stable PC - no reinstall needed.Free scan · no reinstallCan laminate or melamine cabinets be painted?
Yes, when the laminate or melamine is firmly bonded and the surface is prepared for adhesion. Behr advises cleaning, scuff-sanding, and priming these surfaces before applying a cabinet, door, and trim enamel. Peeling edges, swollen cores, or loose plastic cannot be made durable by adding more coats.
Surface-specific checks
- Solid wood: Identify open grain, previous coatings, and grease that must be removed before sanding and priming.
- MDF: Seal exposed or routed edges so they do not absorb primer unevenly; replace panels that have swollen from water.
- Laminate or melamine: Degrease thoroughly, dull the sheen with medium-grit abrasive, remove all dust, and use a bonding primer.
- Thermofoil: Test a small inconspicuous area. Heat or moisture may have loosened the film, in which case replacement fronts are usually more reliable than coating it.
Do not skip the adhesion test. Coat a hidden edge, allow it to cure, and use firm tape to check whether the film lifts. A failure means the cleaning, abrasion, primer, or substrate needs to change before the whole kitchen is painted.
What preparation and painting process gives cabinets a durable finish?
Benjamin Moore’s guidance is direct: “While you can paint over your old kitchen cabinets, you need to prepare the surfaces first.” Preparation commonly determines the result; a Harrison Paint Corp. representative quoted by This Old House estimates surface prep at 75% to 90% of repainting success.
- Remove and label components. Take off doors, drawer fronts, knobs, pulls, and adjustable shelves. Mark each hinge and panel so reassembly returns doors to their original openings.
- Protect the room. Mask appliances, counters, floors, and cabinet interiors that will not be coated. Set up a clean, ventilated area for doors and drawers.
- Degrease and wash. Use a suitable degreaser on cooking oils, hand residue, and cleaner buildup. Rinse or wipe according to the cleaner instructions and let surfaces dry completely.
- Repair defects. Fill dents and abandoned hardware holes, tighten joints, and replace damaged panels. Do not bury active leaks or loose construction under filler.
- Scuff-sand glossy surfaces. Use medium-grit paper, commonly in the 100–150 range, to remove sheen without gouging veneer. Vacuum and wipe with a tack cloth so no abrasive dust remains.
- Prime. Apply a high-quality bonding or stain-blocking primer appropriate to the substrate. Respect its recoat time; rushing can soften the film beneath the finish coat.
- Apply cabinet paint. Use a product formulated for cabinets, doors, and trim. Apply thin, even coats and keep a wet edge to reduce lap marks and drips.
- Sand between coats only as directed. Remove nibs with a fine abrasive after the film has hardened enough, then clean the dust before recoating.
- Reassemble after curing. Benjamin Moore lists 50–90°F as the application range for Advance Interior Paint. The cabinets may feel dry sooner, but the manufacturer recommends waiting at least 24 hours before returning them to service and avoiding heavy abrasion or cleaning for five to seven days while hardness and adhesion develop.
Spraying can produce a smoother finish, while careful brushing and rolling can be practical on site. The method matters less than a clean substrate, compatible primer, controlled dust, and enough cure time before hardware is tightened against the new film.
How much does painting cost compared with refacing or replacing?
The following are national U.S. estimates, not bids. Actual pricing changes with cabinet count, access, repairs, finish system, region, and whether doors are sprayed off-site.
Also popular on Amazon

- Ultra-White Brilliance: Experience the transformative power of Titanium Infusion, an ultra-white hue inspired by the artist’s palette – perfect for a modern, timeless look.
- One-Day Transformation: Redefine your kitchen cabinets in a single day with our brush-and-roll application - no professional help needed.
- All-Inclusive Kit: Each package covers 100 square feet, ideal for the typical kitchen, and includes all the necessary tools for a flawless finish.
- Eco-Friendly & Safe: Enjoy the peace of mind with our low-VOC, water-based formula, ensuring a safer painting experience.
- Effortless Transformation: No stripping or priming required; our paint adheres beautifully to wood, laminate, and metal cabinets with minimal preparation.
| Scope | Published U.S. estimate | What the figure represents |
|---|---|---|
| Professional or full painting project | $2,000–$6,500 | HomeGuide national estimate for painting kitchen cabinets |
| DIY painting materials | About $200 | This Old House estimate for materials; labor, tools already owned, repairs, and replacement hardware are additional |
| Professional painting minimum | At least $1,000 | This Old House stated minimum for professional painting; the final price depends on scope |
| Door-only replacement | $2,200–$6,600 | HomeGuide national estimate for replacement doors and fronts |
| Refacing | $5,000–$13,000 | HomeGuide national estimate including new fronts and treatment of existing boxes |
| Full cabinet replacement | $4,500–$15,000 | HomeGuide national estimate; local projects with construction or service changes may exceed it |
cK Builders gives a separate contractor framing of $30–$60 per linear foot to paint, $150–$450 to reface, and $100–$1,200 to replace. Treat those figures as an additional contractor estimate, not a universal price list; linear-foot definitions and included work vary.
What a quote should identify
- Number of doors, drawer fronts, exposed ends, and cabinet interiors included.
- Whether degreasing, sanding, repairs, priming, and caulking are line items or assumptions.
- Paint brand, product line, sheen, number of coats, and application method.
- Who removes and reinstalls hardware, and whether new knobs or pulls are included.
- Protection, ventilation, daily cleanup, curing access, and the remedy for adhesion or finish defects.
Compare quotes on identical scope. A low number that excludes repairs, door removal, or cure-time protection is not equivalent to a complete cabinet-finishing proposal.
How long will each option disrupt the kitchen?
Painting requires concentrated preparation and curing but usually leaves other parts of the kitchen usable. Home Depot describes a typical cabinet makeover as three to five days. Full replacement generally limits access for two to four weeks and can run longer when plumbing or electrical work is included.
Plan a painting project around access
- Set up a temporary beverage and meal station away from sanding dust and overspray.
- Remove only the doors and drawers scheduled for work, keeping labeled hardware in sealed bags.
- Ask when counters, sinks, and appliances will be protected or unavailable.
- Keep children and pets away from wet coatings and the curing area.
Plan a replacement around construction
Confirm demolition, field measurements, delivery, installation, countertop handling, inspections, and reconnection of appliances. A replacement schedule can expand when walls are out of square, flooring must be repaired, or a required permit delays service work. Arrange a realistic temporary kitchen rather than assuming the installation window is fixed.
What do homeowners choose, and what do they value?
Houzz’s 2026 figures report that 68% of surveyed homeowners replace all cabinets, 27% partially replace them, and 5% do not upgrade cabinets. Within partial upgrades, 50% refinish exteriors, 32% add cabinets, 26% replace some cabinets, and 20% replace doors only. These are survey results, not a recommendation for every kitchen.
In Houzz’s 2024 findings, look and feel was a primary material consideration for 80% of renovating homeowners, compared with 47% for durability and 40% for cost. Among surveyed new-cabinet choices, solid wood was selected by 76%, plywood by 22%, and paint was the preferred finish for 58%. The figures help explain why appearance often drives the initial decision, while condition and layout determine whether a cosmetic solution is technically appropriate.
Also popular on Amazon
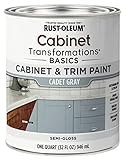
- CABINET TRANSFORMATION: Refresh outdated cabinets, vanities, furniture and trim with rich Cadet Gray color and a smooth semi-gloss finish
- DURABLE PERFORMANCE: Easy-to-clean finish resists dirt and grime while standing up to household chemicals
- SMOOTH APPLICATION: Outstanding flow and leveling help create a beautiful finish with brush, roller, pad applicator or airless sprayer
- FAST PROJECT COMPLETION: Dries to touch in 30 minutes, recoats in 2 hours and is ready for normal use after 24 hours
- INTERIOR CABINET COATING: Ideal for kitchens, bathrooms, laundry rooms and other interior cabinet and trim applications
When is refacing or replacing only the doors the better compromise?
Choose a middle path when the cabinet boxes are square, dry, and firmly joined but the door profile, finish, or hardware is the part you dislike. New fronts can deliver a larger visual change than paint while avoiding demolition of the existing layout.
The Tool Desk
Outbyte PC Repair FREERepair Windows errors before they cause bigger problemsFix Now →Outbyte Driver Updater FREEScan for outdated or missing drivers - takes under a minuteDriver Scan →Refacing works well when
- Box interiors and shelves remain useful and undamaged.
- Door openings use standard or accurately measurable sizes.
- You want a new color or wood look plus new hinges, pulls, and drawer fronts.
- You accept that the current storage geometry remains.
Refacing is a poor fit when
- Water damage extends into the box sides, bottoms, or rails.
- You need wider drawers, taller cabinets, or relocated appliances.
- The existing boxes are out of square or cannot hold new hardware securely.
- Wall or floor conditions require removal anyway.
Measure every opening, not just one representative door. Small variations, overlay style, hinge cup position, and finished end panels affect ordering and installation.
How long do painted cabinets last?
There is no single dependable service-life number for every household. The available guidance covers preparation, application temperature, and early curing, but it does not establish an independent lifespan that applies across paint systems, substrates, cleaning habits, humidity, and daily use.
You can improve durability by correcting leaks, choosing a compatible primer and cabinet coating, allowing the full cure, using soft cleaners, and touching up impact points before moisture reaches the substrate. Ask a painter what maintenance and warranty language applies to the exact product system rather than relying on a universal year count.
What are the most common failure modes, and how can I prevent them?
Peeling or chipping
Usually caused by grease, gloss left unabraded, incompatible primer, or insufficient cure. Strip loose material, clean again, sand sound edges, spot-prime, and repaint only after the underlying cause is corrected.
Recommended Free Tools
Sticky or fingerprint-prone finish
Handling too soon, applying heavy coats, or painting outside the product’s temperature range can slow hardening. Increase ventilation without forcing extreme heat, and follow the product’s recoat and cure instructions.
Also popular on Amazon

- Includes 30 featured and newest released color card. Sprayed on color to see our colors in your homes lighting for more accurate color choices.
- ALL-IN-ONE Paint - NO Sanding, NO Priming, NO Top Coat Required, Low Luster, Velvet Sheen Finish
- Interior/Exterior - Paint your whole house - Ideal for hard surfaces including walls, doors, cabinets, counters, furniture, metal, glass, ceramics and floor and wall tile
- Durable yet stretches to paint smooth fabrics, vinyl and leather
- Results cannot be guaranteed. Digital screens may not show color accurately. Product search "ALL-IN-ONE PAINT by Heirloom Traditions, Color Confidence Card", for an accurate color choice.
Visible brush marks and lap lines
Overworking paint as it begins to set, inconsistent film thickness, or dusty conditions can telegraph texture. Use controlled sections, maintain a wet edge, and lightly de-nib between fully cured coats when the product allows.
Swollen edges after painting
Paint may seal a sound edge but cannot reverse water-damaged MDF or particleboard. Replace the affected panel or repair the leak before finishing adjacent parts.
Doors no longer align
Reinstall labeled hinges, then adjust hinge screws in small increments. If the box itself has shifted or the panel is warped, hardware adjustment will not create a square opening.
Do these 3 things before closing this tab:
1Scan for outdated or missing drivers - takes under a minute2Clear out junk files and repair common Windows errors3Fix the driver behind crashes, sound loss and screen glitchesWhat should I ask a painter or cabinet contractor before signing?
- Which panels will be removed, and where will they be finished and stored?
- How will you test adhesion on laminate, melamine, or previously coated surfaces?
- What cleaning, sanding, primer, and repair steps are included in the written scope?
- Which product system and sheen will be used, and what are its application and cure limits?
- When may doors be handled, when may the kitchen be used normally, and what cleaning is safe during the first week?
- How will you document hidden water or structural damage discovered after removal?
- What is covered if coating peels, hardware holes fail, or a panel is damaged during work?
Get a measured door schedule and a drawing of any layout change for refacing or replacement. For painting, request a sample on the actual cabinet substrate so color and texture are judged under your kitchen lighting.
Frequently Asked Questions
Can I live in the house while kitchen cabinets are being painted?
Usually, yes, if the contractor isolates sanding and spraying, protects food-preparation surfaces, and provides a safe route to the sink or refrigerator. Ask whether doors are finished off-site and whether ventilation equipment will affect adjacent rooms.
Should I change cabinet hardware when I paint?
New knobs and pulls can hide old finish outlines and let you change hole spacing, but mismatched measurements can leave visible holes. Make a drilling template and confirm the pull length is comfortable for the door and drawer sizes.
Do cabinet painting projects need permits?
A finish-only repaint commonly does not, but permits may apply when the project adds circuits, moves plumbing, changes gas connections, or alters walls. Confirm requirements with your local building department before demolition.
How do I clean newly painted cabinets?
Wait through the coating manufacturer’s stated cure period, then use a soft cloth and mild, non-abrasive cleaner. Avoid soaking joints, harsh solvents, scouring pads, and steam cleaners that can soften or force moisture behind the finish.
Quick Recap

Product prices and availability are accurate as of the date/time indicated and are subject to change. Any price and availability information displayed on Amazon at the time of purchase will apply.

