Do these 3 things before closing this tab:
Crashes, No Sound, or Screen Glitches?
Random freezes, missing sound and display glitches usually trace back to one bad driver. Find and replace yours safely.Free scan · under a minutePC Slower Than It Used to Be?
A free scan shows the junk files, broken settings and background clutter dragging Windows down - then fixes them in one click.Free scan · Windows 10 & 111Fix the driver behind crashes, sound loss and screen glitches2Repair Windows errors before they cause bigger problems3Scan for outdated or missing drivers - takes under a minute
ThatPainter is reader-supported. When you buy through links on our site, we may earn an affiliate commission. Learn More
For most localized bulge effects, use Filter > Liquify > Bloat. Bloat moves pixels away from the brush center, making a cheek, object, logo, pattern, or painted form look swollen or rounded. For a symmetrical bubble, use Spherize; for inflated lettering or a logo, use a Smart Object and Edit > Transform > Warp.
Choose the tool based on the result you want: organic swelling, spherical distortion, or controlled typography. Protect the background and keep an untouched copy of your layer so you can revise the effect.
Choose the right Photoshop tool
| Desired result | Best tool | Why |
|---|---|---|
| Organic, localized swelling | Liquify > Bloat | Provides gradual brush-based control. |
| Symmetrical bubble or lens | Filter > Distort > Spherize | Creates even spherical distortion. |
| Bulged text, logo, or graphic | Smart Object + Edit > Transform > Warp | Provides a controllable mesh and protects the original artwork. |
| Graphic conforming to a curved object | Warp, Displace, or both | Lets the design follow the surface before you add a localized bulge. |
| Small retouching adjustment | Liquify with low pressure | Allows gradual enlargement without changing the whole image. |
| Distortion limited to one area | Selection or layer mask before Liquify | Helps protect the background. |
Photoshop includes several distortion approaches, including Liquify, Warp, Distort, and Skew. They overlap, but are not interchangeable.
Method 1: Create a bulge with Liquify’s Bloat tool
This is the most flexible method for a face, object, fabric area, hand-painted shape, or other irregular subject. Adobe describes Liquify as an interactive workspace for pushing, pulling, rotating, puckering, and bloating pixels; its desktop path is Filter > Liquify.
#1 Best Overall

- Battery-Free Pen: StarG640 drawing tablet is the perfect replacement for a traditional mouse! The XPPen advanced Battery-free PN01 stylus does not require charging, allowing for constant uninterrupted Draw and Play, making lines flow quicker and smoother, enhancing overall performance
- Ideal for Online Education: XPPen G640 graphics tablet is designed for digital drawing, painting, sketching, E-signatures, online teaching, remote work, photo editing, it's compatible with Microsoft Office apps like Word, PowerPoint, OneNote, Zoom, Xsplit etc. Works perfect than a mouse, visually present your handwritten notes, signatures precisely
- Compact and Portable: The G640 art tablet is only 2 mm thick, it's as slim as all primary level graphic tablets, allowing you to carry it with you on the go
- Chromebook Supported: XPPen G640 digital drawing tablet is ready to work seamlessly with Chromebook devices now, so you can create information-rich content and collaborate with teachers and classmates on Google Jamboard’s whiteboard; Take notes quickly and conveniently with Google Keep, and effortlessly sketch diagrams with the Google Canvas
- Multipurpose Use: Designed for playing OSU! Game, digital drawing, painting, sketch, sign documents digitally, this writing tablet also compatible with Microsoft Office programs like Word, PowerPoint, OneNote and more. Create mind-maps, draw diagrams or take notes as replacement for mouse
Prepare the layer
- Open the image in Photoshop.
- Duplicate the working layer, or convert it to a Smart Object.
- If only one object should bulge, isolate it with Object Selection, Select Subject, the Pen Tool, or a layer mask.
- Keep the original layer hidden underneath as a fallback.
Adobe recommends converting a layer to a Smart Object before opening Liquify when the current version supports that workflow. Older Adobe documentation identifies Liquify as an exception to Smart Filters. Preserve a duplicate regardless: if your installation does not retain Liquify as an editable Smart Filter, you still have the untouched original.
Apply Bloat
- Choose Filter > Liquify.
- Select the Bloat Tool.
- Set the brush slightly larger than the area you want to enlarge.
- Start with low pressure and click or make short strokes over the center.
- Inspect the result at close range and at normal viewing size.
- Click OK when the shape is ready.
As a practical starting point—not an Adobe default—try a brush between 1.25 and 2 times the width of the area being bulged, with pressure around 10–25% for realistic retouching. Use more pressure or passes for a stylized result. Density controls how broadly the effect blends into its surroundings; moderate density can give a smoother transition.
Several short applications are safer than one aggressive drag. Repeatedly clicking the same point can quickly create a melted-looking blob, so pause often and compare the preview with the original.
Refine the shape
- Forward Warp: Pushes pixels in the direction of the drag, useful for shaping the outline or correcting an uneven side.
- Reconstruct: Selectively reverses distortion where Bloat went too far.
- Smooth: Softens ripples and harsh transitions; use it sparingly.
- Freeze Mask: Protects areas from further distortion.
- Thaw Mask: Removes a Freeze Mask.
- Pucker: Pulls pixels toward the brush center, useful for creating a concave counterpart or tightening edges.
Work around 100–200% zoom for detail, then zoom out to judge the overall silhouette. For realistic results, use a broad brush, low pressure, and symmetrical adjustments where anatomy or manufactured objects require symmetry. For an exaggerated effect, combine Bloat with Forward Warp to shape the contour.
See Adobe’s current Liquify instructions and Liquify overview for the workspace and controls.
Rank #2

- Wacom Intuos Small Graphics Drawing Tablet: Enjoy industry leading tablet performance in superior control and precision with Wacom's EMR, battery free technology that feels like pen on paper
- Works With All Software: Wacom Intuos tablet can be used in any software program to explore new facets of digital creativity; draw, paint, edit photos/videos, create designs, and mark up documents
- What the Professionals Use: Wacom's industry leading pen technology and pen to paper feeling makes it the preferred drawing tablet of professional graphic designers
- Software and Training Included: Only Wacom gives you software with every purchase. Register your Intuos tablet and gain access to some of the best creative software and Wacom's online training
- Wacom is the Global Leader in Drawing Tablet and Displays: For over 40 years in pen display and tablet market, you can trust that Wacom to help you bring your vision, ideas and creativity to life
Method 2: Make a symmetrical bubble with Spherize
Use Spherize when the effect should resemble a centered bubble, lens, or sphere. Unlike brush-based Liquify, it applies more even spherical distortion to a selection.
- Duplicate the layer.
- Select the image, artwork, or circular area to bulge.
- Choose Filter > Distort > Spherize.
- Increase Amount gradually.
- Test the available mode options—Horizontal, Vertical, or Both directions—if your version displays them.
- Confirm the filter, then soften the perimeter with a layer mask if necessary.
Spherize wraps the selected image around a spherical form, so it is fast and predictable for centered graphics. It is less suitable for irregular objects, off-center facial features, or shapes that need hand-directed contour changes. It can also stretch lettering and patterns unnaturally. Adobe’s filter reference states that Spherize does not work on images larger than 11,500 × 11,500 pixels.
If the effect ends in a harsh circular boundary, feather the selection slightly before applying it, or apply Spherize to a duplicate layer and fade its edge with a soft mask.
Method 3: Bulge text, logos, and graphics with Warp
Warp is usually the better starting point for designed artwork because you can control its silhouette without painting directly into the original pixels.
- Select the text, logo, or artwork layer.
- Convert it to a Smart Object if you want the source artwork to remain editable.
- Choose Edit > Transform > Warp.
- Push the center of the mesh outward while keeping the outside edges comparatively stable.
- Add or split warp lines when you need localized control.
- Press Enter or Return to commit, or Esc to cancel.
Current Photoshop references describe preset grids such as 3 × 3 and 4 × 4, custom grids, and split-warp controls. Options can vary by version, so use the mesh available in your installation rather than looking for a universal “Bulge” preset.
Rank #3

- Word-first 16K Pressure Levels: The upgraded stylus features 16,384 levels of pressure sensitivity and supports up to 60 degrees of tilt, delivering smoother lines and shading for a natural drawing experience. With no battery or charging needed, it operates like a real pen, making it easy for beginners to create effortlessly. This functionality helps novice artists develop their skills and explore their creativity without the intimidation of complex tools
- Designed for Beginners: This drawing pad desinged with 8 customizable shortcuts for both right and left-hand users, express keys create a highly ergonomic and convenient work platform
- Perfectly Adapted for Android: The XPPen Deco 01 V3 art tablet supports connections with Android devices running version 10.0 and above. It is recommended to download the XPPen Tools Android application, which adapts to your smartphone's screen aspect ratio, ensuring accurate mapping. It also supports mapping on Android screens with different aspect ratios in portrait mode
- Large Drawing Space, Bigger Bold Inspiration: This expansive drawing pad has10 x 6.25-inch helps you break through the limit between shortcut keys and drawing area
- Easy Connectivity for Beginners: The Deco 01 V3 offers USB-C to USB-C connectivity, plus adapters for USB C. This ensures easy connection to various devices, allowing beginner artists to set up quickly and focus on their creativity without compatibility concerns. Whether using a laptop, tablet, or desktop, the Deco 01 V3 provides a seamless experience, making it an ideal choice for those just starting their digital art journey
Warp changes geometry; it does not create volume by itself. To make lettering look inflated, add a soft highlight on the light-facing edge, a darker gradient on the opposite side, restrained inner-shadow or bevel contrast, and a soft contact shadow. These lighting and compositing steps supply the three-dimensional cues that distortion alone cannot provide.
Quick wins for a faster PC:
Scan for outdated or missing drivers - takes under a minuteDriver Scan →Repair Windows errors before they cause bigger problemsFix Now →Fix the driver behind crashes, sound loss and screen glitchesFind Drivers →For a product label or painted graphic, first use Warp or Displace to conform the artwork to the object’s surface, then use Liquify or a smaller Warp adjustment for localized swelling.
Adobe’s Photoshop reference covers the Warp mesh and split-warp controls.
Protect the background
The most common mistake is applying Liquify to the entire image. Walls, horizon lines, furniture, clothing, and nearby objects can all become visibly warped.
Selection-first workflow
- Select the subject with Object Selection, Select Subject, the Pen Tool, or a refined manual mask.
- Copy the subject to a new layer.
- Apply Liquify or Warp to that isolated layer.
- Repair any background exposed beyond the original boundary on a separate layer.
Mask-constrained workflow
Alternatively, create a selection or layer mask before entering Liquify and freeze background areas inside the Liquify workspace. Adobe’s Liquify tutorial demonstrates using a selection mask to protect nearby background elements.
What’s actually slowing this PC down?
Pick the symptom - the matching free tool is one click away.
Rank #4

- Customize Your Workflow: The 6 customizable press keys on Huion H640P drawing tablet for pc let you assign your most-used commands—like undo, zoom, brush switch, or save—so you can keep your hands on the tablet and your mind on the art. Whether you're a digital painter switching brushes, or a comic artist zooming in and out, these keys keep your workflow smooth and uninterrupted. Plus, the Huion driver lets you save different shortcut profiles for different apps, so you never have to reconfigure when switching software.
- Professional Pen Performance: Huion H640P drawing pad for computer comes with the battery-free PW100 stylus that's always ready when inspiration strikes. With 8192 levels of pressure sensitivity, every light sketch, or bold stroke responds naturally to your hand—just like a real pen. The 5080 LPI resolution and 233 PPS report rate deliver lag-free, precise strokes, so you can draw confidently without second-guessing your cursor. The pen side buttons help you switch between pen and eraser instantly.
- Compact and Portable: Huion H640P computer graphics tablet features a compact, ultra-portable design at just 0.3 inches thin and 0.61 lbs light, so it slides easily into your backpack—perfect for sketching in coffee shops, taking notes in class, or editing on the go between home and studio. The 6x4 inch active area offers enough room for natural pen movements while fitting comfortably on crowded desks, or lecture hall seats.
- Stable Compatibility: Huion H640P graphic drawing tablet works seamlessly with Mac, Windows, Linux PCs, and Android smartphones/tablets (OS version 6.0 or later). Left-handed friendly, and you just need to flip the tablet and adjust the settings in the driver. Please note: H640P does NOT support iPhone/iPad.
- Move Beyond the Mouse: Huion Inspiroy H640P is a pen tablet that replaces your mouse for more natural, precise control. Freehand draw, take notes, or even play OSU—everything you do with a mouse, you can do better with a pen. The precise tip makes it ideal for detailed photo editing, graphic design, or signing PDF. Meanwhile, the ergonomic pen grip helps you avoid the strain that comes from hours of using a mouse.
If enlarging or moving the subject leaves an empty gap, extend the background first or rebuild it afterward with Content-Aware Fill, Generative Fill, cloning, or healing. Keep reconstruction separate from the distorted subject so it is easier to correct.
Independent reader supportYour contribution helps us test, update, and keep practical guides available for everyone.Geometry is not volume
Bloat, Spherize, and Warp alter pixel positions. They do not automatically make a form look three-dimensional. For a convincing inflated effect, add volume cues that agree with a single light source:
- Place a soft highlight on the light-facing edge.
- Use a darker gradient toward the shadow-facing side.
- Add restrained edge contrast or an inner shadow.
- Place a soft contact shadow beneath the raised form.
- Preserve or restore texture so the stretched area does not look blurry.
For surreal artwork, stronger contrast, reflections, texture overlays, or a slight blur and matching noise pass can help integrate the result. For realistic retouching, compare with the original frequently and change only as much as the image requires.
Fix common bulge-effect problems
| Problem | Likely cause | Repair |
|---|---|---|
| The background melts | The full image was liquified without protection. | Undo, isolate the subject, use a mask, or freeze the background. |
| The result looks like a blob | Brush too small, pressure too high, or strokes too long. | Use a larger brush, lower pressure, short strokes, and Reconstruct the edge. |
| Edges become wavy | The transition is too narrow or the boundary was not protected. | Freeze the edge, use a larger low-pressure brush, and apply Smooth sparingly. |
| Texture becomes blurry or pixelated | Raster pixels were stretched, especially from a small source. | Use the highest-resolution source, keep the bulge moderate, and add a small amount of matching texture or noise. |
| Spherize has a harsh edge | The selection ends abruptly. | Feather the selection or fade the filtered duplicate with a mask. |
| Warped text is not three-dimensional | Warp changed the shape but supplied no lighting. | Add controlled highlights, shadows, edge contrast, and a contact shadow. |
| Liquify is slow or unavailable | GPU or document-performance limitations. | Check Photoshop’s graphics-processor settings, reduce document size, or simplify the preview. |
Adobe notes that Liquify performance improves with GPU acceleration. Availability and performance can still vary with the document, hardware, and Photoshop version.
Useful Liquify shortcuts
| Action | Shortcut |
|---|---|
| Forward Warp | W |
| Reconstruct | R |
| Twirl | C |
| Pucker | S |
| Bloat | B |
| Push Left | O |
| Freeze Mask | F |
| Thaw Mask | D |
| Reverse direction for applicable tools | Alt / Option |
| Step backward | Ctrl + Alt + Z / Command + Option + Z |
These shortcuts come from an archived Adobe reference, so confirm them in your current installation if one does not work.
Best Value
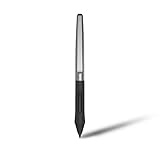
- Battery-free Stylus - Only COMPATIBLE to Huion Inspiroy H640P/H950P/H1060P/H610Pro V2/HS610/HS64/H420X/H580X/H610X; Never worry about pen-charging, and eco-friendly of use; Without operating battery, the pen is only 16g in weight, and its front end is made of wearable silicone for soothing feel.
- NOT COMPATIBLE with iPad, other Graphics Tablet or Huion Graphics Monitor GT Series; Huion provides one year warranty.
- Two Customizable Pen Buttons - Set the function to your reference like eraser, fasten your working efficiency; Palm rejection design of dual keys on both sides of the pen helps reduce touch frequency and realize most effective creation.
- Long-lasting Lifespan - First of Huion's products features battery-free stylus, say goodbye to charging cables; Don't need to worry about the potential battery leakage and run-out.
- 8192 Levels of Pen Pressure Sensitivity - Enjoy the accuracy and precision when drawing; Having 233 PPS report rate, 5080LPI resolution, you can paint or draw or sketch smoothly on your Huion Inspiroy series Tablets.
Photoshop on the web
Photoshop on the web includes Liquify under Retouch > Liquify, but its interface and controls differ from desktop Photoshop. It can suit a quick browser-based adjustment; desktop Photoshop is the stronger choice for detailed masking, Smart Objects, advanced Warp work, and repeatable production workflows.
Frequently Asked Questions
Can I bulge text in Photoshop?
Yes. Convert the text to a Smart Object and use Edit > Transform > Warp to push the center outward. Add highlights, shadows, or bevel shading separately if you want an inflated rather than merely distorted appearance.
How do I bulge only one object?
Select the object, place it on its own layer, and apply Liquify or Warp there. You can also use a selection, layer mask, or Liquify’s Freeze Mask to protect the background.
Is Spherize better than Liquify?
Neither is universally better. Spherize is more even for a centered, symmetrical bubble; Liquify is more flexible for organic or irregular swelling.
Can I edit the effect later?
Keep the original layer hidden beneath a duplicate. Smart Objects provide a more editable workflow where your Photoshop version retains the relevant filter or transformation, but Liquify support has varied across versions.
Does Photoshop on the web have Liquify?
Yes. It is available under Retouch > Liquify, although the web interface and controls are not identical to desktop Photoshop.
Quick Recap

Product prices and availability are accurate as of the date/time indicated and are subject to change. Any price and availability information displayed on Amazon at the time of purchase will apply.
Do these 3 things before closing this tab:
1Scan for outdated or missing drivers - takes under a minute2Repair Windows errors before they cause bigger problems3Fix the driver behind crashes, sound loss and screen glitches



