Windows Errors? Fix Them Before They Spread
Windows Errors? Fix Them Before They Spread
Repair common Windows errors and clear accumulated junk for a smoother, more stable PC - no reinstall needed.Free scan · no reinstallCrashes, No Sound, or Screen Glitches?
Random freezes, missing sound and display glitches usually trace back to one bad driver. Find and replace yours safely.Free scan · under a minuteOutbyte PC Repair · freeRepair common Windows errors and clear accumulated junk for a smoother, more stable PC - no reinstall needed.
Fix My PC Now →ThatPainter is reader-supported. When you buy through links on our site, we may earn an affiliate commission. Learn More
You can start drawing today with ordinary paper, one pencil, and a simple object. Look carefully, map the large shape lightly, simplify it into basic forms, check the proportions and empty spaces, refine the contour, and add only a few light and dark values. Spend more time looking than erasing.
Draw this now: a 15–25 minute still life
- Place a mug, apple, shoe, plant, or small toy on a table.
- Keep the object and your viewpoint still.
- Look for one minute before making a mark.
- Lightly map its overall height, width, tilt, and placement.
- Reduce it to a sphere, cylinder, box, cone, or overlapping ovals.
- Check the proportions and negative spaces before adding details.
- Refine the outside contour, then add three values: light, middle, and shadow.
It does not need to look realistic to be successful. A planned placement, recognizable silhouette, believable relationships, and one indication of light or form are enough for a first drawing.
Learning to draw is not one skill and it is not a test of whether you were born artistic. It is a combination of seeing, simplifying, controlling marks, understanding form, and making decisions through practice. The balance changes depending on your goal: doodling, cartooning, portraits, landscapes, technical drawing, expressive work, or digital illustration all use overlapping foundations, but none requires realism as the only worthwhile destination.
Free tools Windows power users keep installed
One-click scans. No signup required.
A useful beginner process is:
Look → lightly map → simplify into shapes → check relationships → refine the contour → add a few values → stop and review.
#1 Best Overall

- PREMIUM 68LB/100GSM SKETCH PAPER FOR DRY MEDIA: Fuxi's sketch paper pad has 100.8gsm, 155μm-thick paper with a bright white diagonal-tooth surface for erasing, shading and blending. Fuxi sketching paper works with graphite, colored pencils, charcoal, pens, light ink and oil pastels. Fuxi makes sketch paper for kids to use at school or at home; this drawing paper pad supports classwork and practice as sketch paper for drawing. Not for watercolor, alcohol markers, acrylic paint or heavy wet media.
- DIAGONAL-TOOTH TEXTURE & REPEATED-ERASING PERFORMANCE: Fuxi sketchpad 9x12 uses 100.8gsm, 155μm bright white paper. Its diagonal tooth grips graphite, colored pencil and charcoal for clean lines, shading and blending. High-strength surface sizing withstands repeated erasing during figure studies, still-life drawing, landscapes and urban sketches. This sketchpad for kids suits class practice; at home, it works as a sketchpad for drawing, while roomy pages support detailed studies for adults
- TOP SPIRAL BOUND & LAY-FLAT: The Fuxi 9x12 sketchbook has a top coil that flips smoothly and stays above the page, helping reduce wrist contact for left- and right-handed users. The 9x12 spiral sketchbook opens flat for sketching, shading, notes and art class. Pages detach neatly for homework, sharing or display. Fuxi's spiral sketchbook 9x12 is a sketchbook for drawing that combines the roomy workspace expected from an art sketchbook 9x12 with a 9x12 spiral bound sketchbook format.
- THOUGHTFUL DOUBLE-SIDED HARDCOVER DESIGN & TRUE-TO-SIZE 9X12 SHEETS: The Fuxi sketchbook 9x12 measures 13.2 x 9 x 0.7 in; each micro-perforated sheet removes cleanly at a full 9 x 12 in. With 100 sheets (200 usable sides), this perforated sketch book 9x12 features drawing paper 9 x 12 in size for class and home practice. Rigid front and back covers help protect pages in backpacks and give this double sided hardcover sketchbook a firm drawing surface for class, travel or sketching without a desk.
- ACID-FREE 98% BRIGHT WHITE DRAWING PAPER: Made with 100gsm sheets, Fuxi white drawing paper for kids keeps pencil lines, shading and color clear. This drawing paper pad works as a drawing pad for kids at school or home. The drawing book for kids supports doodles and classwork, while the drawing notebook for kids keeps sketches and ideas together. As an art drawing pad, it gives beginners and artists room for dry-media practice. Acid-free pages help reduce yellowing over time.
You can pursue a favorite subject immediately while learning the fundamentals in parallel. A person who wants to draw characters can draw characters now; a person who wants realistic portraits can begin with faces now. The exercises below simply make each attempt teach you something useful.
What you need to begin
Your starter kit can be extremely small:
- Ordinary printer paper or an inexpensive sketchbook
- One HB, No. 2, or similar general-purpose pencil
- A clean eraser
- A pencil sharpener
- A firm table or clipboard
Paper and a pencil are sufficient prerequisites for beginning drawing, as Proko’s Drawing Basics curriculum also explains. You do not need a large professional pencil set, specialty paper, a tablet, blending stumps, fixative spray, anatomy mannequins, or a perspective ruler before you make your first page.
What the pencil grades mean
HB is a middle-range pencil and a sensible all-purpose choice. The higher the number before H, the harder and lighter the pencil tends to be. The higher the number before B, the softer and darker it tends to be. A 2H or 4H can make fine, pale construction lines; a 4B or 6B can create broad, dark tones. Those grades are options, not requirements: pressure, angle, and the side of the graphite can give one ordinary pencil a surprisingly broad range of marks. City Lit’s beginner guide gives similar examples of hard and soft grades.
Do these 3 things before closing this tab:
1Scan for outdated or missing drivers - takes under a minute2Clear out junk files and repair common Windows errors3Fix the driver behind crashes, sound loss and screen glitchesUseful alternatives
- Ballpoint pen: encourages commitment because you cannot erase every decision.
- Charcoal: excellent for broad values and expressive marks, but dusty and less convenient.
- Colored pencil or marker: playful and useful for shape and color exercises, but unnecessary for learning structure.
- Digital tablet: useful for undo, layers, resizing, reference placement, and color experiments. It does not remove the need to observe, measure, construct, and control marks; the fundamentals apply to both traditional and digital work.
The complete beginner drawing process
Use this sequence for a mug, plant, animal, face, room, or imagined character. The early decisions matter more than the final details.
1. Fix the viewpoint
Put the object in one place and try not to move either it or your head while drawing. A change in viewpoint changes the visible angles and proportions. Choose a comfortable position first; City Lit’s observational drawing advice specifically warns that changing position changes what you see.
2. Choose the composition
Before drawing the subject, decide:
- Will the page be portrait or landscape?
- How large should the subject be?
- How much empty space should surround it?
- Should it be centered or placed to one side?
Composition is not something to postpone until a drawing is finished. Page orientation, placement, and the shapes of the surrounding space are part of the drawing from the beginning. Getty’s beginner contour and landscape exercises also make composition and orientation explicit choices.
3. Observe before marking
Spend about a minute simply looking. Find the tallest and widest points, the main tilt or axis, the largest empty spaces around and inside the subject, and the direction of the light. This helps you draw the particular mug or leaf in front of you instead of the generic symbol stored in your memory.
4. Draw a light envelope
An envelope is a loose, simple boundary around the entire subject. Use light marks to indicate its overall height, width, angle, and position on the page. Do not begin with eyelashes, fur, texture, handles, claws, or other small features.
5. Simplify into shapes and forms
Reduce what you see to a few manageable parts:
- A sphere or oval for fruit
- A cylinder for a mug or bottle
- A box for a book or carton
- A cone for a lampshade
- Overlapping ovals and cylinders for many animals and plants
A shape is flat: it has height and width. A form implies depth: a circle becomes a sphere, and a rectangle can become a box. Getty’s formal-analysis resource makes this same two-dimensional versus three-dimensional distinction. Princeton’s museum drawing guidance likewise uses basic shapes, lines, and angles to distill complex subjects.
6. Check relationships
Before refining the outline, compare:
- Overall height to overall width
- One part to another
- The angle of the top to the angle of the bottom
- The distance from the subject to each page edge
- The shapes of the empty spaces around and within it
Negative space is not merely unused paper. It is the shaped area around or inside the subject, and it can reveal a proportion error faster than staring at the object itself. Getty describes negative space as having its own shape and compositional importance.
7. Refine the contour
Look back and forth between the subject and your page. Replace the rough envelope with a more specific contour, correcting the large shape before adding small details. If a line is wrong, make a deliberate new line rather than repeatedly scratching over the same mark. A loose grip and larger arm movement help with long, confident strokes; Getty recommends drawing with more of the arm for larger marks.
The Tool Desk
Outbyte PC Repair FREERepair Windows errors before they cause bigger problemsFix Now →Outbyte Driver Updater FREEFix the driver behind crashes, sound loss and screen glitchesFind Drivers →8. Add three to five values
Choose one light direction and group the tones instead of shading everything equally:
- The lightest area or preserved paper
- The main light or middle tone
- The form shadow on the object
- The cast shadow on the surface
- Optional reflected light
Value means the relative lightness or darkness of an area. It helps a flat shape feel three-dimensional. Getty’s value worksheet demonstrates a gradual ten-step scale, while beginner drawing curricula such as Sessions College’s drawing course introduce the light side, halftone, form shadow, reflected light, and cast shadow as related parts of a lighting setup.
Rank #2

- Premium Artist Drawing Paper: Premium drawing pads and sketchbooks with a 9 x 12-inch size are ideal for artists of all skill levels. Each sketchpad contains 100 sheets, for a total of 100 high-quality paper sheets. Good texture for sketching and drawing. A lovely paper book gift for anyone who likes to write, paint, illustrate, sketch, or create art. Graphite pencils, colored pencils, charcoal, pens, soft oil pastels, sketching sticks, and more can all be used with this sketchbook.Graduation gift card,high school graduation gifts. college school supplies, school supplies, back to school.
- Thick Sketching Drawing Book Pad: With a standard weight of 68 pounds/100 grams, this sketchbook paper is pH neutral and acid-free. It is also thick and high quality. For clean artwork, it stops bleeding, smudging, and feathering. Maintain the quality of your artwork for many years to come, Perfect for kids sketching,drawing.
- Travels Anywhere Inspiration Strikes — Backpack, Car, Cafe, Classroom: Lightweight yet durable enough for daily use by kids, teens, and adults. Fits in most school backpacks, art bags, and even large purses. Great for urban sketching, travel journaling, manga drawing, doodling, art homework, and beginner to-professional practice. All kinds of dry media, including pencils, pens, crayons, charcoal, pastels, and sketching sticks, can be used with our acid-free, natural white drawing paper.Important: This is DRY MEDIA paper — for alcohol markers or watercolors, choose our dedicated marker/watercolor pads instead.
- Lays Completely Flat — Perfect for Long Drawing Sessions: Both left-handed and right-handed users will find the top spiral binding to be pleasant and accommodating, since it makes it simple to turn pages and allows the pad to sit flat when opened. It will always preserve the paper in good condition and improve the writing and sketching quality thanks to the sturdy backboard and thick cardstock cover. Because each page is micro-perforated, removing a single page is simple
- The Perfect Gift for Kids, Nieces & Grandkids Who Love to Draw: Whether it's a birthday, back-to-school surprise, this large sketchpad is ideal for creating artwork and honing skills. Ideal gift for graduation gifts, Christmas art supplies, craft painting suppliesor just to spark creativity, this 100-sheet 9x12 sketchbook keeps young artists (ages 3-14) drawing for months. great for fieldtrips, art class, and long car rides.
9. Stop and review
Ask yourself:
- Is the subject recognizable?
- Is its height-to-width relationship believable?
- Does it sit on a surface?
- Does the lighting come from one consistent direction?
- What single change would improve it most?
Make that one change, then stop. Endless correction often makes a beginner focus on minor details while leaving the main proportion or composition unresolved.
The fundamentals, in an order that makes sense
There is no single mandatory curriculum, but this progression prevents a common mistake: trying to render details before understanding the large structure. Proko’s current fundamentals curriculum organizes the territory around line, shape, perspective, value, and edges; the sequence below translates those ideas into short, usable tasks.
Crashes, No Sound, or Screen Glitches?
Random freezes, missing sound and display glitches usually trace back to one bad driver. Find and replace yours safely.Free scan · under a minuteWindows Errors? Fix Them Before They Spread
Repair common Windows errors and clear accumulated junk for a smoother, more stable PC - no reinstall needed.Free scan · no reinstallObservation: draw what is visible
Observation is active comparison, not passive looking. Ask, What angle, length, curve, gap, and value do I actually see? rather than, What does a mug, eye, or leaf usually look like?
Try drawing a household object from life, comparing the negative spaces, measuring with a pencil held at arm’s length, turning a reference upside down, or drawing only a silhouette. A small specialized 16-week observational-drawing study reported greater improvement than a comparison group on line variation, linear perspective, and light-source tasks. That is interesting evidence for structured observation, not a guaranteed timetable for every beginner.
Mark and line control
Lines can describe edges, movement, direction, texture, and tone. Practice straight lines, curves, long and short strokes, light and heavy pressure, parallel lines, hatching, and crosshatching. The National Gallery of Art’s drawing fundamentals resource treats gesture, contour, pressure, hatching, and crosshatching as distinct mark-making tools.
One-minute mark warm-up
- Fill one third of a page with straight lines.
- Fill another third with curves, waves, and zigzags.
- Fill the final third with marks from very light to very dark.
- Hold the pencil loosely and vary pressure and speed.
Builds: hand confidence, pressure control, and a wider mark vocabulary.
Quick wins for a faster PC:
Fix the driver behind crashes, sound loss and screen glitchesFind Drivers →Repair Windows errors before they cause bigger problemsFix Now →Shape and silhouette
Start with circles, ovals, squares, rectangles, triangles, and organic blobs. The goal is not to fill pages with mechanically perfect circles. The goal is to recognize large relationships that you can handle.
Draw ten random blobs and turn them into animals. Draw the silhouette of a shoe, plant, person, or tool. Build ten household objects from only two or three shapes. Shape-based beginner exercises from Adobe Express are useful for an immediate confidence boost, but pair them with proportion checks and observation so the skill transfers beyond the example.
Form and construction
Construction lets you understand and invent objects rather than merely copy their visible outline. Use boxes, cylinders, spheres, cones, and cross-contour lines that wrap around a form.
- Animals: head, rib cage, pelvis, limb cylinders, and a line of action
- People: gesture, major masses, limbs, and simple joint directions
- Objects: boxes, cylinders, spheres, and cones
- Plants: stems as cylinders, leaves as flattened forms, and overlapping masses
Construction is especially valuable when you want to rotate a subject, invent a character, or draw without a photograph. It is the bridge between a flat symbol and a believable form.
Proportion and measurement
Use comparative measurement rather than memorizing rigid formulas. Mark the top, bottom, left, and right boundaries. Compare the width of one part with the height of another. Check angles against the page edges. Use centerlines on cups, bottles, faces, and symmetrical objects.
Face-proportion rules can be useful scaffolding, but they are not universal laws. Human faces vary, and stylized art intentionally changes proportions. Measurement should help you see decisions, not force every subject into one template.
Perspective and depth
In a beginner linear-perspective setup:
- The horizon line represents the viewer’s eye level.
- A vanishing point is where a set of receding parallel lines appears to meet.
- An orthogonal is a line receding toward that vanishing point.
- One-point perspective is useful when the subject faces you directly.
- Two-point perspective is useful when you see the corner of a box or building.
Getty’s perspective lesson uses the horizon line, vanishing point, overlap, and changes in size and detail to explain depth. Do not conclude that every line in every real scene converges to one visible point. Only sets of parallel lines receding in the same direction share a vanishing point; one-point perspective is a simplified exercise.
Rank #3

- 【100 Sheets of White Drawing Paper】100 sheets of sturdy 68lb/100gsm drawing paper give kids, beginners, students, and artists room for daily sketching, art class, school projects, line work, and shading practice. This SuFly drawing paper pad has micro-perforated sheets that tear out to 9x12 drawing paper for artwork, homework, or sharing. In class, it works as clean drawing paper for kids; at home or on the go, it works as dependable drawing paper for adults.
- 【Acid-Free Sketch Paper for Dry Media】Made with acid free paper, this sketch book features acid free sketch paper for art practice and creative drawing. This sketch paper works with pencil, graphite, colored pencil, charcoal, crayon, and pastel. Unlike ordinary sketch papers, this sketch paper pad is made for dry media. In class or at home, it works as sketch paper for kids. For sketching, it works as sketch paper for drawing. These sketch paper pads for drawing are not for markers or watercolor
- 【Top Spiral Binding That Lays Flat】Top spiral binding lets pages turn smoothly while this SuFly sketchbook lays flat on desks, classroom tables, or laps. Designed as a top spiral sketchbook, this spiral sketchbook 9x12 keeps the coil away from left- and right-handed artists. With a sturdy cover, it works as a hardcover sketchbook for drawing, an art sketchbook 9x12 for school projects, and a sketchbook for kids. Use this spiral bound sketchbook 9x12 for home practice.
- 【Hardcover Support & Clean Tear-Out Pages】Front and back sketch book hard covers protect this SuFly spiral sketch book 9x12 from bending, creasing, and backpack wear. As a spiral bound sketch book 9x12, it stays slim for class, desks, and school bags, while micro-perforated pages tear out to a clean 9x12 drawing area for homework, finished art, or sharing. For students comparing sketch books for drawing, this format works as a sketch book for art class and a reliable sketch book for school.
- 【Sketch Pad for Every Skill Level】SuFly sketch pads is made for everyday creativity, with a spacious sketch pad 9x12 format for sketching, shading, doodling, and drawing practice. The spiral bound sketch pads design turns pages smoothly for comfortable use. Built for ages and skill levels, this sketch pad for adults also works as a sketch pad for kids in art class and a sketch pad for artists during daily practice, making it practical for sketch pads for drawing for adults.
Easy one-point perspective scene
- Draw a horizontal horizon line and place one vanishing point on it.
- Draw a rectangle in the foreground.
- Connect its corners lightly to the vanishing point.
- Add smaller rectangles between the first rectangle and the point.
- Turn them into a hallway, tunnel, bookshelf, road, or row of windows.
- Add overlapping objects and reduce detail as they recede.
Objects generally appear smaller as they move farther away. Overlap and more foreground detail are additional depth cues.
Value and shading
Before trying realistic rendering, make a five- or ten-step value scale. Leave the first square white, then gradually build darker squares. Use the side of the pencil for broad tone and the point for hatching. The Getty worksheet demonstrates both methods.
Three-value sphere
- Draw a circle.
- Choose a light direction, such as upper left.
- Leave a small highlight near the light.
- Keep most of the light side white or lightly toned.
- Gradually darken toward the opposite side.
- Place the darkest form shadow away from the light.
- Add a cast shadow beneath the sphere so it sits on the surface.
Begin with white, middle gray, and dark gray. More subtle transitions can come later.
Edges and texture
Not every boundary should be equally dark and sharp. Hard edges suggest corners or strong boundaries. Soft edges suggest rounded forms, soft materials, or diffuse light. A lost edge can make a drawing feel less cut out.
Texture should follow the surface: curved marks around a cylinder, directional strokes through fur, and grouped marks for wood or fabric. The Met’s graphite guide describes hatching, crosshatching, broad-side tonal marks, blending, and lifting graphite with an eraser to create highlights. Texture comes after the large form, not before it.
Fun exercises that build real skill
Choose exercises for both enjoyment and a specific purpose. A finished-looking picture is not the only measure of a useful session.
| Exercise | How to do it | Skill it trains |
|---|---|---|
| Blind or limited-looking contour | Draw a continuous line while looking mostly at an onion, leaf, shoe, or toy rather than the paper. Try five minutes. | Visual concentration and eye-hand coordination |
| Five-minute contour | Draw a still-life object without lifting the pencil. The Andy Warhol Museum suggests five- to ten-minute continuous-contour sessions with objects such as onions and fruit. | Attention to edges, curves, and shape changes |
| Shape-to-creature game | Make ten random blobs. Add only eyes, a mouth, appendages, and one pattern or texture to each. | Shape invention and creative confidence |
| Object bingo | Draw something round, transparent, folded, shiny, soft, patterned, or equipped with a handle. | Flexible observation across materials and subjects |
| Negative-space drawing | Draw the empty shapes around a chair, hand, plant, or scissors instead of naming and outlining the object. | Proportion and non-symbolic seeing |
| Silhouette challenge | Fill an animal, person, plant, building, or shoe completely dark. Test whether it is recognizable from its outside shape. | Gesture, proportion, and readable design |
| Three-value still life | Draw an object using only white, middle gray, and dark gray. | Value grouping and restraint |
| Gesture drawing | Draw people, animals, or moving objects in 30–60 seconds, then try two- and five-minute poses. | Movement, pose, proportion, and prioritization |
| Copy, close, and redraw | Study a simple reference for one minute, hide it, draw from memory, compare three differences, and redraw. | Visual memory plus correction |
| Copy and remix | Copy a reference, then make it taller, turn it sideways, alter its expression, or put it in a new setting. | Transfer from observation to imagination |
| One-point scene | Turn a vanishing-point exercise into a road, hallway, train platform, bookshelf, or tunnel. | Depth and spatial planning |
Blind contour is best treated as a warm-up, not a complete drawing method. Its purpose is to move attention toward the subject and away from constant self-correction; the resulting image will often be distorted. Follow it with a normal observational drawing.
Easy things to draw, organized by goal
Objects and fruit
Mugs, apples, boxes, shoes, keys, bottles, and folded cloth are excellent first subjects. They train silhouette, proportion, ellipses, simple forms, and light. Use the envelope → form → contour → cast shadow → three-values process.
Plants and leaves
Plants train organic contours, gesture, repetition, and texture. Start with the stem and major leaf masses instead of drawing every individual leaf. Add a few characteristic details only after the overall silhouette works.
Animals
Begin with the head, rib cage, pelvis, and line of action. Add legs as tapered cylinders rather than starting with paws and claws. A clear silhouette often makes an animal more convincing than a highly detailed but poorly proportioned drawing.
Faces
Start with a simple head shape, a centerline, the major brow-to-chin relationships, and the overall shadow pattern. Add eyes, nose, and mouth only after the head’s tilt and placement are believable. Do not treat one facial formula as a rule for every face.
Hands
Use your own hand as a reference. Block the palm as a box or wedge and the fingers as tapered forms. Begin with the gesture and overall arrangement, then divide the fingers into smaller sections. Hands are difficult because they combine foreshortening, overlapping forms, and many possible poses; short studies are more useful than waiting until you feel ready.
Landscapes
Group a landscape into foreground, middle ground, and background. Establish the composition and major masses first, then use overlap, size changes, and reduced detail to create depth. A road, path, fence, or row of windows can provide a simple perspective structure.
Recommended Free Tools
Rank #4
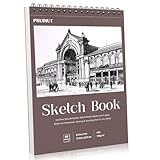
- 【Professional Grade 8.5x11 Sketchbook for All Artists】Premium 68lb/100g/m2 acid-free paper resists bleed and smudge. Great for dry media like pencil, charcoal and pastel. 50 smooth sheets for beginners and professionals. Perfect sketchbook for drawing, sketching projects
- 【Spiral Binding Portable Design with Tear Line】Durable spiral binding design allows 360° page turns, and pre-perforated tear edge design allows for clean paper tears (no scissors required). 8.5x11 sketchbook size fits standard portfolio. Back hardcover doubles as outdoor/desktop drawing board
- 【Versatile Drawing Supplies for Dry Media】Thick, non-yellowing paper pairs well with colored pencils, gel pens, markers and charcoal. Acid-free surface extends the life of your work. Our sketchbooks meet studio and classroom standards. A great gift for art students and creative people
- 【Durable 8.5x11 Sketchbook with Extras】Premium matte cover protects pages, reinforced spiral spine for durability. Built-in backboard for easy drawing on your knees or uneven surfaces. Classic size that fits in a backpack - ideal travel sketchbook for inspiration anytime, anywhere
- 【Multi-Purpose Artist Sketchbook Set】8.5x11 sketchbook, perforated pages make it easy to create frameable artwork. Compatible with all dry media - from quick sketches to detailed illustrations, to meet a variety of artists' creative projects
Cartoon characters
Cartooning is selective simplification, not simply easier realism. Decide what the shapes communicate: round forms can feel soft or friendly, angular forms can feel sharp or energetic, and a strong silhouette can make a character readable at a small size. Build the character from deliberate head, torso, limb, and gesture forms, then exaggerate intentionally.
Step-by-step sites such as HowToDraw.ai can provide a quick win by breaking a subject into a few shapes and minimizing complex shading. Use those tutorials as a starting point, then draw a different subject from observation so the process transfers.
Independent reader supportYour contribution helps us test, update, and keep practical guides available for everyone.A realistic four-week beginner plan
This is a suggested structure, not a promise that everyone will reach a particular level in four weeks. Focused practice with feedback improves specific skills, but people progress at different rates.
| Week | Focus | Suggested sessions |
|---|---|---|
| 1 | Marks, shapes, and observation | Three minutes of lines and curves, five minutes of contour or silhouette, ten minutes drawing a mug, fruit, shoe, plant, or keys, and two minutes reviewing one success and one correction. |
| 2 | Forms and value | Practice spheres, boxes, cylinders, cones, value scales, and one object under one light source. Finish each session with a small shaded still life. |
| 3 | Space and movement | Practice one-point rooms or roads, overlapping objects, foreground/middle/background, timed gestures, and animal silhouettes. |
| 4 | A personal project | Choose a pet, favorite object, character, small landscape, still life, or room corner. Use the complete process from reference and composition through construction, proportion, contour, value, accents, and review. |
A 15-minute session
- Two minutes: lines, curves, or boxes.
- Two minutes: observe and map the subject.
- Seven minutes: draw the large shapes and forms.
- Three minutes: add three values or a cast shadow.
- One minute: write down the strongest feature and the next correction.
A 30-minute session
- Five minutes of warm-up marks or gesture.
- Five minutes of observation, composition, and envelope.
- Ten minutes of construction, proportion checks, and contour.
- Seven minutes of value grouping and one or two edges.
- Three minutes of review and a quick second attempt at the weakest part.
Alternate study drawings with just-for-fun drawings. A learner who performs only drills may lose interest; a learner who makes only unstructured finished drawings may repeat the same mistakes. A 70/30 split—roughly 70% observation or reference-based work and 30% imaginative play—is a useful starting recommendation, not a universal law.
The Tool Desk
Outbyte PC Repair FREEClear out junk files and repair common Windows errorsFree Scan →Outbyte Driver Updater FREEFix the driver behind crashes, sound loss and screen glitchesFind Drivers →Observation, imagination, tutorials, and tracing
Should you draw from observation or imagination?
Observation gives you immediate information about proportion, light, shape, and perspective. Imagination is motivating and develops invention, but it depends on stored visual knowledge and construction skills. Use both: draw a real object, then remix it into a character, environment, or alternate pose. Wacom’s beginner guide also emphasizes references and drawing from life, including pets and zoo subjects.
Are step-by-step tutorials useful?
Yes, especially when you want an immediate win. They show how a subject can be reduced to shapes and can help you practice sequence and confidence. Their limitation is that copying the same sequence may not teach you how to handle a different angle, object, or lighting setup.
For every tutorial, close the lesson after one concept, draw the exercise from memory, compare it with the reference, and repeat it once with a different subject. Completing projects is more useful than binge-watching lessons; this is also the practical advice emphasized in Proko’s fundamentals course.
Is tracing cheating?
Tracing can be useful when it is clearly being used as analysis: study a proportion, trace a complex contour, identify construction lines, or transfer a composition for later examination. It can also support learners with motor or accessibility limitations.
Do these 3 things before closing this tab:
1Fix the driver behind crashes, sound loss and screen glitches2Repair Windows errors before they cause bigger problems3Scan for outdated or missing drivers - takes under a minuteTracing alone does not require you to decide where the marks belong, so it does not replace freehand observation and construction. A 2026 randomized crossover study reported benefits from a tracing-supported method in a specific anatomy-learning context, but that narrow result should not be generalized to every drawing goal or treated as evidence that tracing replaces freehand practice.
Traditional versus digital drawing
Traditional drawing makes marks immediate and keeps the process simple. Digital drawing provides undo, layers, easy resizing, reference placement, and quick color experiments. Neither automatically solves proportion, observation, construction, or value.
If you draw digitally, occasionally practice on one layer with limited undo and little or no stabilization. Otherwise, unlimited correction and zooming can encourage you to polish tiny details before deciding whether the overall composition works. The same sequence still applies: look, map, simplify, compare, refine, and render.
When a drawing goes wrong
| Problem | Likely cause | Recovery |
|---|---|---|
| Shaky lines | Drawing slowly with many corrective strokes | Ghost the motion in the air, loosen your grip, use the elbow or shoulder for longer lines, and make one deliberate stroke. Minor imperfections are preferable to scratched-over lines. |
| The drawing looks like a symbol | Drawing what the object is known to look like instead of what is visible | Draw the silhouette, study negative spaces, turn the reference upside down, and describe angles and gaps rather than naming parts. |
| The object is recognizable but flat | Outline-only drawing with no form or lighting | Choose one light source, separate light from shadow, add three values, and include a cast shadow. Use an ellipse or cross-contour where it helps describe volume. |
| Proportions are wrong | Details were started before the outer limits were established | Mark the top, bottom, left, and right boundaries; compare height and width; inspect negative spaces; and redraw the construction lightly. |
| Perspective is distorted | Unrelated vanishing directions or vanishing points placed too close together | Return to one-point perspective, put the horizon at eye level, use one vanishing point for one receding set of parallels, and keep verticals vertical in the exercise. |
| Everything is gray | Shading is being used as decoration rather than to describe light | Mark the light direction, separate the light and shadow sides, use only three values, preserve the lightest paper, and add the cast shadow last. |
| Tutorials do not seem to help | Passive watching without independent recall or comparison | Close the tutorial, redraw from memory, compare three differences, and apply the concept to a new subject. |
| Motivation disappears | Every session feels like a drill or a demand for a finished masterpiece | Use five minutes of fundamentals, ten to fifteen minutes on a favorite subject, and five minutes of a playful remix. |
If drawing causes pain
Use a relaxed grip, keep the wrist reasonably neutral, choose a surface that does not force your shoulder into a cramped position, and take regular breaks. Use larger arm movements for larger marks, but do not treat wrist drawing as forbidden. Stop if drawing causes persistent or worsening pain and seek appropriate professional advice.
Free tools Windows power users keep installed
One-click scans. No signup required.
Common beginner questions to keep in mind
You do not need special innate talent, although people begin with different interests, coordination, and experience. You do not need to draw every day; sustainable, regular sessions are more useful than occasional marathons. You do not need perfect circles before drawing faces, people, animals, or landscapes. Start with the subjects you care about, then use each one to practice a specific foundation.
Best Value

- CONVENIENT DESIGNS FOR SKETCH DRAWING: The sketchbook designs with durable spiral bound and die cut line per each inner paper, you can detach paper without any trouble. Also, the 8.5x11 inches 90gsm high quality sketch paper provide perfect drawing experience
- PREMIUM AND DURABLE PAPER: The sketchbook includes 80 sheets 90gsm paper, the durable sketch paper provides perfect drawing and writing experience, great idea for all drawing method, such as, pencil, pastels, charcoal, gel pen and so on
- LARGE SIZE WITH PROTECTIVE COVER: 1 pack of 8.5x11 inches sketchbook, the large size provides multiple functions, to meet all your drawing requirements, it can offer unique prefect painting experience for you. Also, the waterproof hardcover with PU material makes protection function for high quality art works
- QUALITY ENSURE: All of the components are under our door-to-door quality control system; quality assurance process delivers outstanding quality and durability
- GREAT GIFT: An ideal gift for you to find more sketch drawing necessary tools easy way and ideas here. It provides a unique and practical present
More detail does not automatically make a drawing better. Composition, silhouette, proportion, form, and value should be solved before texture and tiny accents. A ruler can help scaffold a perspective exercise, but it is not necessary for every drawing. “Use the whole arm” is useful advice for loose, larger marks, not a rule that makes wrist movement wrong.
Explanations sometimes describe drawing as switching from a verbal, symbolic mode to a special “right-brain” mode. The contour, negative-space, relationship, and light-and-shadow exercises associated with Betty Edwards can be practical, but the hemisphere-based explanation should be treated as part of that teaching method rather than settled neuroscience. The exercises are useful without making a brain-dominance claim.
Where to go next
Once the basic process feels familiar, choose the direction that keeps you interested:
What’s actually slowing this PC down?
Pick the symptom - the matching free tool is one click away.
- For portraits, study head construction, centerlines, planes, and grouped values.
- For figures, practice gesture, major masses, balance, and simple anatomy.
- For animals, study silhouettes, line of action, rib cage, pelvis, and limb cylinders.
- For landscapes, study composition, overlap, atmospheric simplification, and perspective.
- For cartoons, study shape language, silhouette, exaggeration, and expression.
- For digital art, learn layers and brushes after the drawing fundamentals feel familiar.
- For graphite, charcoal, or colored pencil, explore how each material changes mark, value, edge, and texture.
For a structured continuation, Proko’s Drawing Basics course covers materials, line, shape, perspective, values, and edges. Museum resources from the National Gallery of Art, Getty, and Andy Warhol Museum provide additional contour, gesture, mark-making, observation, and still-life exercises.
Frequently Asked Questions
Do I need talent to learn how to draw?
You do not need special equipment or a fixed level of innate talent to begin. Drawing develops through specific skills such as observation, proportion, construction, value, and mark control. Progress is individual, so focus on improving one skill at a time rather than expecting identical results on a fixed schedule.
Should I draw from imagination or from reference?
Use both, but begin with plenty of observation or reference-based drawing. Real objects and useful references provide information about proportion, light, and form; imaginative drawing helps you invent and stay motivated. A simple approach is to draw an object from life and then remix it into a character or scene.
Is tracing cheating?
Tracing can be useful for studying proportion, construction, or a complex contour, and it can support some accessibility needs. However, tracing alone does not require the same decisions as freehand observation, so it should supplement rather than replace freehand practice.
Do I need to learn anatomy before drawing people?
No. Start with gesture, simple body masses, and basic proportions. Learn anatomy gradually as it helps explain the forms you are drawing. You can draw people immediately without waiting to complete an anatomy course.
Why do my drawings look flat?
The drawing may have an outline but no clear form or lighting. Choose one light direction, group the subject into light, middle, and shadow values, and add a cast shadow. Ellipses, cross-contours, and overlapping forms can also communicate depth.
How often should I practice?
Regular, sustainable sessions are better than occasional marathons. Fifteen focused minutes several times a week can include a short warm-up, one observation exercise, and a quick review. Daily practice is optional, not a requirement.
Should I use an expensive tablet or pencil set?
No. Paper and an HB or No. 2 pencil are enough to begin. Digital tools and larger pencil sets can be useful later, but they do not automatically solve observation, proportion, construction, or shading.
What’s actually slowing this PC down?
Pick the symptom - the matching free tool is one click away.
When should I start drawing faces, hands, or animals?
Start whenever you want. Use simple construction: a head shape and centerline for faces, a palm wedge and tapered forms for hands, and head, rib cage, pelvis, and line of action for animals. Short studies are more productive than waiting until you feel ready.
The Bottom Line
The easiest way to start drawing is to draw something you care about with simple tools, while giving each attempt one clear job. Observe the real subject, map the large relationships, build it from simple forms, correct the proportions before details, add a few values, and stop before overworking it. A short, repeatable practice that mixes fundamentals with enjoyable subjects will take you farther than expensive supplies or endless tutorial watching.
Quick Recap

Product prices and availability are accurate as of the date/time indicated and are subject to change. Any price and availability information displayed on Amazon at the time of purchase will apply.




