The Tool Desk
What’s actually slowing this PC down?
Pick the symptom - the matching free tool is one click away.
Outbyte Driver Updater FREEFix the driver behind crashes, sound loss and screen glitchesFind Drivers →Outbyte PC Repair FREEClear out junk files and repair common Windows errorsFree Scan →
ThatPainter is reader-supported. When you buy through links on our site, we may earn an affiliate commission. Learn More
The best Grinch-inspired photo edits use more than a green filter. Recolor the subject with yellow-green tones, preserve the eyes and teeth, add darker facial shadows, exaggerate the expression slightly, and finish with fur-like texture, red clothing, and holiday lighting. Use a phone or web editor for a quick social image; use Photoshop for cleaner masks, realistic texture, and controlled facial reshaping.
What makes a photo look Grinch-like?
The recognizable effect comes from a combination of color, shape, expression, and styling:
As an Amazon Associate I earn from qualifying purchases.
- Yellow-green skin, fur, or hair rather than a flat emerald overlay.
- Darker green around the eye sockets, nose, jaw, eyebrows, and facial creases.
- High, arched eyebrows and a narrowed or mischievous gaze.
- A slightly exaggerated nose and a broad or curled grin.
- Red Santa-style clothing with white trim.
- Green or yellow-green texture around the face and hairline.
- Cool shadows, warm highlights, and a festive background.
These are visual cues for a Grinch-inspired character edit, not requirements for copying any particular official image or movie still. The goal is a playful portrait that remains recognizable as the original person.
Choose a good source photo
Start with the best original image available. A high-resolution portrait gives you cleaner selections and more believable texture than a screenshot or compressed social-media download.
#1 Best Overall
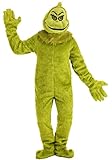
- Size: X-Large
- Main body: 69% polyester 31% acrylic; other: 100% polyester long-pile faux fur
- Jumpsuit has hook and loop fastener at center back
- Padded cushion inside front of jumpsuit for plump look
- Collar has fabric ties at back of neck
The easiest photos to edit are:
- Front-facing or three-quarter portraits.
- Evenly lit images with visible facial detail.
- Photos with a neutral or uncluttered background.
- Images where hair, beard, and shoulders are reasonably distinct from the background.
- Expressions that can support raised brows or a mischievous smile.
Avoid strong green lighting, extreme backlighting, very small faces, heavy beauty filters, and backgrounds that are similar in color to the hair. Sunglasses, hands, hats, and hair covering the face can also make masking and expression changes more difficult.
Quick method on a phone or web editor
A simple editor such as Picsart is suitable for a fast, stylized result. Canva is particularly useful when the finished image will become a holiday card, invitation, poster, or social graphic. Their exact tools and plan features can vary by platform and current app version.
- Upload the portrait. Keep the original photo separately, and duplicate it if the editor supports layers.
- Isolate the subject if possible. Use a background-removal or foreground-selection feature, or apply the effect manually with a brush or mask.
- Shift the color. Open Adjust, Color, or Color Edit. Move the visible skin and hair toward a yellow-green. Lower the strength if the result becomes neon.
- Protect important details. Mask or erase the effect from the whites of the eyes, teeth, jewelry, glasses, and reflective surfaces. Do not recolor the entire image indiscriminately.
- Add darker green shading. With a soft, low-opacity brush, darken the brows, sides of the nose, eye sockets, cheek hollows, and jawline.
- Add texture. Try a licensed fur, grunge, paper, or fine-noise overlay. Place it above the green layer, reduce its opacity, and mask it away from the eyes, nostrils, teeth, and smooth highlights.
- Add holiday styling. Recolor a jacket red or add a properly licensed Santa hat, white trim, lights, snow, or a Christmas background.
- Unify the image. Add a subtle shadow or vignette and make sure the new background and clothing follow the original light direction.
- Export a copy. Keep the original and the editable project file before exporting the final JPEG or PNG.
Picsart’s official tutorials cover uploading an image, applying effects, adjusting effect controls, and adding overlays or stickers. Its grunge workflow is a useful model for adding low-opacity texture: Picsart photo effects tutorial and Picsart grunge effect tutorial. Canva documents image color editing and automatic foreground/background isolation here: Canva image color tools.
What the quick method cannot do well
Fast editors are useful for a recognizable, fun result, but they may struggle with hair-edge masking, individual fur strands, precise facial reshaping, and realistic lighting. “Quick” means suitable for a meme, post, or casual card—not automatically photorealistic.
Detailed Photoshop method
1. Prepare a layered working file
- Open the original portrait.
- Save a working copy as a PSD.
- Keep the untouched original layer hidden at the bottom of the layer stack.
- Duplicate the working layer. Convert the duplicate to a Smart Object when you expect to use Liquify or other filters.
Adjustment layers and masks let you revise the edit without permanently painting over the original pixels. Adobe’s current documentation covers Hue/Saturation adjustment layers at Adobe’s Hue/Saturation guide, while its Liquify documentation explains Smart Object workflows at Adobe’s Liquify guide.
Rank #2

- Christmas Green Monster Costume for Adults: Deluxe 7PCS Santa Claus costume, Santa Suit includes: Red Santa top+Green furry thick pants+Green monster latex mask+Green furry gloves+ Red velvet socks with white pompom+ Red fur edging hat+Buckle Belt, valuable Christmas green monster costume for adults
- Green Monster Costume Details: Christmas green monster costume features polyester and fur material, thicker fabric, various details are clearly visible, the latex mask with eyes holes, no obstacles in your sight, the chunky design version makes you feel more comfortable
- Deluxe Material: Christmas green monster costume is made of 100% polyester faux fur and soft velour, red Santa Claus top with white trim at sleeves and neckline, Green furry pants with an elastic waist fit your body shape perfectly, monster mask is made of latex, safe and environmentally friendly, gloves and hat, socks are comfortable to wear, Belt with buckle easily adjusts your waist size
- Green Monster Costume: Wearing this Christmas green monster costume for your party, you will be a furry, mean-tempered, scary guy, as we all know, this guy will break into other's homes on Christmas Eve while people sleep to steal everything they own
- Various Occasions: Christmas green monster costume Santa Claus costume Santa suit is perfect for your Christmas party, Christmas Eve, Halloween, Cosplay party, New Year, Birthday party, School event, or more. machine wash or dry clean, Christmas green bog monster costume is the ideal choice for your daily party
2. Select what should change
Do not apply one green effect to the entire photograph. Use Object Selection or Select Subject as a starting point, then refine the result with Select and Mask. For individual colors, use Select > Color Range. Paint directly on a layer mask to clean up difficult edges.
Create separate selections where possible for:
- Face and exposed skin.
- Hair, beard, or existing fur.
- Clothing.
- Background.
- Added props and overlays.
Keep the eyes, teeth, lips, jewelry, glasses, and shiny objects separate. This prevents the entire portrait from becoming a flat green silhouette.
3. Create the base green
- Select the face or skin mask.
- Choose Layer > New Adjustment Layer > Hue/Saturation.
- Use Colorize only if you need a more uniform tint. For a natural result, target the existing skin colors instead.
- Adjust Hue, Saturation, and Lightness while watching the original skin detail.
- Clip the adjustment to the intended layer or refine its mask.
Useful starting ranges are:
| Control | Starting point | How to judge it |
|---|---|---|
| Hue | Approximately 75–105° | Move toward yellow-green, not a universal fixed value. |
| Saturation | Approximately 25–55 | Increase until the character reads, then reduce if the skin looks neon. |
| Lightness | Approximately -5 to +10 | Protect facial detail; do not brighten every shadow equally. |
| Layer opacity | Approximately 60–90% | Lower it when too much of the original skin color has been lost. |
These are illustrative starting points, not presets. A warm indoor portrait, a cool outdoor portrait, and a dark complexion will all require different settings.
4. Restore dimension with shadows and highlights
Green color alone looks artificial because it removes the visual separation between planes of the face. Build the volume back with separate layers:
- Use dark green or olive around the upper eyelids, eyebrows, sides of the nose, cheek hollows, and jaw.
- Use warmer yellow-green on the forehead, cheekbones, nose bridge, and chin.
- Use a low-opacity brush on Soft Light, Overlay, or Color rather than painting opaque marks.
- Use Curves or another adjustment layer to deepen shadows while protecting highlights.
In a simpler editor, Curves can adjust overall contrast and individual red, green, and blue channels. See Picsart’s Curves tutorial for the general workflow.
Do these 3 things before closing this tab:
1Scan for outdated or missing drivers - takes under a minute2Repair Windows errors before they cause bigger problems3Fix the driver behind crashes, sound loss and screen glitchesRank #3

- Premium 100% Polyester Top with Fuzzy White Trim: The Santa-style top features soft fuzzy white edges, paired with 100% polyester fabric that’s lightweight, breathable, and wrinkle-resistant—ideal for all-night parties or stage performances.
- Ultra-Light Green Pants with Super Stretchy Waist: Non-stuffy green pants keep you cool even during long wears; the highly elastic waistband fits various body types snugly without tightness.
- Fuzzy Gloves & Realistic Green Latex Mask: Fuzzy gloves add a soft texture, while the green latex mask perfectly replicates the classic character’s look—completing your iconic monster ensemble.
- 7-Piece Complete Set (No Extra Buys): Includes top, pants, adjustable belt, character hat, fuzzy gloves, shoe covers (fits most adult sizes), and mask—unbox and wear directly.
- Versatile for Holiday & Party Occasions: Perfect for Christmas, Halloween, masquerades, cosplay, and stage shows; its eye-catching design ensures you stand out at any event.
5. Exaggerate the expression with Liquify
Color identifies the idea; expression makes the transformation convincing. On a duplicate Smart Object, choose Filter > Liquify. Use low pressure and build changes gradually:
- Raise or arch the eyebrows slightly.
- Pull the corners of the mouth into a broader grin.
- Make the nose a little rounder or more hooked.
- Narrow the eyes or lower the upper eyelids subtly.
- Add a small amount of cheek or jaw asymmetry.
Liquify includes brush-based push, pull, rotate, pucker, and bloat-style controls. Toggle Preview frequently and compare the result with the original. Avoid changing both sides identically; slight asymmetry often looks more natural. Keep the eyes aligned unless you deliberately want a cartoon effect.
If the smile becomes warped, undo the last strokes rather than trying to repair the entire face. Extreme distortion can make the person unrecognizable, which is especially undesirable for children’s photos or family cards.
6. Add fur or hair texture
The easiest approach is a properly licensed fur or grunge texture:
Free tools Windows power users keep installed
One-click scans. No signup required.
- Place the texture above the green face layer.
- Try Soft Light, Overlay, or Multiply.
- Reduce opacity until the facial detail remains visible.
- Mask the texture away from the eyes, teeth, nostrils, lips, and reflective areas.
- Rotate or warp the texture so its direction follows the form of the face.
For a more convincing result, use a fur brush around the cheeks, brow, jaw, hairline, and silhouette. Vary strand length, direction, opacity, and hue. Add a darker contact shadow where the fur meets a collar or garment.
Rank #4
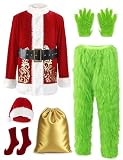
- Premium Full Set of Green Giant Monster Santa Costume: Men’s santa costume is made of premium material, artificial faux fur, velour and velvet, breathable and comfortable., easy to wear. Natural latex full face mask. This adult Christmas costume suit is good quality that can be used more than once
- 8PCS Santa Outfit Set: Red santa cosplay zipper top has white faux fur trim at sleeves and gold printed pattern at bottom, Latex full mask has breath holes and holes above the eyes, Green furry pants have elastic waist, Red velvet santa hat has fur edging and pompom at trip, Gloves has green long plush on the backs, Belt with gold buckle, Red velvet socks,Golden bag. This 8pcs adult santa suits covered all outfits that you need for cosplay
- Green Giant Monster Suit Feature: Furry white faux fur trim, furry cuffs and furry hat brim, green exquisite plush to keep you warm in both frigid winter and later fall. The fine gold printed pattern at hem, realistic appearance, the signature scowl to make you a special appearance at Xmas party and attract everyone
- Suitable Occasions: Great for Christmas Party, Halloween, Themed Party, Cosplay Party, Masquerade, Stage Show, Parade, Ball Parties, Carnivals, Fancy Dress, New Year Eve, Family Party, School and Office Xmas Celebration. Wearing deluxe green monster santa costume suit, increase the Christmas atmosphere, catch eyes and indulge yourself in a Christmas mood. Can be great idea for family members, friends, can be a huge surprise for them and yourself
- The furry Christmas outfit set looks like a green old guy with the worst temper, he make your Christmas more funny and everyone wants to take a picture with him
Do not cover every surface with identical fur. Texture should be strongest at edges, transitions, and shadowed areas. Uniform texture looks like a pasted filter.
7. Edit the eyes, mouth, and teeth
These details strongly affect whether the image looks intentional:
- Keep the whites of the eyes mostly neutral.
- Add only a subtle yellow-green reflection if it suits the style.
- Darken the upper eyelids and brow area.
- Preserve tooth highlights and avoid turning teeth green.
- Use a restrained red or burgundy tint on the lips when appropriate.
For a cartoon treatment, you can enlarge the eye whites, strengthen the catchlights, and paint graphic eyelid shadows. For a realistic treatment, keep these changes understated.
8. Add red clothing and a holiday background
Separate the clothing from the face. If the existing jacket or shirt can be recolored cleanly, use a masked Hue/Saturation adjustment. Otherwise, add a red garment on a separate layer and preserve the original folds and shadows. Add white trim with a soft-edged shape or a properly licensed graphic.
Suitable backgrounds include a dark Christmas interior, snowy scenery, red curtains, blurred holiday lights, or a decorated tree. Blur the background slightly so it does not compete with the face. Match its light direction and color temperature to the subject. A warm red background against a cool, unlit face will make the composite look assembled rather than photographed.
Best Value
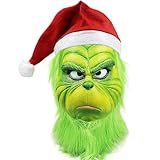
- Material: Christmas Mask uses 100% natural high-quality latex.
- One size fits all teenagers and adults. The green monster mask has enough internal space for head movement
- It can also be considered an ornament. Shown in the living room, when guests see it, they will not be able to resist it.This Christmas mask brings true happiness to your children or friends, this is a great gift.
- Green monster mask, eye-catching color allows you to play an important role in fancy dress party, carnival, Halloween and Christmas
- Risk-free shopping: We will do our best to solve any of your problems quickly and effectively.
9. Apply a final grade
- Reduce overly bright greens.
- Increase contrast selectively instead of crushing every shadow.
- Keep red clothing from becoming fluorescent.
- Add a restrained vignette.
- Apply a small amount of grain to the whole image, not only the inserted elements.
- Inspect the result at 100% and at thumbnail size.
A unified grain layer can help blend the original portrait and added assets, but excessive grain destroys facial detail.
Independent reader supportYour contribution helps us test, update, and keep practical guides available for everyone.Fix common problems
| Problem | Likely cause | Fix |
|---|---|---|
| Neon-green skin | Too much saturation or opacity. | Lower Saturation, reduce the adjustment-layer opacity, and add olive shadows or yellow-green highlights. |
| Green eyes or teeth | The mask covers the entire face. | Paint black on the layer mask over the eye whites and teeth; restore their natural highlights. |
| Visible mask edges | A hard selection or halo around hair. | Refine with Select and Mask, soften the edge slightly, and clean the mask at 100% zoom. |
| Pasted-on fur | Texture is uniform or too opaque. | Reduce opacity, mask the center of the face, and vary texture direction around the form. |
| Warped smile | Liquify pressure was too high. | Undo recent strokes or revert to the duplicate Smart Object and rebuild with lower pressure. |
| Green background contamination | Color Range selected similar background colors. | Use a subject mask first and refine the background separately. |
| Lighting mismatch | Added clothing or background has a different light direction. | Match brightness, shadow placement, color temperature, and edge softness. |
| Too much blur or grain | Effects were used to hide poor edges. | Repair the mask and lighting, then apply only a restrained final texture. |
Make it cartoon-like or realistic
For a cartoon version
Use stronger Liquify changes, flatter yellow-green colors, heavier graphic shadows, larger eye whites, and a more obvious grin. A clean outline, simplified background, and bright red clothing can make the result look illustrated rather than photographic.
For a realistic version
Use localized color shifts, subtle facial distortion, texture concentrated around edges, realistic contact shadows, and a final grade that affects the entire image. Preserve pores, wrinkles, natural asymmetry, and the person’s original identity.
Which tool should you use?
| Tool | Best for | Trade-off |
|---|---|---|
| Photoshop | Precise masks, layered editing, facial reshaping, texture, and print-quality work. | More expensive and harder to learn. Adobe’s subscription plans and features vary by region and current checkout offer. |
| Picsart | Fast phone edits, effects, stickers, overlays, and social posts. | Less precise for hair, realistic fur, and advanced facial warping. |
| Canva | Cards, invitations, posters, thumbnails, and photo-plus-text layouts. | Less suitable for detailed facial sculpting or complex compositing. |
| Professional retoucher | Paid campaigns, large prints, and high-quality identity-preserving work. | Costs more and requires time, source-image rights, and clear instructions. |
Photoshop web and mobile access are included with Photoshop plans, although availability and plan structures can change. Adobe’s current desktop technical requirements page covers Photoshop version 27.x and later; check the official requirements before installing: Photoshop technical requirements.
Commercial and copyright considerations
Use a photo you own or have permission to edit. For added fur, clothing, backgrounds, fonts, stickers, and overlays, use assets with licenses that cover your intended use.
A private joke or personal holiday card is different from selling merchandise, running an advertisement, or publishing a commercial campaign. Do not assume that movie stills, official character artwork, logos, promotional imagery, or copied fonts are free to reuse. Copyright, trademark, publicity, and platform rules vary by use and jurisdiction. Adobe’s image-use guidance explains that third-party content outside permitted terms may require permission from the copyright owner: Adobe permissions guidance.
The Tool Desk
Outbyte PC Repair FREERepair Windows errors before they cause bigger problemsFix Now →Outbyte Driver Updater FREEFix the driver behind crashes, sound loss and screen glitchesFind Drivers →Calling an effect “official” or “licensed” would require an explicit statement from its provider. The workflows here describe a Grinch-inspired transformation, not an official one-click Grinch preset.
Export without losing your work
- Save the layered PSD before flattening anything.
- Keep the original portrait in a separate location.
- Export a high-quality JPEG for ordinary social sharing.
- Export PNG when transparency is required.
- Use the highest practical quality for printing.
- Review the exported file on the device where it will be shared or printed.
Never flatten the only copy until you are satisfied. The layered file makes it easy to reduce the green, repair a mask, change the background, or create a less exaggerated version later.
Quick Recap

Product prices and availability are accurate as of the date/time indicated and are subject to change. Any price and availability information displayed on Amazon at the time of purchase will apply.




