The Tool Desk
Recommended Free Tools
Outbyte PC Repair FREERepair Windows errors before they cause bigger problemsFix Now →Outbyte Driver Updater FREEFix the driver behind crashes, sound loss and screen glitchesFind Drivers →
ThatPainter is reader-supported. When you buy through links on our site, we may earn an affiliate commission. Learn More
Sherwin-Williams paint that peels, blisters, or cracks will not be fixed by brushing on another coat. First identify whether moisture or loss of adhesion is lifting the film, or whether application problems have created small bubbles, pinholes, craters, or fisheyes. Stop leaks, condensation, failed caulk, contamination, or other causes; remove every loose layer; clean, dry, sand, fill, and prime the sound substrate; then repaint only under the current product label and data-page conditions. Localized, dry damage can often be repaired with scraping and spot priming. Broad or recurring failure requires moisture-control or building-envelope repairs before any new coating.
What do peeling, bubbling, and cracking paint usually mean?
These defects describe different failure mechanisms, so the correct repair starts with the appearance and the depth of the damage. Sherwin-Williams defines peeling as loss of adhesion between a coating and the substrate or an earlier coat. Blistering is a bubble formed when the paint film loses adhesion and lifts. Flaking is commonly preceded by cracking or checking. Small craters, pinholes, and foaming can instead be application defects in an otherwise bonded film.
As an Amazon Associate I earn from qualifying purchases.
| What you see | Most likely mechanism | What to check first | Initial response |
|---|---|---|---|
| Large lifted areas, flakes, or sheets that expose an earlier coat or the substrate | Loss of adhesion, often moisture, contamination, or a weak previous coat | Leaks, failed caulk, damp material, condensation, dirt, grease, wax, silicone, glossy paint, and adhesion of nearby coats | Stop the cause, test nearby adhesion, then remove all poorly bonded paint |
| Rounded blisters or bubbles, especially on exterior walls or hot surfaces | Moisture or heat lifting the film | Rain, dew, high humidity, roof and gutter defects, wall moisture, interior vapor, or painting in direct sun | Repair the moisture path and allow the surface to dry before scraping and recoating |
| Cracks, checks, and subsequent flakes, commonly on wood | Movement, poor penetration, inadequate preparation, or coats applied too thin | Wood expansion and contraction, hard grain, dents, unfilled cracks, and unstable old paint | Scrape to a sound edge, sand, fill, prime, and repaint |
| Tiny bubbles, pinholes, foam, craters, or fisheyes while the film remains attached | Entrapped air or contamination during application | Shaken paint, high mixer speed, aggressive brushing or rolling, wrong roller nap, porous surface, heat, reducer, oil, wax, silicone, or grease | Let the film dry, sand smooth, remove contamination, prime porous areas, and correct the application method |
How can I tell moisture blistering from an application bubble?
Moisture blistering normally lifts a section of film and may reach the substrate; an application bubble is usually small and remains within the new coat. A blister often appears where water can enter or vapor can escape, while foaming or pinholes can be distributed across a freshly rolled area. The distinction matters because sanding a moisture blister without fixing the water source guarantees another failure.
Signs of moisture or heat-related blistering
- Bubbles are broad, raised, and separated from the wall, siding, or previous coat.
- The defect follows a leak, damp basement, exterior joint, roof edge, gutter, or area of high indoor humidity.
- Paint was applied to a damp surface, in direct sun on a hot surface, or shortly before dew, rain, or a period of high humidity.
- An oil or alkyd coating was applied to damp material.
Sherwin-Williams describes blistering as “the bubbles that form underneath a paint surface that ultimately cause a loss of adhesion of the paint film.” That description distinguishes a lifted film from a surface texture problem created while the wet coating was being spread.
Popular on Amazon
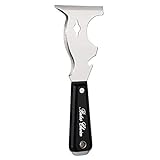
- Bates paint scraper tool 10 in 1 easy to use and convenient.
- A must have tool in your home, Rust-resistant steel blade with wood grip designed .
- This is a multi purpose tool and is ideal for home improvement projects like applying joint compound, puttying windows, scraping paint, removing loose putty, removing loose paint, removing vinyl or paper wall covering.
- Patching dents cracks holes in plaster with soft grip designed to last for long jobs without hand discomfort
- Package includes: 10 in 1 paint scraper tool
Signs of application-related bubbling or fisheyes
- The defects are tiny, crater-like, or pinhole-sized and do not pull the entire film away from the substrate.
- They appeared while rolling or brushing, particularly after shaking, high-speed mixing, over-brushing, or over-rolling.
- The surface is porous or unsealed, the roller nap is wrong, the weather is hot, or an incorrect reducer was used.
- Round craters remain where oil, wax, silicone, grease, solvent cleaner, or a contaminated repair patch repelled the coating.
What should I do before scraping the paint?
Do not start with a scraper. Find and stop the condition that caused the failure, because a perfectly prepared patch will fail again if water or vapor is still entering.
- Inspect the building. Look for roof or wall leaks, failed caulk at joints and openings, clogged or damaged gutters, siding too close to soil, damp masonry or wood, condensation, and high indoor humidity. On exteriors, check corners, penetrations, and transitions where water can enter.
- Check the paint history. Determine whether the surface was dirty, wet, glossy, chalky, or only marginally bonded before painting. Note whether the previous coat was oil or alkyd and whether the new coat was applied before dew, rain, or adequate drying.
- Control moisture. Repair leaks, restore drainage, replace failed caulk, and use ventilation, louvers, fans, or a dehumidifier where appropriate. Keep wood siding at least 6 inches above soil where that condition applies.
- Test the surrounding coating. Sherwin-Williams recommends checking adhesion in a 6- to 12-inch radius around peeled areas. If nearby paint releases easily, expand the removal area until the remaining film is sound.
- Protect the work area. Use appropriate eye, skin, and respiratory protection for scraping and sanding, contain chips, and avoid disturbing coatings whose composition or age is unknown without following applicable safety requirements.
How do I repair peeling paint step by step?
Peeling repair is successful only when every weak layer is removed and the substrate is dry and stable. Painting over a curled edge merely buries the failure and leaves a visible ridge.
What’s actually slowing this PC down?
Pick the symptom - the matching free tool is one click away.
- Remove loose material. Scrape or wire-brush every flake, blister, crack, and hollow-sounding section. Continue until edges are firmly bonded.
- Feather the perimeter. Sand the transition between bare substrate, old paint, and intact finish so the repair does not telegraph through the new coat. Dull glossy paint rather than coating it intact.
- Clean the surface. Remove dirt, grease, wax, silicone, sanding dust, and other contamination. Cleaning residue must also be removed.
- Dry completely. Do not prime or paint damp drywall, wood, masonry, or metal. Drying time depends on the material and conditions, so use the coating label and data page rather than a fixed shortcut.
- Make repairs. Fill compatible cracks, dents, and voids; replace failed caulk; and complete leak or drainage work before coating.
- Prime exposed or unstable areas. Bare, chalky, porous, or marginally bonded surfaces need a compatible sealer or stabilizing primer. Sherwin-Williams lists PrimeRx Peel Bonding Primer for flaking conditions.
- Confirm conditions. Recheck adhesion around the repair and verify the label requirements for surface preparation, temperature, humidity, and recoat interval.
- Apply the finish. Use the specified product and applicator, lay on even coats, and allow each coat to dry for the stated time.
How do I fix bubbling or blistering that reaches the substrate?
Blisters that expose drywall, wood, masonry, or metal indicate a bond failure that must be repaired at its source. Remove the loose paint, repair moisture, then rebuild the coating system on a dry substrate.
For blisters caused by exterior or interior moisture
Correct failed caulk at joints, corners, and openings; repair roof and wall leaks; clean or repair gutters; address siding-to-soil contact; and reduce interior vapor with ventilation or dehumidification. Allow the wall or siding to dry fully. Scrape the blister and all surrounding loose paint, sand the rough edge, clean away dust and contamination, fill defects, and apply a compatible primer before the finish coat.
For blisters caused by heat, dew, or rain during application
Schedule work when the surface is not hot from direct sun and when the label’s weather and drying conditions can be maintained. Paint applied shortly before dew, rain, or high humidity may lose adhesion even if the substrate looked dry at the time. Remove the failed film and wait for the material to dry before priming.
Also popular on Amazon

- 【Multipurpose】5pcs Spackling Knives Different Sizes Are Available, Perfect for Putty, Wallpaper, Applique, Backing, Repair, Paint, Plaster, Including Drywall, Plaster, Baking, Spackling, Patching, Stucco and Much More, Can Be Used to Repair All Kinds of Dents, Cracks, Holes, Spackle Tool Suitable for Any Work Project
- 【Will Not Corrode】Putty Knives Use of High-quality Stainless Steel Material, not Rust, Solid Corrosion Resistance, Easy To Clean, no Need To Worry About Deformation And Breakage. Is The Perfect Metal Scraper Tool
- 【Comfortable Grip】The Handle Part Is A Perfect Combination Of Soft Rubber And Plastic, Retains Sturdiness And Durability While Ensuring A Comfortable Grip. Also Designed With Holes For Easy Storage
- 【Family Essentials】What You Get: 1inch Putty Knife, 2inch Putty Knife, 3inch Putty Knife, 4inch Putty Knife, And 5inch Putty Knife; come With 5 Different Sizes Meet Your Different Using Requirements, can Be Used As Paint Scraper Tool, Wallpaper Remover, Drywall Knife Set And Most
- 【Customer Commitment】our Commitment to Rerdeim Has Always Been Committed To Providing Customers With Higher Quality Products And A Comfortable Customer Experience. If You Have Any Concerns Or Questions About This Product, Please Feel Free To Contact Us
For blisters that reach only a previous coat
Remove loose paint, sand the edges, and dull any glossy areas of the remaining coat. Clean the surface and provide adequate drying time. If the earlier coat itself is weak, extend removal and use a stabilizing primer rather than trapping it under a new finish.
Free tools Windows power users keep installed
One-click scans. No signup required.
How do I repair cracking and flaking paint?
Do not cover active flaking with a new coat. Cracking often precedes flaking, particularly on wood, where expansion and contraction, hard grain, poor penetration, thin coats, or inadequate preparation can break the film.
Wood surfaces
Scrape all loose paint, sand the edges, and inspect for cracks, dents, and areas where the old coating has not bonded. Fill defects with a compatible filler, then prime to stabilize or seal the surface. Sherwin-Williams identifies Exterior Latex Wood Primer as an option for wood preparation; select the product that matches the substrate and finish system. Repaint only after the repaired surface is smooth and dry.
Drywall, masonry, and other rigid substrates
Remove loose flakes until the remaining coating is firm. Clean and dry the exposed area, fill compatible dents or cracks, and prime porous or bare material. Masonry or below-grade areas deserve particular attention to dampness; a finish coat cannot substitute for correcting water migration.
When the crack keeps returning
A recurring crack signals movement, moisture, or an unstable underlying layer rather than a cosmetic defect in the latest coat. Reinspect joints, leaks, humidity, and adhesion beyond the visible line before repeating filler and paint.
Also popular on Amazon

- Versatile Cleaning Power: Our razor blade scraper set is your all-in-one solution for effective cleaning. This non-retractable tool, featuring a rubber handle, is perfect for glass, stovetops, and windows. With 15 extra SK5 steel razor blades, it's a plastic scraper tool that never misses a spot
- Built-in Convenience: Experience ultimate convenience with the built-in blade storage of our razor scraper tool. Easily switch between tasks, from sticker removal to paint scraping. The hanging hole adds portability, making this plastic razor blade scraper a handy companion for all your cleaning needs
- Precision and Durability: Crafted with precision, the razor blade scraper tool is designed for durability and longevity. The plastic scraper, along with the top-quality SK5 steel razor blades, ensures efficient and long-lasting performance. Your go-to glass scraper for pristine surfaces every time
- Effortless Sticker and Residue Removal: Tackle stubborn stickers and residue effortlessly with our razor scraper. The non-retractable design provides stability, while the plastic razor blades delicately remove unwanted materials without damaging surfaces. The ultimate sticker scraper tool for a clean, clear finish
- Professional-Grade Glass Scraper: Elevate your cleaning routine with a professional-grade glass scraper. This razor blade scraper set is ideal for glass top stoves, windows, and more. Its non-retractable design, combined with the plastic razor blades, delivers precision and efficiency in every swipe. Upgrade to a cleaner, clearer space
How do I fix small bubbles, pinholes, craters, or fisheyes?
These defects require a different remedy from large moisture blisters. Let the coating dry, then remove the texture and the contamination that caused it before applying another coat.
- Allow the film to dry. Sanding wet paint smears the defect and can create a larger weak area.
- Sand smooth. Remove bubbles, pinholes, and crater edges without cutting unnecessarily into sound substrate.
- Clean contamination. Remove oil, wax, silicone, grease, solvent-cleaner residue, and sanding dust. A contaminated repair patch can cause fisheyes even when the rest of the wall is clean.
- Seal porous material. Prime unsealed or highly absorbent areas so the finish does not release entrapped air from the substrate.
- Correct the application. Do not shake paint unnecessarily; use the manufacturer’s recommended mixing speed, avoid aggressive brushing or over-rolling, select the correct roller nap, and use only the reducer specified on the label or data sheet.
- Recoat under the stated conditions. High heat and insufficient drying time can recreate the problem, so follow the product’s recoat and environmental requirements.
For smooth surfaces, Sherwin-Williams says a 1/4- or 3/8-inch roller nap is usually sufficient. A thicker nap can hold more air or leave an unsuitable texture on a smooth wall.
Which primer and finish should I use after removing failed paint?
Choose by substrate, condition, and the type of stabilization required, not by color alone. Product formulations and availability can change, so verify compatibility on the current label and data sheet.
| Condition | Purpose | Sherwin-Williams products named for this type of work | Decision note |
|---|---|---|---|
| Flaking or marginally bonded paint | Stabilize edges and bridge firmly bonded paint to repaired areas | PrimeRx Peel Bonding Primer | Remove genuinely loose paint first; a peel-bonding primer is not a substitute for scraping |
| Interior wall or wood preparation | Seal and prepare a sound, repaired surface | Premium Wall & Wood Primer | Confirm that the substrate and finish are listed on the current product information |
| Exterior wood | Prime exposed or repaired wood before an exterior finish | Exterior Latex Wood Primer | Dry the wood and correct water entry before priming |
| Masonry or mineral surfaces | Prepare compatible masonry substrates | Loxon primers | Use the specific Loxon product whose label covers the substrate and moisture condition |
| Finish repaint | Provide the final protective and decorative coat | Duration, SuperPaint, Resilience, Emerald, ProClassic, or WoodScapes, as appropriate to the surface | Do not assume products are interchangeable; follow the complete system and recoat directions |
For joints and openings, use a compatible exterior paintable sealant. Sherwin-Williams names SherMax, PowerHouse, and Stampede among its sealant options. The correct sealant, primer, and finish must all be suitable for the substrate and exposure.
Do these 3 things before closing this tab:
1Clear out junk files and repair common Windows errors2Fix the driver behind crashes, sound loss and screen glitches3Repair Windows errors before they cause bigger problemsCan I paint over peeling paint?
No. If the existing film is loose, cracked, blistered, chalky, or poorly bonded, the new coat will adhere to that weak layer and fail with it. Painting over only hides the edge temporarily and can make later removal more difficult.
Also popular on Amazon

- Save time and effort: ball for the second hand to hold, non-slip texture, easy-to-grasp handle, hard and sharp scraper. This ergonomically designed carbide scraper helps you do twice as much work as other wood scraper or paint scraper tools in less time and with less effort.
- Durable and sharp blade: The blade is made of carbide, which is very sharp and corrosion-resistant, and can easily cut into the surface of the material you want to remove. At the same time, high-quality materials enable the blade to work for a long time. The service life is also dozens of times that of traditional blades.
- Reduce the risk of damaging the underlying material: The knobs and screws are very strong and will not shake, and the handle has anti-slip patterns to help maintain consistent pressure on the workpiece being scraped. Reduced risk of excessive shedding and damage to underlying material.
- Comfortable and healthy: It will not create a lot of dust like other paint scrapers and will not threaten the health of the respiratory tract and it doesn't smell like chemicals like paint stripper.
- Versatile Multi-surface Application:Can be used to remove paint, glue, wood, varnish, wood stains, rust, decals, stains, etc. from wood siding, boat hulls, cabinets, glass, tiles, walls, floors, mirrors, metal, stonework, concrete and other flat surfaces. Membrane glue residue, sealant, putty or adhesive. It can be a paint scraper tool for wood, a floor scraper, or a wood scraper for woodworking. Change roles according to your needs.
A spot repair is reasonable when the surrounding coating passes an adhesion check, the failure is dry and localized, and the moisture or contamination source has been removed. Broad peeling, repeated blistering, or failure that extends beyond the visible patch calls for expanded removal and building-envelope or ventilation work before repainting.
Independent reader supportYour contribution helps us test, update, and keep practical guides available for everyone.What conditions must be right before repainting?
The repaired surface must be sound, clean, dry, and compatible with the primer and finish. The label and technical data page control the allowable temperature, humidity, surface condition, mixing, reducer, application method, and recoat interval; those requirements take precedence over a generic drying rule.
- Do not coat over rain, condensation, dew, damp masonry, wet wood, or unresolved interior moisture.
- Do not leave glossy areas unabraded or contamination under the primer.
- Use the specified roller nap or brush and apply even, not excessively worked, coats.
- Allow each layer to dry for the stated interval before sanding or recoating.
- On exterior work, maintain a weather window long enough for the product to dry as directed.
How do I prevent Sherwin-Williams paint from peeling again?
Prevention combines building maintenance with coating technique. Paint is the final layer of a wall or siding system; it cannot compensate for water entering behind it.
Windows Errors? Fix Them Before They Spread
Repair common Windows errors and clear accumulated junk for a smoother, more stable PC - no reinstall needed.Free scan · no reinstallOutdated Drivers Are Slowing You Down
One free scan finds every outdated or missing driver and matches the right update for your exact hardware.Free scan · exact hardware match- Keep roof drainage functioning and repair damaged or clogged gutters.
- Renew failed caulk at joints, corners, windows, doors, and other openings.
- Keep exterior wood clear of soil by at least 6 inches where applicable.
- Ventilate damp rooms and control indoor humidity with fans or a dehumidifier when needed.
- Keep surfaces clean and dry; remove grease, wax, silicone, and sanding dust before priming.
- Dull glossy paint and test the bond of old coatings before deciding how far to remove.
- Use a primer and finish that are compatible with the substrate and one another.
- Select the correct roller nap, avoid over-brushing and over-rolling, and follow the specified reducer and drying times.
- Do not paint exterior surfaces immediately before rain, dew, or condensation is expected.
When is a spot repair enough, and when is professional help justified?
Spot repair fits a limited, dry failure with firm surrounding paint and a clearly corrected cause. A larger intervention is justified when damage is widespread, keeps returning, reaches multiple sides of a building, or accompanies leaks, damp masonry, persistent condensation, or extensive substrate deterioration.
| Situation | Appropriate scope | Why |
|---|---|---|
| One small peeled patch, no active moisture, sound surrounding paint | Scrape, feather, clean, dry, fill, spot-prime, and blend the finish | The defect is localized and the remaining coating is stable |
| Several blisters along a joint, roof edge, window, or gutter | Repair the envelope first, then remove and rebuild affected coating | The pattern points to a water-entry path |
| Recurring interior bubbles or peeling in a damp room | Improve ventilation or humidity control and investigate vapor migration | New paint alone does not remove moisture loading |
| Flaking across broad wood siding or multiple elevations | Plan systematic testing, removal, priming, and exterior repairs | Extensive failure may include marginally bonded layers and drainage defects |
What should I check if the repair fails again?
Start with the mechanism, not the brand or color. If a blister returns in the same location, look for water behind the coating, failed caulk, roof or gutter leakage, or vapor escaping from inside. If tiny craters return immediately after rolling, investigate contamination, porous substrate, roller nap, mixing, overworking, heat, and reducer. If a broad sheet releases, test the adhesion of the layer beneath it and remove more material before priming.
Also popular on Amazon

- Versatile Scraper Kit: For contour scraping in painting applications
- 6 Stainless-Steel Blades: (1) blade for concave and narrow reveals, (1) for small, flat, and concave molding, (1) for medium and large rods, (1) for flat work and large concave moldings, (1) for sharp indented and concave moldings, and (1) for round moldings, door and window casings
- Included Blade File: Stored in handle for convenient blade sharpening
- Easy Blade Change: Blade storage case for the 6 blades is included
- Comfortable Handle: Easy to use, soft grip, offset handle
Keep a simple record of the substrate, primer, finish, weather, and drying intervals. Comparing that record with the current product label and data sheet can reveal a missed condition, incompatible layer, or insufficient recoat time without guessing at the cause.
Frequently Asked Questions
How long should I wait after washing a wall before priming?
Wait until the substrate and any joints or filler are fully dry, not merely dry to the touch. The actual interval varies with material, airflow, temperature, and humidity, so use the primer and finish data pages for the required surface condition and recoat timing.
Do I need to remove every layer of old paint?
Remove every layer that is loose, cracked, blistered, chalky, or poorly bonded; firmly attached layers can remain after their edges are feathered and glossy areas are dulled. An adhesion check around the defect helps define the safe removal boundary.
Why do fisheyes appear only in my repaired patch?
A patch can retain silicone, wax, grease, solvent-cleaner residue, or sanding dust even when the surrounding wall is clean. Let the coating dry, sand the area, clean it thoroughly, and prime porous or contaminated material before recoating with the specified application method.
Will a dehumidifier stop exterior paint from peeling?
A dehumidifier can reduce interior humidity and vapor migration, but it cannot repair failed exterior caulk, roof leaks, gutters, or siding that is too close to soil. Exterior water-entry and drainage defects still have to be corrected at the building envelope.
Quick Recap

Product prices and availability are accurate as of the date/time indicated and are subject to change. Any price and availability information displayed on Amazon at the time of purchase will apply.

