Free tools Windows power users keep installed
One-click scans. No signup required.
ThatPainter is reader-supported. When you buy through links on our site, we may earn an affiliate commission. Learn More
You can start knitting with just two needles and some yarn. For the shortest path to a finished project, use smooth worsted-weight yarn, cast on, learn the knit stitch, knit every stitch across every row to make garter stitch, then bind off and weave in the ends.
This guide uses right-handed English-style instructions and takes you through a small garter-stitch square. After you finish it, you will understand the purl stitch, stockinette stitch, gauge, basic pattern abbreviations, and the most common beginner mistakes.
What knitting is—and what you are learning first
Knitting creates fabric from interlocking loops held on needles. The two foundational stitches are the knit and purl. Combinations of those stitches produce garter stitch, stockinette, ribbing, seed stitch, cables, lace, and many other textures. You do not need to learn all of them before making your first project. Lion Brand’s beginner overview also starts with the basic sequence rather than requiring an entire stitch encyclopedia.
#1 Best Overall

- 【18 SIZES】The Bamboo Knitting Needles Set metric sizes in the set are 4mm, 5mm, 6mm, 7mm, 8mm, 9mm and 10mm.
- 【RELIABLE MATERIAL】The Bamboo Natural are made of quality Material that has been bleached and carbonized, very smooth without rough edges, straight needles are light weight so do not tire out your wrist.
- 【SINGLE POINTED】The Long Wooden Knitting Needles of wooden knitting needle makes it easier keep the stitches on, not falling off. The more you use the wood knitting needles they will wax over and become more smoother and easier-slide, due to the oil in your fingers.
- 【GREAT FOR SEASONED KNITTERS AND BEGINNERS ALIKE】This Single Point Straight Wood Needles is great for both beginner knitters and experienced knitters.
- 【UNIQUE GIFT FOR YOURSELF OR A LOVED ONE】These needles are specially curated, and are completely unique. It’s a must-have knitting tool for yourself or your favorite knitting aficionado.
Your first useful goal is simple: keep the correct number of loops on the needle while making one consistent knit stitch repeatedly.
What you need to start knitting
Essential supplies
- Yarn: Choose a smooth, light- or medium-colored Category 4, or worsted-weight, yarn.
- Two knitting needles: US 8 / 5 mm needles are a useful example with worsted yarn, but the yarn label or pattern takes precedence.
Helpful but optional tools
- Scissors
- A tapestry needle, also called a yarn needle, for weaving in ends
- A ruler or tape measure
- Stitch markers
- A crochet hook for rescuing a dropped stitch
Yarn and needles are enough to begin. Scissors and a yarn needle become useful when you finish the project. This basic supply list is consistent with Lion Brand’s beginner purchasing advice.
Choose beginner-friendly yarn
A reliable starting choice is smooth worsted yarn in CYC Category 4 / Medium. It is thick enough for the stitches to be visible without making the needles and loops uncomfortably large. The Craft Yarn Council’s yarn-weight system gives Category 4 a general needle range of approximately 4.5–5.5 mm, or US 7–9, and a broad stockinette gauge guideline of 16–20 stitches per 4 inches.
For practice, choose yarn that is:
- Smooth: Fuzzy fibers and textured embellishments can hide the individual loops.
- Light or medium in color: Black and very dark yarn make it harder to see where to insert the needle.
- Solid or lightly heathered: Highly variegated colors can make the stitch structure difficult to read.
- Not prone to splitting: A yarn that separates into multiple strands can catch on the needle tip.
Worsted yarn is a practical middle ground, not a universal best. Acrylic, wool, wool blends, cotton, and other fibers all behave differently and have different care requirements. Pick the yarn that is easiest to see and control for your first exercise. Lion Brand recommends smooth worsted yarn and light colors for beginners, while Knit Picks uses worsted yarn for several small practice projects.
The Tool Desk
Outbyte PC Repair FREERepair Windows errors before they cause bigger problemsFix Now →Outbyte Driver Updater FREEScan for outdated or missing drivers - takes under a minuteDriver Scan →Bulky yarn can make a project grow quickly, but very large needles and thick loops may feel awkward while you are learning tension. Worsted yarn is often easier for seeing and practicing the shape of each stitch.
Choose your knitting needles
For the worked example in this guide, use US 8 / 5 mm straight needles with worsted yarn. That is an example setup, not a rule. Check the yarn label, and follow the pattern’s needle and gauge instructions when making a specific item.
Straight, circular, and double-pointed needles
- Straight needles have a point at one end and a stopper at the other. They are intuitive for a small flat project.
- Circular needles have two needle tips joined by a flexible cable. You can use them exactly like straight needles for knitting back and forth. They are also used to knit seamless tubes in the round.
- Double-pointed needles are generally used for small circumferences in the round, such as sock toes or hat crowns. They are not needed for your first flat square.
Circular needles can be used for flat knitting, so do not worry if that is what you already own. When knitting in the round, however, you do not turn the work after every row, and you must check that the cast-on edge is not twisted before joining it.
Needle materials
- Wood or bamboo: Provides more grip, which can help keep stitches from sliding off.
- Metal: Smooth and fast, but it may feel slippery to a new knitter.
- Plastic: Lightweight and often inexpensive; the feel varies by needle.
There is no universally correct material. A beginner needle guide from Gathered describes these general trade-offs. Choose the pair that feels comfortable and has tips sharp enough to enter a stitch without splitting the yarn.
Quick wins for a faster PC:
Repair Windows errors before they cause bigger problemsFix Now →Scan for outdated or missing drivers - takes under a minuteDriver Scan →Basic knitting terms
- Working yarn
- The yarn attached to the ball or skein and the active stitch.
- Tail
- The loose end left over from the slip knot or finishing.
- Stitch
- One loop held on a needle.
- Row
- One complete pass across all stitches from one edge to the other.
- Needle with stitches
- The needle holding the loops you are about to work.
- Empty needle
- The needle used to form new stitches.
- Right side and wrong side
- The two faces of a flat piece. Garter stitch looks similar on both sides, while stockinette has a smooth side and a bumpy side.
- Cast on
- Create the first row of loops on a needle.
- Bind off
- Secure the final row so the stitches cannot unravel. In the UK, this is often called cast off.
How to hold the needles and yarn
The instructions below use right-handed English-style knitting: hold the needle with stitches in your left hand and control the working yarn with your right hand. The empty needle is held in your right hand.
Continental knitting holds the working yarn in the left hand. It makes the same knit and purl stitches; only the way you control and wrap the yarn differs. Crocheters sometimes find Continental knitting natural because the yarn remains in the left hand, but neither method is inherently correct or faster for everyone.
Rank #2

- Material: Knitting needles made of plastic material, with a smooth surface, not easy to break, not easy to wear, comfortable handle, reduce hand fatigue, you can rest assured to use it for a long time
- Size: Knitting needles set include 7 different sizes, namely 4mm, 5mm, 6mm, 7mm, 8mm, 9mm and 10mm. There are two of each size, which is convenient for you to choose the most suitable size according to your needs
- Wide application: Knitting needles are very suitable for various knitting hand-made, such as sweaters, scarves, blankets and accessories, etc. It is an ideal choice for beginners and professional knitting enthusiasts, and can also be used as a handmade gift for your family and friends
- Easy to use: These plastic knitting needles are quiet and silent when operating, avoiding disturbing people around. Lightweight, it helps to reduce the burden on the wrist and fingers, suitable for all knitting enthusiasts
- Package includes: You will receive 14 single point knitting needles in 7 sizes, each size contains two, with a variety of bright colors, making your knitting process more enjoyable. The design of different colors is easy to quickly identify and choose
Left-handed knitters can mirror the movements, use a left-handed video or written tutorial, or try Continental knitting if it feels more natural. The important landmarks are the same: identify the front of the stitch, put the yarn in the correct position, form a new loop, and slide the old loop off.
Keep the yarn controlled, not strangled. The stitches should slide along the thicker shaft of the needle. If the right needle cannot enter the next stitch, your tension is too tight. If loops fall off easily or large gaps appear between stitches, hold the yarn with slightly more control.
What’s actually slowing this PC down?
Pick the symptom - the matching free tool is one click away.
Step 1: Make a slip knot
- Make a loop near the end of the yarn, leaving a tail of several inches.
- Pull a small section of yarn through the loop to form a new loop.
- Place the new loop on the left needle.
- Pull gently on the tail and working yarn to snug the knot around the needle.
The knot should be secure but able to slide. Do not cinch it tightly around the tapered needle tip.
Stitch-count convention for this guide: the slip knot counts as the first stitch. Therefore, when the instructions say to cast on 36 stitches, the slip knot is stitch number one and you add 35 more stitches. This convention is not universal: some instructions say the slip knot does not count. Always follow the convention stated by the pattern or tutorial you are using. The difference is documented in the knitted cast-on instructions and the Craft Yarn Council’s pattern-reading handout.
Step 2: Cast on with the knitted cast-on
The knitted cast-on is a good first method because its hand motion closely resembles the knit stitch. It creates a relatively firm edge and does not require you to estimate a long yarn tail.
- With the slip knot on the left needle, hold the needle in your left hand. The working yarn should be at the back.
- Insert the right needle into the front of the slip-knot loop as if you were going to knit.
- Wrap the working yarn counterclockwise around the right needle.
- Pull the wrapped yarn through the existing loop to create a new loop on the right needle.
- Transfer that new loop from the right needle to the left needle without twisting it. You now have one additional stitch.
- Repeat the same process by inserting the right needle into the newly created last stitch on the left needle.
Continue until you have 36 stitches, including the original slip knot. Keep the loops loose enough to move along the needle shaft. The cast-on edge should not be stretched tightly around the narrow point of the needle.
Checkpoint: Count your stitches before beginning the first row. The loops should face the same direction, none should be twisted around the needle, and the edge should be flexible rather than rigid.
Other cast-on methods to try later
- Long-tail cast-on: Creates a neat, versatile, somewhat elastic edge, but requires estimating or measuring a yarn tail and can be harder to coordinate initially.
- Backward-loop cast-on: Very easy to learn, but it can produce a loose edge.
Some general beginner guides call long-tail the best first cast-on, while dedicated tutorials often start with knitted cast-on. That is a difference in teaching preference, not a contradiction about how knitting works. Use the knitted cast-on for this lesson, then try long-tail when you want a more elastic edge. Lion Brand’s cast-on guide compares the basic approach.
Step 3: Make the knit stitch
Work the following sequence on every stitch in the first row. Read the visual checkpoints as you go; they help you confirm that the loop is behaving correctly before moving on.
- Start position: Hold the needle with the cast-on stitches in your left hand and the empty needle in your right hand.
- Place the yarn: Keep the working yarn at the back of the work.
- Insert: Insert the right needle through the front of the first stitch, entering from left to right. The right needle should pass behind the left needle.
- Wrap: With your right hand, wrap the working yarn counterclockwise around the right needle.
- Pull through: Use the right needle to pull the new loop through the old stitch toward the front.
- Slide off: Slide the old stitch off the left needle. The new stitch is now on the right needle.
After step six, stop and look. The old loop must have left the left needle. If it remains there and you continue, you may accidentally create an extra stitch. Lion Brand’s basic knit-stitch sequence follows this same insertion, wrap, pull-through, and slide-off order.
Recommended Free Tools
Rank #3

- Complete Full-Size Knitting Needles Set: With more size choice than others, metal knitting needle set including 11 pairs straight knitting needles with size of B(2mm), C(2.5mm), D(3mm), E(3.5mm), G(4mm), 7(4.5mm), H(5mm), I(5.5mm),J(6mm), 7mm, L(8mm).Length: 9.8 inch/25cm. 9 pairs circular knitting needles in different sizes: 2.5 mm, 3.5 mm, 4.5 mm, 5.5 mm, 6 mm, 7 mm, 8 mm, 9 mm, 10 mm. The length of each circular knitting needles is approximately 31.5"/80cm.
- Easy to Use: Our circular knitting needles set are easy to use without damaging the yarn, the stitches don't slip off the needles and this knitting needles are very flexible, great for novice knitters, beginners and kids! The head of knitting needles marked accurate sizes that can help you recognize which one you need and easy to grip.
- Lightweight and Durable: Our knitting needles are made of stainless steel, lightweight and smooth to knitting, these knitting needles set are rust-free and durable, designed to last for years of use. Compared with bamboo knitting needles, use steel needles, the yarn will not stuck, you can fast knitting with no snagging or catching. A great knitting mate!
- Great Gift Idea for DIY Lovers: Our full-size knitting needles set is a warm and meaningful gift for any age - young, middle, elderly who loves knitting craftsmanship. Whether it is on Christmas, Thanksgiving, Mother's Day, Valentine’s Day, birthday, anniversary or other festivals, this knitting kit will be a perfect choice! To view our full range, click on "Visit the Katech Store".
- Wide Applications: Our all-in-one knit kit including everything you need to knit, this knitting needles set can be used to crochet dolls, hats, accessories, scarves, sweaters and other DIY Handicrafts. A set of different sizes of knitting accessories for all your knitting needs, from which you can choose the perfect needle to start your knitting project. It's the perfect choice for you to prepare gifts for your family or friends!
Repeat until every cast-on stitch has been worked. Do not pull the yarn sharply after each stitch. A new stitch should rest around the needle shaft and remain open enough for the next insertion.
Step 4: Turn the work and knit the next row
When you finish a row, all the worked stitches should be on the right needle and the left needle should be empty.
- Put the needle holding the stitches into your left hand.
- Put the empty needle into your right hand.
- Turn the fabric as if turning a page. The opposite face is now toward you.
- Keep the working yarn at the back and knit across the new row using the same six-step motion.
In flat knitting, you turn after every row. The cast-on edge is not counted as a worked row in the usual garter-stitch instructions. Each time you reach the end, change hands and turn the fabric before starting again. Lion Brand’s knit-stitch and garter-stitch explanation demonstrates this arrangement.
Step 5: Make garter stitch
Garter stitch means knitting every stitch on every row when working flat. Keep repeating the knit stitch across a row, turn the work, and knit across the next row.
Windows Errors? Fix Them Before They Spread
Repair common Windows errors and clear accumulated junk for a smoother, more stable PC - no reinstall needed.Free scan · no reinstallCrashes, No Sound, or Screen Glitches?
Random freezes, missing sound and display glitches usually trace back to one bad driver. Find and replace yours safely.Free scan · under a minuteGarter stitch creates horizontal ridges and is reversible, so both faces are broadly similar. It generally lies flatter than stockinette, making it forgiving for a first project. In garter stitch, each visible ridge represents two rows. If you count ridges rather than individual rows, multiply the ridge count by two. See Gathered’s garter-stitch explanation and Knit Picks’ guide to counting garter rows for the texture and counting details.
After every row, check three things:
- The same number of stitches remains on the needle.
- The old stitch has left the left needle.
- The working yarn is still attached to the active stitch and has not been accidentally pulled through the fabric.
After several rows, the fabric should show regular ridges. Early tension may be uneven; that is normal. Focus first on keeping the stitch count consistent.
Your first project: a garter-stitch square
This small project gives you enough repetition to learn the motion without committing to a long scarf.
Materials
- Smooth Category 4 / worsted-weight yarn
- US 8 / 5 mm straight needles, or a size that suits your yarn
- Scissors
- Tapestry needle
Instructions
- Make a slip knot and place it on the left needle. Count it as stitch one.
- Use the knitted cast-on to cast on 36 stitches total.
- Knit every stitch across the first row.
- Turn the work, move the full needle to your left hand, and knit every stitch across the next row.
- Repeat until the piece looks approximately square.
- Bind off using the instructions below.
- Cut the yarn, pull it through the final loop, and weave in both ends.
Knit Picks gives a comparable 36-stitch, worsted-yarn, US 8 / 5 mm example that may finish at approximately 7–9 inches, depending on personal gauge. Treat that measurement as a guide, not a promise. Yarn thickness, needle size, and how tightly you knit all change the finished dimensions. A 20–22-stitch piece is also useful if you want a compact practice swatch; a 36-stitch piece gives you a larger dishcloth-style square.
Step 6: Bind off
This basic knitwise bind-off is suitable for a practice square. It secures the final row with a firm, straightforward edge.
- Knit the first two stitches normally. Both stitches will be on the right needle.
- Insert the left needle into the first stitch on the right needle.
- Lift that first stitch over the second stitch and off the right needle. One stitch remains.
- Knit one more stitch, so there are again two stitches on the right needle.
- Lift the previous stitch over the newest stitch and off the needle.
- Repeat steps four and five until only one stitch remains.
- Cut the yarn, leaving approximately a 6-inch tail for a small practice piece.
- Pull the tail through the final loop and tighten gently.
Do not pull the bind-off so tightly that the edge cannot lie flat. A basic bind-off works well for this square, but stretchy projects such as cuffs, necklines, and socks may need a more elastic bind-off. Lion Brand’s bind-off overview explains why different edges need different degrees of stretch.
Rank #4
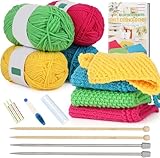
- [ Knitting Needles Set for Beginners ]: Aeelike knitting kits include almost everything you may need, such as super soft cotton yarns, smooth bamboo and metal knitting needles, and other useful knitting accessories, sufficient enough to meet your daily knitting needs. Besides, these single pointed needles are smooth, flawlessly tapered and ideal for all yarns and every project.
- [ Easy to Learn & Follow ]:This dishcloth knitting kit is beginner- friendly and comes with detailed instructions and demonstrations that clearly showed 4 different knitting patterns, making learning knitting skills a breeze and helping adults go from beginner to expert, also helping someone who has been crocheting for a while to start on a new craft.
- [ Versatile and Practical ]: With this premium knitting set, you will relax yourself and gain much fun as you dive into the knitting world. Meanwhile, the finished dishcloth crafted with high-quality cotton crochet yarns is suitable for washing machion, easy to wash and dry, perfect for multiple daily uses like washing dishes and wiping desks or windows, even can be used as cup coasters, which is so worthwhile that no one wants to miss.
- [ Why We Sell the Knitting Kit ]: Knitting product is unlimited styles and a characteristic artistic handmade product that can not be replaced by any mechanical product. Also, it is a best choice for beginner knitter who want to try a new hobby, so try it now and easily finish your first craft projects!
- [ Great Gift for Anyone Who Knitting ]: This cute knitting set is a wonderful gift for any age - young, middle, elderly who loves knitting craftsmanship. Whether it is on Christmas, Thanksgiving, Mother's Day, Valentine's Day, birthday, anniversary or other festivals, Aeelike knitting kit can be your ideal choice.
Step 7: Weave in the ends
- Thread one yarn tail onto a tapestry needle.
- On the wrong side of the fabric, weave the needle through several nearby stitches.
- Change direction once or twice so the tail is held securely.
- Trim the excess yarn close to the fabric without cutting the knitted stitches.
- Repeat with the other tail.
A tail of about 6 inches is generally workable for a small square. If a tail will be used to seam pieces together or join fabric, leave it substantially longer instead of trimming it first.
Learn the purl stitch next
Once you can knit several rows and bind off, purling is the next useful skill. The essential difference is yarn position:
Free tools Windows power users keep installed
One-click scans. No signup required.
- Knit: working yarn at the back.
- Purl: working yarn at the front.
- Bring the working yarn to the front of the work, between the two needles.
- Insert the right needle into the front of the next stitch from right to left.
- Wrap the working yarn around the right needle.
- Pull the new loop through the old stitch.
- Slide the old stitch off the left needle.
That makes one purl stitch. Move the yarn back behind the work before knitting again. If you forget to move it, you can create an accidental yarn over and an extra stitch. Lion Brand’s purl glossary and Gathered’s purl guide show the yarn-front position and needle movement.
Make stockinette stitch
Stockinette, also called stocking stitch in the UK, alternates knit and purl rows when you are knitting flat:
Row 1: Knit every stitch
Row 2: Purl every stitch
Repeat rows 1 and 2
One side has smooth columns shaped like little Vs. The other side has bumps created by the purl stitches. Stockinette is a logical second practice fabric, but it tends to curl at the top, bottom, and side edges. That is why an unbordered stockinette scarf can be frustrating as a first project. Garter stitch, ribbing, or another border can help control the curl. When stockinette is knitted in the round, knitting every round produces the smooth stockinette fabric because every round is viewed from the outside. See Gathered’s stocking-stitch explanation for the flat-knitting repeat and curling behavior.
Independent reader supportYour contribution helps us test, update, and keep practical guides available for everyone.Do you need a gauge swatch?
Gauge is the number of stitches and rows you produce over a specified measurement. It matters when the finished size matters.
Skip an exact gauge swatch for: a practice square where you only want to learn the motion. A dishcloth, scarf, or simple bag may also be forgiving if an exact size is not important.
Do not skip gauge for: a hat, sweater, sock, fitted accessory, or any pattern with specified dimensions. A small difference in stitches per inch can make a wearable object significantly too large or too small.
To check gauge:
- Use the same yarn, needles, and stitch pattern specified for the project.
- Make a swatch larger than the area you need to measure; approximately 5–6 inches across is a practical starting point.
- Wash and block the swatch if the finished item will be washed and blocked.
- Lay it flat without stretching it.
- Count the stitches and rows across the pattern’s specified measurement, often 4 inches.
- If you have too many stitches in that measurement, use a larger needle.
- If you have too few stitches, use a smaller needle.
Needle size changes gauge, but so does personal tension. Yarnspirations’ gauge instructions cover swatch size, washing, measurement, and needle-size corrections.
How to read a simple knitting pattern
Patterns use abbreviations to keep repeated instructions short. These are common U.S. knitting terms:
Best Value

- Complete Knitting Needles Set: This knitting needles set includes 9 pairs (18 needles) of bamboo knitting needles in sizes 2mm, 3mm, 4mm, 5mm, 6mm, 7mm, 8mm, 9mm, and 10mm. You also receive 6 stitch holders. All needles are 9.8 inches (25 cm) long, providing a wide range for your knitting projects
- Smooth Bamboo Material: These bamboo knitting needles are made of lightweight, smooth bamboo. The polished surface helps yarn glide easily with less snagging, making them comfortable to hold for longer periods without tiring your hands
- Single-Pointed Design: Featuring a single-pointed tip, these wooden knitting needles help keep your stitches securely on the needle, reducing the chance of them falling off accidentally. This design helps you manage stitches as you work
- For Various Projects & Skill Levels: From thin 2mm to thick 10mm needles, this set handles different yarns. It's a practical knitting needle set for scarves, hats, or small crafts, useful for both learning and experienced knitters
- Organized & Easy to Use: Each needle is permanently marked with its size for quick selection. The included stitch holders help you pause projects neatly. This organized knitting accessories kit helps you start and manage your work
| Abbreviation | Meaning |
|---|---|
CO |
Cast on |
BO |
Bind off |
k |
Knit |
p |
Purl |
st or sts |
Stitch or stitches |
rep |
Repeat |
RS |
Right side of the work |
WS |
Wrong side of the work |
st st |
Stockinette stitch |
g st |
Garter stitch |
For example, Row 1: k across means knit every stitch in that row. CO 36 sts means cast on 36 stitches. A pattern may define special abbreviations separately, so read its abbreviation key before starting. The Craft Yarn Council’s knitting abbreviation list is a useful reference.
Terminology can differ by country. U.S. bind off is often UK cast off, and U.S. stockinette stitch is commonly UK stocking stitch. Confirm the pattern’s terminology before following instructions from another country.
Common beginner knitting problems and fixes
Count your stitches before trying to repair anything. A piece that looks uneven may simply reflect early tension changes. If the stitch count is stable and the fabric is improving, you may not need to undo it.
| What you see | Likely cause | What to do |
|---|---|---|
| The first row is almost impossible to knit. | The cast-on edge is too tight. | Restart more loosely. Let each loop rest around the needle shaft rather than pulling it tight around the tapered tip. The knitted cast-on may be easier to control than long-tail for this exercise. |
| The work gradually becomes wider. | An extra stitch has been added, often by wrapping the yarn over the needle unintentionally or knitting into the space between stitches. | Count at the end of every row. If the extra stitch is recent, undo back to it. If it is several rows down, carefully unravel to the error and work forward again. |
| The work gradually becomes narrower. | A stitch was dropped, or two stitches were accidentally worked as one. | Look for a loose loop and a vertical ladder of yarn. Secure the loop immediately with a crochet hook, safety pin, or locking marker. Pick it up one ladder at a time, or unravel back to the mistake if that is clearer. |
| A sudden hole appears with one extra stitch. | An accidental yarn over. | For a recent error, undo the extra wrap. For an older error in a project where the stitch count matters, unravel to the hole and correct it rather than ignoring it. |
| A stitch looks twisted. | The loop was placed back on the needle facing the wrong way. | Turn the loop so its legs face the same direction as neighboring stitches before working it. Do not force the needle through a twisted loop. |
| The edge is loose and uneven. | Inconsistent cast-on tension. | Practice the cast-on separately. Aim for loops that touch the needle without stretching the yarn. A backward-loop cast-on may be particularly loose, so try knitted or long-tail cast-on for a firmer edge. |
| You cannot see where the needle should go. | The yarn is too dark, fuzzy, textured, or embellished. | Switch to a smooth, light- or medium-colored yarn while learning. |
| The fabric looks uneven but the stitch count is correct. | Your tension is still developing. | Keep going for several rows. Many beginners tighten the first stitches of a row or change tension as they concentrate. Regular practice usually improves this; do not unravel every imperfect stitch. |
| You lose track of rows. | Rows were not recorded as you worked. | Count garter ridges, remembering that one ridge equals two rows. Mark every fifth or tenth row on paper, or use a removable row counter or stitch marker. |
| A project is much too large or small. | Your gauge differs from the pattern’s gauge. | Make and measure a swatch. Use larger needles for fewer stitches per measurement or smaller needles for more stitches per measurement. |
| You return to circular-needle work in the wrong direction. | Flat knitting and knitting in the round were confused. | Flat knitting turns after every row. In-the-round knitting continues around the tube without turning. Before joining in the round, make sure the cast-on edge is not twisted. |
How to rescue a dropped stitch
A dropped stitch usually appears as a loose loop with horizontal strands, or ladders, above it. Stop pulling the fabric and secure the loop so it cannot run farther down. A crochet hook is the easiest rescue tool: place it through the dropped loop and pull the lowest horizontal strand through the loop, then continue one ladder at a time until the loop reaches the row being worked. Place the recovered stitch back on the needle with the correct leg facing forward.
What’s actually slowing this PC down?
Pick the symptom - the matching free tool is one click away.
Garter stitch can be less visually obvious to repair than stockinette because its structure alternates direction. If you cannot tell which strand belongs next, secure the stitch and unravel carefully back to the error. A small amount of undoing is safer than pulling random strands. Knitting.com’s dropped-stitch guide covers ladders, securing the loop, and crochet-hook recovery.
What to knit after your first square
- Make another garter-stitch square and aim for more even tension.
- Turn the square into a small dishcloth or practice piece.
- Practice a swatch of purl stitches.
- Make a stockinette swatch and observe its smooth side and curling edges.
- Try a simple ribbed project using alternating knits and purls.
- Choose a beginner pattern with clear gauge information and little or no shaping.
- Learn circular knitting when flat knitting and stitch counting feel comfortable.
A scarf is geometrically simple, but it can require a great deal of repetitive knitting. A small square, dishcloth, headband, cowl, or other short project can provide a faster first finish. Choose a scarf later if you enjoy the repetition.
Quick first-project checklist
- Choose smooth, visible Category 4 / worsted yarn.
- Use needles appropriate for the yarn; US 8 / 5 mm is a practical example.
- Cast on 36 stitches, counting the slip knot as stitch one for this tutorial.
- Keep the working yarn at the back for every knit stitch.
- Complete the stitch by sliding the old loop off the left needle.
- Turn the work after each flat-knitting row.
- Count stitches at the end of every row.
- Knit every row to create garter stitch.
- Bind off, pull the tail through the last loop, and weave in both ends.
Frequently Asked Questions
Can I learn knitting with circular needles?
Yes. Circular needles can knit flat projects back and forth just like straight needles. For a first square, use the two needle tips as if they were straight needles and turn the work at the end of every row. Joining circular knitting in the round is a separate skill: it does not involve turning, and the cast-on edge must not be twisted.
Does the slip knot count as a stitch?
It depends on the instructions. In this guide, the slip knot counts as the first stitch, so casting on 36 means making the slip knot and adding 35 stitches. Some patterns say the slip knot does not count, so follow the convention stated by the pattern.
PC Slower Than It Used to Be?
A free scan shows the junk files, broken settings and background clutter dragging Windows down - then fixes them in one click.Free scan · Windows 10 & 11Outdated Drivers Are Slowing You Down
One free scan finds every outdated or missing driver and matches the right update for your exact hardware.Free scan · exact hardware matchWhy is my knitted square getting wider?
You probably added stitches, often through an accidental yarn over or by knitting into the gap between stitches. Count the stitches at the end of each row. If the extra stitch is recent, undo the last few stitches to it and work them again.
Is gauge important for a beginner?
Not usually for a practice square whose exact size does not matter. Gauge is important for hats, sweaters, socks, fitted accessories, and patterns with specified dimensions. Use the same yarn, needles, and stitch pattern as the project when making a gauge swatch.
The Bottom Line
For your first successful project, keep the sequence small: cast on, knit every stitch across every row, turn after each row, bind off, and weave in the ends. That is enough to make a useful garter-stitch square. Add purling, stockinette, gauge, and pattern reading one skill at a time.
Quick Recap

Product prices and availability are accurate as of the date/time indicated and are subject to change. Any price and availability information displayed on Amazon at the time of purchase will apply.
Quick wins for a faster PC:
Clear out junk files and repair common Windows errorsFree Scan →Scan for outdated or missing drivers - takes under a minuteDriver Scan →



