ThatPainter is reader-supported. When you buy through links on our site, we may earn an affiliate commission. Learn More
You can make a beginner-friendly paper ranunculus by building a paper-ball center on floral wire, wrapping it in green crepe paper, and gluing shaped petals around it from smallest to largest. Add leaves and floral tape to finish the stem; for a second bloom, make a smaller closed bud and tape its wire alongside the main stem. The steps below follow a ranunculus-specific template and supply list, with notes on a separate project that uses a different material setup.
As an Amazon Associate I earn from qualifying purchases.
What do you need to make a paper ranunculus?
Gather the materials for one tutorial as a matched set rather than mixing instructions and templates from different projects. The Søstrene Grene ranunculus tutorial calls for crepe paper, paper balls, floral tape, a glue gun, side-cutting pliers, stem wires, and scissors. Its template supplies the petal and leaf shapes and sizes, so print it before cutting.
Free tools Windows power users keep installed
One-click scans. No signup required.
- Crepe paper in a petal color and green
- One larger paper ball for the open flower, plus a smaller one if you want a bud
- Stem wire for the flower and, optionally, the bud
- Floral tape
- A glue gun
- Scissors and side-cutting pliers
- The project template, printed at its intended size
A separate project, Lia Griffith’s Kid’s Crepe Paper Ranunculus, specifies 18-gauge green paper-covered stem wire, floral tape, craft scissors, a low-temperature glue gun, and needle-nose pliers or wire cutters. Its project page offers a PDF template, SVG files, written instructions, and photo guidance; it describes the project as premium, with one-time purchase and membership options. Check the page for current access terms before choosing it.
Popular on Amazon

- Great Value Paint Brush Set: Soucolor 20 acrylic paint brushes come in 10 different sizes, making them ideal for fine detailing, model painting, rock painting, nail art, face painting, DIY crafts, and general art projects. The varied brush sizes give you better control for both delicate lines and broader color coverage, while the soft bristles deliver smooth, consistent results on acrylic, oil, watercolor, canvas, wood, ceramic, and more.
- Awesome Set of Paint brushes: Professional paint brushes can cover all of your needs. The multi-purposed brushes are ideal for Watercolor, Oil, Gouache, enamel, Acrylic Painting, Body, Nail, Face Painting, Miniature, Model, Wood, Glass, Cup, Ceramic, Fine work, Art class, Craft Art Painting, DIY Art Crafts etc.
- Soft and long-lasting: The bristles are soft and strong, with nickel metal ferrules and blue wooden handles. After cleaning, the bristles will become soft and fluffy again and will not fall off.
- Easy to clean: it’s very convenient to Wash well in soap and water. Retain shape after drying. the brushes hold up very well. Nice selection to beginners and professionals. Keep them clean and they last a long time.
- Perfect for All Painters & Occasions: Suitable for art beginners, hobbyists and professional artists. Great for art class, home creation, travel painting and DIY handmade projects. A practical art gift for students, teachers, family and craft lovers.
These are different material setups, not a single combined supply list. Follow the template and supplies that belong to the tutorial you choose: wire covering, gauge, paper-ball size, and template dimensions can vary. A cutting machine is optional for the Lia Griffith project, which also lists scissors. Its kit index lists a Crepe Paper Ranunculus Flower Kit and multiple template and instruction versions; check that page for the current contents and availability.
How do you prepare the center and stem wire?
Start with the center, because it anchors the petals and gives the flower its stem. The ranunculus-specific tutorial uses a paper ball fixed to stem wire, then covers the ball with green crepe paper.
- Print and cut the template. Keep the petal and leaf pieces organized by size. You will use the template to cut the paper shapes and follow its specified petal counts.
- Attach the larger paper ball to a stem wire. Secure the ball so it stays in place while you glue petals around it. The tutorial calls for a glue gun; take care around the hot tip and glue.
- Prepare a green covering. Cut a piece of green crepe paper large enough to wrap around the ball. Smooth or gently shape it, then glue it around the paper ball to cover the center.
- Make a second center if you want a bud. Fix the smaller paper ball to a separate wire and cover it with green crepe paper in the same way. Set both centers aside while you prepare the petals.
Keep the main wire accessible below the covered ball; you will wrap it with floral tape after adding the flower. Avoid pulling the green covering so tightly that it shifts or exposes the ball. If the paper does not cover the center neatly, adjust it before the glue sets rather than relying on petals to hide a loose or slipping base.
The Tool Desk
Outbyte PC Repair FREERepair Windows errors before they cause bigger problemsFix Now →Outbyte Driver Updater FREEFix the driver behind crashes, sound loss and screen glitchesFind Drivers →How do you cut and shape the petals?
Cut the petals from the color crepe paper using the template, and cut the green leaves from the leaf pattern. Follow the template’s sizes and quantities instead of guessing: the petal sizes determine the order and coverage of the flower.
Also popular on Amazon
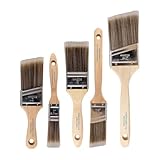
- COMPLETE 5-PIECE BRUSH SET FOR EVERY PAINTING TASK — Includes 1 Inch Flat, 1.5 Inch Angle, 2 Inch Flat, 2 Inch Angle Stubby, and 2.5 Inch Angle brush giving you every size professional painters use daily. Get all 5 for less than the price of a single brush from hardware store brands — professional grade performance at a fraction of the cost. Perfect for walls, trim, cabinets, doors, furniture, and detailed cutting-in work on any project.
- ZERO BRISTLE LOSS — GUARANTEED BY PRECISION ADHESIVE BONDING — Every bristle is locked in place with precision-set adhesive that keeps them in the brush — not in your paint job. The coated steel ferrule provides structural support while the adhesive bond ensures clean performance on every stroke. Premium SRT synthetic filaments load more paint and release it evenly for a smooth streak-free finish on walls, ceilings, and trim. Works with latex, oil-based paint, primer, sealer, and wood stain.
- INCLUDES THE ANGLE STUBBY MOST SETS LEAVE OUT — Professional painters know the 2 Inch Angle Stubby is the go-to brush for tight cabinet interiors, window sashes, inside corners, and detailed trim where standard angle brushes are too long. Combined with the 1.5 and 2.5 inch angle sash brushes you have precision cutting-in covered at every scale — baseboards, crown molding, door casings, and ceiling lines.
- FLAT BRUSHES FOR BROAD SMOOTH COVERAGE ON ANY SURFACE — The 1 and 2 inch flat brushes deliver even coverage on walls, furniture, shelving, doors, fences, decks, and wood surfaces. Ideal for applying primers, stains, varnishes, polyurethane, and specialty coatings. Solid wood handles provide all-day comfort and control for both professional contractors and weekend DIY homeowners tackling interior or exterior painting projects.
- TRUSTED BY PROFESSIONAL PAINTERS AND CONTRACTORS NATIONWIDE — Pro Grade delivers professional-grade results at a price that makes sense for crews who go through brushes on every job. Ideal for property managers, remodeling contractors, apartment turnover crews, maintenance teams, and commercial painting operations. Backed by thousands of verified reviews from working painters. Washable and reusable for multiple projects.
- Sort the pattern pieces. Keep each petal size in a separate group. This makes it easier to start with the smallest pieces and work outward without losing track of the layers.
- Cut the specified number in each size. Place the template on the crepe paper and cut the shapes cleanly with scissors. Also cut the leaves from green crepe paper.
- Shape each petal into a rounded form. Gently form the crepe paper with your fingers so the petal is cupped rather than flat. Work gradually; the goal is a rounded petal that can sit around the center, not a sharply creased fold.
The general crepe-paper flower guidance from Martha Stewart also covers cutting, shaping, taping, and attaching leaves. Use general advice like that for handling the paper, but let your chosen ranunculus template determine the flower’s specific shapes, counts, and assembly order.
If a cut edge is uneven, trim it before assembly so it does not catch on neighboring petals. If the crepe paper begins to flatten while you work, gently reshape it before gluing. Keeping the pieces sorted and cupped helps you avoid having to pull apart a layer later to correct the order.
How do you layer the petals for an open flower?
Glue the smallest petals around the covered large center first, then continue adding petals in the template’s size sequence. The smaller inner layer establishes the flower’s center; the larger outer layers build the open bloom.
- Position the smallest petal against the center. Apply glue where the petal will meet the green-covered ball, then press it into place.
- Continue around the center. Add the remaining smallest petals around it, placing them next to one another to form the first layer.
- Add the next size outward. Glue the next group around the first layer. Keep each petal rounded and arrange the pieces to cover the joins beneath them.
- Repeat with the remaining sizes. Work from smaller petals to larger ones until you have used the template’s specified pieces. Check the flower as you go so the layers form an open, rounded bloom rather than a flat ring.
Do not glue every petal at once and then try to fit the entire layer around the flower. Attach them one at a time so you can adjust their position and maintain an even outline. If one petal sits too far out of line, correct it before moving on to the next group. Small differences are part of a handmade flower; the practical aim is a secure, rounded arrangement with the center covered.
Also popular on Amazon
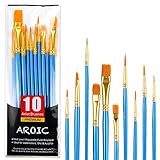
- 【All sizes of art brushes】: The 10 sizes of multi-functional brushes have various shapes, making the mixing color easier, which is very suitable for artists, students, teenagers, children and painters at all levels. Wonderful Present ideas for friends and family who like painting!
- 【general brush set】: Professional paint brush can meet all your needs. Multifunctional brush is very suitable for watercolor, oil, gouache, acrylic painting, body, nail, face painting, miniature, model, ceramics, arts and crafts painting, etc.
- 【high quality process】: It is designed with anti falling bristles, anti-rust nickel ferrule and solid wood handle. You can use the brush to focus on the painting and always be creative.
- 【easy to maintain】: After using the brush, it is very convenient to clean the brush with warm soapy water and reshape the tip of the brush. Air dry the brush and place it on top of the top for long use.
- 【100% satisfaction guarantee - buy now】1 packs of set brushes, you can also get friendly customer service, any questions feel free to contact us, within 24 hours to help you! There is no risk in buying our paint brush kit.
The tutorial’s instructions are tied to its own template and specified petal counts, so there is no universal number of petals to substitute. If you choose another project’s template, use its instructions rather than transferring the counts from this one.
How do you make a smaller closed bud?
A closed bud uses the smaller paper-ball center and a short layer of three or four petals. Keep those petals close around the ball instead of opening them out like the main flower.
- Take the smaller, green-covered center on its separate wire.
- Shape three or four petals and glue them around the ball, keeping the bloom closed.
- Set the bud aside until you are ready to combine its stem with the open flower.
This is an optional variation, not a required part of the single-flower tutorial. Making a second bloom gives the finished stem a different shape, but it also adds a second wire to secure and wrap. If you are learning the petal sequence, finish the open flower first; then make the bud with the same materials and attach it once both blooms are secure.
Quick wins for a faster PC:
Clear out junk files and repair common Windows errorsFree Scan →Scan for outdated or missing drivers - takes under a minuteDriver Scan →Repair Windows errors before they cause bigger problemsFix Now →How do you add leaves and finish the stem?
Glue small leaves near each bloom, then wrap the flower wires with floral tape and join the bud stem to the main stem. Position the larger leaves along the combined stem before finishing the wrap.
Also popular on Amazon

- 【KIDS PAINT BRUSHES SET】Anezus paint brushes for kids come with 10 pcs paint brushes of 5pcs round paintbrushes and 5 flat paint brushes with colorful handles, good for the young artist to explore their creativity in painting and crafting
- 【HIGH QUALITY PAINT BRUSHES FOR KIDS】These toddler paint brushes made of soft hog bristle, bright colored handles and rust proof ferrules. The bristles are firmly fixed in the kids paint brushes and no shedding. Each children paint brush measure 6 1/4 inches (16cm) in length and ferrules 1/2"(1.3cm) diameter, large enough for the little hand to grip and control
- 【WIDE APPLICATIONS】With combination of round and flat craft paint brushes for kids, work great with washable paint, tempera paint and acrylic paint. Great for arts and craft, rock, leather, gesso and ceramic, or body, nail and face art painting.
- 【EASY TO CLEAN 】After using paint brushes for acrylic, oil or watercolor painting, it’s very convenient to clean them with warm soapy water and reshape the paint brush tips. Keep these craft paint brushes clean and they last a long time.
- 【GREAT GIFT IDEA】Perfect for students, teens, kids, children and painters of all levels. Wonderful gift idea for girls, boys and kids who love painting! These all-purpose paint brushes for kids are ideal for kids' school projects, birthday parties, painting parties, art parties, back to school supplies, classroom decoration and more.
- Add small leaves by the flowers. Glue the tutorial’s small leaves near the base of each flower, close to where the bloom meets its wire.
- Wrap the open-flower wire. Start the floral tape near the flower and wrap downward along the stem.
- Wrap the bud wire. Cover its wire too, then hold it against the main stem around the middle of the larger stem.
- Arrange the larger leaves. Place them along the stem, then continue wrapping so the leaves and the joined bud wire are secured.
- Shape the finished flower. Adjust the petals and stems gently to give the blooms their final form.
Floral tape covers and binds the wires; the tutorial’s sequence has you wrap each flower stem and then tape the smaller stem to the larger one. Keep the bud alongside the main stem rather than trying to hide its wire behind the flower head. Check that the branches are held together and the leaves sit where you want them before you finish the wrap.
Independent reader supportYour contribution helps us test, update, and keep practical guides available for everyone.Which tutorial or kit should a beginner choose?
Choose based on the kind of guidance you want and whether you prefer hand-cutting or machine cutting. The available sources describe project formats and materials, but do not establish that one option produces a better-looking flower.
| Option | Guidance described | Best fit |
|---|---|---|
| Søstrene Grene ranunculus tutorial | Ranunculus-specific steps, template, and supply list | A concise guide with a defined material set |
| Lia Griffith Kid’s Crepe Paper Ranunculus | Written instructions, PDF template, SVG files, and photo tutorial; page identifies it as a premium project | A more structured project with multiple forms of guidance |
| Lia Griffith kit index | Lists a ranunculus kit and updated and original template, SVG, and instruction versions | A reader looking for a kit-based project route; verify current contents |
For the premium project or kit, check the source page for current access, price, and contents: those details can change. The kit index names the ranunculus project, but the available information does not establish the contents or availability of a particular current retail listing. A cutting machine is not essential to the project page’s listed options; it includes craft scissors as well as machine choices.
What’s actually slowing this PC down?
Pick the symptom - the matching free tool is one click away.
What should you do if the flower looks uneven or loose?
Most assembly problems are easier to fix before the next layer goes on. Pause between petal sizes and check the center, spacing, and attachment points while they are still accessible.
Also popular on Amazon

- 【162-Piece Bulk Set | Dual Brush System】Maximize versatility with 81 flat brushes (0.59 inch edge for bold strokes) and 81 round brushes (0.39 inch tips for details) – 3X more tools than standard kits! Pre-sorted in labeled compartments for instant access during painting sessions. Ideal for art classrooms, mural projects, and multi-artist households.
- 【Pro-Grade Durability | Zero Shedding Guarantee】 "Engineered with triple-crimped nylon bristles (43% higher resilience vs. standard) and aerospace aluminum ferrules tested for 10,000+ flex cycles. Lab-verified 0.01% shedding rate even with heavy impasto techniques – outperforms flimsy bristles in budget brushes."
- 【Multi-Scenario Readiness | Event & Daily Use】 Optimized for: Thanksgiving/Christmas face designs classroom projects ceramic decorating fabric printing and model painting; Lightweight plastic handles each reduce hand fatigue during prolonged sessions
- 【Effortless Maintenance | Long-Term Durability】 Clean with warm soapy water in 10 seconds; Reshape tips and air-dry vertically to preserve bristle integrity,After use, air-dry brushes thoroughly and store upright in the provided case to preserve bristle shape. The premium nylon filaments naturally regain their original form after each stroke. For cleaning, simply rinse in warm soapy water and gently reshape bristles with fingertips."
- 【Multiple Application】These acrylic paint brushes can be applied for most occasions,such as:watercolor,oil, gouache paint,face paint, acrylic paint, suitable for Thanks Giving Day, Christimas, Halloween face and body painting, canvas painting, fabric, rock, miniature, model, ceramics, arts and crafts painting, etc.
- The center shows through: Check that the inner petals begin at the base of the green covering and sit close together. Add the next petals only after the inner layer is positioned securely.
- The bloom looks flat: Gently re-form the petals into rounded shapes before gluing, and preserve that curve as you place them around the center.
- The outline looks lopsided: Compare the placement of the petals in the current size group. Adjust a piece before adding more petals over its edge.
- A petal shifts: Hold it in position while the glue sets, taking care with hot glue. If it remains loose, secure the join before covering it with another layer.
- The bud opens too much: Bring its three or four petals closer around the smaller ball and hold them in a closed position as you attach them.
- The stems separate: Reposition the bud wire against the main stem around its middle and wrap floral tape firmly enough to bind the two wires together.
If a piece cannot be adjusted cleanly, avoid tugging hard on the surrounding crepe paper. Remove or reposition it only as far as needed to secure the join; then reshape the petal and continue. The paper can be handled gently, but it is still possible to tear or distort it by pulling against a glued edge.
Frequently Asked Questions
Can I make a paper ranunculus without a cutting machine?
Yes. The described ranunculus projects include hand-cutting as an option, and the Lia Griffith project lists craft scissors alongside optional machine choices. Use the template that belongs to your chosen project and cut the pieces by hand.
What wire gauge should I use for a crepe-paper ranunculus?
The Søstrene Grene supply list specifies stem wire without stating a gauge. Lia Griffith’s separate project specifies 18-gauge green paper-covered stem wire, so use that size only if you are following that project’s material setup.
Free tools Windows power users keep installed
One-click scans. No signup required.
Can I use tissue paper instead of crepe paper?
The cited ranunculus tutorials specify crepe paper, and their instructions and templates are designed for that material. The cited tutorials do not establish how tissue paper would behave with those templates, so a tissue-paper version would require different guidance.
Quick Recap


