Outdated Drivers Are Slowing You Down
Recommended Free Tools
One free scan finds every outdated or missing driver and matches the right update for your exact hardware.Free scan · exact hardware match
Windows Errors? Fix Them Before They Spread
Repair common Windows errors and clear accumulated junk for a smoother, more stable PC - no reinstall needed.Free scan · no reinstall
ThatPainter is reader-supported. When you buy through links on our site, we may earn an affiliate commission. Learn More
The easiest protest sign is a lightweight piece of poster board or recycled cardboard with one short message, large high-contrast lettering, and a simple symbol. You can make one in about 30–60 minutes with a pencil, ruler, broad markers or paint, scissors, and tape. Before you start, check the rules for the specific event or property: some venues restrict sign size, materials, handles, or how signs may be carried.
This guide shows how to plan, letter, decorate, reinforce, and test a protest sign that remains readable in a crowd without becoming unnecessarily heavy, sharp, or difficult to carry.
PC Slower Than It Used to Be?
A free scan shows the junk files, broken settings and background clutter dragging Windows down - then fixes them in one click.Free scan · Windows 10 & 11Crashes, No Sound, or Screen Glitches?
Random freezes, missing sound and display glitches usually trace back to one bad driver. Find and replace yours safely.Free scan · under a minuteWhat you need
Basic supplies:
- Poster board, corrugated cardboard, or recycled shipping-box cardboard. If you want to buy one, protest sign poster board is a convenient starting material, but recycled cardboard works just as well for many short-term signs.
- Pencil, ruler, and eraser
- Broad permanent markers, water-based craft paint, or a large paintbrush
- Scissors
- Glue stick, paper glue, masking tape, or packaging tape
Optional: printed photographs, colored paper, stencils, letter templates, or a wide-tip marker such as jumbo permanent markers for large lettering.
A craft knife can help cut thicker cardboard, but use one only with appropriate adult supervision and a safe cutting surface. You do not need every item on this list: a marker and a recycled box can be enough.
Cardboard and poster board have long been common protest-sign materials, from simple painted cardboard to more elaborate poster-board artwork. The Getty’s documentation of preserved protest signs shows how varied these materials and designs can be. Learn more about preserving signs of protest at the Getty.
#1 Best Overall
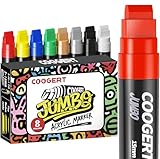
- MULTI-SURFACE – permanent jumbo paint markers are versatile enough to be used on a variety of surfaces, paint markers for canvas, posters, banner, sign, wall, fabric, wood, , rocks, glass, plastic, metal ,anchor charts, car, windows, cardboard and more
Before making it: check the venue rules
A craft tutorial cannot tell you what is allowed at a particular demonstration. Read the event organizer’s instructions and the rules of the property where you will gather. Restrictions may cover:
Quick wins for a faster PC:
Scan for outdated or missing drivers - takes under a minuteDriver Scan →Repair Windows errors before they cause bigger problemsFix Now →Fix the driver behind crashes, sound loss and screen glitchesFind Drivers →- Maximum sign dimensions
- Materials, such as requirements for soft cardboard, poster board, or cloth
- Handles, poles, or other supports
- Whether signs may be attached to fences, buildings, or other property
- Where signs may be carried or displayed
For example, National Park Service demonstration guidance describes protected expressive activity while also requiring compliance with site-specific regulations and safety requirements. A National Mall notice illustrates how federal demonstration venues can impose material and size limits. Check National Park Service demonstration information and the rules for your actual location. The ACLU also explains that peaceful assembly and symbolic expression, including carrying signs, are generally protected while noting that restrictions and enforcement vary by place and circumstance. Read the ACLU’s guide to protesters’ rights.
Step 1: Choose one short message
Write the message before decorating the sign. A handheld sign is usually most effective when it communicates one idea—a demand, question, short quotation, organizational name, or call to action—in a quick glance.
- Write the full idea on scrap paper.
- Make three shorter versions.
- Choose the version with the fewest words that still says what you mean.
- Check every quotation, name, statistic, and claim for accuracy before lettering it.
Do not shrink a long paragraph until it barely fits. If the idea needs explanation, consider making a second sign or using a short headline with one supporting line.
Step 2: Choose the size and orientation
A landscape rectangle is easy to hold at chest height and gives a short horizontal phrase room to breathe. Portrait orientation can work well for a tall symbol, a compact vertical message, or a sign intended to be photographed.
Recommended Free Tools
Before cutting or drawing, think about how you will carry, transport, store, and photograph the sign. Poster board or a recycled shipping box is normally adequate for a simple handheld sign. For wind or repeated handling, reinforce the board rather than making it unusually thick or heavy.
Rank #2
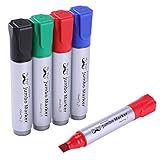
- The package includes four jumbo markers with 0.4" chisel tip
- Great ink supply lasts a long time
- Mr. Pen fast-drying permanent markers are available in black, green, red and blue
- Wide point permanent marker makes extra-large lines in one pass
- Perfect for use on wood, foil, boxes, poster board, concrete, stone, tile, brick, metal, plastics, vinyl, and wax paper
There is no single universally required poster size, handle type, or lettering measurement. An 18-by-24-inch or 24-by-36-inch foldable cardboard construction can be a useful maker approach for a larger sign, but it is not a universal engineering standard or a guarantee that the dimensions will be accepted at your venue.
Step 3: Sketch a readable layout
Place the board on a flat surface and lightly mark a margin with your ruler. Divide the face into one to three zones:
- Main message: the largest area and the first thing people should notice
- Supporting line: optional; use it for a short clarification, name, or call to action
- Graphic area: space for one simple symbol or image
Leave open space around the words. A crowded sign can contain more information but communicate less from a distance. Poster-design guidance from the National Institutes of Health emphasizes simple layouts, clear hierarchy, limited type styles, and enough white space. See NIH guidance on poster layout and hierarchy.
You can make a simple grid by drawing horizontal and vertical guide lines. For a more complex illustration, draw a grid over a reference image and a proportionally larger grid on the board; copy the image one square at a time, then erase the guides.
Step 4: Letter the message in pencil first
Do not begin with permanent ink. Lightly sketch each letter so you can correct spacing, size, and alignment before filling it in.
- Mark the approximate start and end of each line.
- Block in the largest words first.
- Leave more space between words than between letters.
- Step back several feet and check whether the line looks centered and balanced.
- Erase and adjust before adding marker or paint.
Use bold, uncomplicated letterforms. Block capitals, heavy rounded letters, and simple sans-serif shapes are usually easier to read than thin strokes, tightly packed letters, ornate scripts, or several different lettering styles.
Rank #3
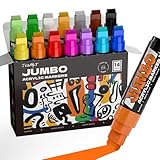
- 14 Colors Jumbo Markers: 15mm wide pen tip meets the demand for quick and large-scale coloring. Set upgraded with two commonly used metallic colors to satisfy more painting needs. Each color delivers rich saturation, high opacity, and excellent layering and masking capabilities
- 3-IN-1 Nib Design: Adjust line width effortlessly from 3mm to 15mm by tilting the tip—no marker pen swaps needed. Unleash unmatched creative freedom. It is ideal for artists, art enthusiasts, and crafters
- Multi-Surface Compatibility: Waterproof and wear-resistant ink performs brilliantly on stone, wood, canvas, fabric, and car metal. Excellent lightfastness ensures outdoor artwork (murals, banners, signs) stays vibrant. Perfect for holiday gifts and crafts—Easter, Halloween, Thanksgiving, Christmas, school activities, and birthday parties
- Smooth Writing Experience: Built-in metal ball bearing and fiber sponge tip deliver consistent, silky-smooth ink flow. A pump valve prevents drying during intermittent use, and the secure cap adds leak-proof protection to prevent ink stains
- Safety markers: Specially formulated to be quick-drying and bleed-resistant, this ink keeps your workspace clean while being non-toxic and acid-free for safety
Step 5: Fill the letters with strong contrast
Trace the pencil letters with a broad permanent marker or fill them with a large brush. Dark lettering on a light background and light lettering on a dark background are reliable starting points. If you use paint, allow it to dry fully before stacking or transporting the sign.
Readability depends on distance, lighting, contrast, spacing, and stroke thickness. The National Park Service’s exhibit guidance recommends maximizing contrast and adjusting letter and word spacing; it cites a 70-percent contrast target for certain display contexts. That figure is a design reference, not a guarantee that every handheld sign will be legible at every distance. Review National Park Service exhibit-design guidance.
NIH and HHS poster guidance similarly favors large type, short scannable sections, light backgrounds with dark text, and strong contrast. A practical test is more useful than relying on a particular font-size number: place the sign several feet away and ask someone to read it without prompting.
Step 6: Add one simple symbol or image
A single recognizable image can reinforce the message without competing with it. Depending on the subject, you might use a heart, raised fist, plant, scale, globe, candle, or another relevant symbol.
Keep the graphic away from the most important words. Avoid putting text over a busy photograph or detailed illustration; small details that look impressive up close may disappear in a crowd.
Option A: draw a symbol by hand
Sketch the outline in pencil, simplify it until it is recognizable, and fill it with one or two contrasting colors. Test it from the intended viewing distance. If the shape becomes an indistinct blob, remove detail or increase the size.
Rank #4

- 24 Vivid Colors: Unleash your creativity with our acrylic markers. With 14 classic, 6 metallic, and 4 neon colors, this collection empowers you to add stunning intense color, shiny accents, and eye-catching neon effects to your projects
- Versatile 3-in-1 Nib Design: Simply tilt to switch between fine, medium and broad lines. Ideal for quick filling, bold coloring, and seamless coverage. One acrylic paint pen, endless possibilities
- Quick-Dry & High-Coverage: Our water-based markers are quick-drying and waterproof. Blend for gradients while wet. Once dry, the opaque, permanent color defies the base material and stays crisp through layers, true-to-color without bleeding
- Works on Diverse Surfaces: Buttery-smooth flow for effortless control. Our jumbo markers glide seamlessly on glass, wood, plastic, metal, paper, stone, ceramics, canvas, and more. Ideal for rock painting, window art, and poster boards
- Usage Instructions: Shake well before use. For first-time use, gently press the tip to release air pressure, then press down repeatedly until it's fully saturated with ink. After each use, recap tightly and store upright (tip up) to prevent drying and leakage (Tip: For ages 14+ only.)
Option B: attach a printed photograph
Print the image, trim it, and attach it with a glue stick, paper glue, or strips of tape. Smooth from the center outward to reduce bubbles and curled corners. A local copy shop or poster-printing service may be useful for a large image, but availability and pricing vary by location; verify the provider before promising a particular result.
Use your own photograph or an image you are licensed to reproduce. The U.S. Copyright Office explains that original photographs receive copyright protection when created and that using another person’s photograph generally requires permission unless a specific exception applies. Learn about photograph copyright at the U.S. Copyright Office.
Step 7: Reinforce the back
Hold the sign by one edge and flex it gently. If it bends too easily, attach a second sheet of cardboard or poster board to the back. Keep the construction lightweight and flexible.
Free tools Windows power users keep installed
One-click scans. No signup required.
- Cut the backing to the same size, or slightly smaller so it does not create sharp projecting edges.
- Attach it with glue or broad strips of tape.
- Tape the perimeter and any center seam.
- Press down loose corners and let adhesive dry before carrying the sign.
A foldable cardboard backing can make a larger sign easier to transport and store. One practical maker method uses folded cardboard for signs around 18 by 24 inches or 24 by 36 inches, but treat those dimensions as an example rather than a tested performance specification.
Do not add hard, pointed, sharp, or unnecessarily heavy components. A sign should remain a sign—not become a rigid object that could create a safety problem or violate event rules. Optional supplies such as glue sticks, masking tape, and packaging tape can help with assembly, but ordinary household tape and recycled materials may be sufficient.
Independent reader supportYour contribution helps us test, update, and keep practical guides available for everyone.Step 8: Add a handle only if the event allows one
Some demonstrations allow a handheld sign with a support; others restrict handles, poles, or the materials used for them. Check the event rules before adding anything.
If a handle is allowed, use a lightweight, blunt, soft support and attach it securely to the back. A narrow tube made from folded cardboard may be preferable to a rigid rod. Cover or fold over exposed tape and check that the attachment does not tear through the sign when lifted.
What’s actually slowing this PC down?
Pick the symptom - the matching free tool is one click away.
Best Value

- Jumbo Markers Set: SRUOLOC jumbo markers are made with the highest quality water-based acrylic ink. That is waterproof, quick-drying, permanent , and smooth flow
- Non-Toxic and Safe – SRUOLOC paint markers are non-toxic, Each thick permanent marker meets ASTM d-4236 and EN-71 safety standards, are suitable for artists of all ages, working seamlessly on rock, fabric, glass, wood, plastic, paper, and more
- 3-IN-1 NIB: (fine, medium, and jumbo) The thick tip permanent markers set felt wide tip is not only equipped with 3-IN-1 nib, but also allows the jumbo marker paint pen to produce smooth and even ink
- MULTI-SURFACE: Our permanent jumbo poster markers are versatile enough to be used on a variety of surfaces, ideal for wall-painting, posters, stone, ceramic, glass, wood, fabric, canvas, plastic, metal, resin, terracotta, seashell, and more
- The permanent markers 12 color set is perfect for artists to use on DIY designs, arts, and crafts, and painting projects
Mechanical strength is not the only consideration. Even if a handle works, it may not comply with the rules of a park, campus, workplace, government building, or private venue.
Step 9: Test the finished sign from a distance
Use this final checklist:
- Can someone understand the message in a quick glance?
- Are the most important words the largest?
- Is the lettering clearly separated from the background?
- Can you read it several feet away?
- If relevant, can someone across a street or crowd read the main phrase?
- Are the words level, spaced, and unobstructed?
- Does any tape, image, or decoration cover the message?
- Are the edges smooth, secure, and free of loose or sharp pieces?
- Is the sign light enough to carry comfortably for the duration of the event?
- Does it comply with the organizer’s and venue’s rules?
Take a test photograph from the distance and angle where the sign is likely to be seen. If the message disappears in the photograph, increase contrast, simplify the layout, enlarge the lettering, or remove the image.
Safety and cleanup notes
- Use scissors, craft knives, hot glue, and solvent-based products according to their labels. Keep them away from children unless an adult is supervising.
- Brush-applied paint or markers are usually simpler for beginners than spray paint. If you use spray paint, follow the label and provide adequate ventilation; OSHA’s spray-operation guidance addresses ventilation and related hazards. Read OSHA’s spray-painting standard.
- Do not attach a sign to public or private property unless the rules expressly allow it.
- Carry the sign in a way that does not block your vision, interfere with other people, or create a hazard.
- After the event, take the sign and all scraps, tape, and fasteners with you unless disposal is specifically provided.
Picture plan for this tutorial
For a complete illustrated version, photograph each stage using original images or properly licensed material:
- Materials arranged on a table
- Three rough message sketches
- Pencil margins and layout grid
- Block letters being filled with marker or paint
- A simple symbol placed beside the text
- The reinforced back and taped seams
- Close and distance readability comparison
- The finished sign in a neutral setting, with permission from any identifiable people
Do not photograph identifiable people without their permission, and do not assume that a photograph taken at a public gathering may automatically be reused for publication.
Frequently Asked Questions
What is the best material for a homemade protest sign?
Poster board is lightweight and easy to letter. Recycled corrugated cardboard is a useful no-purchase alternative. If a sign must withstand wind or repeated handling, reinforce the back with a second lightweight layer rather than making it excessively heavy.
How many words should a protest sign have?
There is no fixed maximum, but a handheld sign should usually express one idea in the fewest words possible. Test it from several feet away and remove words that do not improve the meaning.
Can I use a stick or pole as a sign handle?
Only if the specific event and venue allow it. Rules vary, and some locations restrict handles or require soft, lightweight materials. Check the organizer’s instructions and property rules before adding a support.
How can I make a sign readable from far away?
Use short text, large bold letters, strong contrast, generous spacing, and one simple graphic at most. Test the finished sign from several feet away or across the relevant viewing area, then simplify anything that disappears.
The Bottom Line
Start with a short, accurate message on lightweight poster board or recycled cardboard. Sketch the layout, use large high-contrast lettering, add only one simple image, reinforce weak areas, and test the sign from a distance. Before carrying it, confirm that its size, materials, and any handle comply with the rules of the specific demonstration venue.
Quick Recap

Product prices and availability are accurate as of the date/time indicated and are subject to change. Any price and availability information displayed on Amazon at the time of purchase will apply.




