Recommended Free Tools
ThatPainter is reader-supported. When you buy through links on our site, we may earn an affiliate commission. Learn More
Make these raised flower tiles by shaping polymer clay, curing it according to the package directions, adding color with water-based wax crayons, and covering each bloom with a UV-cured clear finish. The result is a small, glossy dome that resembles an enamel-candy tile. Michelle’s 2026 A Crafty Mix tutorial uses the flowers in a mosaic on an old planter, alongside leftover mosaic tiles and garden twigs secured with silicone glue. The same pieces can become magnets, curtain tie-backs, drawer pulls, or napkin rings. Polymer clay is the tutorial’s choice for that outdoor-decor project; air-dry clay is suggested for indoor creations. Neither option should be treated as automatically weatherproof, food-safe, or compatible with every resin product.
As an Amazon Associate I earn from qualifying purchases.
What are domed clay flower tiles?
They are small, raised flowers made from clay and finished with a clear, glossy layer. The petals remain visibly sculpted or cut out, while the finish pools over the surface to create a rounded “candy” appearance. The look comes from three separate stages: forming the flower, adding blended color, and applying a UV-cured coating.
What’s actually slowing this PC down?
Pick the symptom - the matching free tool is one click away.
The project is intentionally modular. You can make a handful of individual blooms for a small accent, or produce many flowers in several colors and arrange them as a mosaic. The demonstrated project places them on an old planter, but the flowers can be adapted to other decorative objects that do not require a certified food-contact surface.
Popular on Amazon

- Great Value Paint Brush Set: Soucolor 20 acrylic paint brushes come in 10 different sizes, making them ideal for fine detailing, model painting, rock painting, nail art, face painting, DIY crafts, and general art projects. The varied brush sizes give you better control for both delicate lines and broader color coverage, while the soft bristles deliver smooth, consistent results on acrylic, oil, watercolor, canvas, wood, ceramic, and more.
- Awesome Set of Paint brushes: Professional paint brushes can cover all of your needs. The multi-purposed brushes are ideal for Watercolor, Oil, Gouache, enamel, Acrylic Painting, Body, Nail, Face Painting, Miniature, Model, Wood, Glass, Cup, Ceramic, Fine work, Art class, Craft Art Painting, DIY Art Crafts etc.
- Soft and long-lasting: The bristles are soft and strong, with nickel metal ferrules and blue wooden handles. After cleaning, the bristles will become soft and fluffy again and will not fall off.
- Easy to clean: it’s very convenient to Wash well in soap and water. Retain shape after drying. the brushes hold up very well. Nice selection to beginners and professionals. Keep them clean and they last a long time.
- Perfect for All Painters & Occasions: Suitable for art beginners, hobbyists and professional artists. Great for art class, home creation, travel painting and DIY handmade projects. A practical art gift for students, teachers, family and craft lovers.
What supplies do you need?
| Supply | Purpose | Notes from the tutorial |
|---|---|---|
| Polymer clay | Outdoor-planter flower tiles | Michelle used polymer clay for the planter project. |
| Air-dry clay | Indoor decorative versions | Presented as an indoor alternative, not as proof of outdoor durability. |
| Cling wrap | Covering clay during flattening or cutting | Used over the clay before rolling or pressing. |
| Rolling pin | Flattening assembled clay balls or a clay sheet | A small craft rolling pin is sufficient for this step. |
| Flower-shaped cookie cutter | Uniform blooms | Optional; use it when you want repeated shapes. |
| Water-based wax crayons | Color and blended effects | Use dry for bold lines or add water for a watercolor-like blend. |
| Craft paint | Coloring substitute | The tutorial names paint as an alternative if crayons are unavailable. |
| UV resin or clear gel nail varnish | Transparent domed finish | Apply a small amount and cure under a UV light. |
| UV light | Curing the clear finish | Follow the particular product’s curing directions. |
| Silicone glue | Attaching flowers in the planter mosaic | Used with leftover mosaic tiles and twigs in the shown application. |
Keep the clay, color medium, clear coat, and adhesive as separate decisions. The source does not establish that every polymer-clay formulation works with every UV resin or gel varnish, so check the instructions supplied with the products you select.
Which clay should you choose for indoor or outdoor décor?
Use polymer clay when you are following the tutorial’s planter-mosaic approach, and reserve air-dry clay for indoor creations. That is the author’s material choice, not an independent durability certification. A finished piece exposed to sun, rain, temperature changes, or repeated handling may behave differently depending on the exact clay, color, clear coat, adhesive, and substrate.
For an indoor tile, air-dry clay can simplify the process because it does not require an oven. For polymer clay, plan your work around the manufacturer’s curing or baking instructions. Do not substitute a generic temperature or time: formulations vary, and the tutorial does not provide a universal schedule.
Outdated Drivers Are Slowing You Down
One free scan finds every outdated or missing driver and matches the right update for your exact hardware.Free scan · exact hardware matchWindows Errors? Fix Them Before They Spread
Repair common Windows errors and clear accumulated junk for a smoother, more stable PC - no reinstall needed.Free scan · no reinstallHow do you shape the flowers?
There are two reliable routes. Assemble small balls into a flower when you want irregular, varied blooms; roll a sheet and use a cutter when you want a repeatable pattern. Both methods use cling wrap while the clay is being flattened or cut.
Method 1: Build flowers from clay balls
- Condition the clay. Work it until it is flexible enough to roll without cracking. Divide it into small portions.
- Roll the components. Make one small ball for the center and one ball for each petal. Vary the sizes if you want flowers that are not identical.
- Arrange the flower. Place the petal balls around the center on a flat work surface. Leave enough space between flowers if you are making several at once.
- Cover with cling wrap. The film sits between the clay and rolling pin, helping you flatten the parts without dragging them.
- Flatten gently. Roll over the covered arrangement until the balls merge into a single flower. Stop when the petals have the profile you want; excessive pressure can erase the shape.
This assembled approach gives every bloom a slightly different outline. It is useful when your final arrangement is meant to feel handmade rather than mechanically repeated.
Also popular on Amazon
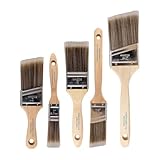
- COMPLETE 5-PIECE BRUSH SET FOR EVERY PAINTING TASK — Includes 1 Inch Flat, 1.5 Inch Angle, 2 Inch Flat, 2 Inch Angle Stubby, and 2.5 Inch Angle brush giving you every size professional painters use daily. Get all 5 for less than the price of a single brush from hardware store brands — professional grade performance at a fraction of the cost. Perfect for walls, trim, cabinets, doors, furniture, and detailed cutting-in work on any project.
- ZERO BRISTLE LOSS — GUARANTEED BY PRECISION ADHESIVE BONDING — Every bristle is locked in place with precision-set adhesive that keeps them in the brush — not in your paint job. The coated steel ferrule provides structural support while the adhesive bond ensures clean performance on every stroke. Premium SRT synthetic filaments load more paint and release it evenly for a smooth streak-free finish on walls, ceilings, and trim. Works with latex, oil-based paint, primer, sealer, and wood stain.
- INCLUDES THE ANGLE STUBBY MOST SETS LEAVE OUT — Professional painters know the 2 Inch Angle Stubby is the go-to brush for tight cabinet interiors, window sashes, inside corners, and detailed trim where standard angle brushes are too long. Combined with the 1.5 and 2.5 inch angle sash brushes you have precision cutting-in covered at every scale — baseboards, crown molding, door casings, and ceiling lines.
- FLAT BRUSHES FOR BROAD SMOOTH COVERAGE ON ANY SURFACE — The 1 and 2 inch flat brushes deliver even coverage on walls, furniture, shelving, doors, fences, decks, and wood surfaces. Ideal for applying primers, stains, varnishes, polyurethane, and specialty coatings. Solid wood handles provide all-day comfort and control for both professional contractors and weekend DIY homeowners tackling interior or exterior painting projects.
- TRUSTED BY PROFESSIONAL PAINTERS AND CONTRACTORS NATIONWIDE — Pro Grade delivers professional-grade results at a price that makes sense for crews who go through brushes on every job. Ideal for property managers, remodeling contractors, apartment turnover crews, maintenance teams, and commercial painting operations. Backed by thousands of verified reviews from working painters. Washable and reusable for multiple projects.
Method 2: Cut flowers from a sheet
- Roll an even sheet. Michelle’s instruction is approximately 5 mm thick. Keep the thickness consistent so the flowers cure at a similar rate.
- Cover the sheet. Lay cling wrap over the clay before cutting. This keeps the cutter from contacting the clay directly.
- Cut the blooms. Press a flower-shaped cookie cutter through the covered sheet. Lift away the surrounding clay and repeat.
- Refine the edges. If a petal edge has a visible ridge, smooth it lightly before curing. Avoid thinning one petal dramatically compared with the others.
The cutter is optional. You can use a template or freehand outline, but a cutter makes a series of matching flowers easier to arrange as a regular border or repeating mosaic motif.
How do you cure or bake the clay?
Remove the cling wrap before curing. Set the flowers on a flat surface and cure or bake them exactly as the clay maker specifies. If the instructions call for baking, let the pieces cool completely before coloring or applying the clear finish.
The Tool Desk
Outbyte Driver Updater FREEScan for outdated or missing drivers - takes under a minuteDriver Scan →Outbyte PC Repair FREEClear out junk files and repair common Windows errorsFree Scan →The tutorial does not give a baking temperature or duration, so do not copy a generic number from another clay brand. Use the package directions for the specific formulation and thickness you chose. A flat support also helps preserve the tile shape while it cures.
How do you add blended color?
Water-based wax crayons are the featured coloring material. Draw directly on the cured flower for strong lines, or add water to the crayon marks and blend them for a watercolor-like effect. Craft paint is the stated substitute if you do not have the crayons.
- Start with a dry test mark. Apply a small amount of crayon to one petal or to a spare piece of cured clay so you can judge the intensity.
- Build the color. Use a separate hue on neighboring petals or layer a darker center over a lighter base.
- Blend selectively. Introduce a little water where you want a softened transition. Leaving some dry strokes visible preserves the look of petal veins.
- Let the color settle. Before applying resin or gel varnish, make sure the surface is ready for a clear coat according to the coloring product’s directions.
Craft paint gives you another route to opaque or graphic petals. Because the tutorial does not compare paint formulas, choose a craft paint intended for the surface you are decorating and allow it to dry as directed before adding the finish.
Also popular on Amazon
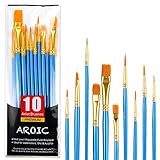
- 【All sizes of art brushes】: The 10 sizes of multi-functional brushes have various shapes, making the mixing color easier, which is very suitable for artists, students, teenagers, children and painters at all levels. Wonderful Present ideas for friends and family who like painting!
- 【general brush set】: Professional paint brush can meet all your needs. Multifunctional brush is very suitable for watercolor, oil, gouache, acrylic painting, body, nail, face painting, miniature, model, ceramics, arts and crafts painting, etc.
- 【high quality process】: It is designed with anti falling bristles, anti-rust nickel ferrule and solid wood handle. You can use the brush to focus on the painting and always be creative.
- 【easy to maintain】: After using the brush, it is very convenient to clean the brush with warm soapy water and reshape the tip of the brush. Air dry the brush and place it on top of the top for long use.
- 【100% satisfaction guarantee - buy now】1 packs of set brushes, you can also get friendly customer service, any questions feel free to contact us, within 24 hours to help you! There is no risk in buying our paint brush kit.
How do you make the enamel-candy dome?
Apply a small amount of UV resin or clear gel nail varnish to the colored flower, then cure it under a UV light. Michelle describes the resulting layer as shiny and domed, similar to enamel candy tiles.
Crashes, No Sound, or Screen Glitches?
Random freezes, missing sound and display glitches usually trace back to one bad driver. Find and replace yours safely.Free scan · under a minuteWindows Errors? Fix Them Before They Spread
Repair common Windows errors and clear accumulated junk for a smoother, more stable PC - no reinstall needed.Free scan · no reinstall- Prepare one flower at a time. Place it on a level, protected surface so the clear liquid can settle instead of running immediately.
- Add a controlled amount. Start with a small drop in the center and guide it toward the petals without flooding the edges.
- Check the perimeter. Keep the coating on the flower rather than allowing it to spill onto your work surface. Remove an unwanted bead before curing, following the product’s handling instructions.
- Cure under UV light. Use the curing procedure specified for your resin or gel varnish and UV light. The tutorial does not establish that the two finish options cure for the same duration.
- Inspect after curing. Look for uncovered color, a low spot, or a drip. If the product instructions permit another layer, add it only after the first layer has cured.
The source names UV resin and clear gel nail varnish as alternatives but does not compare their cost, hardness, weather resistance, or compatibility with every clay. Treat the glossy dome as a decorative finish, not as proof that the tile is food-safe or permanently waterproof.
How do you assemble the planter mosaic?
For the demonstrated décor piece, arrange the finished flowers with leftover mosaic tiles and garden twigs on an old planter, then secure the elements with silicone glue. Plan the composition before gluing so you can balance large flowers, small tiles, and linear twigs.
- Clean the planter. Remove loose dirt and let the surface dry before arranging anything.
- Make a dry layout. Test several combinations of flowers, tiles, and twigs. Keep the domed flowers where their color will be visible.
- Mark the arrangement if needed. A few removable pencil marks can help you replace pieces in the same positions.
- Apply silicone glue. Use the adhesive according to its label and press each item into place. Avoid squeezing glue over the visible face of a flower.
- Allow the adhesive to set. Follow the silicone glue’s curing directions before moving the planter or exposing it to conditions the adhesive label does not support.
The tutorial presents the planter as a creative application, not a tested outdoor-life claim. If the planter will live outside, the clay, clear finish, glue, and planter material all contribute to how long the decoration remains intact.
Which shaping method is better for your design?
| Decision | Assembled clay balls | Rolled sheet and cutter |
|---|---|---|
| Look | Organic flowers with varied petals | Matching flowers with consistent outlines |
| Control | Easy to change petal count and size while arranging | Easy to repeat a motif across a larger mosaic |
| Best use | Loose clusters and one-of-a-kind accents | Borders, grids, and coordinated sets |
| Key handling step | Flatten the covered balls evenly | Roll the sheet to approximately 5 mm before cutting |
You can combine the routes in one project: use cutter-made flowers for a regular border and a few hand-built blooms as focal points. Keep the curing, coloring, and clear-coat stages the same for both shapes.
Also popular on Amazon

- 【KIDS PAINT BRUSHES SET】Anezus paint brushes for kids come with 10 pcs paint brushes of 5pcs round paintbrushes and 5 flat paint brushes with colorful handles, good for the young artist to explore their creativity in painting and crafting
- 【HIGH QUALITY PAINT BRUSHES FOR KIDS】These toddler paint brushes made of soft hog bristle, bright colored handles and rust proof ferrules. The bristles are firmly fixed in the kids paint brushes and no shedding. Each children paint brush measure 6 1/4 inches (16cm) in length and ferrules 1/2"(1.3cm) diameter, large enough for the little hand to grip and control
- 【WIDE APPLICATIONS】With combination of round and flat craft paint brushes for kids, work great with washable paint, tempera paint and acrylic paint. Great for arts and craft, rock, leather, gesso and ceramic, or body, nail and face art painting.
- 【EASY TO CLEAN 】After using paint brushes for acrylic, oil or watercolor painting, it’s very convenient to clean them with warm soapy water and reshape the paint brush tips. Keep these craft paint brushes clean and they last a long time.
- 【GREAT GIFT IDEA】Perfect for students, teens, kids, children and painters of all levels. Wonderful gift idea for girls, boys and kids who love painting! These all-purpose paint brushes for kids are ideal for kids' school projects, birthday parties, painting parties, art parties, back to school supplies, classroom decoration and more.
What problems can occur, and how can you correct them?
- Uneven petals: Re-cover the clay with cling wrap and flatten more gradually. For the sheet method, check thickness before cutting each flower.
- Flowers lose their outline: Reduce pressure while rolling or pressing. A cutter-made flower may need only a single firm press rather than repeated passes.
- Color looks too harsh: Add water to water-based wax-crayon marks and blend the transition. If you used craft paint, soften the effect with a lighter adjacent color rather than adding an untested solvent.
- Clear coat runs over the edge: Use less resin or gel varnish and work on a level surface. Correct the spill only in the way the product instructions allow before curing.
- Glossy dome is uneven: Apply a smaller central drop and guide it outward. A second layer should be added only if the finish product permits recoating after cure.
- Adhesive shows around the mosaic: Plan the dry layout first and use a controlled amount of silicone glue. Wipe or remove excess only according to the adhesive label.
What safety and durability limits should you keep in mind?
Work in a ventilated area and follow the safety information supplied with the clay, UV resin or gel varnish, UV light, paint, and silicone glue. Protect your work surface and skin as directed by each product label. Keep uncured resin and other materials away from children and pets.
Most importantly, do not infer performance that the tutorial does not document. The source does not verify long-term weather resistance, food-contact safety, brand-to-brand compatibility, or a guaranteed bond on every planter surface. Present the finished flowers as decorative components and choose the final application with those limits in mind.
Can you use the flowers for projects beyond a planter?
Yes. The tutorial suggests turning the finished pieces into magnets, curtain tie-backs, drawer pulls, and napkin rings. These are creative directions rather than tested performance claims, so match the attachment method and hardware to the object’s intended use.
For a magnet, keep the tile light enough for the magnet and adhesive you select. For a drawer pull or tie-back, make sure the hardware carries the mechanical load instead of relying on the domed flower alone. A napkin ring should be treated as décor, not as a food-contact surface, because the source does not establish food-safety compliance for the clay or finish.
What’s actually slowing this PC down?
Pick the symptom - the matching free tool is one click away.
What is the simplest project plan?
- Decide whether the piece is indoor décor or an outdoor-planter accent.
- Select polymer clay for the tutorial’s planter approach, or air-dry clay for an indoor version.
- Choose hand-built balls for varied flowers or a 5 mm sheet and cutter for uniform flowers.
- Shape the blooms under cling wrap and remove the wrap before curing.
- Cure or bake according to the clay maker’s instructions; cool baked pieces completely.
- Color with water-based wax crayons, blending with water, or use craft paint.
- Apply a small amount of UV resin or clear gel nail varnish and cure under a UV light.
- Arrange the flowers with mosaic tiles and twigs, then attach them with silicone glue for the planter mosaic.
- Keep the finished object within the material and adhesive limits stated on the product labels.
The distinctive effect comes from restraint: a clear layer thick enough to round the surface, but not so heavy that it hides the petal shape. Make a few flowers in different color combinations first, then repeat the palette across the larger mosaic.
Also popular on Amazon
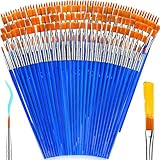
- 【162-Piece Bulk Set | Dual Brush System】Maximize versatility with 81 flat brushes (0.59 inch edge for bold strokes) and 81 round brushes (0.39 inch tips for details) – 3X more tools than standard kits! Pre-sorted in labeled compartments for instant access during painting sessions. Ideal for art classrooms, mural projects, and multi-artist households.
- 【Pro-Grade Durability | Zero Shedding Guarantee】 "Engineered with triple-crimped nylon bristles (43% higher resilience vs. standard) and aerospace aluminum ferrules tested for 10,000+ flex cycles. Lab-verified 0.01% shedding rate even with heavy impasto techniques – outperforms flimsy bristles in budget brushes."
- 【Multi-Scenario Readiness | Event & Daily Use】 Optimized for: Thanksgiving/Christmas face designs classroom projects ceramic decorating fabric printing and model painting; Lightweight plastic handles each reduce hand fatigue during prolonged sessions
- 【Effortless Maintenance | Long-Term Durability】 Clean with warm soapy water in 10 seconds; Reshape tips and air-dry vertically to preserve bristle integrity,After use, air-dry brushes thoroughly and store upright in the provided case to preserve bristle shape. The premium nylon filaments naturally regain their original form after each stroke. For cleaning, simply rinse in warm soapy water and gently reshape bristles with fingertips."
- 【Multiple Application】These acrylic paint brushes can be applied for most occasions,such as:watercolor,oil, gouache paint,face paint, acrylic paint, suitable for Thanks Giving Day, Christimas, Halloween face and body painting, canvas painting, fabric, rock, miniature, model, ceramics, arts and crafts painting, etc.
Frequently Asked Questions
Can I make these flower tiles without a flower-shaped cookie cutter?
Yes. The cutter is optional. Build each bloom from a center ball and petal balls, or sketch and cut a simple outline by hand after rolling the clay sheet.
Do I need a UV light for the glossy finish?
The tutorial’s UV resin and clear gel nail varnish steps both call for curing under a UV light. If you choose a different finish, follow that product’s own cure method rather than assuming it will harden under UV.
Can these tiles be used on a food-serving tray?
The source does not establish food-contact safety for the clay, color, resin, or gel varnish. Keep the pieces on decorative surfaces unless every material is specifically certified for the intended contact.
How should I store unfinished flowers between sessions?
Keep uncured clay, colored pieces, and finishing products protected from dust and accidental contact, following each product’s storage directions. Separate flowers before the clear coat so they do not stick together while the surface is still soft.
Quick Recap


