PC Slower Than It Used to Be?
Crashes, No Sound, or Screen Glitches?
Random freezes, missing sound and display glitches usually trace back to one bad driver. Find and replace yours safely.Free scan · under a minuteWindows Errors? Fix Them Before They Spread
Repair common Windows errors and clear accumulated junk for a smoother, more stable PC - no reinstall needed.Free scan · no reinstallOutbyte PC Repair · freeA free scan shows the junk files, broken settings and background clutter dragging Windows down - then fixes them in one click.
Run a Free PC Scan →ThatPainter is reader-supported. When you buy through links on our site, we may earn an affiliate commission. Learn More
The easiest paper flower depends on the result you want. Choose a tissue-paper pom-pom for fast party décor, a folded printer-paper flower for a no-glue children’s craft, a crepe-paper tulip to learn realistic flower shaping, or a crepe-paper rose for a more dramatic bouquet. This guide walks through 12 paper-flower projects, including stemmed flowers, favors, hanging decorations, and flower-inspired treatments.
You will also find printable pattern links, measured cut lists, paper and adhesive advice, hand-cutting and Cricut options, painting techniques, and fixes for the problems beginners encounter most often. One important qualification: the Martha Stewart roundup that inspired this collection advertises templates, but the dedicated printable patterns are unevenly distributed. Some projects have their own PDF; others use a general petal or leaf pattern, a measured strip, or a technique rather than a separate template. The links below identify exactly what each project uses.
As an Amazon Associate I earn from qualifying purchases.
The Tool Desk
Outbyte Driver Updater FREEScan for outdated or missing drivers - takes under a minuteDriver Scan →Outbyte PC Repair FREERepair Windows errors before they cause bigger problemsFix Now →Choose your first paper-flower project
If you are making paper flowers for the first time, start with the project that matches your materials and deadline rather than beginning with the most realistic bloom.
| Your goal | Best starting project | Why |
|---|---|---|
| Fastest, lowest-skill decoration | Floral tissue-paper pom-pom | It uses repeated accordion folds and does not require individual petal shaping. |
| A no-glue children’s craft | Folded kirigami flower | Ordinary printer paper folds into a flower with cutting but no wire or adhesive. |
| A realistic stemmed flower | Crepe-paper tulip | It teaches cupping, curling, layering, and stem wrapping. |
| A realistic statement flower | Large crepe-paper rose | Individual petals can be shaped into a full, dimensional bloom. |
| A project for children or painting practice | Painterly poppy | The painted surface makes every flower different before it is cut and assembled. |
| A large party backdrop | Paper-bag flower or cardstock wall flower | Both create large shapes quickly and can be mounted or hung. |
| A recycled-material project | Paper-bag flower | Six ordinary gusseted paper bags form one oversized decoration. |
| Watercolor practice | Coffee-filter rose | Coffee filters absorb diluted color and remain light enough to layer. |
| A wedding or shower favor | Dahlia favor or tulip favor | Both combine a flower shape with a small gift or plant. |
| No printer or template | Pom-pom, paper-bag, or fringed paper flower | These rely on measured strips, folded bags, or simple rectangles. |
A cutting machine is optional. The beginner flowers in this guide can be cut by hand; a Cricut or Silhouette mainly saves time when you need many identical cardstock petals. Lia Griffith’s beginner guide also presents hand cutting as a valid alternative.
#1 Best Overall
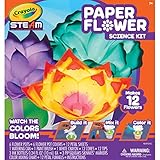
- DIY PAPER FLOWERS CRAFT KIT: This science kit features everything needed to make 12 Wicking Paper Flowers, as well as a guide with step-by-step instructions.
- CRAYOLA STEAM KITS: Hands-on learning experiences that allow kids to be creative are fun and educational
- GIFT FOR KIDS: The magic of these color changing flowers is something beautiful to behold This craft kit makes a great gift for girls and boys on birthdays, holidays, and more.
- EDUCATIONAL TOY: Crayola STEAM kits are perfect for educational play and at home learning
- SAFE AND NONTOXIC: Ideal for kids, ages 7 and up
Paper choice: match the material to the construction
Paper is not interchangeable. The best material depends on whether the flower must stretch, fold through several layers, hold a curl, support a stem, or survive repeated handling.
| Paper | Best use | Strengths | Limitations |
|---|---|---|---|
| Crepe paper | Realistic stemmed flowers | Stretchable, cuppable, curlable, and naturally textured. | Its grain matters, and it tears when overstretched or cut carelessly. |
| Tissue paper | Pom-poms, party flowers, and favors | Inexpensive, light, and capable of looking very full. | Tears easily and provides little structural support. |
| Cardstock | Giant wall flowers, crisp layered blooms, and machine cutting | Strong, consistent, and easy to cut repeatedly. | It does not stretch or cup like crepe paper. |
| 24-pound printer paper | Folded kirigami or origami-style flowers | Thin enough to fold through multiple layers. | Too flimsy for large, heavily layered flowers. |
| Coffee filters | Watercolor roses and children’s crafts | Absorb diluted color and shape easily. | Delicate and less durable than crepe or cardstock. |
| Paper bags | Large hanging decorations | Inexpensive and fast for oversized forms. | More decorative than botanically realistic. |
Crepe-paper grain direction
Crepe paper has ridges and stretch. For a petal that cups properly, align the ridges lengthwise from the petal base toward its tip. The supplied crepe-paper petal patterns mark the intended direction. The general instruction is to place the pattern on the paper with its grain aligned lengthwise and, where the template permits, cut several layers together—up to nine layers in the supplied instructions. For a first attempt, cut fewer layers until you know how delicate your paper is.
Do these 3 things before closing this tab:
1Clear out junk files and repair common Windows errors2Scan for outdated or missing drivers - takes under a minute3Repair Windows errors before they cause bigger problemsCardstock has no comparable stretch direction. That makes it excellent for crisp, oversized wall flowers but unsuitable for a folded kirigami flower, where ordinary printer paper is specifically preferred. One Little Project’s folded-flower instructions explain why cardstock is too thick for that method.
Materials and tools
Basic kit for most projects
- Sharp paper scissors.
- Pencil or fine-tip marker.
- Ruler.
- Scrap cardstock for durable tracing templates.
- Craft glue, tacky glue, or hot glue.
- Floral tape.
- Floral wire and wire cutters if making stems.
- A pencil, bamboo skewer, dowel, or quilling tool for curling edges.
- Cutting mat if using a craft knife or cutting machine.
- Printer for PDF patterns.
Project-specific supplies
- Crepe paper, tissue paper, cardstock, coffee filters, or gusseted paper bags.
- Floral wire in different gauges. The source projects use examples including 18-gauge wire for many crepe-paper stems, 16-gauge wire for the tulip favor, and 24-gauge wire for tissue pom-poms. These are project-specific examples, not universal requirements.
- Cotton balls or scraps of paper for flower centers.
- Watercolors, diluted paint, markers, or chalk pastels.
- Ribbon, fishing line, monofilament, or string for hanging decorations.
- Optional glitter, fringe scissors, deckle-edge scissors, hole punch, pliers, and bamboo skewers.
Specialty crepe paper and tools can cost more than expected, so do not assume paper flowers are always cheaper than fresh flowers. They can be an economical choice for certain backdrops, favors, and reusable decorations, but the final cost also includes wire, adhesive, templates, equipment, and your time.
Printable templates and how to use them
Use this index to choose the appropriate pattern instead of assuming that one petal sheet fits all 12 projects.
| Project or technique | Pattern or guide | What it supplies |
|---|---|---|
| Painterly poppy | Painterly poppy PDF | Poppy petals and black cardstock leaves. |
| Dahlia favor | Dahlia favor PDF | Folded tissue shape for the flower-like favor pouch. |
| Tulip favor | Tulip favor PDF | Petal pattern to trace onto heavy paper. |
| Coffee-filter rose | Coffee-filter rose PDF | Petal shapes for one eight-filter bloom. |
| Crepe roses, daffodils, and adaptable individual petals | Single-petal crepe PDF | General petals and marked grain direction. |
| Crepe leaves | Crepe leaf PDF | Elongated, standard, teardrop, notched, and grassy leaf shapes. |
| Carnation and spider mum | Continuous-petal PDF 1 | Attached strips that remain joined along the fold. |
| Dahlia and daisy strips | Continuous-petal PDF 2 | Attached strips for wrapping around a center. |
The daffodil, scented flower, splattered flower, paper-bag flower, and small paper pom-pom do not require a separate dedicated petal PDF in the supplied source material. Use the general sheets, measured rectangles, or a shape drawn directly on the material as indicated below. The original poppy PDF also states that its pattern is for personal use only, so check the terms on each downloaded file before using it for commercial products.
Before you cut
- Download the relevant PDF.
- Print at 100% or Actual Size. Do not select Fit to Page unless the pattern itself instructs you to do so.
- Measure any reference ruler, square, or known dimension printed on the page. If it does not match, correct the printer setting before cutting.
- Print the pattern on cardstock or heavy paper if you will trace it more than once.
- Cut out the pattern, then mark the grain arrow on the template if you are working with crepe paper.
- Decide whether you want a small, medium, or oversized flower before resizing.
- If you resize, enlarge every related petal, center, and leaf proportionally. Enlarging one layer alone will produce an unbalanced flower.
Five techniques that make the flowers dimensional
Cup the petal
Place your thumbs behind the center of a crepe petal and your fingers in front. Gently stretch the ridges so the center becomes concave. To make a convex shape, work from the opposite side. Stretch only until the paper holds a curve; forcing it farther creates a thin, weak spot.
Curl the edge
Wrap the top edge of a petal around a pencil, skewer, dowel, or curling tool. Curl the edge outward for an open rose or inward for a tighter bud. Cardstock can be curled by dragging it over a rounded tool, but it will hold a fold rather than stretch into a cup.
Pleat the base
Pinch or make a small pleat at the bottom of a petal before gluing it to the center. This adds volume and prevents every layer from lying flat against the previous one.
Fringe and taper
Fringe creates stamens and fine petals. Make repeated narrow cuts without slicing through the opposite edge. A continuous strip can be tapered as it wraps around a center: keep the lower edge anchored while gradually raising or lowering the strip to change the bloom’s profile.
Stagger the layers
Do not put every petal seam in the same place. Offset each new petal or ring so the flower fills evenly. Raise later rings slightly to avoid a flat stack.
Activate floral tape
Floral tape becomes tacky as it is stretched. Pull it gently while wrapping the wire and flower base, then overlap each turn. It is especially useful for crepe-paper stems and for hiding the attachment point.
The 12 paper-flower projects
1. Crepe-paper daffodils
Best for: A spring bouquet or table arrangement. Difficulty: Easy to moderate. Paper: Crepe paper.
This project teaches the basic individual-petal method. The daffodil’s recognizable look comes from layered yellow petals, a contrasting center, lightly cupped shapes, and painted or striped details rather than from a complicated cutting pattern.
Free tools Windows power users keep installed
One-click scans. No signup required.
Template: Use the general crepe petal PDF and the leaf PDF. The supplied material does not identify a separate daffodil PDF.
- Print the patterns at Actual Size onto cardstock and transfer the petal shapes to crepe paper with the ridges running from base to tip.
- Cut the petals and leaves. For a less uniform result, add thin painted stripes or a wash of a slightly different yellow to some petals.
- Make a small stamen or contrasting center from crepe paper and floral wire. Keep the center firm enough to support the first petals.
- Cup each petal inward, curl its upper edge lightly, and pleat the base.
- Attach the petals one at a time around the stamen, overlapping and staggering them so no gaps show.
- Wrap the base and wire with stretched floral tape. Add mottled or lightly painted leaves a few inches below the bloom.
Result: The center should remain visible while the petals open around it. If the flower looks like a flat yellow disk, cup the petal centers more deeply and raise the outer ring.
2. Painterly poppies
Best for: Gift wrapping, informal décor, or a child-friendly painting project. Difficulty: Easy. Paper: Double-sided crepe paper, plus black cardstock for the leaves.
Rank #2

- DIY Flowers: With your flower maker, you can make bouquets quickly and easily, and use your imagination to create beautiful flowers. Make a beautiful bouquet for yourself, your family and your friends!
- Educational Toys: Knowing the parts & composition of plants, Bright, colorful Flower Market set helps hand-eye coordination and fine motor skills. Colorful DIY floral fabric toy set for children, promoting creativity and imagination
- DIY Fun: Our DIY flower set is a great art toy for parent-child interaction and children to create together. They can mix and match pieces to create different flowers at will. Providing countless hours of crafting fun for girls
- Rich Accessories: Flower Bouquet set including Auxiliary machine, colorful flower pieces, 2 different vases, flower receptacle, long flower branches, short flower branches, base and bouquet wrapping paper. Open the bottom of the auxiliary device and it can be used as a storage box
- Ideal gift for 4+ year old kids, offering hours of fun and educational play: Best gifts for birthdays, Mother's Day Gifts, Children’s Day, Christmas, Easter, and Summer camp activities
Paint first, cut second. Abstract marks make every poppy different, so accuracy is less important than allowing the color to remain visible after the flower is shaped.
Template: Download the painterly poppy and leaf PDF. The file identifies the pattern as personal-use material; review its terms before commercial use.
- Test your paint on a scrap of the same crepe paper. Use a controlled amount of water; a saturated sheet can warp or weaken.
- Paint abstract stripes, spots, or brush marks on the crepe paper and let it dry completely before cutting.
- Trace and cut the poppy petals. Cut the leaves from black cardstock using the supplied pattern.
- Shape the petals with a shallow cup and a slightly curled edge. Poppies generally look better when their petals are open and irregular rather than tightly stacked.
- Build the center with a small stamen or wrapped wire, then attach the petals around it with glue or floral tape.
- If the leaf design calls for a wired attachment, punch the indicated hole before attaching it. Add the leaf below the bloom and wrap the stem.
Painting tip: Let the first color dry before adding a second. This keeps the design painterly instead of turning it into a muddy wash.
3. Tissue-paper dahlia favors
Best for: Weddings, showers, birthdays, and garden parties. Difficulty: Easy. Paper: Tissue paper.
This is a flower-shaped favor container, not the same construction as a stemmed dahlia bloom. The favor can hold a dahlia bulb and planting instructions, making it useful for a garden-themed event.
PC Slower Than It Used to Be?
A free scan shows the junk files, broken settings and background clutter dragging Windows down - then fixes them in one click.Free scan · Windows 10 & 11Outdated Drivers Are Slowing You Down
One free scan finds every outdated or missing driver and matches the right update for your exact hardware.Free scan · exact hardware matchTemplate: Use the dedicated dahlia favor template.
- Print the template at Actual Size, then cut it out. For repeated favors, transfer it to cardstock.
- Fold the tissue as directed by the pattern and cut the repeated flower-like shapes through the folded layers. Use sharp scissors and avoid pulling the tissue while cutting.
- Open the cut tissue and shape it into the pouch or dahlia-like favor form. Keep the folds loose enough to create volume.
- Add a small tag with the bulb variety and planting instructions. Finish with ribbon leaves or a ribbon tie as shown by the design.
- Place the bulb or gift in a removable liner or packet. Soil and moisture should not touch the tissue paper.
Display tip: Arrange the favors together in a shallow tray rather than placing them in water. The tissue is decorative and not water-resistant.
4. Floral tissue-paper pom-poms
Best for: Fast hanging party décor. Difficulty: Easy. Paper: Tissue paper.
The dedicated tissue-pom-pom instructions use eight 20-by-30-inch sheets, 24-gauge floral wire, scissors, and an 18-inch piece of wire.
- Stack eight sheets neatly.
- Accordion-fold the stack in pleats approximately 1½ inches wide.
- Wrap the center with the 18-inch piece of 24-gauge wire. Twist securely, leaving enough wire or a separate line for hanging.
- Trim both ends. Round the ends for a soft pom-pom or cut points for a more dahlia-like flower.
- Separate the layers one at a time, pulling gently from the center toward the outside. Work on one side, then the other.
- Fluff the two halves into a sphere or flatten one side slightly if the pom-pom will hang against a wall.
Most common mistake: Do not pull several tissue layers at once. The outer layers tear first, leaving gaps that are difficult to repair.
What’s actually slowing this PC down?
Pick the symptom - the matching free tool is one click away.
5. Paper tulip favors
Best for: Place cards, favors, and a paper bloom displayed with a real potted tulip bulb. Difficulty: Easy to moderate. Paper: Pink or colored cover stock for the petals and cardstock for the pattern.
Materials: The project uses a printed template and 18 inches of 16-gauge green cloth-wrapped floral wire. Download the dedicated tulip favor template.
- Print the pattern on cardstock and cut it out as a tracing template.
- Trace the petals onto heavy paper or cover stock and cut them cleanly.
- Form the paper bloom around the upper end of the floral wire. Attach the petal pieces with the adhesive recommended for your paper, keeping the attachment compact.
- Wrap the lower attachment and visible wire with floral tape if you want a finished green stem.
- Position the paper flower among the leaves of a real potted tulip bulb or use it as a freestanding favor.
Water warning: The paper bloom must stay above the waterline. Do not place the paper portion in the bulb’s water or treat it as water-safe.
6. Watercolor coffee-filter roses
Best for: A low-cost painted bouquet or a watercolor activity. Difficulty: Easy to moderate. Paper: Disposable cone coffee filters.
One full bloom in the Martha Stewart version uses eight filters. You will also need watercolor paint, floral wire and tape, a bamboo skewer, scissors, and the coffee-filter rose template.
- Trace the petal shapes onto the coffee filters. Cut the required pieces without stretching the filters.
- Paint the pieces with diluted watercolor. Use a pale wash for a soft rose or add a darker edge for more definition.
- Lay the painted pieces flat or support them gently while they dry. Do not assemble while they are damp.
- Wrap the smallest petal around the upper end of the wired center. Secure it with floral tape.
- Add successive petal layers, cupping each one and staggering the seams. Keep the first layers tight and let the outer layers open farther.
- Wrap the completed base and stem with floral tape. Use the bamboo skewer as a shaping tool, not as a structural substitute for wire.
Paint-specific tip: Wet filters tear easily and lose their shape. If a filter feels soft or cool from moisture, wait longer before assembling it.
7. Scented crepe-paper flowers
Best for: A decorative arrangement or gift accent. Difficulty: Easy. Paper: Crepe-paper streamer.
This measured-strip method does not need a petal template. It creates a fringed flower around a lightly scented center.
Rank #3

- Value Package: you will receive 10 rolls of colorful Crepe paper in different colors, 28 paper flower templates in 4 different shapes and sizes, 100 green floral wire poles, 3 floral tape in different colors, and a pigment set, enough for you to DIY different paper flowers or share with others
- DIY Various Flowers: the size of the cream paper is 10x98 inches, the floral tape is 12mm/0.5 inches wide, 15 yards/roll, and the length of the wire is 36 cm/14 inches; The paper flower template kit comes in 4 different shapes and 6 different sizes of petal designs, You can DIY and match different sizes of leaves and different shapes of bottoms to make the flowers more vivid and exquisite
- Suitable Materials: wrinkle paper is made of paper, petal template is made of kraft paper, paper flower template tool is sturdy, not easy to deform or break, can be used multiple times, and provides you with long term use experience; Iron wire is made of iron, floral tape is made of plastic
- Enjoy the Fun of DIY: you can use paper flower decoration templates to cut matching wrinkled paper, assemble flowers using wire and other tools, DIY beautiful center decorations or wall decorations, decorate your home, walls, tables, doors, etc., and enjoy the fun of DIY production
- Various Application Types: you can use these paper flower templates to create beautiful roses, daisies, peonies, and daffodils, decorating your room, daycare center, hotel, restaurant, birthday party, wedding party, photography studio, etc., making them elegant
- Cut a 9-inch strip of crepe-paper streamer.
- Fringe one long edge with repeated narrow cuts, leaving the opposite edge intact.
- Lightly dab a cotton ball with fragrance oil. Use only a product whose label permits the intended use; fragrance oil is not automatically food-safe, skin-safe, or pet-safe.
- Wrap the cotton ball in paper to create a small stamen center.
- Wrap the fringed strip around the center, allowing the fringe to form the flower’s fine petals.
- Secure the base with stretched floral tape and continue down the wire stem.
Safety: Keep scented paper flowers away from children, pets, food, skin-contact uses, candles, fireplaces, hot bulbs, heaters, and open flames. Fragrance makes the paper decorative; it does not make it safe to use like a real flower.
8. Splattered tissue-paper flowers
Best for: Colorful party décor coordinated to a painted event palette. Difficulty: Easy, provided the base flower is already assembled. Paper: Tissue paper or a tissue pom-pom.
This is a finishing treatment rather than a separate flower pattern. First make a tissue flower, preferably the accordion pom-pom above.
- Mix water with a small amount of paint in a spray bottle.
- Test the spray on scrap tissue. A fine mist creates a tint; a partially depressed pump creates larger droplets.
- Spray one color at a time from different distances. Keep the bottle moving so one spot does not become saturated.
- Allow the flower to dry before adding another color or moving it to its display location.
- Fluff any flattened layers only after the paper is fully dry.
The related tissue-and-crepe craft guide recommends adding paint to water in a spray bottle and applying one color at a time. Too much liquid collapses tissue and creates blotches.
Quick wins for a faster PC:
Scan for outdated or missing drivers - takes under a minuteDriver Scan →Clear out junk files and repair common Windows errorsFree Scan →9. Large crepe-paper roses
Best for: A statement bouquet, wall décor, or oversized arrangement. Difficulty: Moderate. Paper: Double-sided crepe paper.
The standard rose pattern in the detailed Martha Stewart crepe-paper guide uses five small inner petals and seven larger outer petals. Use the single-petal template and leaf template.
- Print the pattern on cardstock. Mark the grain direction and align it from each petal’s base toward its tip.
- Cut five small petals and seven larger petals, or scale the entire pattern proportionally for a larger bloom.
- Create a firm bud or stamen on floral wire. Wrap the first small petal tightly around it.
- Cup each petal below its middle by gently stretching the crepe. Curl the upper edge outward with a pencil or skewer.
- Pleat the base of each petal and attach the remaining small petals around the bud.
- Add the seven larger petals in a second ring. Raise each successive petal slightly and stagger its seam.
- Wrap the flower base and stem with stretched floral tape. Add leaves several inches below the bloom.
Scaling warning: An enlarged flower exerts more leverage on its stem. Reinforce the center or use stronger wire rather than simply making the petals larger and leaving the original support unchanged.
10. Hanging paper-bag flowers
Best for: Large hanging decorations, classroom displays, garlands, and party backdrops. Difficulty: Easy. Paper: Six gusseted paper bags of the same size and color.
You will also need scissors, a hole punch, double-sided tape, and string. The six-bag basis comes from the Martha Stewart project roundup; the assembly reconstruction shows the stacking and opening sequence.
- Flatten the six bags and trim away uneven sections at the open ends.
- Draw a simple petal point or rounded petal shape on the open end and cut all six bags consistently.
- Apply double-sided tape between the bags in a central vertical line or the pattern’s recommended contact areas. Do not cover every surface or the flower will be difficult to open.
- Stack the bags in the same direction and press the taped areas together.
- Punch a hole through the center of the stacked bags and thread string through it. Tie securely, leaving a loop for hanging.
- Open the first and last bags away from the stack until they meet, forming a circular flower. Separate the remaining layers carefully.
Test first: Bag width, gusset depth, and the shape of the cut ends all change the finished flower. Make one sample before cutting a large quantity.
11. Small paper pom-pom flowers
Best for: Party favors, small arrangements, and a quick beginner flower on a stem. Difficulty: Easy. Paper: Tissue paper, single-ply crepe, or double-ply crepe.
This version is different from the large accordion-fold hanging pom-pom: it is a smaller fringed flower made from a strip or compact folded stack and intended for a vase, favor, or arrangement.
The Tool Desk
Outbyte PC Repair FREEClear out junk files and repair common Windows errorsFree Scan →Outbyte Driver Updater FREEFix the driver behind crashes, sound loss and screen glitchesFind Drivers →- Cut a rectangular strip or small stack of tissue or crepe paper. Use a paper guide if you want identical flowers, but no complex template is required.
- Fringe one long edge, leaving a continuous uncut edge for gathering.
- Gather or wrap the strip around a small paper or cotton center. Keep the center tight enough to support the fringe.
- Secure the base with glue or floral tape. Attach a short wire stem if the flower will go in a vase.
- Fluff the fringe outward one section at a time. Trim uneven tips only after the flower is formed.
Fringe scissors can speed up a batch but are optional. If the flower looks sparse, add another strip rather than pulling the existing fringe harder.
12. Paper asters
Best for: Filler flowers and multi-bloom stems. Difficulty: Moderate. Paper: Crepe or tissue paper.
The aster uses a cotton-and-glitter center, fine fringed petals, twisted ribbon paper, and leaves. Use the general leaf patterns for the foliage; the supplied material does not identify a separate aster petal PDF.
- Make a small center from cotton. Apply a thin layer of adhesive and add glitter, then allow it to dry completely.
- Cut narrow fringed strips from crepe or tissue paper. Keep the uncut edge intact.
- Wrap the fringed strip around the center, adding several small blooms to one stem if you want a branching aster effect.
- Secure each bloom with floral tape and cover the stem.
- Cut and attach leaves below the flowers. Add twisted ribbon paper if the design calls for extra texture.
- Fan the fringe evenly and remove loose glitter before placing the stem near fabrics or children.
Failure mode: Too much glitter makes the center heavy and can pull the petals out of shape. Use a thin adhesive layer.
Recommended Free Tools
Continuous-petal flowers: the strip method
Not every crepe flower is assembled from separate petals. Martha’s detailed crepe guide separates the individual-petal method from the continuous-petal method. With the strip method, the petals remain connected along a folded edge, are fringed or cut as a continuous unit, and then wrap around the center.
Rank #4

- 46 COLOR CREPE PAPER: This kit includes 46 rolls of crepe paper in different colors (each 10" x 98"), 100 floral wire stems, 1 roll of green floral tape, a pair of scissors, and a roll of double-sided tape
- HIGH-QUALITY MATERIALS: Our crinkle rolls are made from high-quality pulp, and each sheet is tear-resistant, fade-resistant, and recyclable. The green metallic thread is soft and elastic, allowing it to be easily bent into various shapes. The product also comes with tape and scissors to help you easily create works of art
- INTERESTING DIY: You can share these colorful crepe papers with your children, friends, family, or anyone who enjoys crafting, and enjoy the fun of making origami flowers together. This is also the perfect gift for DIY enthusiasts
- MULTIPLE COLOR COMBINATIONS: Our crepe paper comes in 46 different colors, each with uniform color and no color difference. With such a wide range of colors to choose from, you can create the perfect piece according to your needs
- WIDELY USED: Our crepe paper is suitable for various occasions, such as weddings, birthday parties, singles parties, anniversaries, and other important occasions, so you can use it to decorate the place you need
| Flower pattern | Cut list | Assembly idea |
|---|---|---|
| Carnation | Three strips, each 12 inches long and 2 inches high. | Gather and wrap the strips around the center for a ruffled bloom. |
| Spider mum | One 36-inch strip, 5 inches high. | Use long, narrow petals to create a radiating flower. |
| Dahlia | One 32-inch strip, 3¾ inches high. | Wrap the continuous strip in a controlled spiral. |
| Daisy | One 18-inch strip, 3¼ inches high. | Wrap the strip around the center, then open and shape the petals. |
Download the carnation and spider-mum patterns or the dahlia and daisy patterns. Leave the petals attached along the fold as the template indicates. A continuous strip is faster than cutting and attaching many individual petals, but it is less forgiving: uneven tension while wrapping produces an uneven flower.
Standard workflow for a stemmed crepe-paper flower
- Print the petal and leaf patterns onto cardstock.
- Mark the grain direction on the pattern.
- Align the crepe ridges lengthwise with each petal or leaf.
- Cut the required number of pieces.
- Make the center: a button, bud, pistil, floret, or fringe, depending on the flower.
- Cup, curl, and pleat every petal before attaching it.
- Stretch floral tape slightly and wrap the base of the center.
- Add petals one at a time, overlapping and staggering them.
- Wrap the completed flower base and wire stem with floral tape.
- Add leaves below the bloom.
- Make final angle adjustments only after the tape or adhesive has secured the structure.
For more detailed stamen dimensions, wire examples, and separate individual- and continuous-petal methods, see the detailed crepe-paper flower guide.
Hand cutting versus Cricut or Silhouette
Hand cutting
- Advantages: No machine or software is needed, delicate crepe and tissue are easier to control, one-off size changes are simple, and it is suitable for children’s crafts or small batches.
- Trade-offs: Repeated petals take longer and may vary in size. Intricate cardstock designs are harder to reproduce consistently.
Cutting-machine workflow
- Download an SVG or import the compatible design into the machine software. A PDF may need to be traced or converted; do not assume every PDF is a cut-ready file.
- Size the entire design proportionally.
- Choose the material setting closest to the actual paper.
- Select the appropriate mat. Cricut’s current guidance distinguishes LightGrip, StandardGrip, and StrongGrip mats by material weight.
- Load the paper and run a test cut.
- Cut the full batch only after the test succeeds.
- Remove the excess paper first. Peel the mat away from the paper rather than aggressively pulling the paper upward.
- Shape and assemble the pieces by hand.
Cricut’s cardstock guidance recommends a test cut because results vary by paper, blade, mat, and machine. Its paper-flower guidance also recommends turning the mat over and peeling it backward to reduce curling.
Do these 3 things before closing this tab:
1Clear out junk files and repair common Windows errors2Scan for outdated or missing drivers - takes under a minute3Repair Windows errors before they cause bigger problemsA machine is most useful for large batches, layered cardstock flowers, wedding décor, and repeated backdrops. For a single rose, tulip, poppy, or coffee-filter flower, sharp scissors are usually faster than troubleshooting a new machine setting.
Adhesive choices
| Adhesive | Best use | Watch for |
|---|---|---|
| Floral tape | Wrapping stems and attaching crepe petals to wire. | It must be stretched slightly to activate its tack. |
| Hot glue | Fast, strong bonds for cardstock, giant flowers, and wall décor. | Bulky glue spots and burn risk; use low temperature or adult supervision for children. |
| Tacky or PVA glue | Clean paper-to-paper bonds where a little drying time is acceptable. | Too much liquid can wrinkle lightweight paper. |
| Double-sided tape | Paper bags, favors, and light temporary décor. | Less suitable for heavily stressed structural joints. |
| Glue stick | Light paper and children’s crafts. | Usually not strong enough for heavy layered cardstock flowers. |
Test the adhesive on a scrap of the exact paper. Coatings, paint, humidity, and glue formulas change how a bond behaves.
Troubleshooting paper flowers
Petals tear
Likely causes: Dull scissors, too many layers, cutting against the crepe grain, overstretching, or assembling wet painted paper.
- Use sharper scissors and fewer layers.
- Keep the cardstock pattern on top while tracing or cutting delicate pieces.
- Align the crepe grain from base to tip.
- Let paint and coffee filters dry completely.
- Stretch only until the petal cups.
Sharp cutting tools and grain alignment are also emphasized in the Martha Stewart crepe method and Lia Griffith’s crepe-paper guidance.
The flower looks flat
- Cup the center of each petal instead of merely curling its edge.
- Pleat the bases before attaching them.
- Raise later petal rings slightly.
- Stagger the seams.
- Use a firmer center or heavier paper where the structure is collapsing.
Petals point in the wrong direction
Check the grain before recutting the whole flower. Cut one test petal with the ridges running from base to tip and compare it with a petal cut in the other direction. The incorrectly aligned piece will usually stretch or curl across its width rather than along its length.
The center is lumpy
- Reduce the amount of cotton or paper in the center.
- Keep the first petals tight.
- Wrap floral tape around the stamen before adding petals.
- Offset each petal rather than stacking all the bases in one spot.
Tissue tears while fluffing
- Separate one layer at a time.
- Pull outward from the center, not upward by the tips.
- Use better-quality tissue if the paper fails repeatedly.
- Leave wider margins when cutting pointed or scalloped ends.
The dedicated pom-pom instructions specifically direct makers to separate the layers one at a time.
The printed template is the wrong size
- Confirm that the printer is set to 100% or Actual Size.
- Measure the reference mark on the printed page.
- Resize the entire design proportionally.
- Do not enlarge a petal without enlarging its corresponding center and leaves.
The Cricut tears or fails to cut
- Choose the material setting closest to the actual paper.
- Use the mat recommended for that weight.
- Clean or replace a blade that leaves incomplete cuts.
- Run a test cut before the complete batch.
- For thin crepe or tissue, use hand cutting unless you have already tested that exact machine-and-material combination.
Paint curls or bleeds through the paper
- Use less liquid.
- Paint pieces before assembly.
- Dry them flat or support them gently while drying.
- Test paint on the exact paper.
- Apply splatter in light passes instead of saturating the flower.
Wall flowers fall down
- Use hidden thumbtacks for lightweight, temporary décor.
- Use removable hook-and-loop strips where suitable for the wall surface.
- Clean and dry the wall before applying removable strips.
- Do not rely on ordinary tape for a long-term installation.
- Test one mounted flower before creating the full backdrop.
The giant-flower guide from The Craft Patch discusses hidden thumbtacks and removable strips and treats ordinary tape as a short-term option.
Display, storage, and longevity
- Stemmed flowers: Put wired flowers in a dry vase, bottle, or floral foam. Keep the stem attachment above any water.
- Hanging décor: Use ribbon, string, fishing line, or monofilament suited to the flower’s weight and the mounting point.
- Wall flowers: Choose the least aggressive secure method that will hold the weight. Remove removable strips according to their instructions so the flower does not tear as it comes down.
- Storage: Keep flowers dry, dust-free, and loosely covered in a box. Do not compress tissue pom-poms or sharply bend wired crepe petals.
- Sunlight: Direct sunlight can fade paint and paper over time. Rotate or shade displays if color preservation matters.
- Outdoor use: Do not assume any paper flower is suitable for outdoor exposure. Moisture, wind, sunlight, and temperature changes can damage the paper and adhesive unless the complete construction has been tested.
Martha Stewart describes paper flowers as capable of lasting for a very long time, but that is not a guarantee of decades-long life. Longevity depends on the paper, adhesive, sunlight, moisture, dust, and handling.
Recommended Free Tools
Safety for paper-flower making and display
- Hot glue guns can burn skin. For children, use low-temperature glue or have an adult handle the gun. The U.S. Consumer Product Safety Commission art-and-craft guide advises against high-temperature glue guns for children.
- Keep scissors, floral wire, wire ends, fragrance oils, glitter, and small embellishments away from unsupervised young children.
- Keep tissue, crepe paper, cardstock, paper bags, and scented flowers away from candles, fireplaces, heaters, hot bulbs, and open flames. Use battery-powered LED lights instead of candles in paper décor. See the CPSC paper-decoration and holiday safety guidance.
- Do not put scented paper flowers in food or drink, or use them for direct skin contact.
- When displaying a paper flower with a real plant or water-filled container, keep the paper above the waterline.
- Paper flowers are not automatically flame-resistant, waterproof, pet-safe, or child-safe simply because they are made from craft materials.
A practical beginner path
Make a tissue pom-pom if you need a quick decoration, a folded printer-paper flower if you want a no-glue craft, or a crepe-paper tulip if you want to learn transferable techniques. Once you can align the grain, cup a petal, pleat its base, stagger the layers, and wrap floral tape, the same skills carry over to roses, lilies, peonies, daffodils, and many other paper flowers.
Source and template notes
The 12-project list corresponds to Martha Stewart’s paper-flower roundup. That page is primarily a visual roundup, so the instructions here consolidate its project concepts with the linked detailed tutorials and PDFs. The general crepe-paper construction methods come from Martha Stewart’s crepe-paper guide. Template availability can change if a source updates or removes a PDF; always confirm the printed reference measurement before cutting a full batch.
Frequently Asked Questions
Do I need a Cricut to make paper flowers?
No. Scissors are enough for all 12 project types. A Cricut or Silhouette is useful for large batches and consistent cardstock petals, but it requires the right file, blade, mat, material setting, and a successful test cut.
Can I use cardstock instead of crepe paper?
Only when the construction allows it. Cardstock is strong for giant wall flowers and crisp layered blooms, but it does not stretch or cup like crepe paper. It is also too thick for the multi-fold kirigami flowers, which work best with ordinary 24-pound printer paper.
Free tools Windows power users keep installed
One-click scans. No signup required.
Why does the article not give a separate printable template for every flower?
The source roundup does not expose a dedicated PDF for every entry. The poppy, dahlia favor, tulip favor, coffee-filter rose, general crepe petals, leaves, and continuous strips have direct pattern links. The daffodil, scented flower, splattered flower, paper-bag flower, and small paper pom-pom use adaptable shapes, measured strips, or a base flower instead.
How do I keep paper flowers from falling off a wall?
Use hidden thumbtacks for lightweight temporary displays or an appropriate removable hook-and-loop strip on a clean, dry wall. Test one flower first, avoid ordinary tape for long-term installations, and remove adhesive according to its instructions so the flower and wall are not damaged.
The Bottom Line
Start with tissue pom-poms for speed, folded printer paper for a no-glue craft, or a crepe-paper tulip for realistic flower-making skills. Print patterns at Actual Size, align crepe-paper grain from petal base to tip, shape before assembling, and test every adhesive, paint, printer setting, or cutting-machine setting on scrap first.
Quick Recap





