Free tools Windows power users keep installed
One-click scans. No signup required.
The Tool Desk
Outbyte PC Repair FREERepair Windows errors before they cause bigger problemsFix Now →Outbyte Driver Updater FREEScan for outdated or missing drivers - takes under a minuteDriver Scan →ThatPainter is reader-supported. When you buy through links on our site, we may earn an affiliate commission. Learn More
The most effective Photoshop tool for making a person appear slimmer is Liquify: choose Filter > Liquify, isolate the subject, then make small, low-pressure adjustments to the silhouette. For a believable portrait, do not rely on a dramatic waist squeeze. Improve the crop, perspective, lighting, clothing, skin, and facial balance as well—and preserve an untouched original.
As an Amazon Associate I earn from qualifying purchases.
Photoshop changes the pixels in a photograph, not the person. The goal should be a flattering, recognizable image rather than an artificial transformation or a claim about what anyone should look like.
What Photoshop can—and cannot—change
Retouching can change the apparent proportions of a waist, arms, shoulders, legs, neck, and face. It can also alter the relationship between the subject and the frame, remove temporary blemishes, correct distracting shadows, smooth clothing wrinkles, and improve the way light defines the face.
Popular on Amazon

- PLEASE NOTE:XPPen Artist13.3 Pro drawing tablet Need to connect with computer,you need to use it with your computer or laptop, the 3 in 1 cable is included
- Drawing Tablet with Screen: Tilt Function- XPPen Artist 13.3 Pro supports up to 60 degrees of tilt function, so now you don't need to adjust the brush direction in the software again and again. Simply tilt to add shading to your creation and enjoy smoother and more natural transitions between lines and strokes
- Graphics Tablets: High Color Gamut- The 13.3 inch fully-laminated FHD Display pairs a superb color accuracy of 88% NTSC (Adobe RGB≧91%,sRGB≧123%) with a 178-degree viewing angle and delivers rich colors, vivid images, and dazzling details in a wider view. Your creative world is now as powerful as it is colorful
- Drawing Pad: One is enough- The sleek Red Dial on the display is expertly designed with creators in mind, its strategic placement allows for natural drawing postures. With just one wheel, you can effortlessly zoom in and out, adjust brush sizes, and flip the canvas—all tailored to suit the habits of everyday artists. The 8 customizable shortcut keys allow you to personalize your setup, streamlining your workflow and enhancing creative efficiency
- Universal Compatibility & Software Support:supports Windows 7 (or later), Mac OS X 10.10 (or later), Chrome OS 88 (or later), and Linux systems. Fully compatible with major creative software including Photoshop, Illustrator, SAI, and Blender 3D. Register your device to access additional programs like ArtRage 5 and openCanvas for expanded creative possibilities.
It cannot reliably create a convincing result when the original file is tiny or heavily compressed, when another person or object hides part of the body, or when complex architecture sits immediately beside an area you want to reshape. In those cases, pixel deformation tends to produce smears, gaps, halos, or bent lines.
Prepare a reversible Photoshop document
- Open the photograph and save a copy as a layered PSD or PSB.
- Duplicate the original layer.
- Keep an untouched, hidden layer named
Originalat the bottom of the stack. - Convert the working duplicate to a Smart Object: right-click the layer and choose Convert to Smart Object.
- Use descriptive names such as
Liquify body,Liquify face,Skin cleanup,Dodge and burn, andFinal color.
Applying Liquify to a Smart Object makes later changes more flexible, although a layered workflow is not a guarantee that every operation is permanently risk-free. Adobe documents Smart Objects as part of a more flexible Liquify workflow: Liquify in Photoshop.
Make the photograph more flattering before reshaping the body
Many “slimming” improvements come from proportion and composition rather than distortion.
- Crop excess space: remove distracting empty areas without enlarging the subject unnaturally. Avoid cropping directly through joints.
- Correct perspective: straighten a tilted horizon or converging verticals. A camera angle or wide lens can exaggerate the parts of the body closest to the camera.
- Control attention: use tonal contrast to draw attention toward the face and darken distracting bright areas near the waist or edges of the frame.
- Compare crops: keep the original and proposed crop visible while deciding. A better frame can make the image feel more balanced without changing anatomy.
For future shoots, camera position, pose, lighting, and focal length usually create a more natural result than trying to correct a large distortion afterward.
Make a person look slimmer with Liquify
Adobe’s Liquify filter uses brush-based tools to push or pull pixels, with controls including brush size, pressure, and density. On Photoshop desktop, use Filter > Liquify: Adobe’s Liquify overview.
Protect the background first
The most common failure is moving the background along with the subject. Make a rough selection around the person, refine the edge around hair, hands, and loose fabric, and add a layer mask instead of deleting pixels. Protect door frames, rails, tiles, windows, walls, and other straight or repeated patterns.
Also popular on Amazon

- Please note: Kamvas 13 (Gen 3) Pen Display is not a standalone product, this device must be connected to a computer/laptop to work.
- All-new Canvas Glass 2.0: HUION Kamvas 13 (Gen 3) drawing tablet for pc features a fully laminated 13.3-inch screen and brand new anti-sparkle canvas glass 2.0 for reduced glare and improved accuracy. It is perfect for designers, artists, and illustrators to unleash their creativity.
- Advanced PenTech 4.0 Technology: The 16384 levels of pressure sensitivity and 2g IAF ensure a fluid and natural drawing experience, while the 3 customized pen side buttons improve your workflow.
- Improved Color Accuracy: With enhanced color accuracy to Avg. ΔE<1.5, 16.7 million display colors, 99% sRGB coverage, and Rec.709 standard color gamuts, HUION Kamvas 13 (Gen 3) digital art tablet delivers stunning visuals.
- Rigorous Color Calibration: HUION Kamvas 13 (Gen 3) drawing monitor includes a factory calibration report for added assurance of color consistency.
Photoshop’s web guidance also demonstrates constraining Liquify with a selection mask: Liquify in Photoshop on the web.
Free tools Windows power users keep installed
One-click scans. No signup required.
Use small, controlled movements
- Select the masked subject layer or Smart Object and open Filter > Liquify.
- Zoom in far enough to see both the body edge and nearby background.
- Choose the main push or warp tool.
- Use a brush large enough to affect the contour gradually. Lower pressure is safer than one aggressive stroke.
- Make several short strokes rather than one long drag.
- Adjust one area at a time, then use Preview to compare the edit with the original.
- Use Undo or Reconstruct to remove a localized distortion.
- Click OK only after checking the entire image at normal viewing size and at 100%.
Do not copy fixed brush settings from another image. The correct size and pressure depend on image resolution and the scale of the subject. As a principle, use a large brush, moderate or low density, low pressure, short strokes, and untouched structure between adjustments.
Areas that may need subtle correction
- Waist: pull the side contour inward slightly, keeping the transition into the ribs and hips smooth.
- Upper arms: reduce an outward bulge caused by pose or perspective, but preserve the shoulder-to-elbow relationship.
- Hips and thighs: refine an accidental contour created by clothing or lens angle without removing natural asymmetry.
- Shoulders: correct exaggerated width only enough to keep the head, neck, and torso proportionate.
- Neck: use extreme restraint; aggressive neck edits are easy to notice.
- Clothing: treat bunching or a flared jacket edge as a fabric problem rather than simply squeezing the body underneath it.
Real bodies and poses are rarely perfectly symmetrical. Matching both sides exactly can look less natural than preserving the original asymmetry.
Slim and refine the face with Face-Aware Liquify
When Photoshop detects a face, Face-Aware Liquify offers controls for face width, jawline, forehead, eyes, nose, and mouth. The desktop path is Filter > Liquify, followed by the Face-Aware Liquify panel. Adobe’s documented workflow is described here: Face-Aware Liquify.
- Select the layer containing the face, preferably a Smart Object.
- Open Filter > Liquify.
- Expand Face-Aware Liquify and select the correct face if several people are detected.
- Open Face Shape and make a conservative adjustment to face width or jawline.
- Use the Eyes, Nose, and Mouth controls only when that specific change is intentional and coherent with the rest of the face.
- Check glasses, earrings, teeth, facial hair, ears, and the hairline before accepting the filter.
Slimming the face does not require enlarging the eyes, narrowing the nose, or changing the mouth. If detection fails because the face is too small, turned away, blurry, or poorly lit, use a low-pressure manual brush—or leave the feature alone.
Do these 3 things before closing this tab:
1Fix the driver behind crashes, sound loss and screen glitches2Clear out junk files and repair common Windows errors3Scan for outdated or missing drivers - takes under a minuteMake the portrait look polished without erasing identity
“Prettier” is subjective. In practical retouching, it is better understood as cleaner, more balanced, and more consistent with the subject’s stated goal.
Also popular on Amazon

- [Outstanding Visuals] You can enjoy immersive viewing in great clarity and fine detail with the help of 15.6-inch full-laminated screen and anti-glare glass of the Huion Kamvas Pro 16 drawing tablet with screen. For a good feel while drawing, the graphics drawing monitor contains smooth but slight texture.
- [Brilliant Color] See your creations in vibrant and true-to-life colors on this pen display with 120% sRGB (92% AdobeRGB) color gamut volume(16.7 million 8-bit). 1000:1 contrast ratio shows shadow details clearer and sharper.
- [Optimized Workflow] Kamvas pro 16 drawing monitors comprise with 6 customized express keys and a touch bar which is helpful to get access to favorite shortcuts of keywords or mouse to achieve different operations like zooming in and out, adjusting brush size, saving time and keystrokes.
- [Adjustable Stand ST200] The adjustable stand can be moved between 20 and 60 degrees to suit your working way, which helps reduce tension for your neck, shoulder, and back, and offers you the best viewing angle for drawing and typing.
- [Advanced Pen Performance]The art tablet includes a pen without battery which provides accurate and responsive performance, 60° tilt recognition, and virtually lag-free tracking. Moreover, the pen contains 2 side buttons that can be programmable to the software’s shortcuts.
- Remove temporary blemishes, lint, and distracting stray hairs.
- Retain permanent features such as freckles, scars, and moles unless the subject specifically requests a change.
- Reduce under-eye darkness rather than removing all natural variation.
- Brighten the eyes slightly without whitening the entire eye.
- Whiten teeth subtly and preserve their shape and texture.
- Correct color casts in skin, clothing, and background.
- Use Dodge and Burn to clarify facial structure instead of blurring it away.
A restrained skin workflow
- Create a new blank layer for cleanup.
- Set Healing or Clone tools to sample the current and lower layers where appropriate.
- Work at 100% and remove temporary distractions first.
- Use Healing for small blemishes that should blend into nearby texture.
- Use Clone Stamp when exact texture or edge control is needed.
- Use Dodge and Burn for uneven light while preserving skin texture.
- Zoom out frequently and reduce the layer opacity if the retouching becomes obvious.
Broad blur is usually the least reliable primary method: it destroys pores and creates plastic-looking skin.
Correct clothing, posture, and silhouette
A twisted shirt, a jacket that flares outward, a sleeve pushed toward the camera, or a hand pressed against the torso can make a subject look wider than intended. Correcting those details may produce a more believable result than reshaping the entire body.
Use Liquify for small fabric corrections, or use Puppet Warp for a limited pose change such as moving an elbow or relaxing a shoulder. Adobe describes Warp as bending or stretching an image through a flexible grid and Puppet Warp as repositioning selected areas while keeping others anchored: Photoshop distortion tools.
After editing, inspect seams, buttons, stripes, plaid, zippers, text, logos, jewelry, belt lines, and cast shadows. Clothing should still follow the body rather than appearing independently reshaped.
Repair warped backgrounds and edges
If the subject was not isolated, Liquify may bend a wall, repeat a tile pattern, or create a gap around hair. Undo the distortion where possible, then rebuild damaged areas on a separate layer with Clone Stamp, Healing, or Content-Aware tools. Inspect the border at 100% for halos and hard cutout edges.
Selections that are too rough can be just as visible as the original distortion. Hair, fingers, transparent fabric, and loose garments need especially careful masking.
Also popular on Amazon
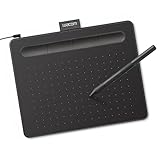
- Wacom Intuos Small Graphics Drawing Tablet: Enjoy industry leading tablet performance in superior control and precision with Wacom's EMR, battery free technology that feels like pen on paper
- Works With All Software: Wacom Intuos tablet can be used in any software program to explore new facets of digital creativity; draw, paint, edit photos/videos, create designs, and mark up documents
- What the Professionals Use: Wacom's industry leading pen technology and pen to paper feeling makes it the preferred drawing tablet of professional graphic designers
- Software and Training Included: Only Wacom gives you software with every purchase. Register your Intuos tablet and gain access to some of the best creative software and Wacom's online training
- Wacom is the Global Leader in Drawing Tablet and Displays: For over 40 years in pen display and tablet market, you can trust that Wacom to help you bring your vision, ideas and creativity to life
Quality-control checklist
Before exporting, inspect the image at fit-to-screen size, 100%, and in a horizontally flipped view. Also compare the original and edited versions directly. Check for:
- bent door frames, walls, rails, tiles, or windows;
- pinched waists and detached-looking arms;
- distorted fingers, glasses, earrings, or teeth;
- a face that is too narrow for the neck;
- broken clothing seams, patterns, or logos;
- repeated skin texture and plastic-looking highlights;
- halos around hair and clothing;
- shadows that no longer match the edited body;
- an unnatural loss of the subject’s recognizable features.
If the edit is the first thing you notice, reduce it. A subtle correction that survives a quick glance is usually more successful than a dramatic transformation.
Independent reader supportYour contribution helps us test, update, and keep practical guides available for everyone.When another tool—or another editor—is better
| Problem | Better starting point |
|---|---|
| Small contour correction | Liquify |
| Whole-garment or larger shape adjustment | Transform or Warp |
| Small pose correction | Puppet Warp |
| Tilted framing or lens perspective | Crop, Perspective, or lens correction |
| Broken background texture | Layer masks, Clone Stamp, Healing, or Content-Aware tools |
Photoshop on the web documents the path Retouch > Liquify, but tool names and layouts can differ between desktop, web, mobile, and Express editions: Photoshop web Liquify tools.
For a single casual image, a simpler editor may be sufficient. For layered, precise work involving masks, Smart Objects, background repairs, and detailed retouching, Photoshop is the more appropriate choice. Professional retouching may be worthwhile for weddings, agencies, actors, corporate headshots, and large batches. Compare portfolios, revision policies, turnaround, commercial rights, layered-file delivery, privacy practices, and whether natural texture is preserved.
Ethical and professional considerations
Obtain the subject’s consent before making substantial body or facial changes. Correcting a temporary distraction is different from changing someone’s body identity. Editorial, advertising, documentary, medical, and news work may require disclosure of substantial manipulation and should follow the client’s or publication’s standards.
What’s actually slowing this PC down?
Pick the symptom - the matching free tool is one click away.
Save the layered file and never overwrite the original camera file. Export a high-quality JPEG for ordinary web or social use; use PNG when transparency is required. Keep enough resolution for the intended destination and retain a record of the edited version when the image is used commercially.
Also popular on Amazon

- Customize Your Workflow: The 6 customizable press keys on Huion H640P drawing tablet for pc let you assign your most-used commands—like undo, zoom, brush switch, or save—so you can keep your hands on the tablet and your mind on the art. Whether you're a digital painter switching brushes, or a comic artist zooming in and out, these keys keep your workflow smooth and uninterrupted. Plus, the Huion driver lets you save different shortcut profiles for different apps, so you never have to reconfigure when switching software.
- Professional Pen Performance: Huion H640P drawing pad for computer comes with the battery-free PW100 stylus that's always ready when inspiration strikes. With 8192 levels of pressure sensitivity, every light sketch, or bold stroke responds naturally to your hand—just like a real pen. The 5080 LPI resolution and 233 PPS report rate deliver lag-free, precise strokes, so you can draw confidently without second-guessing your cursor. The pen side buttons help you switch between pen and eraser instantly.
- Compact and Portable: Huion H640P computer graphics tablet features a compact, ultra-portable design at just 0.3 inches thin and 0.61 lbs light, so it slides easily into your backpack—perfect for sketching in coffee shops, taking notes in class, or editing on the go between home and studio. The 6x4 inch active area offers enough room for natural pen movements while fitting comfortably on crowded desks, or lecture hall seats.
- Stable Compatibility: Huion H640P graphic drawing tablet works seamlessly with Mac, Windows, Linux PCs, and Android smartphones/tablets (OS version 6.0 or later). Left-handed friendly, and you just need to flip the tablet and adjust the settings in the driver. Please note: H640P does NOT support iPhone/iPad.
- Move Beyond the Mouse: Huion Inspiroy H640P is a pen tablet that replaces your mouse for more natural, precise control. Freehand draw, take notes, or even play OSU—everything you do with a mouse, you can do better with a pen. The precise tip makes it ideal for detailed photo editing, graphic design, or signing PDF. Meanwhile, the ergonomic pen grip helps you avoid the strain that comes from hours of using a mouse.
Adobe’s US pricing page was observed listing Photoshop at US$22.99 per month on an annual plan billed monthly, while the Photography plan including Photoshop and Lightroom was listed at US$19.99 per month; an annual prepaid Photoshop option was listed at US$263.88 per year. Prices, taxes, promotions, and trial terms can change, so check Adobe’s current plans before subscribing.
Frequently Asked Questions
Can I make someone look slimmer without using Liquify?
Yes. Start with cropping, perspective correction, lighting, pose, and clothing cleanup. These changes can improve perceived proportions without directly reshaping the body.
Why does Liquify warp the background?
The brush affected pixels outside the subject. Undo the change, isolate the person with a selection and layer mask, then inspect and repair nearby lines or repeating textures.
How do I undo a Liquify edit?
Use Undo or Reconstruct inside the Liquify workspace. If Liquify was applied to a Smart Object, reopen its Smart Filter for further editing; a hidden original layer provides an additional fallback.
Can I do this on a phone?
Availability and controls vary by Photoshop edition. Photoshop on the web documents Retouch > Liquify, while mobile and Express workflows may not provide the same desktop tools.
How much retouching is too much?
When anatomy, texture, background geometry, or recognizable features become visibly inconsistent—or the edit is more noticeable than the subject—the adjustment is too strong.
Quick Recap


