Recommended Free Tools
Windows Errors? Fix Them Before They Spread
Free scan · no reinstall
Crashes, No Sound, or Screen Glitches?
The Tool Desk
Outbyte Driver Updater FREEScan for outdated or missing drivers - takes under a minuteDriver Scan →Outbyte PC Repair FREEClear out junk files and repair common Windows errorsFree Scan →Free scan · under a minute
PC Slower Than It Used to Be?
Free scan · Windows 10 & 11
ThatPainter is reader-supported. When you buy through links on our site, we may earn an affiliate commission. Learn More
Make a first pysanka by writing with hot wax, dyeing from light to dark, and removing the wax at the end. This Ukrainian wax-resist tradition creates the design in layers—so the colour you want to keep must be waxed before the next dye bath.
As an Amazon Associate I earn from qualifying purchases.
Free tools Windows power users keep installed
One-click scans. No signup required.
A pysanka is made by writing with hot wax before each dye bath—not by painting the finished image on the shell. The wax protects the colour already on the egg, so the design is built in reverse: protect white, dye; protect that new colour, dye again; then melt away the wax to reveal the finished layers.
This is a simple starter lesson in the Ukrainian wax-resist tradition of pysanka-making. It teaches the core technique, not a single universal set of Ukrainian patterns, colours, meanings, or preparations. UNESCO’s 2024 inscription describes pysanka-making as a living Ukrainian tradition, shared through families and classes and meaningful beyond Easter as well as within it.
#1 Best Overall

- 1-pound of batiking wax
- For wax resist dyeing
Before you start: this is a decorative raw-egg project
Traditional pysanky are commonly made on raw eggs. Treat this version as decoration, not an edible dyed Easter egg. If you want eggs to eat, use hard-cooked eggs, food-safe colouring, and a separate food-safety approach; do not assume this hot-wax, raw-shell workflow makes an egg edible.
You may also begin with a properly hollowed shell. Raw eggs can carry Salmonella. For hollow shells, the USDA says to use only uncracked refrigerated eggs, wash the shell in hot water, then rinse it with 1 teaspoon liquid chlorine bleach per 1/2 cup water before removing the contents. Refrigerate the contents promptly if you intend to use them as food. Read the complete USDA shell-egg guidance before hollowing eggs.
What you need
- One clean, uncracked egg, or a safely prepared hollow shell
- A kistka (also spelled kystka)—the funnel-tipped wax-writing tool
- Clean beeswax
- Pencil
- Soft cloth or paper towel
- Dyes, arranged from light to dark, in containers suited to the dye instructions
- A controlled heat source appropriate to your kistka, plus a safe rest for the hot tool
- Protected work surface
A kistka is not simply a paintbrush: its small funnel holds liquid wax so you can write fine, controlled lines on the shell. The University of Kansas provides a useful visual explanation of the tool and process in its pysanky guide.
The one rule to remember
Wax preserves the colour that is already on the shell. Once wax covers an area, later dye cannot colour it. Work from your lightest intended colour to your darkest.
| What you do | What it preserves |
|---|---|
| Wax a white line on the natural shell | That line stays white |
| Dye the egg yellow, then wax a shape | That shape stays yellow |
| Dye orange, then wax more details | Those details stay orange |
| Finish in a dark dye | Every unwaxed area becomes the dark background |
This staged light-to-dark sequence is the essential wax-resist logic. The example below—yellow, orange, red, then black—is a widely taught beginner sequence, not a rule that every pysanka must follow.
The Tool Desk
Outbyte Driver Updater FREEFix the driver behind crashes, sound loss and screen glitchesFind Drivers →Outbyte PC Repair FREEClear out junk files and repair common Windows errorsFree Scan →Rank #2
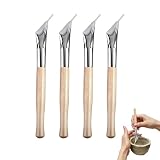
- Versatile Wax Application: Suitable for a variety of surfaces including ceramic, clay, and fabric, these batik pens are appropriate for both beginners and experienced artists.
- Sturdy Design: Each pen features a natural wood handle and a stainless steel tip with a wax reservoir, supporting extended and dependable use.
- Easy to Use: The side-loading design allows for quick and easy refilling of the wax, making it convenient for continuous and smooth wax application
- Multiple Tip Sizes: Comes with different-sized tips to cater to various artistic needs, providing flexibility in your creative projects.
- Portable and Reusable: Compact and lightweight, these pens are easy to carry and clean, making them a useful addition to any artist's toolkit.
How to make a first pysanka
1. Choose a forgiving design
For a first egg, use symmetry rather than a complicated traditional motif. Draw very light pencil guidelines: an equator around the widest part of the egg, a line from top to bottom, then a second vertical line to create four sections. Fill those sections with one or two repeated ideas: bands, small leaves, teardrops, triangles, or a simple starburst.
The pencil lines are scaffolding, not part of the finished design. The KU instructional sequence likewise begins by dividing the egg into sections with pencil marks.
2. Write the parts that will stay white
Heat and load the kistka exactly as its maker instructs. Test the wax flow on scrap paper or a paper towel first. Then trace the pencil divisions and add a few small details that you want to remain the shell’s original colour.
Wax is the resist: it blocks dye from reaching the shell. Keep the egg steady, let the tool glide rather than scratch, and favour continuous simple lines over fussy detail.
Recommended Free Tools
Heat safety: a traditional manual kistka is often heated with a flame, although other setups exist. Use a stable heat source, keep wax and paper away from flame, protect the table, and give the hot tool a dedicated rest. Closely supervise children.
Rank #3
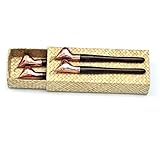
- Authentic pure copper tjanting (wax applicator) for making batik
- Easy to fill and can hold a lot of wax
- Heavy gauge copper sheeting ensuring wax stays hot for longer
- Set included 4 tjantings: single spout #1, #2, #3 and a double spout #2
- Handmade in Java - the world center of batik
3. Dye light to dark, waxing after every colour
Follow your dye manufacturer’s mixing and immersion directions. Put the egg into the lightest intended dye. When the colour is where you want it and the shell is dry enough to handle without smearing, add wax over every area that should stay that colour.
- Yellow: dye the egg yellow; wax the leaves, dots, or band segments that should remain yellow.
- Orange: dye the egg orange; wax the orange details you want to keep.
- Red: dye the egg red; wax the red details you want to keep.
- Dark final dye: dye the egg black, deep brown, dark blue, or another final dark colour, following the dye instructions.
At each stage, pause and ask: “Which visible areas do I want to keep at this exact colour?” Cover those areas with wax before the next bath. The remaining exposed shell is intentionally available for the darker dye.
4. Reveal the design gradually
After the final dye is dry, warm a small patch of wax and wipe it away with a soft cloth or paper towel. Continue in small sections around the egg. Traditional demonstrations may use a candle to melt the wax; use only a reveal method appropriate to your kistka, workspace, and safety setup.
As the wax comes off, the reverse plan becomes visible: white lines reveal the original shell, then yellow, orange, and red details appear, while the exposed areas retain the final dark dye.
5. Let it be a decoration
Handle the finished egg gently. Display it in a padded egg cup, basket, or other stable holder away from knocks, direct sun, and heat. A raw or hollow pysanka is an art object; do not eat it or use it for an egg hunt.
Rank #4

- 【Versatile Use, Ideal for Batik】This electric wax pen features interchangeable tips suitable for various decorative styles; it is highly effective for batik art, egg decorating, fabric painting, and creative wax-line drawing.
- 【Single Pen Set】This set includes one pen with a broad tip. It cannot be used alone and requires wax sticks (sold separately). With practice and proper temperature control, it can produce fine lines, making it suitable for detailed drawing applications.
- 【Adjustable Set A】This batik tool set includes an electric wax pen, a temperature-adjustable power cord, two stands, and a set of ultra-fine tips in three sizes (large, medium, and small). Wax sticks must be purchased separately.
- 【Starter Set B】This electric Kistka wax pen set includes a set of ultra-fine tips (large, medium, and small), an electric wax pen, a temperature-adjustable power cord, 500g of wax sticks, two stands, a silicone wax sharpener, a plastic embroidery hoop, and six popular tri-color pens—ideal for beginners learning wax pen control. Proper temperature adjustment ensures a smooth flow of wax during use.
- 【Professional Set C】This Kistka egg-decorating set offers a comprehensive range of tools and supplies for advanced projects. It includes sets of both ultra-fine and broad tips (each in large, medium, and small sizes), an electric wax pen, a temperature-adjustable power cord, 500g of wax sticks, two stands, a silicone wax sharpener, a plastic embroidery hoop, and six popular tri-color pens. This electric Kistka pen is suitable for intricate batik, egg decorating, painting, and decorative wax art projects.
A respectful way to choose designs
Many pysanky designs carry cultural, religious, natural-world, or protective associations, but those meanings are regional, historical, and personal—not a single fixed code. The KU cultural resource notes that symbols in the tradition predate Christianity and were later interpreted through Christian lenses, and that symbolism changes by place and time. For a first egg, an original geometric or botanical-inspired composition is a good choice: it lets you learn the method without assigning an invented universal meaning to a motif.
As you advance, learn particular designs in context—from Ukrainian artists, cultural organizations, classes, or regionally specific references—rather than treating a quick online symbol chart as definitive. The tradition includes both inherited family practices and contemporary teaching; its depth is part of what makes it worth approaching carefully.
What’s actually slowing this PC down?
Pick the symptom - the matching free tool is one click away.
Troubleshooting
- My light colour disappeared.
- It was probably not waxed before the next, darker bath. A dye layer cannot be recovered after it has been overdyed; in the next egg, wax each colour you want to save before moving on.
- My egg looks much darker than I expected.
- That is normal when much of the shell remains exposed for the final bath. Plan the pale details first and use a dark final dye as the background.
- The wax will not flow from my kistka.
- Test away from the egg. The tool may need to be heated or loaded differently; follow the instructions for that particular kistka rather than overheating it. Keep beeswax clean and use a safe tool rest.
- I do not have a kistka.
- A substitute can make a wax-resist craft, but it is not the same as traditional kistka writing. A kistka is the purpose-built precision tool for this technique.
- Can I make this on a boiled egg and eat it later?
- Use a separate hard-cooked-egg project instead. The USDA’s guidance says edible dyed eggs should be hard-cooked, coloured with food-safe dye, and returned to refrigeration within two hours. This tutorial is for decorative raw or hollow shells.
What to try next
Once your first egg is successful, change only one variable at a time: add a fourth colour, make the pencil divisions finer, or repeat one small motif more precisely. The craft rewards planning and repetition. Your first pysanka does not need perfect lines to demonstrate the essential achievement: you have used wax to save each colour on its way from light to dark.
For cultural background as well as technique, start with UNESCO’s record of the Ukrainian tradition and the University of Kansas’s illustrated pysanky process.
Frequently Asked Questions
Is a pysanka just a painted Easter egg?
No. A pysanka is created through repeated wax-resist writing and dyeing. The final image appears when the wax is removed.
Best Value

- TRADITIONAL BATIK TOOL:Solid brass wax bowl with precision curved nozzle delivers steady even wax flow to draw delicate floral and geometric patterns, restoring authentic hand-drawn batik effect for fabric art
- ERGONOMIC LONG WOOD HANDLE:Polished solid wooden grip fits palms naturally, insulates heat to prevent scalding, offers non-slip comfortable hold and reduces fatigue during long-hour creation
- LEAKPROOF & HEAT RETENTION DESIGN:Thickened brass body conducts heat evenly to keep wax liquid longer; seamless connection between bowl and tip stops wax leakage and messy drips on fabrics
- WIDE MULTIPURPOSE APPLICATION:Works for fabric dyeing, pottery resist decoration, canvas, linen, scarf, garment DIY, paper craft and leather marking, ideal for artists, students, handcraft workshops and art classes
- STURDY & EASY TO MAINTAIN:Anti-rust brass and durable hardwood resist deformation and wax buildup; simply wipe residual wax while warm for quick cleaning, a thoughtful craft gift for batik lovers and art teachers
Can I eat a pysanka after decorating it?
A raw or hollow-shell pysanka is decorative, not an edible egg. For edible Easter eggs, use hard-cooked eggs, food-safe dye, and USDA food-safety guidance.
Quick wins for a faster PC:
Clear out junk files and repair common Windows errorsFree Scan →Scan for outdated or missing drivers - takes under a minuteDriver Scan →Repair Windows errors before they cause bigger problemsFix Now →What should a pysanky egg decorating kit include?
A basic kit should contain a kistka, beeswax, dyes, and instructions. Check the current listing because contents vary.
Do pysanka symbols have one fixed meaning?
No. Colour and symbol meanings vary among regions and over time. Learn specific motifs from a source that identifies their cultural context.
The Bottom Line
For a first pysanka, keep the design simple and remember the rule that makes the whole process work: wax the colour you want to keep, then move to a darker dye.
Quick Recap

Product prices and availability are accurate as of the date/time indicated and are subject to change. Any price and availability information displayed on Amazon at the time of purchase will apply.




