Outdated Drivers Are Slowing You Down
What’s actually slowing this PC down?
Pick the symptom - the matching free tool is one click away.
One free scan finds every outdated or missing driver and matches the right update for your exact hardware.
Scan My Drivers Free →Free scan · exact hardware match
As an Amazon Associate I earn from qualifying purchases.
ThatPainter is reader-supported. When you buy through links on our site, we may earn an affiliate commission. Learn More
Do these 3 things before closing this tab:
1Clear out junk files and repair common Windows errors2Scan for outdated or missing drivers - takes under a minute3Repair Windows errors before they cause bigger problemsFor cabinet paint to adhere, prepare the surface for the specific cabinet material and coating system: remove doors and hardware, clean off grease, repair defects, and follow the primer maker’s directions on sanding and adhesion testing. Sanding is often useful on glossy or previously painted finishes, but it is not a universal requirement for every clean, paintable surface.
Popular on Amazon
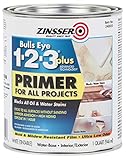
- The product is QT INT/EXT LTX Primer
- Easy and simple use kit
- The product is manufactured in United States
- Primer for all projects.
- First water-based primer that blocks water stains.
Before you start: check the cabinets and gather supplies
Painting is a reasonable option when the cabinet surfaces are sound. Inspect for loose or failing coating, delamination, or water damage before proceeding. The manufacturer guidance cited here covers ordinary surface preparation and small repairs; it does not establish a universal fix for structurally damaged or water-damaged cabinets.
- Use a cleaner-degreaser compatible with the coating system, plus clean cloths or other supplies required by its directions.
- Have sandable filler or putty for small holes and dents, and sandpaper if the selected system calls for sanding.
- Choose primer for the substrate and existing finish; slick surfaces such as laminate may need an adhesion-promoting primer.
- Protect counters and floors, and set aside labels or a system for identifying each door, drawer, and piece of hardware.
How to prep cabinets for paint
-
Empty, remove, and label
Empty the cabinets. Where practical, remove doors, drawers, and hardware so you can reach edges and avoid coating hinges or pulls. Label each part so it can return to its original position, then protect nearby counters and floors.
-
Clean thoroughly and let the surface dry
Remove grease, oils, dirt, dust, soap, wax, and other residue with a suitable cleaner. Follow its directions for washing or rinsing, and let every surface dry before sanding or priming. Cleaning must come first: Benjamin Moore warns that sanding a dirty surface can work grime into the wood, while BEHR notes that dirt, grease, dust, moisture, and glossy residue can interfere with adhesion. See Benjamin Moore’s cabinet preparation guide and BEHR’s cabinet-painting guidance.
Quick wins for a faster PC:
Clear out junk files and repair common Windows errorsFree Scan →Fix the driver behind crashes, sound loss and screen glitchesFind Drivers →Repair Windows errors before they cause bigger problemsFix Now →Special offer. See more information about Outbyte and uninstall instructions. Please review EULA and Privacy policy. -
Inspect and repair small defects
Check for holes, dents, and loose coating. Fill small holes and imperfections with an appropriate sandable filler or putty, following the product directions; if you are changing hardware locations, fill the old screw holes. Let repairs dry as directed, then sand them smooth. Do not assume filler will solve loose, delaminating, or water-damaged material.
Also popular on Amazon
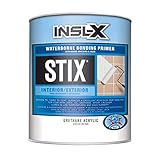 INSL-X SXA11009A-04 Stix Acrylic Waterborne Bonding Primer, 1 Quart, White
- Premium-quality, acrylic-urethane bonding primer-sealer with unparalleled adhesion to the most challenging surfaces, including glossy tile, PVC, vinyl, plastic, glass, glazed block, glossy paint, pre-coated siding, fiberglass, and galvanized metals.
- Bonding primer for drywall, plaster, ceiling, acoustical tile, wood trim and doors, Formica, ceramic tiles, glossy surfaces, PVC plastic, masonry walls, wood, trim, shutters, masonry, stucco, concrete, cement block, galvanized metal, aluminum, and other challenging surfaces.
- Bonds to "hard-to-coat" surfaces and can be top coated with almost any product.
- Fully cures in temperatures as low as 35 °F.
- 75 - 100 square foot coverage for interior or exterior use
-
Decide whether the surface needs sanding
For a glossy or previously painted finish, scuff-sanding or deglossing is commonly recommended to improve adhesion. BEHR lists 150–220 grit sandpaper for its cabinet project guidance. Benjamin Moore recommends 180–220 grit to dull wood or laminate without removing the existing coating completely, and its ADVANCE guide gives 150–220 grit for roughening the finish. These are maker-specific recommendations, not one grit range for every cabinet or product.
There is a conditional exception: Sherwin-Williams says a prepared test patch using its Extreme Bond Primer may show adequate adhesion on some clean, paintable surfaces without sanding. That does not make skipping sanding appropriate for every finish, primer, or topcoat. Follow the selected system’s instructions and conduct an inconspicuous adhesion test when the manufacturer recommends one. See Sherwin-Williams’ homeowner cabinet guide.
Sand gently, especially on laminate or thin veneer, and avoid cutting through the surface or removing sound existing coating unless the product directions require it. The cited guidance does not set a universal pressure or grit that is safe for every substrate.
Free tools Windows power users keep installed
One-click scans. No signup required.
Special offer. See more information about Outbyte and uninstall instructions. Please review EULA and Privacy policy. -
Remove sanding dust
Clear dust before primer. The right method depends on the coating system: Sherwin-Williams’ cabinet guidance specifies a damp rag and clean water, while Benjamin Moore’s ADVANCE guide describes vacuuming and wiping with mineral spirits or a tack cloth. Do not combine methods by default; follow the selected primer’s label and let the surface dry.
Also popular on Amazon
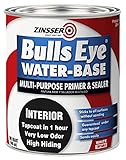 Zinsser Bulls Eye Water-Base Primer & Sealer, White | Bulls Eye water-base primer-sealer, Quart, White. Low-odor fast-dry stain-blocking primer that seals drywall, wood & painted.
- Use to prime interior surfaces such as walls, doors, trim, plaster, concrete and more
- Water-based low-odor formula provides exceptional stain hiding even on dark or porous surfaces
- Dries to the touch in 30 minutes and covers up to 100 sq. ft. per quart
- Creates a uniform flat-finish surface ideal for top coating
- Adheres to slick surfaces without the need for deglossing or sanding
-
Prime for the cabinet material and existing finish
Primer choice depends on what the cabinets are made of and what is already on them. Sherwin-Williams recommends considering adhesion-promoting primer for laminate and previously painted wood in its professional guidance; Benjamin Moore distinguishes primer recommendations for wood and laminate and notes that previously stained cabinets may need stain-blocking primer. Treat named products and recommendations as examples from those manufacturers, not universal prescriptions. Check compatibility with the substrate, existing coating, and intended topcoat.
-
Follow the primer’s sanding and drying directions
If the selected system calls for sanding primer, wait until it has dried for the stated time, sand as directed, and remove the resulting dust. For example, Sherwin-Williams’ homeowner instructions say to let its primer dry at least 24 hours before sanding with very fine grit; its cabinet PDF describes a 320-grit fine-sanding step. Those instructions apply to that source and product context, not to all primers.
-
Apply finish coats and allow the specified cure
Follow the finish label for recoat intervals and cure before putting items against a freshly painted surface. As a product-specific example, Benjamin Moore says ADVANCE can take up to 16 hours to dry and gives 3–5 days as the optimal cure time for its painted cabinet interiors. Do not apply those timings to other paints.
Recommended Free Tools
Special offer. See more information about Outbyte and uninstall instructions. Please review EULA and Privacy policy.
Should you sand cabinets before painting?
Use the surface condition and chosen coating system to decide. On glossy or previously coated cabinets, sanding or deglossing is a common preparation step. On some clean, paintable surfaces, Sherwin-Williams allows a possible no-sanding route if its primer directions and a prepared test patch support it. The distinction matters especially for laminate or melamine, where adhesion deserves specific attention rather than assumptions based on ordinary wall-paint preparation.
Also popular on Amazon
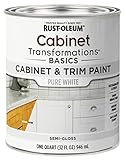
- CABINET TRANSFORMATION: Refresh outdated cabinets, vanities, furniture and trim with rich Pure White color and a smooth semi-gloss finish
- DURABLE PERFORMANCE: Easy-to-clean finish resists dirt and grime while standing up to household chemicals
- SMOOTH APPLICATION: Outstanding flow and leveling help create a beautiful finish with brush, roller, pad applicator or airless sprayer
- FAST PROJECT COMPLETION: Dries to touch in 30 minutes, recoats in 2 hours and is ready for normal use after 24 hours
- INTERIOR CABINET COATING: Ideal for kitchens, bathrooms, laundry rooms and other interior cabinet and trim applications
| Preparation route | When it may fit | What to do |
|---|---|---|
| Scuff-sand or degloss | Glossy or previously painted finishes when the selected system calls for it. | Clean and dry first; sand gently to dull the surface without cutting through it. Follow the maker’s grit and product directions. |
| Test before deciding to skip sanding | Only where the selected primer maker permits this on a clean, paintable surface. | Prepare an inconspicuous patch and test adhesion as directed. Skip sanding only if the product instructions and test support it. |
Special case: laminate and melamine cabinets
Laminate and melamine can be painted, but the preparation and primer need to address adhesion. BEHR’s guidance calls for cleaning, scuff-sanding, and priming these surfaces; Sherwin-Williams points to adhesion-promoting primer for laminate. Check the instructions for the exact cleaner, primer, and topcoat you intend to use, and test an inconspicuous area when directed. Avoid aggressive sanding that could cut through a thin surface layer.
Why cabinet paint can peel or bubble
BEHR identifies dirt, grease, dust, moisture, and glossy residue as factors that can interfere with adhesion. In practical terms, paint is at risk when residue is left behind, the surface is not dry, a slick finish is not prepared as the selected system requires, or the primer is not suited to the substrate. Sherwin-Williams cautions in its written homeowner guide that “any surface prep short of clean, dry & dull or adhesion is poor, may compromise the service length of the system used.” Treat that as its guidance for its coating system, not a guarantee about the service life of every cabinet finish.
Manufacturer guidance to keep in mind
Preparation instructions differ, particularly on sanding and dust removal. The most reliable approach is to choose a compatible primer and finish system, then follow that system’s current product labels rather than mixing individual directions from different manufacturers. There is no universal durability duration established by the cited guidance, so avoid judging success by a promised number of years.
Quick Recap


