The Tool Desk
Free tools Windows power users keep installed
One-click scans. No signup required.
Outbyte PC Repair FREEClear out junk files and repair common Windows errorsFree Scan →Outbyte Driver Updater FREEScan for outdated or missing drivers - takes under a minuteDriver Scan →
ThatPainter is reader-supported. When you buy through links on our site, we may earn an affiliate commission. Learn More
This guide covers a simple pleated collar sewn to a woven garment neckline, using one published tutorial’s rounded collar construction as an example. Collar patterns differ, so treat its measurements as project-specific: follow your pattern’s markings and seam allowances, and don’t transfer the example pleat sizes to another design. A pleated stand collar, a detachable statement collar, and a folded knit collar each need a different approach.
Choose the collar method before you cut
First identify the garment, fabric, and silhouette. These determine how the collar is drafted, stabilized, and finished; the methods below are alternatives, not interchangeable steps.

| Collar approach | Fabric and shape | Drafting and finish |
|---|---|---|
| Rounded woven collar | Woven fabric; a collar attached around a garment neckline | The Sew Mama Sew example drafts the collar from the garment neckline, forms rounded ends, and catches the upper layer by stitching in the ditch. Sew Mama Sew’s pleated-collar tutorial |
| Pleated stand collar | A blouse pattern specifies the stand-collar shape | Use the supplied pattern pieces, markings, and instructions. Minerva’s blouse pattern #4435 lists fusible interfacing among the additional supplies. Minerva pattern #4435 |
| Detachable statement collar | Non-stretch fabric; a separate accessory | Follow its own pattern and closure instructions. For its statement-collar project, SCHMETZ recommends non-stretch fabric and identifies cotton poplin as best. SCHMETZ statement-collar pattern |
| Folded knit collar | Knit fabric; a T-shirt neckline | A separate tutorial uses repeated folded edges, overlapped angled ends, gathers, and a neckline facing. Its author recommends jersey for that project and cautions that interlock may be too thick. Melly Sews knit collar tutorial |
For a woven garment, use the woven-collar steps below only if their construction suits your pattern. If you are sewing a stand collar or a knit neckline, use the corresponding pattern or method rather than combining measurements and finishing techniques from different designs.
Quick wins for a faster PC:
Repair Windows errors before they cause bigger problemsFix Now →Scan for outdated or missing drivers - takes under a minuteDriver Scan →Clear out junk files and repair common Windows errorsFree Scan →Measure and draft the woven collar
Measure the finished neckline
Construct the neckline and placket area as the garment design requires before measuring. Measure the curved neckline from placket end to placket end, following the actual curve; holding the tape on edge helps it follow that curve more accurately. Use the measurement and seam lines your pattern calls for.
#1 Best Overall
Use an example formula only for that design
In the Sew Mama Sew example, the draft length is the neckline measurement plus 4 inches of extra length for its design, plus seam allowances. Its 25-inch neckline becomes 30¼ inches with two ⅝-inch seam allowances. The example collar is 3 inches wide. Neither the extra length nor the width is a universal rule: a different pleat arrangement or collar shape needs its own dimensions.
That tutorial cuts its collar on the bias. If you follow that construction, cut and stabilize it as directed; otherwise, use the grainline and fabric layout specified by your pattern.
Rank #2
- Used Book in Good Condition
Prepare, sew, and turn the collar
- Stabilize if the design calls for it. The direct woven tutorial interfaces one half of its collar, and a pleated stand-collar pattern may also specify interfacing. Choose a type and weight appropriate for the fabric and pattern, then fuse it according to the interfacing manufacturer’s directions. Minerva pattern #4435
- Shape and press the collar. In the woven example, fold and press the top edge as instructed, then fold at the interfacing edge. Keep the fabric layers aligned and press without stretching the bias-cut piece.
- Sew the ends. With right sides together, sew the collar ends. Curve toward each end to form rounded corners, trim the seam allowance where needed, turn the collar right side out, and press it into shape. Follow your pattern’s seam allowance if it differs from the example.
Mark and secure the pleats
Transfer the placement marks from your pattern before folding. Pleats should be controlled and secured before the collar is attached, so the finished neckline does not pull out of alignment.
For its particular layout, the Sew Mama Sew tutorial places a ½-inch pleat at each mark 3–4 inches forward of the shoulder seam and a 1-inch pleat at center back. Those positions and sizes belong to that example only; use your own pattern’s marks for another collar.
Rank #3

- Size A5 (6-8-10-12-14) Bust 30 1/2" - 36" Waist 23" - 28" Hips 32 1/2" - 38"
- Includes pattern pieces and sewing instructions
- Fitted peplum jacket with a notched collar and back hem variations
- Made by McCall's
- Printed in the U.S.A
- Fold each pleat to its mark and baste it in place so it cannot shift during handling.
- Pin and baste the underside of the collar to the garment neckline, matching the required notches and placement points. Sew the seam.
- Trim or clip the seam allowance where needed for the neckline curve, then press the allowance toward the collar if that is appropriate for the construction.
- Bring the top side over the underside, aligning its pleats with the pleats below. Pin and baste the layers together.
- Stitch in the ditch from the right side so the stitching catches the top side of the collar beneath it.
Finish the inner edge according to the construction
Stitching in the ditch is the finish used by the woven example; it is not a universal collar finish. A collar with a separate band or facing has different seam lines and finishing steps. Simplicity’s collar-with-band instructions demonstrate staystitching, clipping and trimming seam allowances, understitching, and slipstitching the inner edge. Use those steps only when they match your pattern’s band and facing construction. Simplicity: How to Sew a Collar With Collar Band
Quick Recap
Best Value
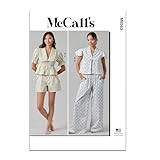
- McCall's pattern kits come with pattern pieces for cutting out the fabric, step by step written and illustrated instructions to guide you through the sewing process, information on how to select fabric and trims, and sizing information
- These clothing sewing patterns can be made to fit misses' sizes XS-S-M-L-XL-XXL
- Tie front top has flounce sleeve and ruffles at neckline; view B top has front button opening, collar with ruffle detail, short puff sleeves and shirred bodice; pull-on shorts and pants have elastic waist and side pockets with self ruffle detail
- Fabric suggestions: challis, cotton blends, cotton lawn, gauze; interfacing A, B: lightweight fusible
- McCall's sewing patterns are proudly designed and manufactured in the United States
Rank #4

- Sewing pattern packet comes with sewing templates, notions and fabric recommendations, pattern pieces, sizing guides, and instructions
- These clothing patterns for sewing can be made to fit misses' sizes 14-16-18-20-22
- Zip front jacket features high collar and optional hood, drop shoulders, rounded slit hem, patch and welt pockets
- Know Me patterns feature styles and designs created by fashion experts, and are a perfect way to personalize your warddrobe with both modern and class inspirations
- Know Me sewing patterns are proudly designed and printed in the United States
Check the result before final pressing
- Confirm the neckline and collar match at the shoulder, center back, and placket or opening points.
- Check that pleats remain aligned and secured, and that the collar lies smoothly without stretching the neckline.
- Trim or clip bulky seam allowances only where the construction requires it, taking care not to cut through the stitching.
- Press the collar and seam allowances in the direction specified by the chosen pattern.

Product prices and availability are accurate as of the date/time indicated and are subject to change. Any price and availability information displayed on Amazon at the time of purchase will apply.




