Quick wins for a faster PC:
Scan for outdated or missing drivers - takes under a minuteDriver Scan →Repair Windows errors before they cause bigger problemsFix Now →Fix the driver behind crashes, sound loss and screen glitchesFind Drivers →
ThatPainter is reader-supported. When you buy through links on our site, we may earn an affiliate commission. Learn More
Neat pillow corners start with choosing the right construction. A basic knife-edge cover joins two panels; a box-edge pillow adds a side strip; and a stuffed cover may need tapered fabric corners to reduce floppy “dog ears.” The best treatment depends on the cover and insert—no single method guarantees a sharp point with every fabric.
Choose the pillow construction first
Knife-edge cover
A knife-edge cover joins its front and back panels around the perimeter, leaving a flat seam at the edge. It is the straightforward choice when you do not want a separate side panel. The National Sewing Circle’s knife-edge and box-edge instructions distinguish this construction from a box edge.
Box-edge pillow
A box-edge pillow joins the front and back with a continuous strip of fabric around the sides. That strip creates the side panel and changes how the pillow is assembled; it is not simply a different way to stitch the corners of a two-panel cover.
Outdated Drivers Are Slowing You Down
One free scan finds every outdated or missing driver and matches the right update for your exact hardware.Free scan · exact hardware matchPC Slower Than It Used to Be?
A free scan shows the junk files, broken settings and background clutter dragging Windows down - then fixes them in one click.Free scan · Windows 10 & 11Sew and turn a basic knife-edge corner
-
Place the front and back panels right sides together and align their edges. Sew around the perimeter, following the project’s seam allowance.
#1 Best Overall
 Brother Sewing Machine, XM2701, Portable Sewing Machine, 27 Stitches
- 27 Unique Built-in Stitches: The Brother XM2701 sewing machine includes 27 built-in stitches including decorative, blind hem, zigzag, and stretch stitches and an auto-size buttonhole
- Automatic Needle Threader and Drop-in Top Bobbin: This beginner sewing machine is also great for experienced users; it includes an automatic needle threader that perfectly pushes thread through the needle and a convenient, jam resistant drop-in top bobbin
- Included Accessories: The XM2701 comes with 6 sewing feet, 3-piece needle set, twin needle, 4 bobbins, manual and more
- Versatile Free Arm: This free arm sewing machine is a simple sewing machine, perfect for a wide range of everyday sewing projects, and users from beginners to advanced
- At Your Side Support: The XM2701 small sewing machine comes with Brother At your side support offering free technical support via online, live chat or phone for the life of your machine
-
At each corner, stop with the needle down, lift the presser foot, pivot the fabric, lower the foot, and continue stitching. Pivoting at the corner helps keep the seam continuous and the point aligned.
-
Before turning the cover right side out, press the seam allowances. The Simple Edge Pillow instructions press them first to one side and then the other, then hold them to one side while turning. This helps the allowances settle rather than bunch at the point.
-
Turn the cover gently and ease the seam allowances into place. Shape the point carefully; forceful poking can push through or damage the fabric.
Free tools Windows power users keep installed
One-click scans. No signup required.
Special offer. See more information about Outbyte and uninstall instructions. Please review EULA and Privacy policy.Rank #2
 Brother FB1757X Mechanical Sewing Machine
- 17 built-in stitches
- 4-step buttonhole style
- Reverse button
- Free arm for sewing
- LED lighting for the work area
Reduce bulk after stitching
If the seam allowance makes the corner thick, trim the excess fabric at the corner after stitching, taking care not to cut the seam itself. Trimming the seam allowance reduces bulk inside the finished corner; it is different from changing the outer pattern shape before sewing. The University of Tennessee Extension sewing guidance describes trimming seam-allowance corners for this purpose.
Prevent dog ears on a stuffed pillow
A stuffed cover can develop floppy corners when the fabric shape and the fullness of the insert do not work well together. One approach is to taper each fabric corner by removing a wedge before stitching. The taper changes the cover’s shape so the filled corner is less likely to extend into a loose point. The National Quilters Circle pillow instructions describe this kind of corner adjustment.
There is no universal wedge size in the cited instructions. The amount depends on the cover and how fully the insert fills it, so treat tapering as an adjustment for the project rather than a fixed measurement. If you are unsure, make a small change and check how the cover sits with its insert before removing more fabric.
Rank #3
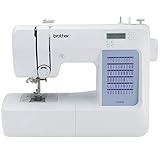
- 60 UNIQUE BUILT-IN STITCHES: The Brother CS5055 sewing machine includes 60 built-in stitches including utility, decorative and heirloom stitch functions, and 7 1-step auto-size buttonholes
- IMPROVED NEEDLE THREADER: Easier than ever to use, the automatic needle threader reliably pushes the thread through the needle. The convenient, jam resistant drop-in top bobbin easy to load and helps ensure your bobbin stays in place
- INCLUDED ACCESSORIES: The CS5055 includes 7 sewing feet, 4 bobbins, a needle set, a trilingual English/Spanish/French user manual and more
- METAL FRAME and FIXED NEEDLE BAR: The durable metal frame construction allows your machine to tackle any project, and the needle is fixed in place while you work, allowing for cleaner stitching and even lines
- LARGE NEEDLE-TO-ARM WORKSPACE: A larger workspace with increased width in needle-to-arm space allows users to work on larger projects
Try a diagonal corner stitch for a flat cover
Another treatment for a flat cover is to sew a short diagonal line across the outside of each corner, then clip away the excess fabric beyond that stitching. This shapes the corner through stitching and clipping rather than tapering the outer fabric pattern before assembly. Follow the Janome pillow instructions for this method, and avoid clipping through the diagonal seam.
The Tool Desk
Outbyte PC Repair FREERepair Windows errors before they cause bigger problemsFix Now →Outbyte Driver Updater FREEScan for outdated or missing drivers - takes under a minuteDriver Scan →Which corner treatment fits your project?
| Method | Best suited to | When it happens | What it changes |
|---|---|---|---|
| Pivot, press and turn | Basic knife-edge cover | During sewing and turning | How the joined panels meet at the corner |
| Taper a wedge from each corner | Stuffed cover with floppy dog ears | Before stitching | The outer fabric shape; the amount depends on the project |
| Diagonal corner stitching, then clip | Flat cover corner treatment | After stitching the corner | The stitched corner shape and excess fabric |
| Trim seam-allowance corners | Any sewn corner with excess interior bulk | After stitching, before turning | The seam allowance, not the cover’s outer pattern shape |
| Add a continuous side strip | Box-edge pillow | During construction | The pillow’s construction, creating a side panel |
These methods address different problems, so they are not interchangeable: choose the construction first, then decide whether you need to manage corner fullness, seam bulk, or the shape of a flat stitched corner.
Quick Recap

Product prices and availability are accurate as of the date/time indicated and are subject to change. Any price and availability information displayed on Amazon at the time of purchase will apply.




