What’s actually slowing this PC down?
Free tools Windows power users keep installed
One-click scans. No signup required.
Pick the symptom - the matching free tool is one click away.
ThatPainter is reader-supported. When you buy through links on our site, we may earn an affiliate commission. Learn More
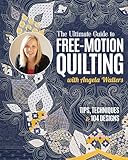


As an Amazon Associate I earn from qualifying purchases.
To quilt a basic swirl, move inward toward its center while leaving room to travel back out. Finish that swirl before starting another. For a hooked variation, add a small, gentle S-shaped curve near the center, then return outward and complete the motif. These are the core moves in Angela Walters and Jennifer Keltner’s Intro to Swirl Designs, an AllPeopleQuilt video presented by Handi Quilter and published October 13, 2016.
How to quilt a basic swirl
- Start the inward curve. With a free-motion quilting foot, guide the needle path toward the swirl’s center.
- Leave yourself an exit. Don’t close the path so tightly that you trap yourself at the center; leave room to travel back out.
- Come back outward. Continue the path until the swirl is complete.
- Move into the next swirl. Finish one motif before beginning another. Walters points to leaving a swirl unfinished as a common place where quilters get stuck.
If you are unsure where the next line should go, pause the machine and plan the direction before continuing. Thinking ahead is part of the motion, not a reason to rush into a line that may leave you boxed in.
#1 Best Overall
How to add a hook
Use the same inward approach as for a basic swirl. Near the inside, add a small, gentle S-like curve, then reverse direction and travel back out to finish the swirl. Keep the hook modest: the lesson presents it as a variation within the swirl, not a separate large loop.
Choose scale, density, and spacing
There is no single required size or fill. The lesson demonstrates changing the scale of the swirls and how densely they cover an area. A companion More Swirl Designs lesson explores keeping line spacing more consistent or varying it. Consistent spacing gives the motifs a more even rhythm; changing the spacing creates a different visual effect. Pick one approach to practice, then adjust scale or spacing deliberately rather than trying to change every feature at once.
What you need to practice
A separate 2024 Mastering Swirls supply sheet lists a sewing machine with a free-motion quilting foot, a quilt sandwich or other practice surface, needles, and machine-quilting thread. It says any free-motion foot works for that class, but this is not a compatibility guarantee for every machine: check the foot against your machine’s make and model.
Do these 3 things before closing this tab:
1Clear out junk files and repair common Windows errors2Scan for outdated or missing drivers - takes under a minute3Repair Windows errors before they cause bigger problemsThe sheet gives #90/14 and #80/12 as examples of needle sizes and says the choice depends on the thread. Treat those as examples, not a universal prescription.
Rank #3

- Stash Books-Beginner's Guide To Free Motion Quilting
Optional aids for a domestic machine
- Quilting gloves: can provide extra control while moving the quilt.
- Slider mat: helps the quilt glide over the machine bed.
- Extension table: provides more work area and supports the quilt.
These are optional aids, not prerequisites. The class supply sheet says its designs are demonstrated on both domestic machines and longarms; the Intro to Swirl Designs lesson does not give machine-specific setup instructions.
Independent reader supportYour contribution helps us test, update, and keep practical guides available for everyone.Machine settings and stitch regulation
The tutorial does not prescribe a stitch-regulator setting for every quilter. Walters offers the qualified advice that a stitch regulator can add drag, and that turning it off may help if soft curves are difficult. This is her opinion, not a universal rule; machine behavior and personal preference can differ.
Quick Recap

Product prices and availability are accurate as of the date/time indicated and are subject to change. Any price and availability information displayed on Amazon at the time of purchase will apply.




