PC Slower Than It Used to Be?
Do these 3 things before closing this tab:
1Scan for outdated or missing drivers - takes under a minute2Repair Windows errors before they cause bigger problems3Fix the driver behind crashes, sound loss and screen glitchesA free scan shows the junk files, broken settings and background clutter dragging Windows down - then fixes them in one click.Free scan · Windows 10 & 11
Crashes, No Sound, or Screen Glitches?
Random freezes, missing sound and display glitches usually trace back to one bad driver. Find and replace yours safely.Free scan · under a minute
ThatPainter is reader-supported. When you buy through links on our site, we may earn an affiliate commission. Learn More
micro:bit Snowfall Christmas Tree is a 2018 beginner maker project by Shao ziyang that combines a micro:bit with a 16×16 WS2812/NeoPixel RGB matrix. The micro:bit shows a small Christmas-tree symbol on its built-in 5×5 display, while the external matrix runs a snowfall animation.
It is best understood as a rectangular animated light display—not automatically as a physical, tree-shaped LED installation. The original project uses Microsoft MakeCode and a custom snowflake extension, with the matrix data line configured on P1.
What’s actually slowing this PC down?
Pick the symptom - the matching free tool is one click away.
As an Amazon Associate I earn from qualifying purchases.
What the original project builds
The original Hackster.io project was published on December 23, 2018. Its two visual elements work together:
- The micro:bit’s onboard 5×5 LEDs display a Christmas-tree icon.
- A 16×16 RGB LED matrix displays animated falling snow.
The project is suitable for a classroom demonstration, beginner electronics activity, or seasonal display. Its original design does not specify a 30–120-pixel LED strip, a MicroPython program, or a complete high-current Christmas-tree installation. Those are different adaptations.
#1 Best Overall

- Includes the BBC Microbit V2.2 which has new speaker sensor, Built-in 25 LEDs, 2 buttons, motion sensor, buzzer, light sensor, temperature sensor, compass, radio and Bluetooth wireless features make it easy to get you started with more fun projects.
- This is an easy to use electronic board that is very versatile and can be coded many different ways. It can be integrated with other coding tools and on many platforms.
- Coding is easy with online block gui, javascript and python. Compiles to hex file, which you then copy to microbit (looks like a drive to pc)
- Box contains: 1 micro:bit v2.2, 1 USB cable, 1 battery holder, 2 AAA batteries, user guide
- Free tutorials and project ideas available on the micro:bit website. The instructions are easy to follow for a beginner to learn to code with it.
Parts list
Required for the closest reproduction
- One micro:bit.
- One 16×16 WS2812/NeoPixel RGB LED matrix.
- Connecting wires or a suitable micro:bit breakout/edge connector.
- A power arrangement appropriate for the particular matrix.
Useful optional accessories
- Breadboard and jumper wires for a temporary prototype.
- External regulated 5 V supply if the matrix requires independent power.
- Current-limited supply or inline fuse for a permanent or larger installation.
- Heat-shrink tubing, insulation, strain relief, or an enclosure.
The original bill of materials is listed on Hackster. For alternatives such as smaller matrices or LED strips, see the NeoPixel component category, but check each product’s voltage, pixel order, connector, and power requirements.
The Tool Desk
Outbyte PC Repair FREEClear out junk files and repair common Windows errorsFree Scan →Outbyte Driver Updater FREEFix the driver behind crashes, sound loss and screen glitchesFind Drivers →The original MakeCode program
The published TypeScript is:
snowflake.config(
    DigitalPin.P1,
    false,
    8,
    50,
    1,
    50
)

basic.showLeds(`
    . . # . .
    . # # # .
    # # # # #
    . . # . .
    . . # . .
`)

snowflake.start()

basic.forever(function () {
})
snowflake.config() belongs to the project’s custom snowflake extension; it is not a standard MakeCode command. The configuration selects P1, includes the project’s published pixel and brightness-related settings, and then snowflake.start() begins the animation. The empty basic.forever loop is intentional: the extension handles the snowfall behavior after it starts.
You can open the original shared MakeCode project here: makecode.microbit.org/_PeCREuit41fv.
Rank #2

- Interactive Learning through Diverse Projects: With a variety of projects, from temperature detection to Bluetooth control, this kit keeps students engaged and encourages collaborative learning, making education both interactive and enjoyable in a classroom setting.
- Real-World Application of Smart Home Technology: By integrating functionalities such as a password-protected door and anti-theft alarms, the kit provides students with practical experience in building and understanding real-world smart home applications, fostering critical thinking.
- Safety and Durability for Classroom Use: Designed with safety in mind, the kit is made from solid basswood with rounded corners, ensuring a safe learning environment for students while minimizing the risk of injury during hands-on activities.
- Rich Educational Resources: The kit includes extensive programming tutorials and scientific experiments, enabling educators to facilitate engaging lessons that enhance students' logical thinking and problem-solving skills in a structured manner.
- Comprehensive STEM Curriculum Integration: The Christmas-themed smart home kit aligns with STEM education goals, providing a hands-on approach to teaching programming, electronics, and engineering concepts, making it an excellent addition to any curriculum.
How to run the project today
- Open the original MakeCode share link.
- Check that the
snowflakeextension loads and that the generated code still containsDigitalPin.P1. - Use the original project schematic to identify the matrix power, ground, and data connections.
- Connect the data wire to the matrix’s DIN or data-input side—not DOUT.
- Download the program to the micro:bit.
- Power the micro:bit and matrix using an arrangement suitable for the matrix’s specifications.
- Confirm that the tree appears on the micro:bit and snowfall begins on the matrix.
The original schematic should be treated as authoritative for its particular hardware. Do not substitute the generic P0 example below without also changing the program and confirming the extension’s pin configuration.
Wiring the matrix safely
The original code uses P1. The matrix’s data input therefore needs to connect to the project’s P1 data connection, with power and ground connected exactly as shown in the original schematic. Connector polarity varies between matrix products, so identify 5 V/VCC, GND, and DIN from the board markings or datasheet before applying power.
Quick wins for a faster PC:
Scan for outdated or missing drivers - takes under a minuteDriver Scan →Repair Windows errors before they cause bigger problemsFix Now →For comparison, the official micro:bit NeoPixel guidance shows a basic setup using P0, 3V, and GND. That is a generic example, not proof that the original P1-based matrix wiring is interchangeable with it.
Rank #3

- Microbit controller V2.21 is included!onboard comes with BLE, accelerometer, electronic compass, three buttons, 5 x 5 LED dot matrix, mainly used for teens' programming education.
- Specially designed this starter kit includes commonly used resistors, LEDs, sensors, LED segment display and more to get you started with 18 interesting projects at least.
- We have detailed tutorials (including an introduction, wiring diagram, test code, driver installation, Example Projects...... Step by step to explain how to use on our wiki page.
- Each sensor is packaged individually and then held in a beautiful plastic box with compartments, it must be the best kit for you, your friends, and electric newbies or hobbyists.
- All boards are well-packed after function, voltage and current testing. The kit is well packaged, with each item packed separately.
Always share ground between the micro:bit and an independently powered matrix. Never connect an unknown or higher-voltage signal directly to a micro:bit GPIO pin. Begin with the lowest practical brightness and test with a small number of pixels before running the full display.
Can the micro:bit power a 16×16 matrix?
A 16×16 matrix contains 256 individually addressable RGB pixels. At high brightness—especially full white—it can require far more current than a micro:bit or small battery setup should be expected to provide. The original listing does not publish a complete modern power budget.
The micro:bit V2 hardware documentation specifies up to 190 mA for external accessories. That figure is not a recommendation to power 256 pixels at full brightness from the board. For a sustained or bright display, use an independently rated supply for the matrix, connect its ground to the micro:bit ground, and follow the matrix datasheet. Keep brightness low for a small demonstration, and stop immediately if the board resets, the matrix flickers, wiring heats, or the supply voltage sags.
Rank #4
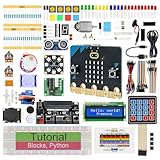
- micro:bit V2: Latest version official board, a pocket-sized device allows you to get hands-on with coding and digital making
- 2 Sets of Codes: Block-based visual programming language code and Text-based Python code
- 316-Page Detailed Tutorial: Provides step-by-step guide with basic electronics and components knowledge (The download link can be found on the product box) (No paper tutorial)
- 44 Projects from Simple to Complex: Each project has schematics, wiring diagrams, complete code and detailed explanations
- 225 Items in Total: This kit includes the common components, modules and sensors available for the board
WS2812-family products also differ in layout, color order, connectors, and power behavior. “NeoPixel” is commonly used for this class of addressable LED, but it does not guarantee identical electrical characteristics.
Independent reader supportYour contribution helps us test, update, and keep practical guides available for everyone.Using the standard NeoPixel extension as a fallback
If the custom extension is unavailable, first try importing the original shared project. MakeCode can also load an extension from its published package or, where appropriate, from a repository URL; the micro:bit extension guidance explains the mechanism.
If necessary, create a new MakeCode project, open Settings → Extensions, search for NeoPixel, and use the standard package documented by Microsoft: microsoft/pxt-neopixel. An illustrative starting point is:
Best Value

- 【About Starter Kit】 ElecFreaks Micro:bit Starter Kit is designed for microbit beginer who is beginning learning electric circuit and programming knowledge. They can use this micro:bit basic DIY kits to create or complete more experiment, such as traffic light , use photocell to control mircro:bit screen or LED.
- 【Abundant components】The Microbit Starter kit has provided 24 kinds of electronic components to help you start, including LED, button, buzzer, temperature sensor, trimpot, servo and motor etc. Micro:bit Starter kit can help us enter a wonderful of electronic world.
- 【Multiple Programming Languages】 This micro:bit Starter Kit supports Makecode graphical programming, JavaScript programming, Python and other programming methods. Microbit beginer can use programming to achieve what they want. It better improves interest in programming!
- 【Perfect and educational gift 】With all of the components, we offer 14 case to enable users to master the principles of electronic circuits, components, and basic programming.There will be learning link in the Guidance Manual.
- 【TIPS 】(1)WITHOUT micro: bit!!! Suitable for ages over 10 years old. (2)Wiki Tutorial Get: Pls enter "wiki.elecfreaks.com/en/" to learn. (3)Strong Technical Support—Pls click “elecfreaks” amazon store and click “Ask a question” to email us! Looking for your consultation!
let strip = neopixel.create(DigitalPin.P1, 256, NeoPixelMode.RGB)
strip.setBrightness(20)

basic.forever(function () {
    strip.clear()
    // Add selected snow pixels here.
    strip.show()
    basic.pause(120)
})
This is not a verified drop-in replacement for the original extension. A matrix may be wired in a serpentine or column-major pattern, so linear pixel numbers may produce a rotated or scrambled image. Establish the matrix’s physical pixel order before recreating the tree or snowfall pattern. The standard extension supports operations including create, setPixelColor, show, setBrightness, shift, and rotate.
micro:bit V1 versus V2
The original project predates micro:bit V2. Basic MakeCode and NeoPixel functionality is generally shared between generations, but the old custom extension should be tested rather than assumed compatible.
V1 hardware can report error 927 when a project uses V2-only features or an incompatible extension. If that happens, remove V2-specific blocks, test in the simulator, and try a standard NeoPixel implementation. See the official V1/V2 compatibility guidance and the V2 reference.
Troubleshooting
| Symptom | Likely causes and fixes |
|---|---|
| Nothing lights | Check polarity, common ground, the selected P1 pin, and DIN versus DOUT. Confirm the supply voltage and that the extension loaded. |
| Flickering or resets | Reduce brightness, check loose grounds and connectors, shorten or improve the data wiring, and use a supply with sufficient current. |
| Wrong colors | The matrix may use RGB, GRB, or another ordering. Test red, green, and blue individually and select the matching NeoPixel mode. |
| Rotated or scrambled animation | Check whether the matrix is serpentine, column-major, physically rotated, or mapped differently by the custom extension. |
| Extension missing | Import the original share link, add the package by its published listing or repository URL, or rebuild with the standard NeoPixel extension. |
| Error 927 | Look for V2-only blocks or extension dependencies when using a V1 board; simplify the project and test compatibility. |
Useful adaptations
- Lower-power classroom version: use a smaller NeoPixel matrix and keep brightness modest.
- Physical tree outline: replace the matrix with an addressable strip, but redesign the animation and power system; this is no longer the original project.
- Interactive display: add button-controlled snowfall speeds or modes. V2 owners can explore sound or touch features, provided the added blocks remain compatible with the board.
- Permanent build: use connectorized wiring, strain relief, insulation, and a properly rated external supply.
For a different matrix-oriented MakeCode approach, see the NeoPixel matrix extension, while remembering that its coordinate system may not match the original hardware.
Verdict
The original micro:bit Snowfall Christmas Tree remains a practical beginner project if you can obtain a compatible 16×16 matrix and load its custom MakeCode extension. Its concept is simple, but reproducing it safely depends on three details often glossed over: the original program uses P1, the matrix must be connected at DIN with a shared ground, and 256 pixels should not be treated as a low-current accessory. Start with the original project, test at low brightness, and use an external matrix supply whenever the hardware specifications require it.
Free tools Windows power users keep installed
One-click scans. No signup required.
Quick Recap

Product prices and availability are accurate as of the date/time indicated and are subject to change. Any price and availability information displayed on Amazon at the time of purchase will apply.




