What’s actually slowing this PC down?
Pick the symptom - the matching free tool is one click away.
ThatPainter is reader-supported. When you buy through links on our site, we may earn an affiliate commission. Learn More
As an Amazon Associate I earn from qualifying purchases.
Pumpkin decorating can be as simple as painting an intact pumpkin or as detailed as carving a stencil-guided design. For a display that avoids knife work and can last longer, choose no-carve ideas such as paint, markers, decoupage, or embellishments; for a glowing effect, carve a design and use battery-operated lighting. Here are 25 ways to bring pumpkins into your fall décor, organized by finish and where to display them.
Intact pumpkins generally last longer than carved ones, although their lifespan depends on conditions. Marc Evan, founder and co-owner of Maniac Pumpkin Carvers, told Martha Stewart that getting a week from a carved pumpkin is good, while a painted pumpkin can last months. That is his reported experience, not a guarantee for every pumpkin or home.
Popular on Amazon

- Great Value Paint Brush Set: Soucolor 20 acrylic paint brushes come in 10 different sizes, making them ideal for fine detailing, model painting, rock painting, nail art, face painting, DIY crafts, and general art projects. The varied brush sizes give you better control for both delicate lines and broader color coverage, while the soft bristles deliver smooth, consistent results on acrylic, oil, watercolor, canvas, wood, ceramic, and more.
- Awesome Set of Paint brushes: Professional paint brushes can cover all of your needs. The multi-purposed brushes are ideal for Watercolor, Oil, Gouache, enamel, Acrylic Painting, Body, Nail, Face Painting, Miniature, Model, Wood, Glass, Cup, Ceramic, Fine work, Art class, Craft Art Painting, DIY Art Crafts etc.
- Soft and long-lasting: The bristles are soft and strong, with nickel metal ferrules and blue wooden handles. After cleaning, the bristles will become soft and fluffy again and will not fall off.
- Easy to clean: it’s very convenient to Wash well in soap and water. Retain shape after drying. the brushes hold up very well. Nice selection to beginners and professionals. Keep them clean and they last a long time.
- Perfect for All Painters & Occasions: Suitable for art beginners, hobbyists and professional artists. Great for art class, home creation, travel painting and DIY handmade projects. A practical art gift for students, teachers, family and craft lovers.
Painted pumpkin ideas for color and pattern
Acrylic paint works for broad areas of color, while acrylic-based paint markers are useful for lettering and finer imagery, according to Martha Stewart’s guide to pumpkin paints. Keep the pumpkin intact for a no-carve display. Follow the labels and ventilation instructions for any paint or craft material you use.
-
Paint one pumpkin a single seasonal color
Choose one color—such as a warm rust, muted green, cream, or deep plum—and coat the pumpkin for a simple accent. A single-color finish can make an irregular pumpkin shape feel intentional rather than busy. Use it on a mantel, shelf, or entry table where it can stand on its own, or repeat the same color across a larger display.
-
Make a coordinated color set
Give several pumpkins different colors from the same palette instead of painting every one alike. For example, pair a light neutral with two deeper autumn shades, then vary the pumpkin sizes to keep the group from looking like a row of identical objects. This approach works well when you want color across a room without introducing a new pattern.
Special offer. See more information about Outbyte and uninstall instructions. Please review EULA and Privacy policy. -
Add fine lines or script with paint markers
Use an acrylic-based paint marker to draw simple leaves, dots, curving lines, or a short seasonal word on an intact pumpkin. Markers are suited to details and lettering, which can be harder to achieve with a broad brush. Keep the design large enough to read from the display’s usual viewing distance, and let the marker’s label guide drying and handling.
-
Create a chalkboard-style pumpkin
Paint the pumpkin in a dark, chalkboard-inspired finish, then use chalk to add a message, small drawing, or changing seasonal note. This gives the display a casual, hand-drawn quality. Keep the chalk design uncomplicated: a short greeting or a few leaves will usually be easier to read than a full block of text.
-
Use lace as a spray-paint stencil
Lay lace over the pumpkin and apply spray paint so the open pattern creates a delicate, repeated motif. A contrasting base and top color make the design easier to see; a pale finish on a darker pumpkin, for instance, creates a different effect from tone-on-tone color. Martha Stewart’s no-carve idea collection and pumpkin design ideas include lace-pattern inspiration. Follow the paint’s instructions, including ventilation guidance.
-
Give a pumpkin a temporary-tattoo motif
Apply temporary tattoos to an intact pumpkin for a detailed graphic without drawing each element by hand. A few small motifs can be scattered over the surface, or one larger image can serve as a focal point. Check the tattoo product’s directions for application, and avoid assuming every product will adhere equally well to every pumpkin surface.
Recommended Free Tools
Special offer. See more information about Outbyte and uninstall instructions. Please review EULA and Privacy policy.Also popular on Amazon
Sale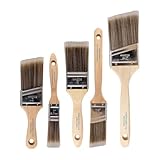 Pro Grade Paint Brushes, Paint Brush Set for Walls, Trim & Stain, 5-Piece | Interior & exterior | Cabinets, doors, furniture, decks | For latex & oil-based | Synthetic bristles, Softwood handles
- COMPLETE 5-PIECE BRUSH SET FOR EVERY PAINTING TASK — Includes 1 Inch Flat, 1.5 Inch Angle, 2 Inch Flat, 2 Inch Angle Stubby, and 2.5 Inch Angle brush giving you every size professional painters use daily. Get all 5 for less than the price of a single brush from hardware store brands — professional grade performance at a fraction of the cost. Perfect for walls, trim, cabinets, doors, furniture, and detailed cutting-in work on any project.
- ZERO BRISTLE LOSS — GUARANTEED BY PRECISION ADHESIVE BONDING — Every bristle is locked in place with precision-set adhesive that keeps them in the brush — not in your paint job. The coated steel ferrule provides structural support while the adhesive bond ensures clean performance on every stroke. Premium SRT synthetic filaments load more paint and release it evenly for a smooth streak-free finish on walls, ceilings, and trim. Works with latex, oil-based paint, primer, sealer, and wood stain.
- INCLUDES THE ANGLE STUBBY MOST SETS LEAVE OUT — Professional painters know the 2 Inch Angle Stubby is the go-to brush for tight cabinet interiors, window sashes, inside corners, and detailed trim where standard angle brushes are too long. Combined with the 1.5 and 2.5 inch angle sash brushes you have precision cutting-in covered at every scale — baseboards, crown molding, door casings, and ceiling lines.
- FLAT BRUSHES FOR BROAD SMOOTH COVERAGE ON ANY SURFACE — The 1 and 2 inch flat brushes deliver even coverage on walls, furniture, shelving, doors, fences, decks, and wood surfaces. Ideal for applying primers, stains, varnishes, polyurethane, and specialty coatings. Solid wood handles provide all-day comfort and control for both professional contractors and weekend DIY homeowners tackling interior or exterior painting projects.
- TRUSTED BY PROFESSIONAL PAINTERS AND CONTRACTORS NATIONWIDE — Pro Grade delivers professional-grade results at a price that makes sense for crews who go through brushes on every job. Ideal for property managers, remodeling contractors, apartment turnover crews, maintenance teams, and commercial painting operations. Backed by thousands of verified reviews from working painters. Washable and reusable for multiple projects.
-
Paint a simple repeat pattern
Use a paint marker or brush to repeat one uncomplicated shape—such as dots, arches, stars, or small leaves—around the pumpkin. Repeating a single motif creates a more orderly effect than mixing several unrelated patterns. Turn the pumpkin as you work so the marks are spaced around the visible surface, rather than concentrated on just one side.
Natural, metallic, and embellished pumpkin finishes
For more texture, combine a painted surface with small add-ons or use natural materials as part of the composition. Keep attached pieces lightweight and arrange them so the pumpkin remains stable on its display surface.
-
Make a tissue-paper leaf decoupage pumpkin
Arrange tissue-paper leaves on an intact pumpkin and apply them as a decoupage design. Overlapping leaves can create a dense, all-over finish; leaving open spaces lets the pumpkin’s original color show through. For a guided project, see Martha Stewart’s colorful leaf decoupage instructions, which show how templates and leaf shapes can inform the composition.
-
Try metallic or gilded leaves
Add metallic leaf shapes or gilded accents to a plain pumpkin for a reflective detail that catches light. A few leaves placed asymmetrically can feel more natural than covering the whole surface. Pair the metallic finish with a restrained base color if you want the accents to remain the focal point.
What’s actually slowing this PC down?
Pick the symptom - the matching free tool is one click away.
Special offer. See more information about Outbyte and uninstall instructions. Please review EULA and Privacy policy. -
Decorate with jewels or stick-on embellishments
Place jewels or other small stick-on decorations in a deliberate pattern: a line following the pumpkin’s ridges, a cluster around the stem, or a sparse constellation of accents. This is a no-carve option when you want a little sparkle without painting a detailed image. Use embellishments appropriate to the pumpkin’s surface and the product’s directions.
-
Add copper-leaf accents
Use copper-leaf details on a painted or natural pumpkin for a warmer metallic look. Rather than covering every ridge, concentrate the accents on one area—around the stem or along a single curve—to create contrast. Follow the leafing product’s instructions, since application methods vary.
-
Layer paint with small embellishments
Start with a painted surface, then add a few small decorative pieces for depth. A dark-painted pumpkin with restrained metallic accents, or a light base with scattered jewels, gives you two textures without requiring a complicated design. Keep the add-ons sparse enough that the paint remains visible and the pumpkin still reads as one composed object.
Also popular on Amazon
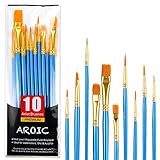 AROIC 10 Pcs Paint Brushes, Acrylic Oil Watercolor Painting Brush Set | Nylon Hair Brushes Artist Professional Drawing Kits for Adult, Kids Face Canvas Rock Painting Arts Crafts Supplies(1 Pack)
- 【All sizes of art brushes】: The 10 sizes of multi-functional brushes have various shapes, making the mixing color easier, which is very suitable for artists, students, teenagers, children and painters at all levels. Wonderful Present ideas for friends and family who like painting!
- 【general brush set】: Professional paint brush can meet all your needs. Multifunctional brush is very suitable for watercolor, oil, gouache, acrylic painting, body, nail, face painting, miniature, model, ceramics, arts and crafts painting, etc.
- 【high quality process】: It is designed with anti falling bristles, anti-rust nickel ferrule and solid wood handle. You can use the brush to focus on the painting and always be creative.
- 【easy to maintain】: After using the brush, it is very convenient to clean the brush with warm soapy water and reshape the tip of the brush. Air dry the brush and place it on top of the top for long use.
- 【100% satisfaction guarantee - buy now】1 packs of set brushes, you can also get friendly customer service, any questions feel free to contact us, within 24 hours to help you! There is no risk in buying our paint brush kit.
-
Make a playful face from lightweight materials
Build a face from lightweight craft or natural materials instead of cutting features into the pumpkin. A few pieces positioned as eyes, a nose, and a mouth can make a display feel playful while keeping the shell intact. This is especially useful when you want a family-friendly look but prefer to avoid knife work.
Special offer. See more information about Outbyte and uninstall instructions. Please review EULA and Privacy policy. -
Use a pale or unusual pumpkin as the design
Choose a naturally pale or otherwise distinctive variety and let its color and shape carry the display. Add only a small marker detail or leave the surface untouched so the pumpkin remains the feature. A group of contrasting natural colors can provide variety without requiring every pumpkin to be painted.
Stencil, etched, and carved pumpkin designs
Stencils and templates can help plan either surface decoration or cut designs. Stencils are useful for a repeatable pattern; a template-based carving can create a scene that becomes visible when illuminated. Carving involves knife work and shortens the useful life of the pumpkin compared with keeping it intact, so decide whether a lit effect is worth that trade-off. Martha Stewart’s stencil and design collection offers patterns to adapt.
-
Make a stencil pattern on the surface
Hold a stencil against the pumpkin and use paint to apply a controlled motif, such as leaves, stars, or a geometric repeat. A stencil is a practical choice when you want a consistent shape but do not want to draw it freehand. Keep the design scale in proportion to the pumpkin: a large motif can read clearly on a large surface, while several smaller repeats suit a smaller pumpkin.
-
Etch a design into the skin
Etching creates a design by working into the pumpkin’s surface without cutting all the way through. Choose a simple outline or repeated detail, and use a template if you want a more controlled result. This offers a middle ground between a fully intact painted surface and an open carved design, although it still alters the skin.
Windows Errors? Fix Them Before They Spread
Repair common Windows errors and clear accumulated junk for a smoother, more stable PC - no reinstall needed.Free scan · no reinstallCrashes, No Sound, or Screen Glitches?
Random freezes, missing sound and display glitches usually trace back to one bad driver. Find and replace yours safely.Free scan · under a minuteSpecial offer. See more information about Outbyte and uninstall instructions. Please review EULA and Privacy policy. -
Carve a template-based scene
Pick a template with shapes large enough to read from a few steps away, then use it to guide the cut design. A simple silhouette or scene can be more legible than a pattern with many tiny openings. For step-by-step carving fundamentals, consult Martha Stewart’s pumpkin-carving guide; use care with cutting tools and keep the work area appropriate for the task.
-
Use battery-operated light in a carved pumpkin
Place a battery-operated candle or LED inside a carved pumpkin to create an illuminated display without using a traditional flame. Martha Stewart’s design ideas and pumpkin-care guidance recommend battery-operated lighting as a safer option than a traditional candle. Follow the light’s own instructions, and make sure it is suitable for the display setup.
Also popular on Amazon
 10Pcs Paint Brushes for Kids, Anezus Kids Paint Brushes Toddler Large Chubby Brushes Round and Flat Preschool Painting Brushes for Washable Paint Acrylic Paint
- 【KIDS PAINT BRUSHES SET】Anezus paint brushes for kids come with 10 pcs paint brushes of 5pcs round paintbrushes and 5 flat paint brushes with colorful handles, good for the young artist to explore their creativity in painting and crafting
- 【HIGH QUALITY PAINT BRUSHES FOR KIDS】These toddler paint brushes made of soft hog bristle, bright colored handles and rust proof ferrules. The bristles are firmly fixed in the kids paint brushes and no shedding. Each children paint brush measure 6 1/4 inches (16cm) in length and ferrules 1/2"(1.3cm) diameter, large enough for the little hand to grip and control
- 【WIDE APPLICATIONS】With combination of round and flat craft paint brushes for kids, work great with washable paint, tempera paint and acrylic paint. Great for arts and craft, rock, leather, gesso and ceramic, or body, nail and face art painting.
- 【EASY TO CLEAN 】After using paint brushes for acrylic, oil or watercolor painting, it’s very convenient to clean them with warm soapy water and reshape the paint brush tips. Keep these craft paint brushes clean and they last a long time.
- 【GREAT GIFT IDEA】Perfect for students, teens, kids, children and painters of all levels. Wonderful gift idea for girls, boys and kids who love painting! These all-purpose paint brushes for kids are ideal for kids' school projects, birthday parties, painting parties, art parties, back to school supplies, classroom decoration and more.
-
Keep the carving minimal
Combine a few small cutouts with painted or etched details rather than carving an entire face or scene. This lets the surface decoration remain prominent while still allowing light through the openings. It is a useful compromise if you want some illumination but prefer a less heavily cut design.
Arrange pumpkins around the home
Placement changes how a pumpkin design reads. A small decorated pumpkin can work as a tabletop accent, while a larger group needs variation in size, height, and finish to feel composed. The fall décor inspiration in Martha Stewart’s seasonal ideas includes pumpkins as part of broader autumn arrangements.
The Tool Desk
Outbyte PC Repair FREERepair Windows errors before they cause bigger problemsFix Now →Outbyte Driver Updater FREEFix the driver behind crashes, sound loss and screen glitchesFind Drivers →-
Build a small dining-table centerpiece
Group several small pumpkins down the middle of a dining table, mixing finishes or colors while keeping the arrangement low enough not to dominate the setting. A few painted pumpkins can sit beside natural ones for contrast. Leave enough space for place settings and serving dishes; the display should frame the table, not compete with its use.
-
Group pumpkins and gourds at the entry
Arrange pumpkins and gourds near the front entrance to make a seasonal welcome. Use a larger piece as an anchor, then add smaller shapes around it rather than lining everything up at equal intervals. Keep the route to the door clear and place the arrangement where it will not be knocked over by ordinary foot traffic.
-
Create a porch or steps cluster
For a porch or steps, vary pumpkin sizes and colors to create a cluster with a clear visual center. Place the largest pumpkins toward the back or sides and smaller ones where they remain visible. On steps, prioritize a stable arrangement that does not obstruct walking space or create a tripping hazard.
-
Add pumpkins to a broader fall display
Use pumpkins as one element among other autumn décor rather than making every object pumpkin-shaped. A few pumpkins can anchor a grouping with other seasonal materials or accessories. Keep a shared color or finish—such as natural tones, metallic accents, or a coordinated painted palette—to make the whole display feel connected.
Free tools Windows power users keep installed
One-click scans. No signup required.
Special offer. See more information about Outbyte and uninstall instructions. Please review EULA and Privacy policy. -
Use mixed sizes and colors for contrast
Combine large and small pumpkins, or mix painted, pale, and naturally colored varieties. Contrast makes each shape easier to distinguish and prevents a cluster from looking flat. To keep the composition coherent, repeat one feature across the group, such as a shared color, a similar surface finish, or a recurring leaf motif.
Also popular on Amazon
 162 Pcs Paint Brushes Bulk, Round Flat Tip Acrylic Paint Brushes Set for Kids Classroom Crafts Oil Watercolor Canvases Face Painting Touch Up
- 【162-Piece Bulk Set | Dual Brush System】Maximize versatility with 81 flat brushes (0.59 inch edge for bold strokes) and 81 round brushes (0.39 inch tips for details) – 3X more tools than standard kits! Pre-sorted in labeled compartments for instant access during painting sessions. Ideal for art classrooms, mural projects, and multi-artist households.
- 【Pro-Grade Durability | Zero Shedding Guarantee】 "Engineered with triple-crimped nylon bristles (43% higher resilience vs. standard) and aerospace aluminum ferrules tested for 10,000+ flex cycles. Lab-verified 0.01% shedding rate even with heavy impasto techniques – outperforms flimsy bristles in budget brushes."
- 【Multi-Scenario Readiness | Event & Daily Use】 Optimized for: Thanksgiving/Christmas face designs classroom projects ceramic decorating fabric printing and model painting; Lightweight plastic handles each reduce hand fatigue during prolonged sessions
- 【Effortless Maintenance | Long-Term Durability】 Clean with warm soapy water in 10 seconds; Reshape tips and air-dry vertically to preserve bristle integrity,After use, air-dry brushes thoroughly and store upright in the provided case to preserve bristle shape. The premium nylon filaments naturally regain their original form after each stroke. For cleaning, simply rinse in warm soapy water and gently reshape bristles with fingertips."
- 【Multiple Application】These acrylic paint brushes can be applied for most occasions,such as:watercolor,oil, gouache paint,face paint, acrylic paint, suitable for Thanks Giving Day, Christimas, Halloween face and body painting, canvas painting, fabric, rock, miniature, model, ceramics, arts and crafts painting, etc.
How do I choose between no-carve and carved pumpkin décor?
Choose no-carve decoration if you want to avoid knife work, keep the pumpkin intact, or prioritize a longer-lasting display. Choose carving when an illuminated cutout is central to the look and you are comfortable with the extra care and shorter display life.
| Approach | Knife work | Best suited to | Trade-off |
|---|---|---|---|
| Paint, markers, decoupage, or embellishments | No | Color, lettering, texture, and longer-lived décor | Requires craft materials and following their labels |
| Stencil or etched surface design | Not for a surface stencil; etching alters the skin | Pattern or detail without a fully open cutout | Etching requires working into the surface |
| Carved design with battery-operated light | Yes | A visible cutout or illuminated scene | Carved pumpkins generally do not last as long as intact ones |
Whichever style you choose, pumpkin care affects how long it remains presentable. Martha Stewart’s pumpkin-care guidance recommends cool, dry storage and drying surface water after rain. These are useful precautions, not a promise of a particular lifespan; conditions and the pumpkin itself vary.
Frequently Asked Questions
Can I decorate a pumpkin that will be displayed outdoors?
Outdoor exposure can affect both the pumpkin and its finish. Choose materials whose labels allow the intended use, and keep in mind that the available care guidance recommends drying surface water after rain and storing pumpkins in a cool, dry place when possible.
What kind of paint marker is suitable for pumpkin details?
The cited painting guide describes acrylic-based paint markers as useful for detailed imagery and lettering. Product formulations vary, so check the marker’s instructions for surface suitability, drying, and ventilation before using it.
Do no-carve pumpkins last forever?
No. Keeping a pumpkin intact generally helps it last longer than carving it, but the pumpkin can still deteriorate. Storage conditions, moisture, and the individual pumpkin affect how long it stays in good condition.
Can a pumpkin stencil be used without carving?
Yes. A stencil can guide a painted surface pattern, while templates can also help plan designs for carving or decoupage. Choose the method according to whether you want a surface-only finish or cutouts.
Quick Recap


