Free tools Windows power users keep installed
One-click scans. No signup required.
ThatPainter is reader-supported. When you buy through links on our site, we may earn an affiliate commission. Learn More
The Skinny Strips Quilt turns precut 2½-inch cotton strips into a 61½ × 74½-inch throw. You sew each print or stripe strip between two shorter white strips, shift the finished rows to create movement, then trim, join, quilt and bind the top. The method is quick to understand, but careful row placement and trimming determine whether the staggered design looks intentional.


Materials and cutting requirements
The quantities below assume 44/45-inch-wide, 100% cotton quilting fabric. Measurements include ¼-inch seam allowances.
| Material | Amount | Cutting |
|---|---|---|
| Assorted print or stripe fabric | 37 2½ × 42-inch strips, or 3 yards total | Cut 37 strips measuring 2½ × 32½ inches |
| Solid white fabric | 37 2½ × 42-inch strips, or 3 yards total | Cut 74 strips measuring 2½ × 21 inches |
| Solid navy binding fabric | 5/8 yard | Cut 7 strips measuring 2½ × 42 inches |
| Backing fabric | 4 yards | Use for the quilt back |
| Batting | One piece 70 × 83 inches | Trim or position after layering |
If you are shopping for 2½-inch precut cotton quilting strips, the top requires 37 print or stripe strips plus 37 solid strips. A precut pack may not contain the exact count or usable length, so check the strip quantity and fiber content before cutting.
PC Slower Than It Used to Be?
A free scan shows the junk files, broken settings and background clutter dragging Windows down - then fixes them in one click.Free scan · Windows 10 & 11Crashes, No Sound, or Screen Glitches?
Random freezes, missing sound and display glitches usually trace back to one bad driver. Find and replace yours safely.Free scan · under a minute#1 Best Overall
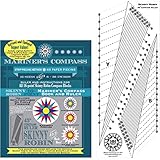
- Skinny Robin 16 Point Mariners Compass Book and Ruler Combo
How the Skinny Strips Quilt is assembled
1. Build 37 strip-pieced rows
- Place one 2½ × 32½-inch print or stripe strip between two 2½ × 21-inch white strips.
- Sew the long seams with a ¼-inch seam allowance. The result is one row containing a long print section and two white sections.
- Press both seams away from the white strips. On successive long-strip seams, alternate the direction in which you feed the pieces through the machine. This helps reduce seam pushing and keeps the rows more even.
- Repeat until you have 37 identical-length rows.
2. Plan the staggered arrangement
Put the rows on a design wall made from flannel or batting. Temporarily stick every row to the surface, then shift rows left or right so the print sections are staggered instead of forming one rigid centered column. Stand back frequently: small changes in offset can alter the apparent rhythm of the whole quilt.
3. Mark, trim and join
- Once the layout is satisfactory, mark the cutting lines along both side edges.
- Trim the assembled rows to the required rectangular dimensions, keeping the marked edges straight and parallel.
- Join the rows in the planned order. Press the horizontal seams in one direction.
Do not trim casually after sewing the rows together. The edge marks establish the rectangle and preserve the staggered positions; inaccurate trimming can make the sides uneven or remove more of one print section than another.
Rank #2

- Robert Kaufman Fabrics Kona Cotton Solids
- Skinny Strips (Honey Bun); 100% cotton premium quilt shop quality fabric
- Precut, rolled and secured with a paper strap by the manufacturer
- Bundle includes 40 1.5-inch by 44-inch (width of fabric) strips
Layout choices
| Layout | Visual direction | Planning effort | Color emphasis | Trimming and alignment |
|---|---|---|---|---|
| Main staggered layout | Offset print sections create an irregular, flowing column | Free-form placement on a design wall | Scrappy, floral or mixed prints | Rows must be aligned before edge marking and trimming |
| Color Bars | Bands radiate from the side edges | Follow the pattern’s placement plan | Strong banding and coordinated color groups | Radiating edges demand careful row positioning |
| Streak of Lightning | Planned zigzags run the length of the quilt | More diagram-led than the free-form version | Directional contrast highlights the zigzag | Small alignment errors can interrupt the zigzag |
Red, white and blue prints give the design a patriotic character, while a floral strip set produces a softer, cheerful version. The strip arrangement—not a change to the sewing units—creates these different effects.
Quilting and binding the finished top
- Lay the completed quilt top over the 70 × 83-inch batting and 4-yard backing.
- Baste the three layers using your preferred method.
- Quilt as desired, choosing a design that supports the long strips without obscuring their staggered movement.
- Join the seven 2½ × 42-inch navy binding strips, attach the binding to the quilt edges, and finish it on the reverse.
The finished quilt measures 61½ × 74½ inches, a practical throw size. Actual quilting and binding time depends on the quilting design, equipment and individual pace; this pattern does not provide a completion time.
Quick wins for a faster PC:
Fix the driver behind crashes, sound loss and screen glitchesFind Drivers →Repair Windows errors before they cause bigger problemsFix Now →Common problems and fixes
Seams push the rows out of alignment
Alternate the sewing direction on successive long seams, use a consistent ¼-inch seam allowance and press away from the white strips. If a row has already drifted, check its length against the other rows before adding it to the design wall.
The print sections form an unwanted straight column
Return the rows to the design wall and vary their left-right offsets. The main design depends on staggered placement rather than centering every print section.
The finished sides are not rectangular
Recheck the edge marks before trimming. Keep the rows in their planned order, align the marks and cut with a long ruler so both edges remain straight.
The Color Bars or Streak of Lightning pattern loses its shape
Lay out every row before sewing the horizontal seams. Photograph or label the order if you need to move the rows, then verify the radiating bands or zigzag path after each seam is joined.
Best Value
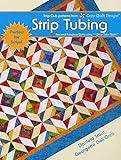
- Sold individually.
- Strip Tubing is another in the line of top-selling books by Cozy Quilt DesignsTM and it makes diagonally pieced Half Square Triangles a snap! Includes 5 full patterns some with multiple layout options all in multiple sizes.
What makes this pattern useful for strip sets
The design uses the same repeatable row unit 37 times, so a coordinated precut collection can be displayed without cutting dozens of small pieces. White strips provide separation, while the print or stripe strips supply the color and direction. Linda Augsburg, Editorial Content Chief for American Patchwork & Quilting, describes it as a throw-sized way to showcase a beloved 2½-inch strip set. American Patchwork & Quilting states that its staff has more than 70 years of quilting experience (American Patchwork & Quilting, 2026); that is an organizational statement, not an independent test of this pattern.
Quick Recap

Product prices and availability are accurate as of the date/time indicated and are subject to change. Any price and availability information displayed on Amazon at the time of purchase will apply.




