Windows Errors? Fix Them Before They Spread
Repair common Windows errors and clear accumulated junk for a smoother, more stable PC - no reinstall needed.Free scan · no reinstallOutdated Drivers Are Slowing You Down
One free scan finds every outdated or missing driver and matches the right update for your exact hardware.Free scan · exact hardware matchThatPainter is reader-supported. When you buy through links on our site, we may earn an affiliate commission. Learn More
To keep flying-geese points from being cut off when you join the units, preserve a quarter-inch overlap at the top of each unit. In this 1:59 lesson, American Patchwork & Quilting Editors demonstrate the geometry using two squares and one rectangle: mark each square’s diagonal as the sewing line, stitch on it, and let the opened squares overlap rather than meet exactly.

As an Amazon Associate I earn from qualifying purchases.
What the lesson demonstrates
American Patchwork & Quilting Editors published “Video 11: Perfect Points on Flying Geese” on October 13, 2016. Its focus is joining flying-geese units without clipping their points. The illustrated construction uses two squares and one rectangle; it is a focused lesson, not a comparison of rulers or alternate methods. Watch the lesson.
Free tools Windows power users keep installed
One-click scans. No signup required.
How to make the overlap
- Mark the sewing lines. Draw a diagonal line on each square. The marked diagonal is the stitching line.
- Sew the first square. Place it on one side of the rectangle and stitch directly along its marked diagonal.
- Open and press. Press the first square open so you can see where its edge lands at the top.
- Position and sew the second square. Place it on the other side of the rectangle and stitch along its diagonal.
- Check the top overlap. When the pieces are opened, the square corners should overlap by a quarter inch at the top. Do not align them so they meet precisely at the point: the overlap provides the seam allowance that helps preserve the point when units are joined.
The instructor also describes allowing a quarter inch on either side of the point at the bottom when adjoining units are sewn. The practical aim is to keep the point intersection intact within the joining seam allowance, rather than stitching across and removing it.
#1 Best Overall

- Made in the USA with high quality acrylic and precision measurements ensuring accuracy for your quilting, sewing, patchwork, and crafting projects.
- Creative Grids exclusive non-slip grip allows you to easily slide the ruler over the fabric until positioned correctly. Then, when slight pressure is applied, the grip holds the ruler in place, eliminating slipping while you cut.
- Easy to read markings.
- Cutting instructions for eight different sizes are printed right on the tool along with their finished sizes.
- Comes with fully illustrated step by step instructions for two different methods.
Trim bulk only if you want to
After opening the piece, the instructor trims the seam allowance behind it to reduce bulk. She presents this as her preference, not a required step. You can leave that allowance in place if you prefer; the point-preserving overlap is the key part of the demonstrated method.
Keep the points visible while joining units
As supplementary assembly advice, a separate quilting tutorial recommends keeping the point crossover visible so you can aim the joining seam through it. It also recommends pressing the joining seams away from the flying-geese points when practical, rather than folding bulky seams back over them. See the supplementary tutorial.
Rank #2

- 8-in-1 Versatility: Effortlessly create eight different finished sizes ranging from 1/2 * 1 inch to 4 * 8 inches. With all cutting requirements printed directly on the ruler, you can skip the math and get straight to sewing.
- Dual-Method Efficiency: Whether you prefer making four units at a time for speed or oversizing your blocks to trim them down to "quilt-show" perfection, our ruler supports both popular construction methods with ease.
- Flat & Stable Cutting Alignment Crafted from premium, heavy-duty acrylic that sits perfectly flat on your cutting mat. The rigid profile provides a steady, even edge to guide your rotary cutter or shears, ensuring a uniform and secure press over your fabric layers for highly accurate cutting.
- Crystal Clear Markings: Engineered with high-contrast, easy-to-read guidelines. The specialized markings are clearly labeled for different sizes, making it simple for both beginners and pro quilters to align their fabric perfectly every time.
- Durable & Compact Design: Measuring 8.5 * 8.5 inches, this ruler is crafted from high-quality, heavy-duty acrylic. It’s the perfect size for your cutting mat and built to withstand years of rotary cutting without losing its edge or clarity.
Materials for practice
The demonstrated construction calls for two fabric squares and a rectangle. Scraps or quilting cotton are suitable materials to practice the technique. A washable marking implement can be useful for drawing the diagonal sewing lines; the lesson does not specify or endorse a particular tool.
What’s actually slowing this PC down?
Pick the symptom - the matching free tool is one click away.
Quick Recap
Best Value
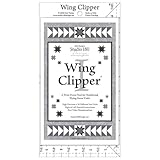
- Perfect Flying Geese—Every Time – Use the Fast Flying Geese technique to make four accurate units from just five squares, then trim to perfection with the Wing Clipper ruler. Item # DT07, Ruler Size 5 ½ x 10 ½
- Trim for Precision & Seam Accuracy – Each unit is sewn slightly oversized and trimmed after pressing, ensuring perfect size and ideal seam placement—no more wonky points.
- 10 Finished Unit Sizes Included – Create Flying Geese from ½” x 1” up to 5” x 10”, with heights finishing in half-inch or whole-inch increments.
- Easy to Use for All Quilters – Features fine, easy-to-read lines, illustrated step-by-step instructions, and trimming guides for both right- and left-handed quilters.
- Learn Visually with Free Videos – Includes free online video tutorials covering construction and trim-down techniques, plus access to companion patterns for even more design options.
Rank #4

- The product includes: You will receive one Flying Goose patchwork ruler. No need to manually calculate the fabric size for each Flying Goose patch; Simply align the ruler with the markings to cut, significantly reducing the difficulty for beginners and improving patchwork efficiency
- Multi-size Compatibility: Covering a size range from 1.5 inches to 10.5 inches, it accurately matches different sizes of Flying Goose patchwork pieces, accommodating the size requirements of various patchwork projects such as quilts and cushions
- Reliable Material: Made of acrylic material, the laser-engraved markings are clear, wear-resistant, and have smooth, burr-free edges. It offers high measurement and cutting accuracy and is not easily deformed or broken, suitable for long-term use. Ensuring the accuracy of your quilting, sewing, patchwork, and handicraft projects
- Multi-functional Compatibility: In addition to the core Flying Goose patchwork, the markings can also help mark commonly used 1/4-inch and 1/2-inch seam allowances in patchwork, suitable for handicrafts. Suitable for DIY, sewing, and other fabric craft creations
- A sewing helper: This product makes quilting a flying goose pattern a breeze. Highly recommended for all sewing enthusiasts. Whether you're a beginner or an experienced quilter, you can easily get started

Product prices and availability are accurate as of the date/time indicated and are subject to change. Any price and availability information displayed on Amazon at the time of purchase will apply.




