ThatPainter is reader-supported. When you buy through links on our site, we may earn an affiliate commission. Learn More
The best beginner jack-o’-lantern is a design built from large, widely spaced shapes: a wide smile, minimal eyes, an angry face, or a simple Frankenstein. Those designs need only a firm medium pumpkin, a washable marker, a serrated pumpkin saw, a scoop, and a battery-operated LED light.
Below are 39 ideas organized by difficulty, technique, pumpkin type, and display style. Some are true carve-through designs; others use etching, drilling, paint, wire, or props. That distinction matters: a painted polka-dot pumpkin and a drilled face may be easy projects, but neither is completed with a carving saw alone. For a broader look at the original 39-design gallery and its available templates, see Better Homes & Gardens’ pumpkin ideas collection.
Choose an idea before you choose a pumpkin
Match the pumpkin to the design rather than trying to force one pumpkin to suit every pattern. A medium, round pumpkin is practical for a simple face. A large, smooth pumpkin gives a stencil or street-facing display more room. A flat-sided pumpkin is useful for detailed patterns, while a white, green, striped, blue-gray, or warty gourd can make a very simple design look distinctive. Bumpy pumpkins are especially effective for monsters, zombie hands, and other deliberately irregular designs.
What’s actually slowing this PC down?
Pick the symptom - the matching free tool is one click away.
#1 Best Overall
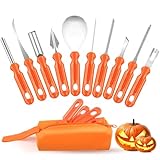
- 👻 Essential for Spooky Halloween Fun--Pumpkin carving remains a beloved Halloween staple, and our premium carving kit streamlines the craft with improved safety and convenience. Ditch risky household knives and craft intricate, eye‑catching Jack‑O'‑Lanterns with total ease.
- 🛠️ Complete 10‑in‑One Professional Carving Set--This all‑round 10‑piece toolkit suits novice crafters and seasoned carvers alike, containing a serrated pulp scooper, double‑sided saw, curved cutting saw, pumpkin drill, V‑groove chisel, arc etching tool and bent carving knife. Paired with a neatly stitched storage pouch fitted with heavy‑duty zippers, it keeps all tools sorted and well‑protected for seasonal reuse.
- ⚙️ Premium Stainless Steel, Exceptional Durability--Each carving implement is forged from sturdy stainless steel via high‑temperature reinforcement craft, delivering sharp cutting performance and outstanding wear resistance. Built to withstand repeated annual use for casual hobbyists and dedicated Halloween enthusiasts.
- ✋ Ergonomic Halloween‑Style Non‑Slip Grips--Boasting festive bright orange PP handles with anti‑slip texture, these tools ensure steady, comfy holding for detailed precision carving. Cut cleanly with minimal force to extend your tools’ service life.
- 🎁 Ideal Family‑Focused Halloween Gift--Spark warm family bonding and creative fun with this practical pumpkin carving kit, an impeccable seasonal gift choice for all ages. Crafted with safety prioritized; adult supervision is required for kids under 13 for secure carving activities.
Look for a pumpkin that is firm, free of soft spots, holes, mold, cuts, and bruises, with a stable base and a sturdy stem. Illinois Extension recommends about 1–2 inches of stem and warns against carrying a pumpkin by the stem; lift it from the base instead. Light-colored pumpkins sometimes have a less resistant skin, although that is only a tendency, and they may not keep as long as darker varieties. The Illinois Extension pumpkin-selection guide has additional selection advice.
Carving pumpkins are usually stringier and less flavorful than pie pumpkins. Save and roast the seeds if the pumpkin is fresh and untreated, but do not promise yourself good pie flesh from a typical jack-o’-lantern. The University of Minnesota Extension guide to pumpkins and winter squash explains the difference between carving and cooking varieties.
A quick chooser
| What you want | Good choices |
|---|---|
| Fastest carve-through designs | Minimal eyes, wide smiling face, angry face, laughing pumpkin, traditional face on a colorful gourd |
| Children can participate without handling knives | Frankenstein, rainbow, painted polka dots, pumpkin trio, grinning grouping, flower-power pumpkins |
| No intricate cutting | Cactus, etched flowers, deer, leaf patterns, succulent, painted bats, monograms |
| Most visible from the street | Flame patch, wide smile, drilled face, mice silhouettes, large monograms, luminarias |
| Best spooky effects | Slithering snakes, zombie hand, dragon, vampires, ghost emoji, drilled face |
| Best for a fall display that can outlast Halloween | Rainbow, leaves, deer, scarecrow, flowers, cactus, succulent, monograms, house numbers |
| Best group projects | Train cars, pumpkin trio, grinning grouping, luminarias, flame pumpkin patch |
| Best with a drill | Slithering snakes, cheese-and-mice, owl, drilled-face pumpkins |
| Best with a stencil | Frankenstein, rainbow, vampires, scarecrow, deer, owl, dragon, mice, selected fall patterns |
Difficulty key: 1 means very easy; 2 means easy with a guide, repeated shapes, drilling, or simple props; 3 means moderate because the design has fragile details, several techniques, wiring, or multiple pumpkins.
Tools and safety before you start
Basic kit
- A firm pumpkin and a washable marker or chalk marker
- A printed stencil, if needed
- A pushpin, thumbtack, nail, or stencil-poking tool
- A serrated pumpkin saw or thin serrated knife
- A large metal spoon, scoop, or ice-cream scoop
- Newspaper, cardboard, a tray, or another washable work surface
- A battery-operated LED tea light, puck light, or string light
These supplies correspond with the basic pumpkin-carving instructions from Better Homes & Gardens. Optional tools include a melon baller or apple corer for round holes, an etching tool or potato peeler, paint and brushes, a drill and bits, toothpicks, and decorative props.
Free tools Windows power users keep installed
One-click scans. No signup required.
Craft knives, X-Acto-style knives, jigsaws, drills, and wire are adult tools. A project can be suitable for a family without making the cutting step suitable for a child. The U.S. Consumer Product Safety Commission says adults should handle pumpkin carving; children can scoop the pulp, trace a pattern, sort seeds, paint, or attach soft decorations. CPSC’s dated safety release estimated an annual average of about 3,200 Halloween-related emergency-department injuries over the preceding three years, with 55% related to pumpkin carving. That is a U.S. estimate reported in 2022, not a current annual statistic. See the CPSC Halloween safety guidance.
- Work on a solid, non-slip surface, never with the pumpkin held in your lap.
- Cut away from your body and keep the non-cutting hand out of the blade’s path.
- Make small, controlled cuts. If the blade meets resistance, withdraw it and try a different angle rather than forcing it.
- Keep children away from the active cutting area, even if they are helping with another part of the project.
LED lighting is the default
Use a battery-operated LED or glow stick in preference to an open-flame candle. CPSC and the National Fire Protection Association both recommend battery-operated lights or glow sticks as safer alternatives.
LED does not automatically mean child-safe. On April 9, 2026, CPSC recalled a Besslly Halloween pumpkin-carving kit because its included tea lights had accessible button-cell batteries. Swallowed coin or button batteries can cause serious internal chemical burns, life-threatening injury, or death. Inspect the battery compartment, keep spare batteries away from children, use lights with secured compartments, and check the CPSC recall database. CPSC’s button-cell battery FAQ explains the hazard.
If you use a candle despite the safer LED option, never leave it unattended. Keep the pumpkin away from curtains, paper, dried flowers, costumes, and other combustibles, and out of the path of trick-or-treaters. Do not use an open flame in a pumpkin that children will handle, and do not assume that a bottom opening eliminates the need for care and ventilation.
Should you cut the top, bottom, or back?
There is no single universally best opening.
- Bottom opening: Usually the most practical choice for a carved pumpkin. It gives you a broad cleaning opening, keeps the stem and top intact, reduces the chance of a lid shrinking and falling inward, and lets you place the pumpkin over an LED. Cut a hole larger than your fist but small enough to hide when the pumpkin is upright. A triangular notch helps you remove and replace the cut section. Follow the BHG bottom-opening and cleaning guide.
- Top opening: The familiar jack-o’-lantern method, and the right choice when the lid is part of the design. Cut at a slight inward angle so the lid rests on the rim, and add a notch to show its orientation. A properly supported top lid does not automatically collapse, but it can loosen as the pumpkin dries.
- Back opening: Useful when you want the entire front to remain an uninterrupted design or need room for a larger LED. Professional carvers sometimes use this approach; the opening is hidden from the main viewing angle.
39 easy pumpkin carving ideas
For every design, read “carve” as cutting through the wall and “etch” as scraping away the skin or some flesh without opening the pumpkin completely. Solid stencil lines generally indicate cut-through areas, while dotted, shaded, or marked areas generally indicate etching; always check the key on the particular template. BHG’s Frankenstein stencil and rainbow stencil illustrate that distinction, and its free fall and animal stencil collection provides additional patterns.
Classic faces
-
Frankenstein face Difficulty 1 · Carving and etching
Use the free stencil for large facial areas, then etch smaller features such as scars, hair, or stitching. Choose a medium-to-large round pumpkin with enough vertical space for the forehead and bolts. A bright LED makes the broad face easy to read, while etched scars glow more softly. This is one of the best beginner and family choices because children can trace, scoop, paint, and sort seeds while an adult cuts.
-
Minimal eyes Difficulty 1 · Simple carving
Carve only two eyes, varying their size, angle, or expression across several pumpkins. This is the fastest idea, needs no stencil, and works on round, flat, colorful, or unusually shaped gourds. Use large openings and a bright LED if the display will be viewed from the sidewalk.
-
Wide smiling jack-o’-lantern Difficulty 1 · Simple carving
Use four broad shapes—two eyes, a nose, and an oversized mouth. A washable freehand sketch is enough, although a simple stencil makes the expression more symmetrical. A medium round pumpkin is practical; choose a large one for a street-facing display. Keep the teeth broad and connected, and use an LED for a strong, clean glow.
Windows Errors? Fix Them Before They Spread
Repair common Windows errors and clear accumulated junk for a smoother, more stable PC - no reinstall needed.Free scan · no reinstallOutdated Drivers Are Slowing You Down
One free scan finds every outdated or missing driver and matches the right update for your exact hardware.Free scan · exact hardware matchSpecial offer. See more information about Outbyte and uninstall instructions. Please review EULA and Privacy policy. -
Traditional face on a colorful gourd Difficulty 1 · Simple carving
Put a basic triangle face on a green, white, blue-gray, striped, or warty pumpkin and let the natural color provide the visual interest. This is a good solution when you want maximum impact with minimal cutting. Pick a pumpkin with a relatively smooth front and use an LED so the color remains visible around the openings.
Rank #2
Sale CHRYZTAL Pumpkin Carving Kit Tools Halloween, Professional Heavy Duty Carving Set, Stainless Steel Double-side Sculpting Tool Carving Kit for Halloween Decoration Jack-O-Lanterns, Gift for Halloween
- 【10 Professional Pumpkin Carving Kit】 The package includes Pumpkin scooper X 1, Small saw X 2, Pumpkin drill X 1, Etching tool X 1, Double-sided saw X 1, Carving Knife X 1, Small Knife X 1, Carving Tools X 2. The different specifications of craving kits will create interesting Halloween pumpkin designs. Tools can be neatly organized and stored in the sturdy zippered nylon carrying case after use.
- 【High-quality Stainless Steel】 10pcs carving set are made by premium stainless steel, thicker than normal carving tools, will not break. Non-slip handle design, easy to grip plastic handle make carving any pattern a breeze. The durable material ensure the tools can be re-used for many years.
- 【Safe & Easy to Use】 The easy-grip handle, and sharp & sturdy antirust blade of our pumpkin carving kit is designed specifically for carving your own Halloween jack-o-lantern pumpkins. Suitable for adults and children. Children use tools that require adult supervision. Not recommended for children under 7 years old.
- 【Carve Perfect Jack-O-Lanterns】 Our 10 pieces of pumpkin tools have different functions, so they can help you cut and create realistic 3D pumpkin details, such as hair, teeth, nose and eyes, to make the pumpkin character look expressive. Let your pumpkin lantern stand out from the crowd and play happily on this Halloween
- 【Have Fun with Family】 Halloween won’t be completed without carving pumpkins and jack-o'-lanterns! Creating a jack-o-lantern is a fun job, our pumpkin carving kit has 10pcs, can allow you to cooperate with your families and friends at the same time, enjoy the happy Halloween pumpkin carving time.
-
Angry face Difficulty 1–2 · Simple carving
Slanted eyebrows do most of the work. Add pupils, teeth, and a wide mouth if the pumpkin has room, but leave thick bridges between the features. This design needs no stencil and reads clearly at night because its eye and mouth shapes are broad.
-
Pumpkin trio Difficulty 2 · Group display
Use three pumpkins with different expressions, or make one a cyclops with a single large eye. Choose similarly sized pumpkins for a coordinated arrangement, or deliberately mix heights. Keep each face simple so several people can work at once; three modest LEDs usually look better than one dim light shared among pumpkins.
-
Grinning pumpkin grouping Difficulty 1 · Group display
Give each household member a different oversized grin or expression. This is forgiving: uneven teeth and imperfect eyes become part of the group effect. Medium pumpkins with broad fronts are easiest, and a separate LED in each pumpkin keeps the display consistent.
Crashes, No Sound, or Screen Glitches?
Random freezes, missing sound and display glitches usually trace back to one bad driver. Find and replace yours safely.Free scan · under a minuteWindows Errors? Fix Them Before They Spread
Repair common Windows errors and clear accumulated junk for a smoother, more stable PC - no reinstall needed.Free scan · no reinstallSpecial offer. See more information about Outbyte and uninstall instructions. Please review EULA and Privacy policy. -
Laughing pumpkin Difficulty 1 · Simple carving
Use oversized features, crooked teeth, and expressive eyebrows. The large mouth is easier to cut cleanly than fine detail and makes a friendly, comic character. A big pumpkin gives the expression more room, but the concept works on any stable round pumpkin.
Cute and family-friendly designs
-
Rainbow pumpkin Difficulty 2 · Carving and etching
Cut the rainbow arches and etch the cloud area instead of cutting every section through. A broad, flat-sided pumpkin makes the arcs easier to space. Use a bright LED behind the carved bands and leave the etched clouds intact for a layered glow.
-
Friendly vampire Difficulty 2 · Stencil carving
Use a stencil for the hooked nose, eyebrows, and fangs. Make the teeth wide and leave generous flesh between them so the mouth does not break. A medium-to-large pumpkin with a smooth front is easiest; use an LED rather than a candle around children.
-
Candy-eating pumpkin Difficulty 1 · Simple carving and prop use
Carve simple eyes and a wide mouth, then use the mouth as a candy opening. Place wrapped candy in a separate protected container or refill it frequently; do not leave exposed food where rain, insects, dirt, or handling can contaminate it. A large pumpkin gives the mouth enough room for easy access.
Recommended Free Tools
Special offer. See more information about Outbyte and uninstall instructions. Please review EULA and Privacy policy. -
Cute owl Difficulty 2–3 · Carving, etching, and drilling
Combine carved facial shapes with etched feather details and drilled circles for the eyes or body. A squat, broad pumpkin gives the owl a convincing silhouette. Several openings make a bright lantern, but the drill and any detail knife are for adults only.
-
Train-car pumpkins Difficulty 3 · Multi-pumpkin painting and carving
Use several similarly sized pumpkins as connected cars. Carve windows and wheels, paint the bodies, and arrange them in a stable line rather than relying on loose connections. This is a group project; children can paint and decorate while an adult cuts. Use separate LEDs, or a protected LED string, in the cars.
-
Batty pumpkins Difficulty 2 · Painting and props
Paint small pumpkins black, etch or paint the eyes, and attach felt wings and ears with secure fasteners. This is suitable for a no-carve display and works especially well with miniature pumpkins. Use a small LED if you want them to glow, but do not leave loose pins or fasteners where children or pets can reach them.
-
Flower-power pumpkins Difficulty 1–2 · Simple carving and decoration
Start with a simple carved face, then add faux flowers, leaves, or greenery. Use pins, toothpicks, or an adhesive appropriate for the materials, and remove every sharp support before the pumpkin goes near children. A colorful gourd or painted pumpkin can remain decorative after Halloween, especially with no-carve flowers.
Special offer. See more information about Outbyte and uninstall instructions. Please review EULA and Privacy policy.
Nature and fall designs
-
Flower stencil pumpkin Difficulty 2 · Stencil carving and etching
Transfer a floral stencil and carve or etch the larger petals. A white, green, or multicolored gourd turns the design into fall décor rather than a traditional horror prop. Use a soft LED glow; etching will show as a more subtle layer than cut-through petals.
-
Leaf stencil pumpkin Difficulty 1–2 · Stencil etching
Apply a leaf or monstera pattern to a green, striped, or multicolored pumpkin. Etch the veins and cut only the largest openings, if any. This design works well without a bright internal light and can remain on display beyond Halloween if the pumpkin stays dry and cool.
Rank #3
 Pumpkin Masters Halloween Pumpkin Carving Kit – 4 Safe Tools & 12 Stencil Patterns – Create Fun & Spooky Jack-O’-Lanterns for Halloween Decorations
- Complete Halloween Pumpkin Carving Kit – Includes 4 safe and durable carving tools plus 12 stencil patterns to help you design spooky, silly, and creative jack-o’-lanterns for Halloween.
- Perfect for Halloween Decorations – Ideal for carving pumpkins for porches, parties, haunted houses, trick-or-treat night, and fall festivals; create glowing pumpkin decorations that set the mood.
- Fun for Kids & Adults – Family-friendly kit makes pumpkin carving safe, easy, and enjoyable; great Halloween activity for children, teens, and adults to enjoy together.
- Endless Carving & Decorating Ideas – Use included stencils or create your own designs for ghosts, witches, bats, monsters, and other classic Halloween icons; perfect for DIY Halloween décor.
- Must-Have Halloween Essential – Durable, reusable pumpkin carving tools ensure you’re ready for Halloween traditions year after year; the ultimate kit for jack-o’-lantern carving and decorating.
-
Easy etched pumpkins Difficulty 1 · Painting and etching
Paint the pumpkin, draw a simple floral pattern, then scrape through the paint and skin without cutting into the flesh. It is a good choice for anyone who dislikes detailed knife work. Use an unblemished pumpkin and keep it intact where possible; the design will not have the same lantern glow as a fully carved face.
-
Succulent stencil Difficulty 1–2 · Etching
Etch plant shapes onto green or unusual pumpkins. A tall or squat gourd can both work, depending on whether the stencil is vertical or spreading. Add paint rather than cut-through holes for an indoor, longer-lasting botanical display.
What’s actually slowing this PC down?
Pick the symptom - the matching free tool is one click away.
Special offer. See more information about Outbyte and uninstall instructions. Please review EULA and Privacy policy. -
Deer silhouette Difficulty 2 · Etching
Etch the deer instead of cutting through the entire silhouette. The partially translucent design creates a softer glow and preserves more of the pumpkin wall. A flat-sided pumpkin is easiest for transferring the antlers and body; simplify thin antlers if the template becomes crowded.
-
Leaf-pattern pumpkin Difficulty 1 · Etching
Use a seasonal leaf stencil and etch the pattern across the front. This differs from the single leaf or monstera concept above: repeat several leaves for a surface pattern. It is a strong choice for a pumpkin you want to keep as fall décor after Halloween.
-
Peek-a-boo barn Difficulty 3 · Scene carving and props
Cut a barn-shaped opening and add painted or faux farm animals. This is a scene rather than a conventional jack-o’-lantern, so choose a large, broad pumpkin and sketch the complete composition before cutting. Keep any small animals, wire, and attachments secure and away from young children.
-
Pumpkin house numbers Difficulty 2–3 · Etching and display
Stack pumpkins and etch large numbers into the skin, or use painted numbers for a no-cut version. Use a wide, flat pumpkin for each digit and secure the stack so it cannot roll or block the entryway. Large numbers read better than intricate lettering at night; use LEDs only if the pumpkins are stable and dry.
Recommended: Fix Windows Errors and Clear Junk Files in Minutes - Free Scan →Recommended: Update Every Outdated Driver on Your PC in One Scan - Free →Special offer. See more information about Outbyte and uninstall instructions. Please review EULA and Privacy policy. -
Pumpkin for the birds Difficulty 2 · Carving and props
Carve a basic face and add artificial crows with wire for a gothic porch scene. Secure the lid with a stable cut, and do not leave exposed sharp wire where children or pets can reach it. A tall pumpkin gives the birds more room, while a large LED makes the face visible behind the props.
Spooky and unusual designs
-
Slithering snakes Difficulty 2 · Drilling and props
Clean out the pumpkin, drill several holes, and thread faux snakes through them. Use a large, smooth pumpkin so the holes can be spaced without weakening the wall. A bright LED behind the snakes creates the strongest effect; drilling is an adult-only step, and the snakes should be artificial rather than live animals.
-
Flame pumpkin patch Difficulty 1 · Broad-shape carving
Use broad flame stencils on one pumpkin or a group. Clean edges matter more than tiny details, so this is a practical design for several pumpkins and several carvers. Orange, red, yellow, and black paint can reinforce the flame shape, while LEDs create a clear nighttime patch.
-
Scarecrow pumpkin Difficulty 2 · Stencil carving and etching
Carve broad silhouette areas and etch the hat, straw, or stitching rather than cutting every line through. A large, slightly tall pumpkin suits the design. Keep the face simple and use an LED so the pumpkin can transition visually from Halloween to general fall décor.
Quick wins for a faster PC:
Fix the driver behind crashes, sound loss and screen glitchesFind Drivers →Clear out junk files and repair common Windows errorsFree Scan →Special offer. See more information about Outbyte and uninstall instructions. Please review EULA and Privacy policy. -
Cheese-and-mice pumpkin Difficulty 2 · Painting, drilling, and props
Paint the pumpkin yellow, drill holes of different sizes, and add artificial mice. A squat pumpkin resembles a wheel of cheese, while a large LED makes the holes visible. The drill and all sharp attachments are for adults; remove plastic mice, paint, and other non-compostable pieces before disposal.
-
Zombie hand Difficulty 2 · Stencil carving
Use a lumpy pumpkin to create a hand emerging from a dark background. Let the natural bumps suggest knuckles, but widen narrow spaces between the fingers so the design does not snap. A bright LED behind the negative space makes the hand readable from a distance.
-
Dragon pumpkin Difficulty 3 · Layered carving and etching
Combine full cuts with shallow scraping to create scales, a face, and a fire-breathing effect. Choose a large pumpkin with a broad front and simplify the smallest scales. Use an LED—never a candle near paper, paint, or attached props—and test the light before finishing the details.
Rank #4
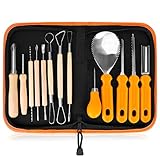 Elmchee Halloween Pumpkin Carving Tools,Jack-O-Lanterns 13 Piece Professional pumpkin cutting carving supplies tools Kit stainless steel lengthening and thickening with Handbag
- 13-PIECE ALL-IN-ONE PROFESSIONAL SET: Dominate any pumpkin carving contest with 13 master-grade tools! This heavy-duty kit includes 6 double-sided stainless steel detail sculptors,2 sharp heavy duty stainless steel pumpkin scoop tool with scraper, 2 sturdy tooth saws, 2 precision hole punches, and 1 detail engraving pen. This kit has everything you need.
- PREMIUM STAINLESS STEEL & ERGONOMIC GRIP: Engineered for professional-grade performance year after year. Crafted from solid, high-tensile stainless steel, these tools are built to last without rusting, bending, snapping, or pitting. The ergonomically designed, non-slip handles provide maximum comfort, precision control, and confidence for intricate carving.
- SAFE & MEMORABLE FAMILY CRAFTING: Create unforgettable Halloween traditions with a fun activity the whole family can enjoy! With varying tool sizes and specialized blunt-edge designs for scooping and punching, there’s a perfectly safe task for everyone. Ditch the dangerous kitchen knives and enjoy a safer, smoother crafting experience.
- LUXURY WRISTLET STORAGE BAG INCLUDED: Keep your tools organized, protected, and highly portable. Our premium leather storage case features dedicated slots for each tool and a convenient wristlet strap. Whether you're heading to a neighborhood carving block party or helping with a school DIY project, you can carry your kit completely hands-free.
- 100% Service】We’re dedicated to enhance your carving experience. Our aim: 100% satisfied customers. However, if you’re not happy with your Pumpkin Carving Set, you can return it anytime. We’ll ask no questions.
-
Sly vampire Difficulty 2 · Stencil carving
Use a stencil for a more theatrical vampire with dramatic eyebrows, a hooked nose, and a sly smile. Unlike the friendly vampire, the expression does the work, so exaggerate the brows and mouth rather than adding fragile teeth. A tall or oval pumpkin gives the face a character-like silhouette.
The Tool Desk
Outbyte PC Repair FREERepair Windows errors before they cause bigger problemsFix Now →Outbyte Driver Updater FREEScan for outdated or missing drivers - takes under a minuteDriver Scan →Special offer. See more information about Outbyte and uninstall instructions. Please review EULA and Privacy policy. -
Ghost emoji Difficulty 1–2 · Etching or simple carving
Etch or carve the familiar ghost-emoji outline. A dark-painted pumpkin creates strong contrast, and the simple silhouette works on a flat or round surface. Keep the eyes large enough to glow and use an LED for a clean, modern display.
-
Mice stencils Difficulty 1–2 · Stencil carving or etching
Put one large mouse silhouette on a pumpkin or distribute several mice across separate pumpkins. Large silhouettes are easier to transfer and read better at night than tiny individual mice. Use a stencil, keep the tails thick, and choose a wide pumpkin or a group of small ones.
-
Drilled-face pumpkins Difficulty 2 · Drilling
Sketch a face and make evenly spaced holes with a drill. This is faster than cutting complex outlines and produces a consistent lantern when illuminated with an LED string or bright puck light. Work only on a stabilized pumpkin, wear appropriate eye protection for drilling, and keep this tool away from children.
-
Checkerboard pumpkins Difficulty 2 · Repeated carving and painting
Transfer a repeated square pattern and cut selected squares, leaving enough pumpkin wall between them. Use two pumpkin colors for contrast, or paint some squares after carving. A flat-sided pumpkin makes the grid easier; an LED behind the cut squares emphasizes the pattern.
Special offer. See more information about Outbyte and uninstall instructions. Please review EULA and Privacy policy. -
Cactus pumpkin Difficulty 1 · Etching and optional lighting
Use a stencil or freehand sketch to create a cactus silhouette, then etch the arms and spines instead of cutting through every line. Green or warty pumpkins are natural choices. Lighting is optional: leaving more of the pumpkin intact helps it function as a longer-lasting fall decoration.
-
Polka-dot painted pumpkin Difficulty 2 · Painting and round openings
Paint the pumpkin, then use a melon baller or apple corer to make circular openings. Reinsert the removed pieces backward for a contrasting finish, or leave the holes open for light. A bright LED shows the dots best, and an adult should handle the coring tool.
-
Monogrammed pumpkins Difficulty 2 · Lettering, carving, or gouging
Trace large initials and carve or gouge them into the skin. Use different fonts and colors for a coordinated family display, but avoid thin script with isolated pieces. A flat pumpkin gives lettering a cleaner canvas, while an LED helps cut-through initials stand out.
-
Pumpkin luminarias Difficulty 2–3 · Repeated carving and display
Use small pumpkins with simple faces or openings and place them along a walkway. Battery-operated lights are the sensible default, and every pumpkin must remain stable, visible, and outside the walking path. This is a group project because the repeated faces are more effective as a row than as one intricate pumpkin.
Free tools Windows power users keep installed
One-click scans. No signup required.
Special offer. See more information about Outbyte and uninstall instructions. Please review EULA and Privacy policy. - Wash and dry the pumpkin. Cleaning the exterior removes dirt before it can enter the cuts.
- Stabilize it. Put it on a towel, rubberized shelf liner, or a shallow bowl ring on a solid table. Cover the work area with newspaper or cardboard.
- Choose and cut the opening. A bottom opening is usually easiest for scooping and lighting. If using the top, cut at an inward angle and make a notch so the lid sits in the same position.
- Remove pulp and seeds. Scrape the inner wall as clean and even as practical. Thin the wall behind detailed sections so light can pass through, but do not weaken narrow bridges or structural parts.
- Fit the stencil. Tape it securely. For a curved pumpkin, make small relief slits around the edge so the paper can conform to the surface.
- Mark the pattern. Use closely spaced pinpricks along the lines, or use a washable marker for freehand designs. Remove the paper before cutting so it does not tear into the openings.
- Read the pattern key. Solid lines generally mean cut all the way through. Dotted or shaded sections generally mean scrape or etch only.
- Cut from the center outward. Break large areas into smaller sections and remove them one at a time. Do not twist or force a nearly detached piece.
- Finish and clean. Trim ragged edges, brush out debris, and wipe away marker residue.
- Test the light. Put in the LED before final display and adjust the interior scraping or light position if the design looks dim.
- Begin with an unblemished pumpkin.
- Clean and dry the exterior before cutting.
- Remove pulp and seeds thoroughly; wet residue encourages deterioration.
- Keep the pumpkin shaded, cool, dry, and off the ground.
- Avoid prolonged direct sun and heat.
- Use an LED instead of a hot candle.
- Apply a thin layer of petroleum jelly to exposed cut edges only if it fits your disposal plan.
- 【13 Professional Pumpkin Carving Kit】 The package includes 8 x double-sided sculpting tools, 2 x sharp sturdy tooth saws, 1 x heavy duty scooper, 1 x etching tool, 1 x drill. The different specifications of craving kits will create interesting Halloween pumpkin designs. Tools can be neatly organized and stored in the sturdy zippered nylon carrying case after use.
- 【High-quality Stainless Steel】 13pcs carving set are made by premium stainless steel, thicker than normal carving tools, will not break. Non-slip handle design, easy to grip plastic handle make carving any pattern a breeze. The durable material ensure the tools can be re-used for many years.
- 【Safe & Easy to Use】 The easy-grip handle, and sharp & sturdy antirust blade of our pumpkin carving kit is designed specifically for carving your own Halloween jack-o-lantern pumpkins. Suitable for adults and children. Children use tools that require adult supervision. Not recommended for children under 7 years old.
- 【Carve Perfect Jack-O-Lanterns】 Our 13 pieces of pumpkin tools have different functions, so they can help you cut and create realistic 3D pumpkin details, such as hair, teeth, nose and eyes, to make the pumpkin character look expressive. Let your pumpkin lantern stand out from the crowd and play happily on this Halloween
- 【Have Fun with Family】 Halloween won’t be complete without carving pumpkins and jack-o'-lanterns! Creating a jack-o-lantern is a fun job, our pumpkin carving kit has 13pcs, can allow you to cooperate with your families and friends at the same time, enjoy the happy Halloween pumpkin carving time.
- Remove the LED, candle, wires, batteries, paint-heavy props, plastic mice, felt, toothpicks, and other non-organic materials.
- If the pumpkin was treated with bleach or another chemical, do not feed it to wildlife or livestock.
- Chop an untreated pumpkin into pieces before home composting if local rules allow.
- Use a municipal pumpkin-smash or organics collection program where available.
- Never leave pumpkins beside roads, in ditches, fields, woods, or parks without permission.
Decorative techniques and display projects
How to transfer and carve a stencil cleanly
For round openings, an apple corer or melon baller can be cleaner than a knife. For layered light, etch shallow areas instead of cutting them through. The BHG general carving guide covers these basic techniques.
How to keep a carved pumpkin presentable
Carved pumpkins deteriorate quickly in heat, rain, and humidity. BHG recommends carving roughly two or three days before Halloween for the freshest appearance. Illinois Extension says a carved pumpkin may last approximately seven to 10 days depending on weather. These are different kinds of advice: carving close to Halloween is the safer schedule if appearance on one specific night matters, while a cool, dry climate may allow a longer display.
Utah State University Extension recommends washing the pumpkin, cleaning or sterilizing tools, removing the interior, applying a bleach solution, and coating cut areas with petroleum jelly. However, reputable preservation sources give materially different bleach formulations: USU refers to a 10% bleach solution, one BHG guide gives 3 teaspoons per 3 gallons of water, another BHG FAQ gives one part bleach to ten parts water, and Illinois Extension has published a 20% solution recommendation. Do not treat any one homemade ratio as universal. If you use bleach, follow the product label, provide ventilation, protect your eyes and skin, never mix bleach with vinegar or another cleaner, and keep the treated pumpkin away from children, pets, wildlife, and compost intended for food gardens. See the USU preservation guidance and BHG cleaning guidance.
Petroleum jelly may help protect exposed cut surfaces, but it also means the pumpkin should not be fed to animals or placed in a food-garden compost system without checking local guidance. No preservation method guarantees that a pumpkin will last through Thanksgiving; temperature, moisture, damage, and the condition of the original pumpkin determine its actual life. Etching and painting can extend the decorative usefulness of some pumpkins because less flesh is exposed, but that is not a guarantee either.
Best Value

Troubleshoot common carving problems
The pumpkin rolls while you work
Stop cutting and stabilize it with a folded towel, rubberized shelf liner, or shallow bowl ring. Work on a table rather than in your lap. If the pumpkin remains unstable, use a bottom opening and display it on a flat base.
The stencil wrinkles
Make small relief slits around the perimeter, tape the stencil in several places, and use closely spaced pinpricks instead of trying to draw over buckled paper. Remove the stencil before cutting.
The design is too detailed
Convert thin lines into etched lines, widen narrow bridges, remove isolated dots or tiny teeth, and simplify the design to a silhouette. A pattern that can be recognized from several feet away will look better than fragile detail that breaks.
A cut piece breaks
Stop pulling and finish cutting around the piece rather than twisting it. A toothpick can temporarily hold a nonstructural decorative piece, but remove sharp supports before placing the pumpkin near children or pets. If the break affects a lid or major bridge, turn it into a deliberately jagged or wonky face instead of trying to force the piece back into soft pumpkin flesh.
The lid falls inside
For the next pumpkin, use a bottom opening. For a top opening, cut at a slight angle and add a notch so the lid seats on the rim. Do not force a loose lid back into a pumpkin that has begun to soften.
The pumpkin does not glow
Remove more pulp, scrape the interior smoother, and thin the wall behind important details without weakening the design. Try a brighter LED or a short LED string. Enlarging the negative spaces is often more effective than simply using a brighter light.
Mold or soft spots appear
Do not eat a moldy pumpkin, and do not give a bleach-treated pumpkin to animals. Remove a collapsing or foul-smelling pumpkin from indoor displays and use a local compost or organic-waste program where available.
No-carve and long-lasting alternatives
You do not need to cut a real pumpkin to create a successful Halloween display. Try surface etching, paint, stickers, paper features, stacked pumpkins and gourds, pumpkin planters, or painted pumpkins with LED lights. For classrooms, indoor displays, and decorations made weeks in advance, artificial pumpkins are often the better material. They can be reused and can accept detailed patterns without the rapid softening of a real pumpkin, although they may require different tools and will not have exactly the same natural glow.
Do these 3 things before closing this tab:
1Clear out junk files and repair common Windows errors2Fix the driver behind crashes, sound loss and screen glitches3Repair Windows errors before they cause bigger problemsBHG’s printable fall stencil collection can also be used on artificial pumpkins. White pumpkins and bluish-green-gray Hubbard squash are alternative canvases for jack-o’-lantern designs; Penn State Extension discusses these unusual options.
Dispose of the pumpkin responsibly
Dumped pumpkins can attract wildlife near roads, smother native plants, and create litter and other environmental problems. The Illinois Extension disposal guidance recommends municipal collection, appropriate donation, or composting instead. A painted, chemically treated, or prop-filled pumpkin is not suitable for wildlife feeding.
Frequently Asked Questions
What is the easiest pumpkin face for a first-time carver?
Choose a wide smiling face, minimal eyes, an angry face, or a laughing pumpkin. Use large shapes with thick bridges between them, and cut with a serrated pumpkin saw rather than forcing a kitchen knife through the wall.
Can children carve pumpkins?
Children should not handle carving knives, craft knives, drills, jigsaws, or wire. Adults should do the cutting while children trace the stencil, scoop pulp with a spoon, sort seeds, paint, or attach soft decorations.
The Tool Desk
Outbyte Driver Updater FREEFix the driver behind crashes, sound loss and screen glitchesFind Drivers →Outbyte PC Repair FREEClear out junk files and repair common Windows errorsFree Scan →Is a top or bottom opening better?
A bottom opening is generally easier to clean and light and avoids many loose-lid problems. A top opening is appropriate for a conventional jack-o’-lantern or a design that includes the lid; a back opening preserves the front surface and accommodates a larger light.
Can I eat the pumpkin after carving it?
Only consider eating fresh, untreated portions that have been handled hygienically. Do not eat pumpkin that is moldy, soft, painted, chemically treated, exposed to an open display, or decorated with glue or props. Carving pumpkins are also usually less suitable for cooking than pie pumpkins.
The Bottom Line
For the best balance of ease, appearance, and safety, choose a firm pumpkin after choosing a broad design, let an adult handle every sharp or powered tool, use etching to replace fragile cut lines, and light the finished pumpkin with a secured battery-operated LED. Carve close to Halloween, keep it cool and dry, and compost or use a local collection program rather than dumping it outdoors.
Quick Recap

Product prices and availability are accurate as of the date/time indicated and are subject to change. Any price and availability information displayed on Amazon at the time of purchase will apply.
Recommended Free Tools




