Quick wins for a faster PC:
Clear out junk files and repair common Windows errorsFree Scan →Fix the driver behind crashes, sound loss and screen glitchesFind Drivers →ThatPainter is reader-supported. When you buy through links on our site, we may earn an affiliate commission. Learn More
Accurate triangle-squares—also called half-square triangles or HSTs—come from controlling three points: the seam, the bias edges and the final size. Start with squares 1/8 inch larger than your pattern specifies, sew a scant quarter-inch seam, press before opening, and trim every unit with the ruler’s 45-degree line on the diagonal seam. The extra trimming step lets you correct small differences instead of trying to sew every unit perfectly on the first pass.
As an Amazon Associate I earn from qualifying purchases.
What a triangle-square is
A triangle-square is a square quilting unit made from two equal right triangles joined along a diagonal seam. Because the outer edges are on the fabric’s bias, they can stretch while you mark, sew, press and handle them. Measurements involving eighths can also be difficult to read accurately. The following techniques address both problems.
1. Cut the starting squares oversized
For the method described by American Patchwork & Quilting (updated June 15, 2021), cut each starting square 1/8 inch larger than the pattern’s stated size. Assemble the HST using your preferred two-at-a-time method, then trim the unit to the designated finished size. The extra fabric gives you room to correct a slightly wandering seam or a unit that opened unevenly.
#1 Best Overall

- Trims Multiple Sizes: Ruler trims 11 sizes of half-square triangles! Streamlines the quilting process. Its multiple sizes eliminates the need for separate rulers for different block sizes, making it a convenient and efficient tool for quilters of all skill levels.
- Accurate Cutting with Minimal Effort: Designed for efficiency and precision, this ruler lets quilters align once and make two cuts to trim all four sides of half-square triangles. There is no need to rotate or realign during cutting. This method speeds up cutting time, ensuring every piece is square, uniform, and ready for assembly in your quilt designs.
- Exclusive Slotted Design: The slotted edge design removes dog ears while trimming, a common challenge in quilting. By eliminating this step, the trimmer improves accuracy in block assembly and saves time, making it easier for quilters to produce flawless, clean-cut quilt blocks.
- Versatile Quilting Tool for Various Techniques: This ruler isn’t limited to half-square triangles; it’s also efficient for squaring hourglass blocks, strip piecing, and strip-tube methods. Its versatility makes it essential for quilters looking to expand their techniques and creativity.
- Durable Acrylic Construction with Easy-to-Follow Instructions: This clear, high quality, acrylic ruler is designed for longevity. It features printed instructions on the ruler, allowing quilters to follow cutting guides easily without needing separate instructions, improving efficiency.
Julie Baird’s technical guide describes a separate two-at-a-time formula: cut each starting square to the desired finished HST size plus 7/8 inch for seam allowances. Use the formula required by your specific pattern or construction method; do not substitute one oversize allowance for another without checking the instructions.
2. Sew a scant quarter-inch seam
When sewing on both sides of a marked diagonal, place the needle just inside a true 1/4-inch seam allowance—slightly narrower, not dramatically smaller. A scant seam helps preserve the required dimensions after the unit is pressed open. Check the first finished unit against the pattern size and trim if necessary.
Rank #2

- Made in the USA with high quality acrylic and precision measurements ensuring accuracy for your quilting, sewing, patchwork, and crafting projects.
- Creative Grids exclusive non-slip grip allows you to easily slide the ruler over the fabric until positioned correctly. Then, when slight pressure is applied, the grip holds the ruler in place, eliminating slipping while you cut.
- Easy to read black and white markings.
- Finished triangle size and appropriate strip width are both printed right on the ruler for cutting both half-square and quarter-square triangles.
- Use the slot on the ruler and the outside edge to mark sewing lines for the Mark and Sew method.
If fabric points are being pulled into the needle opening, a straight-stitch plate may help. Its smaller opening leaves less space for a point to be drawn down, but it is an optional machine accessory rather than a requirement.
Do these 3 things before closing this tab:
1Repair Windows errors before they cause bigger problems2Scan for outdated or missing drivers - takes under a minute3Clear out junk files and repair common Windows errors3. Draw both stitching lines when accuracy is uncertain
Visualizing a quarter-inch offset from the diagonal is difficult for many quilters. Mark the diagonal and then draw the two actual stitching lines on either side of it. Sewing directly on those lines removes the guesswork and is especially useful when making a small batch, working with unfamiliar seam guides or correcting inconsistent units. Once your seam placement is reliable, you can return to your usual marking method.
Rank #3

- Made in the USA with high quality acrylic and precision measurements ensuring accuracy for your quilting, sewing, patchwork, and crafting projects.
- Creative Grids exclusive non-slip grip allows you to easily slide the ruler over the fabric until positioned correctly. Then, when slight pressure is applied, the grip holds the ruler in place, eliminating slipping while you cut.
- Mark through the slotted center with a mechanical pencil and sew 1/4in on each side of the line. Or mark the sewing line by drawing on both outside edges of the tool. It's the perfect tool when making half-square triangle blocks.
- Total Size: 1/2in x 9in
4. Set the seam before opening the unit
Before folding the unit open, press directly over the sewn line. This sets the stitches into the fabric and encourages a clean diagonal when the triangles are opened. Then press the seam to the side or open according to your pattern’s instructions.
Watch for a tuck caught in the seam. A folded ridge pressed into the join changes the unit’s effective size, even when the cut squares were correct.
Rank #4

- Country Of Origin: United States
- Model Number: R98
- Item Package Dimensions: 6.4566929068" L x 6.3779527494" W x 0.7086614166" H
- Item Package Weight: 0.220460011860748 lb
5. Trim the dog-ears and square all four sides
Dog-ears are the small triangular points that extend beyond the finished square. Trim them after pressing so they cannot interfere with neighboring pieces or create extra bulk at an intersection.
Windows Errors? Fix Them Before They Spread
Repair common Windows errors and clear accumulated junk for a smoother, more stable PC - no reinstall needed.Free scan · no reinstallCrashes, No Sound, or Screen Glitches?
Random freezes, missing sound and display glitches usually trace back to one bad driver. Find and replace yours safely.Free scan · under a minuteFor final sizing, use a rotary cutter, cutting mat and a ruler with a 45-degree diagonal line. Place the ruler’s 45-degree mark directly on the HST’s seam, then trim the four sides to the required measurement, repositioning the ruler as needed. Keeping the diagonal aligned prevents a correctly sized square from becoming skewed.
Best Value
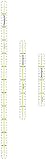
- 1/8" ruler markings along edge of ruler for measurement and placement accuracy
- Patented double-sight lines for visiblity on light and dark fabrics
- Do not use with rotary cutters, knives, or other cutting instruments
- 4", 6", and 12" rulers included in set
- Optical-grade acrylic with smooth, laser cut edges
6. Use a leader/ender strip for a cleaner start
When joining HSTs to other units, begin and end the seam with a small scrap strip, often called a leader/ender. It stabilizes the first stitches and gives the machine a clean entry, which is particularly helpful when sewing along the bulky side where several seams meet. Save the strips for later scrap projects rather than cutting a new piece for every seam.
Choose the workflow that fits your project
| Workflow | Best suited to | Setup and handling | Control over final size |
|---|---|---|---|
| Oversize, sew and trim | Individual units or projects with varied layouts | Uses 1/8-inch extra fabric in the cited APQ method; requires a ruler, mat and rotary cutter | Each unit can be squared separately after pressing |
| Foundation-paper piecing | Repeated units and batches that must match | Foundation papers add a preparation and paper-removal step; chain piecing speeds production | Paper guides the stitching lines; trimming remains part of finishing as directed by the pattern |
American Patchwork & Quilting’s October 13, 2016 demonstration names Thangles and Laundry Basket Quilts papers as examples of foundation products. It shows strip-style papers and one-sheet layouts for multiple units. A shorter stitch length can make the paper easier to remove after sewing and pressing. This is an optional batch method, not a prerequisite for the six process tips.
A practical accuracy check
- Confirm the pattern’s required starting-square size and oversize allowance.
- Mark the diagonal and, if needed, both offset stitching lines.
- Sew a scant quarter-inch seam on each side of the diagonal.
- Press over the stitching line before opening the unit.
- Trim dog-ears, then align the ruler’s 45-degree line with the seam.
- Trim all four sides and verify the finished measurement before joining units.
Handle the bias edges as little as possible between these steps. If a unit is still out of square, correct it at the trimming stage when there is enough fabric left; do not stretch the edges to force a match.
Free tools Windows power users keep installed
One-click scans. No signup required.
Quick Recap

Product prices and availability are accurate as of the date/time indicated and are subject to change. Any price and availability information displayed on Amazon at the time of purchase will apply.




