Quick wins for a faster PC:
Scan for outdated or missing drivers - takes under a minuteDriver Scan →Clear out junk files and repair common Windows errorsFree Scan →ThatPainter is reader-supported. When you buy through links on our site, we may earn an affiliate commission. Learn More
To make a fabric bunny ears headband, choose a construction that suits the finish you want: sew fabric ears onto a covered rigid band for upright ears, glue felt-and-fabric ears around a fabric-covered band for a poseable version, or sew a soft elastic style whose ears tie together at the top. These methods use different materials and attachment steps, so follow one method from start to finish rather than mixing their pattern dimensions.
Choose the right bunny ears style
| Style | Base and support | Best for | Trade-off |
|---|---|---|---|
| Sewn upright ears | Fabric ears sewn to a fabric-covered store-bought band; optional interfacing or wire | A more structured pair of ears attached to a rigid band | Requires sewing and a pattern sized for the band |
| No-sew poseable ears | Felt-and-fabric ears with wire and glue, attached to a fabric-covered band | Bendable ears without sewing the ear shapes | Requires careful wire coverage and hot-glue work |
| Elastic tie-on ears | Fabric casing and elastic; ears tie together at the top | A soft elastic style made from fabric remnants | It has a different silhouette and attachment from ears mounted on a rigid band |
Interfacing stiffens fabric; wire makes an ear bendable or poseable. They are not interchangeable. The sewn options below use a plastic band that is covered with fabric, while the no-sew method relies on that fabric covering as the surface for glue.
Sewn upright ears on a covered headband
Gather materials and choose a pattern
Use a sewing pattern’s own measurements and seam allowance; do not combine dimensions from separate patterns. Katagami’s adult-size guide specifies 26 cm ear height and about 40 × 60 cm of main fabric for four outer ear pieces, plus about 20 × 40 cm of pink contrast fabric, a little fusible interfacing or wire, thread, one store-bought headband, and about 40 × 8 cm of fabric for the band cover. Its suggested seam allowance is 1.0–1.5 cm, and it describes an ordinary headband as about 30–40 cm along its arc. These are that guide’s pattern figures, not universal quantities. See Katagami’s bunny ears sewing pattern and instructions.
What’s actually slowing this PC down?
Pick the symptom - the matching free tool is one click away.
#1 Best Overall

- PATTERN S9837 SIZING: Simplicity one-size pattern includes plush stuffed animals designed for a comfortable, adjustable fit. Check the finished measurements on the envelope before cutting so your make turns out just right.
- IN THE ENVELOPE: Printed tissue pattern pieces and clear step-by-step illustrated sewing instructions guide you from start to finish. The envelope also lists the suggested fabrics and the notions you need, so you can shop for materials with confidence.
- LEARN TO SEW: Designed with beginners in mind, Pattern S9837 features easy-to-follow instructions for creating plush stuffed animals while building your confidence with every step.
- MAKE IT UNIQUELY YOURS: Create custom pieces using your favorite fabrics, prints, trims, and embellishments. Personalize your stuffed animal to reflect your style, or use the cover photos as inspiration for handmade makes that are truly your own.
- AMERICAN SEWING HERITAGE: An American sewing icon since 1927 and proudly made in the USA, Simplicity has been trusted by home sewists for nearly a century for accurate, easy-to-follow sewing patterns.
Measure your own band along its curve before choosing or adjusting a pattern. If using Katagami’s printable pattern, print at 100% with “Fit to page” turned off, then check its calibration square with a ruler.
Cut, sew, and turn the ears
- Cut four outer ear pieces, two for each ear. If using contrast fabric for the inner ears, cut two inner pieces as well. Cut the band cover according to your pattern and band measurement.
- Appliqué each inner-ear piece onto one outer piece that will form the visible front of an ear.
- For each ear, place its two outer pieces right sides together. Sew around the sides and top, leaving the base open. Follow your chosen pattern’s seam allowance.
- Clip the curves without cutting through the stitching, turn each ear right side out, and press. Add interfacing for structure, or insert wire if your pattern calls for bendable ears.
- Wrap and stitch the fabric cover around the headband. Position the ears on the covered band and stitch their open bases in place. Katagami’s example places them about 5 cm either side of the center; adjust the spacing to suit your band and design.
Using a wire-supported sewn pattern
Spotlight’s 2025 project sheet uses cotton fabric, florist wire, a plastic headband, thread, fabric scissors, pins, a sewing machine, and an iron. It specifies a 1 cm seam allowance: sew each ear around its edge, leaving an opening between the notches, then turn, press, and insert a loop of florist wire. Its instructions include a fabric casing around the plastic band. Follow the sheet’s own pattern and placement rather than borrowing measurements from another guide: Spotlight’s Easter Bunny Headbands & Scrunchies project sheet.
Rank #2
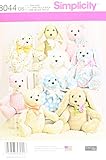
- PATTERN S8044 SIZING: Simplicity one-size pattern includes stuffed animals. Check the finished measurements on the envelope before cutting so your make turns out just right.
- IN THE ENVELOPE: Printed tissue pattern pieces and clear step-by-step illustrated sewing instructions guide you from start to finish. The envelope also lists the suggested fabrics and the notions you need, so you can shop for materials with confidence.
- AMERICAN SEWING HERITAGE: An American sewing icon since 1927 and proudly made in the USA, Simplicity has been trusted by home sewists for nearly a century for accurate, easy-to-follow sewing patterns.
- MAKE IT UNIQUELY YOURS: Create custom pieces using your favorite fabrics, prints, trims, and embellishments. Personalize your stuffed animals to reflect your style, or use the cover photos as inspiration for handmade makes that are truly your own.
- SKILL LEVEL: Intermediate. A rewarding make for sewists with a little experience.
No-sew poseable ears with wire and glue
Materials and preparation
This version uses felt for the outer ears, fabric for the inner-ear pieces, wire, glue, and a fabric-covered headband. Tikkido’s tutorial describes spray adhesive or fusible webbing for attaching the inner fabric to felt, and recommends a low-temperature glue gun for attaching the wire. Its method specifically favors a fabric-covered band over slick plastic or metal as a glue surface. See Tikkido’s poseable bunny ears headband instructions.
Attach the inner fabric and shape the ears
- Print or make an ear template, then cut two outer ears from felt and inner-ear pieces from printed fabric.
- Attach the fabric inner pieces to the felt using spray adhesive or fusible webbing, following the product instructions.
- Apply glue just outside the inner-ear outline and lay wire along it. Work in small sections, then fold the felt over the wire and trim excess wire as directed by the tutorial.
- Wrap each ear base around the fabric-covered headband and glue it in place.
Use care with both exposed wire ends and hot glue. Tikkido recommends a low-temperature glue gun because glue can reach fingers while working. Keep the wire enclosed in the felt rather than leaving it exposed.
Rank #3

- PATTERN S9941 SIZING: Simplicity one-size pattern includes plush stuffed animals designed for a comfortable, adjustable fit. Check the finished measurements on the envelope before cutting so your make turns out just right.
- IN THE ENVELOPE: Printed tissue pattern pieces and clear step-by-step illustrated sewing instructions guide you from start to finish. The envelope also lists the suggested fabrics and the notions you need, so you can shop for materials with confidence.
- AMERICAN SEWING HERITAGE: An American sewing icon since 1927 and proudly made in the USA, Simplicity has been trusted by home sewists for nearly a century for accurate, easy-to-follow sewing patterns.
- MAKE IT UNIQUELY YOURS: Create custom pieces using your favorite fabrics, prints, trims, and embellishments. Personalize your stuffed animal to reflect your style, or use the cover photos as inspiration for handmade makes that are truly your own.
- EASY AND REWARDING TO SEW: A satisfying sewing project for beginner and intermediate sewists, perfect for nursery decor, baby showers, birthdays, handmade gifts, and imaginative play.
Sew a soft elastic tie-on version
The elastic style is a separate pattern, not a shortcut for attaching ears to a rigid band. Fabric remnants and medium-weight interfacing form the ears; a casing holds 8 inches of 3/8-inch elastic, and the ears are inserted into the casing and tied together at the top. Fabricated Closet’s tutorial specifies a 1/2-inch seam allowance and provides its own free pattern. Use those dimensions with that pattern rather than applying them to either rigid-band method. Read Fabricated Closet’s elastic bunny ears headband tutorial.
Quick Recap
Best Value
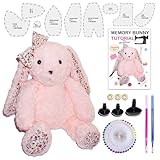
- Bunny Sewing Patterns: the memory bunny patterns for sewing includes 10 pcs patterns, 40 pcs pins, 1 pair of safety eyes and 1 pcs nose, beginner friendly tutorial
- Beginner Friendly Tutorial: the stuffed animal bunny sewing kit is beginner friendly, easy for beginners to sew a bunny with detailed step by step pictorial tutorial and video tutorial
- Reusable Sewing Templates: the stuffed bunny templates are pre-cut on plastic vinyl, smooth surface ensures a perfect quilting or sewing experience; washable and permanent to use
- 18 Inch Large Memory Bunny: the stuffed animal bunny plush sewing patterns come in large size; 18 inches for standing height while 12 inches for sitting height
- Make Special Memory Keepsake: make the clothes of your beloved ones into memory bunny is the best memory keepsake, sew a memory bunny for your family
Rank #4

- PATTERN S9306 SIZING: Simplicity one-size pattern includes plush stuffed animals designed for a comfortable, adjustable fit. Check the finished measurements on the envelope before cutting so your make turns out just right.
- IN THE ENVELOPE: Printed tissue pattern pieces and clear step-by-step illustrated sewing instructions guide you from start to finish. The envelope also lists the suggested fabrics and the notions you need, so you can shop for materials with confidence.
- AMERICAN SEWING HERITAGE: An American sewing icon since 1927 and proudly made in the USA, Simplicity has been trusted by home sewists for nearly a century for accurate, easy-to-follow sewing patterns.
- MAKE IT UNIQUELY YOURS: Create custom pieces using your favorite fabrics, prints, trims, and embellishments. Personalize your stuffed animal to reflect your style, or use the cover photos as inspiration for handmade makes that are truly your own.
- EASY AND REWARDING TO SEW: A satisfying sewing project for beginner and intermediate sewists, perfect for nursery decor, baby showers, birthdays, handmade gifts, and imaginative play.
Choose support and attachment with care
- For upright ears: Sewn layers with interfacing add structure without the bendable shaping of wire.
- For poseable ears: Wire can be shaped, but it needs to be securely enclosed and attached.
- For a glue-based rigid band: Use a fabric-covered band as the glue surface; the cited no-sew tutorial describes slick plastic or metal as less suitable for its method.
- For a soft tie-on style: Follow the elastic pattern’s casing and tie construction; it does not mount ears to a rigid band.
- For wear by children: The cited project instructions do not establish child-safety testing. Check the finished piece for exposed wire, loose parts, sharp ends, and insecure glue or stitching before use.

Product prices and availability are accurate as of the date/time indicated and are subject to change. Any price and availability information displayed on Amazon at the time of purchase will apply.




